


In This Article Show
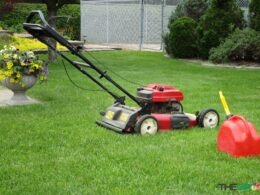
If you’re a proud homeowner, you know the joy of a well-maintained, picture-perfect lawn. It’s a sign of pride, a labor of love, and a testament to hard work. But it can quickly become a cause for concern when your trusty lawn mower starts to leak oil, threatening the beauty and health of your greens.
I’m an experienced lawn care expert with over 13 years of hands-on experience, and today, I’ll be your guide. In this post, I’ll show you how you can identify, fix, and prevent an oil leak in your lawn mower.
This comprehensive guide is designed to simplify a seemingly complex problem, breaking it down into easily digestible steps. Whether you’re a seasoned DIYer or just starting to learn the ropes of lawn care maintenance, this guide will be your handy companion.
Tackling an oil leak might seem daunting at first, but trust me, with the right approach and guidance, you can do it at home.
During my years in the field, I’ve seen my fair share of oil leaks, and with time, I’ve learned to pinpoint the causes and execute effective solutions quickly. I want to pass on that knowledge to you, making your journey smoother and your lawns greener.
Understanding the Causes of Oil Leaks
Before we delve into fixing the issue, it’s important to understand the common causes behind oil leaks in lawnmowers. Recognizing the root of the problem can not only aid in repair but also help prevent future leaks.
Get Gardening For Beginners
Our new EBOOK shows newcomers and green thumbs alike a step by step guide to growing the garden of their dreams.
1. Overfilled Oil Reservoir
As an experienced lawn care expert, I’ve noticed that one of the most common mistakes homeowners make is overfilling the oil reservoir. More oil doesn’t mean better performance; in fact, excess oil can lead to leakage.
2. Worn Out or Damaged Seals
The oil seal and gaskets in your lawn mower are there to prevent oil from escaping. Over time, these seals can wear out or get damaged, resulting in leaks.
3. Improperly Installed or Cracked Oil Filter
The oil filter plays a crucial role in keeping your lawn mower’s engine clean. An improperly installed filter or a filter with a crack or damage can easily become a source of an oil leak.
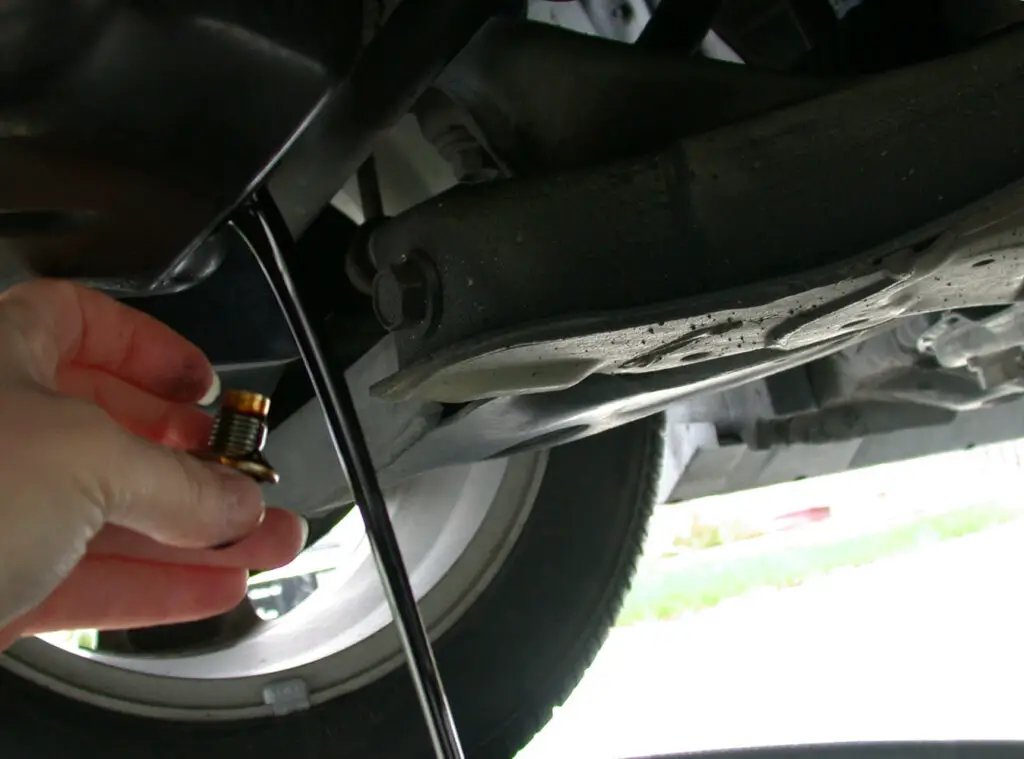
4. Loose Drain Plug
The drain plug can become loose over time or due to rough handling. If not properly tightened, it could lead to oil seepage.
Now, you might be wondering how to tell if your lawn mower is leaking oil. The most telling signs are oil spots under your parked mower or visible oil stains on the machine parts. Smoke coming out of the mower during operation can also indicate an oil leak.
Understanding these causes and signs equips you with the knowledge to tackle the problem effectively and efficiently.
Safety Precautions Before You Begin
Before we embark on the repair journey, it’s crucial to note that safety should always be our top priority. Working with machinery, even something as common as a lawn mower, requires a certain level of caution. As a lawn care professional with over a decade of experience, I cannot emphasize enough the importance of these safety measures.
Get Gardening For Beginners
Our new EBOOK shows newcomers and green thumbs alike a step by step guide to growing the garden of their dreams.
Here are some safety guidelines to follow when dealing with a lawn mower oil leak:
1. Disconnect the Spark Plug
Before starting any repair work, ensure you disconnect the spark plug. This precautionary step helps prevent the engine from accidentally starting while you’re working on it.
2. Wear Protective Gear
It’s highly recommended to wear gloves to protect your hands from oil, grease, and sharp parts. Safety glasses are also a good idea to keep your eyes safe from any possible oil splatter or loose debris.
3. Work in a Well-Ventilated Space:
When dealing with oil, always ensure you’re in a well-ventilated area to avoid inhaling any potentially harmful fumes.
4. Use the Right Tools
Always use the right tools for the job. Trying to improvise can lead to more damage, or worse, injuries.
5. Don’t Rush
Take your time. Trying to rush through a repair can lead to mistakes or oversights, which may compound your issues.
6. Dispose of Waste Properly
Make sure to dispose of any used oil or parts according to local waste disposal regulations.
By adhering to these safety precautions, you ensure a smooth, accident-free repair process. Remember, the goal is to fix your lawn mower, not to rush through the process at the expense of your well-being.
Necessary Tools to Fix an Oil Leak
Fixing an oil leak doesn’t necessarily require a trip to the hardware store. You might already have the necessary tools in your home toolkit. But just to make sure you’re prepared, here’s a list of what you’ll need:
- Wrench Set: A basic wrench set will come in handy for removing and tightening various parts of the lawn mower.
- Screwdriver Set: A set of screwdrivers is always useful in any repair job. Different sizes will help in dealing with a variety of screws in your lawn mower.
- Rags or Paper Towels: These are essential for cleaning up any residual oil and keeping your workspace clean.
- Replacement Parts: Depending on the source of the leak, you may need to replace certain parts such as oil seals, gaskets, or the oil filter. Always ensure you have the correct replacement parts for your specific model of lawn mower.
- Oil Drain Pan: An oil drain pan will be useful in catching any oil that you drain from your lawn mower, keeping your workspace clean, and aiding in the proper disposal of used oil.
- Protective Gloves and Glasses: As mentioned earlier, safety comes first. Gloves will protect your hands from oil and other debris while safety glasses shield your eyes during the process.
- Lawn Mower Oil: Once you’ve fixed the leak, you will need to refill the oil reservoir with lawn mower oil.
Now that we have our tools ready and our workspace prepared, it’s time to roll up our sleeves and get down to the business of fixing that oil leak.
Step-by-step Guide to Fixing an Oil Leak on a Lawn Mower
Now that we’ve prepared our workspace, donned our safety gear, and gathered our tools, it’s time to tackle the oil leak. Here’s a step-by-step guide on how to fix the issue:
Step 1: Locating the Source of the Leak
First, we need to locate where the oil leak is coming from. Start by cleaning the exterior of the lawn mower to remove any excess oil. Once cleaned, inspect the lawn mower for any signs of oil. Common areas to check are the oil seal, gaskets, oil filter, and drain plug.
Step 2: Cleaning the Oil-Stained Areas
After identifying the source of the leak, clean the oil-stained areas thoroughly using your rags or paper towels. This step ensures that once the repair is done, you can easily verify if the leak has been completely fixed.
Step 3: Replacing or Fixing the Broken or Worn-Out Part
Once you’ve identified and cleaned the leaking part, it’s time to fix or replace it.
- If the oil filter is the culprit, unscrew it using a wrench and replace it with a new one.
- If the drain plug is loose, tighten it with a wrench. However, if the plug is damaged, it should be replaced.
- In the case of worn-out seals or gaskets, you’ll need to dismantle the necessary parts, replace the faulty seals or gaskets, and then reassemble them.
- Remember, the exact procedure may vary based on your lawn mower’s model and the part that’s causing the leak.
Step 4: Checking the Oil Seal
The oil seal is a frequent offender when it comes to leaks. If you notice oil around the crankshaft or the oil seal itself, it might need to be replaced. Do this by carefully removing the old seal using a screwdriver and replacing it with a new one.
Step 5: Ensuring Proper Assembly After Fixing
Once you’ve replaced the necessary parts, make sure everything is assembled correctly. Tighten any loose bolts or screws and double-check to ensure everything is in its proper place.
After following these steps, refill the oil and run your lawn mower for a few minutes. Check for any signs of leaking oil. If there’s no leak, congratulations! You’ve successfully fixed your lawn mower’s oil leak.
Prevention Tips to Avoid Future Oil Leaks
Congratulations on successfully navigating through the steps to fix an oil leak in your lawn mower. As the saying goes, “An ounce of prevention is worth a pound of cure.” Now that your lawn mower is leak-free, here are some tips to keep it in top shape and prevent future oil leaks.
1. Regular Maintenance
Regular maintenance is key to the longevity of any machine. Check your lawn mower for any signs of wear and tear before and after use. This can help you catch potential issues early and prevent further damage.
2. Proper Oil Changes
Changing the oil at regular intervals as per the manufacturer’s recommendations ensures the smooth functioning of your lawn mower. Always avoid overfilling the oil reservoir.
3. Check Seals and Gaskets
Regularly check the seals and gaskets in your lawn mower for any signs of wear or damage. Replacing them proactively can prevent oil leaks in the future.
4. Right Storage
Store your lawn mower in a clean, dry place. Excessive moisture can lead to rust, which might lead to oil leaks in the long run.
5. Use Recommended Oil
Always use the oil recommended by the manufacturer. Using a different oil can sometimes cause issues, including oil leaks.
Wrapping Up
By following these preventative measures, you can ensure your lawn mower remains in excellent working condition and serves you well for many seasons to come.
In conclusion, dealing with a lawn mower oil leak might seem daunting at first, but with the right knowledge, tools, and a bit of patience, it’s definitely something you can handle on your own.