


In This Article Show
Spring can feel messy: boots by the door, dark corners, and that “I should freshen things up” itch. Good news—you don’t need fancy tools or a big budget to make your space feel bright and new.
These beginner-friendly DIYs look boutique-level but are simple enough for a slow afternoon. Pick one, put on a playlist, and watch your home wake up for the season.
1. Pressed Flower Suncatcher Frames
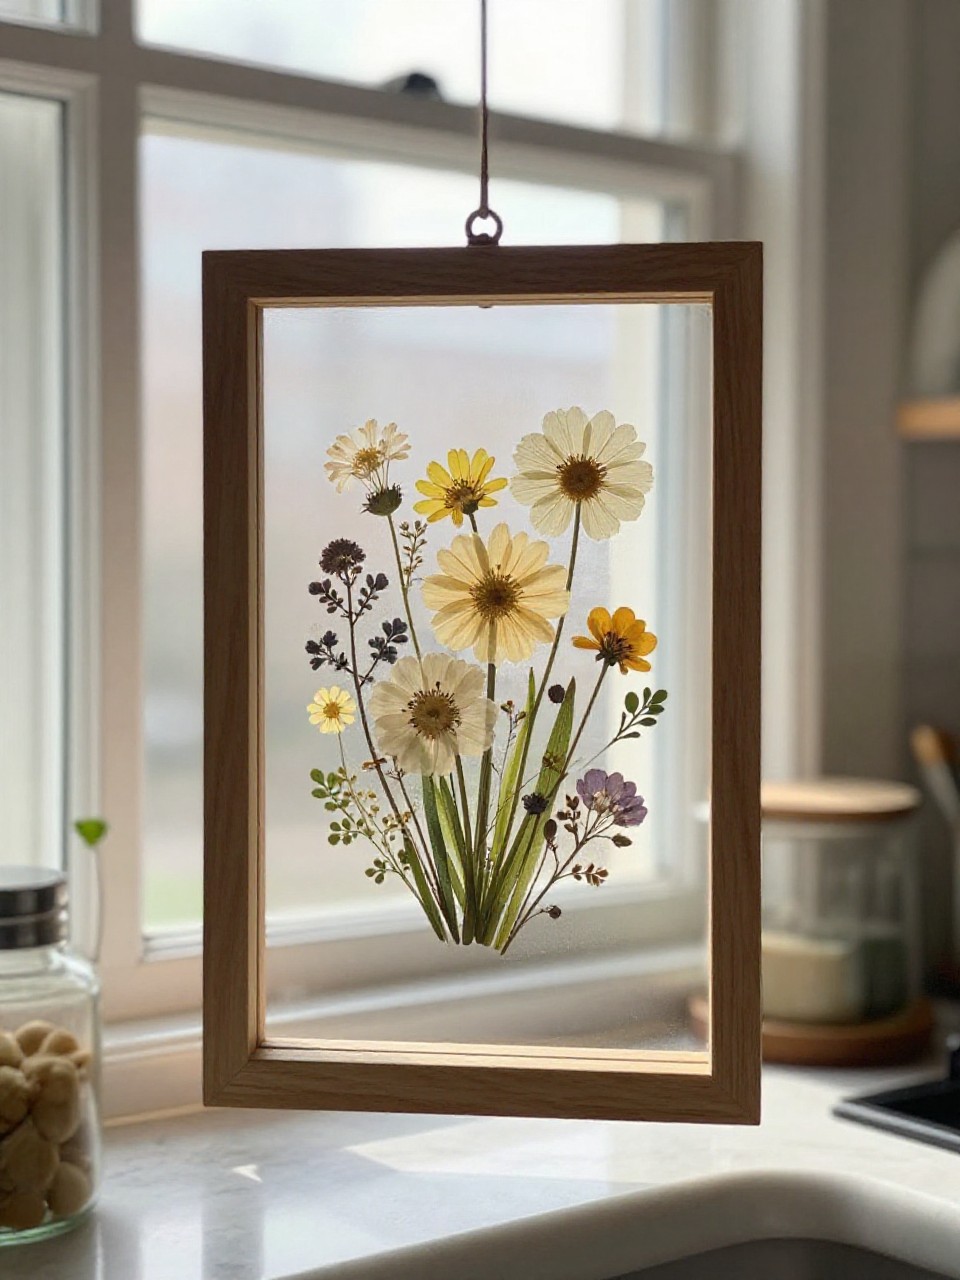
Tiny sunlit windows of spring color that glow whenever light passes through. These delicate frames look like art you bought at a craft market, but they’re made in minutes.
Materials Needed:
- Pressed flowers or leaves (store-bought or DIY)
- Two floating glass frames (or two pieces of glass/plastic)
- Double-sided tape or clear-drying glue
How to make it:
- 1. Arrange pressed flowers between the two glass pieces until you like the layout.
- 2. Use tiny dots of clear glue or tape to secure petals so they don’t slide.
- 3. Close the frame carefully and wipe off smudges.
- 4. Hang in a sunny window and enjoy the stained-glass vibe.
2. Painted Terracotta Herb Pots with Lemon Doodles
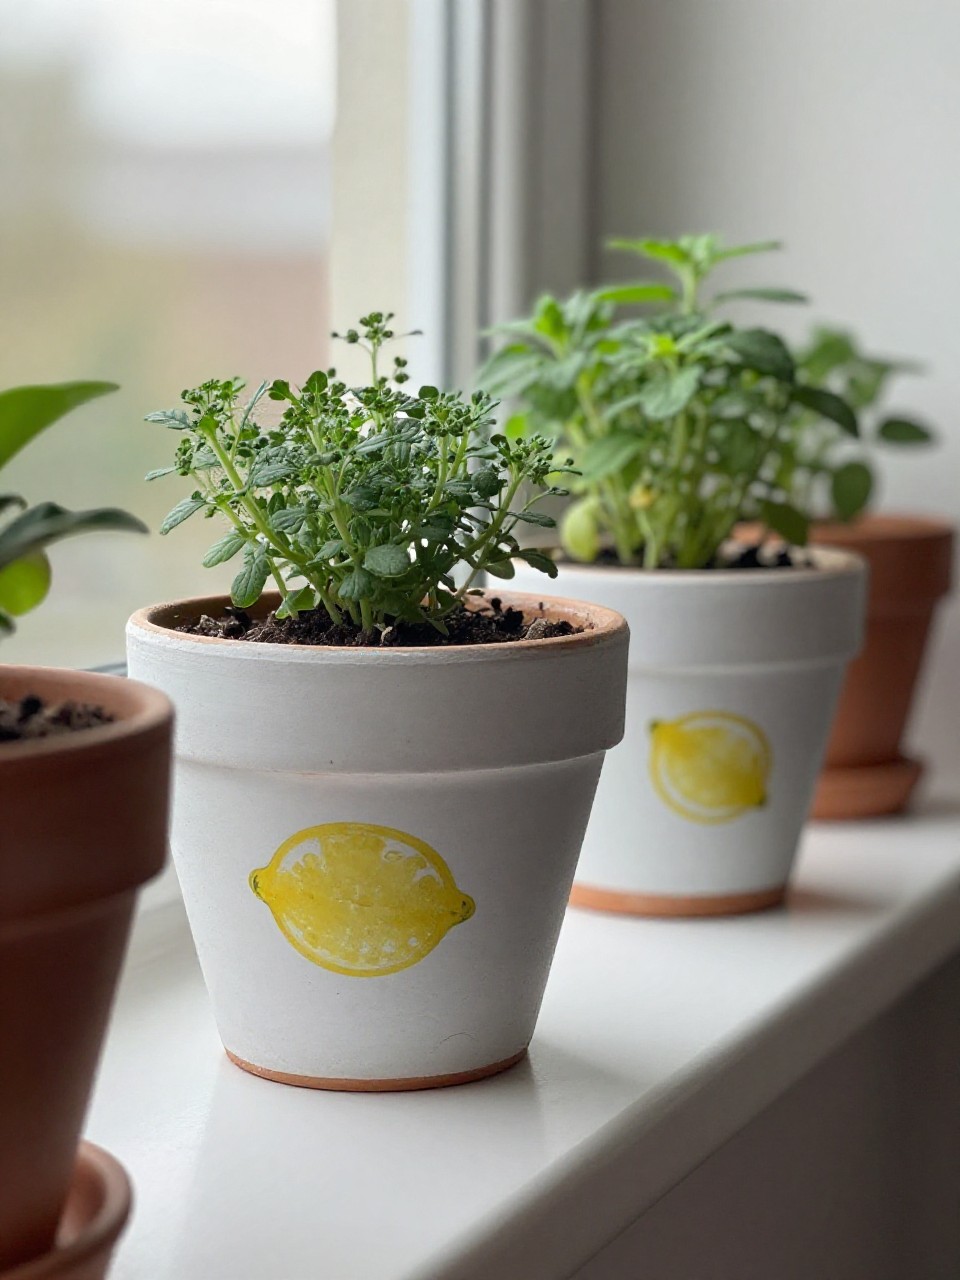
Sunny, hand-drawn lemons make plain pots look like a farmer’s market find. The simple doodles are forgiving and cheerful—no art degree needed.
Materials Needed:
- Small terracotta pots and saucers
- Acrylic paint (white, yellow, green) + sealer
- Small round brush + pencil
How to make it:
- Paint pots white and let dry completely.
- Lightly pencil oval lemon shapes, then fill with yellow; add green leaves.
- Add tiny white highlight dots; let dry and seal with a clear sealer.
- Plant herbs and line them on your sill.
3. Fabric-Covered Switch Plates
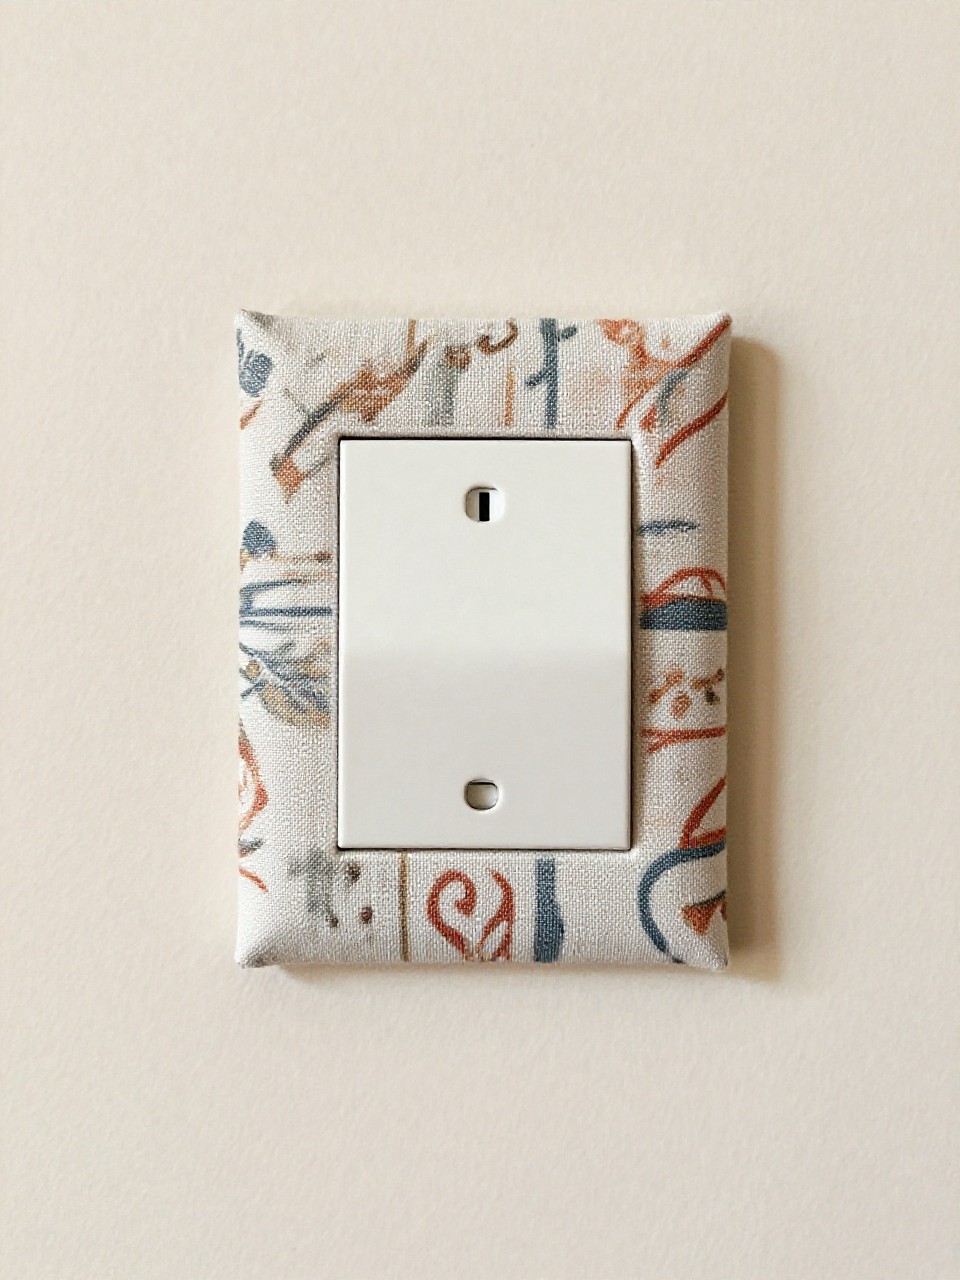
Turn boring light switches into tiny art tiles. This quick upgrade adds pattern pops in hallways and powder rooms.
Materials Needed:
- Spare fabric scraps (cotton works best)
- Mod Podge or white glue
- Craft knife
How to make it:
- Remove the switch plate and clean it.
- Brush glue on the front, press fabric on top, smoothing bubbles.
- Wrap fabric around edges; cut X slits over openings with a craft knife and fold inside.
- Seal with a top coat of Mod Podge, let dry, and screw back on.
4. Wildflower-Ink Dip Dye Tea Towels
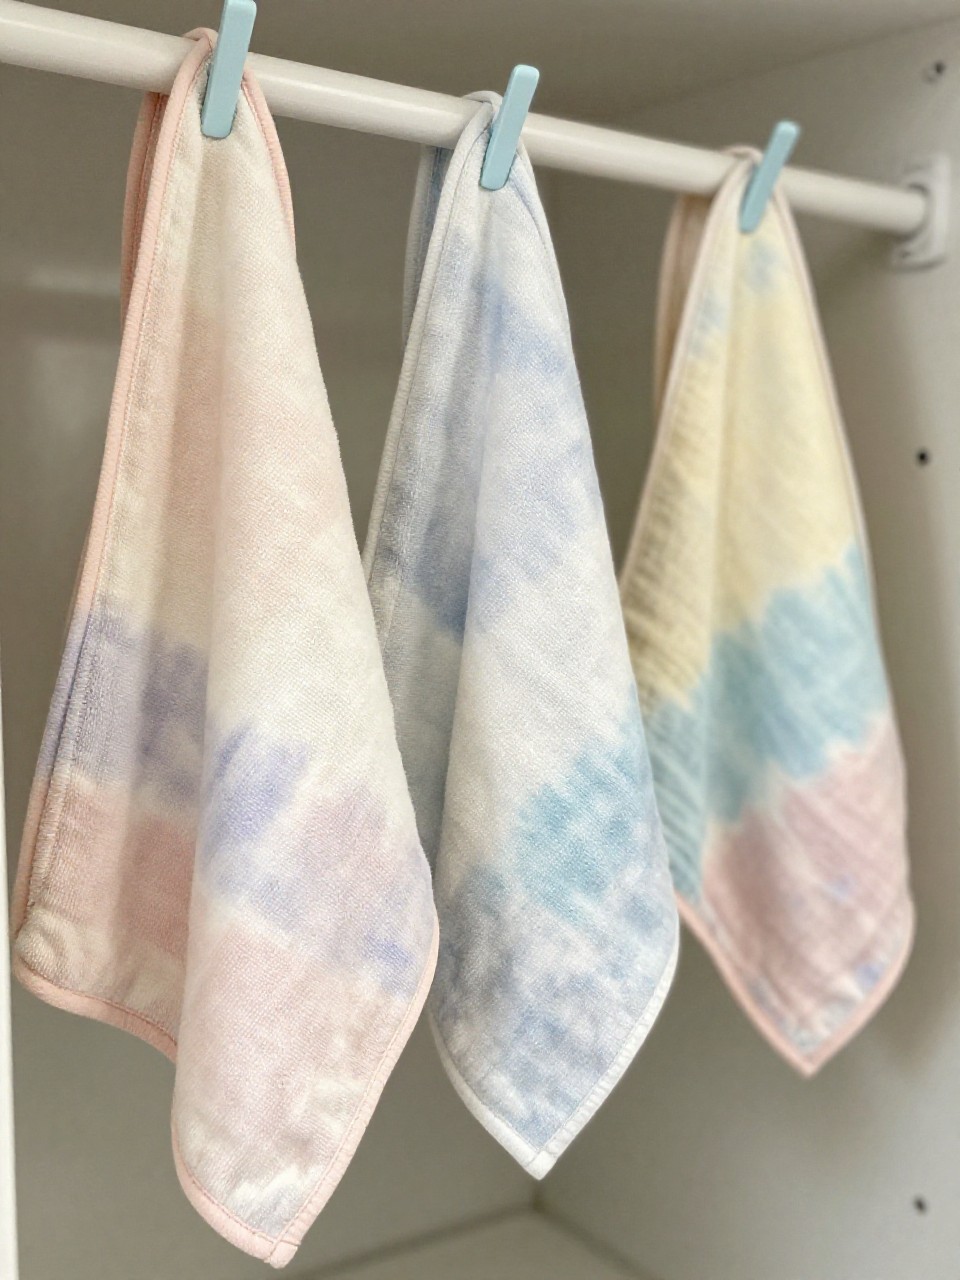
Soft gradients and organic streaks feel like watercolor meadows. Each towel looks custom and “boutique,” yet you only dip and dry.
Materials Needed:
- White cotton tea towels
- Fabric dye (soft pastels or plant-based dye)
- Bucket or large bowl
How to make it:
- Mix dye according to instructions in a bucket.
- Wet towel, then dip just the edges or corners to create an ombré fade.
- Lift slowly for darker tips and lighter middles; let excess drip.
- Rinse lightly, dry flat, and press with an iron.
5. Air-Dry Clay Bud Vases with Thumb-Dent Texture
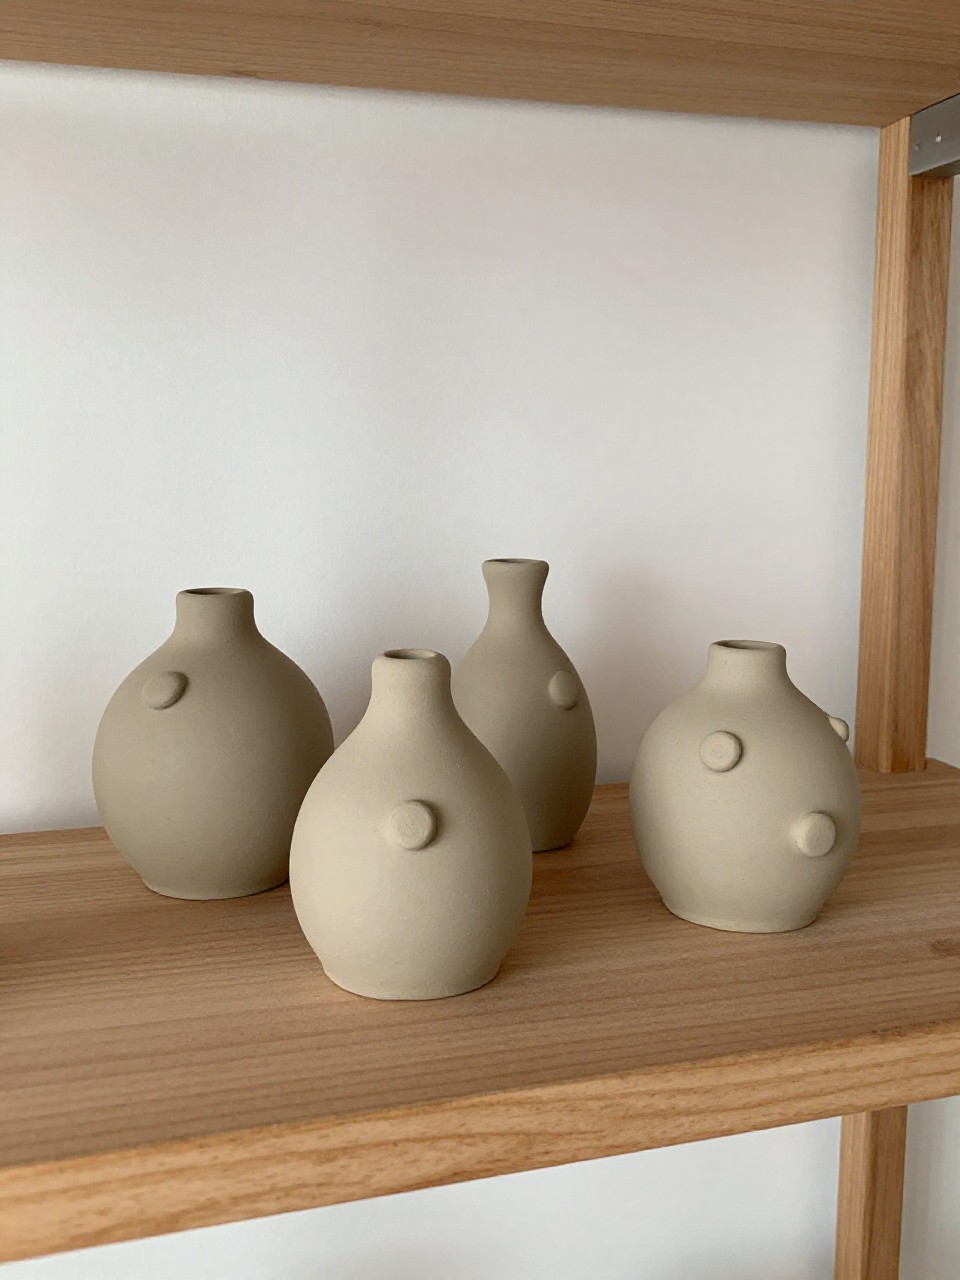
Rustic and modern at once, these tiny vases show off single blooms. The thumb dents give organic charm you can’t buy.
Materials Needed:
- Air-dry clay (white or terracotta)
- Small glass vial or test tube (optional for water)
- Sandpaper (fine grit)
How to make it:
- Roll clay into a ball, then pinch and hollow the center to form a small vessel.
- Press your thumb to create soft dents for texture; insert a glass vial if using.
- Smooth edges with a damp finger; let dry fully per package.
- Lightly sand and display with a fresh stem.
6. Botanical Stamped Napkins
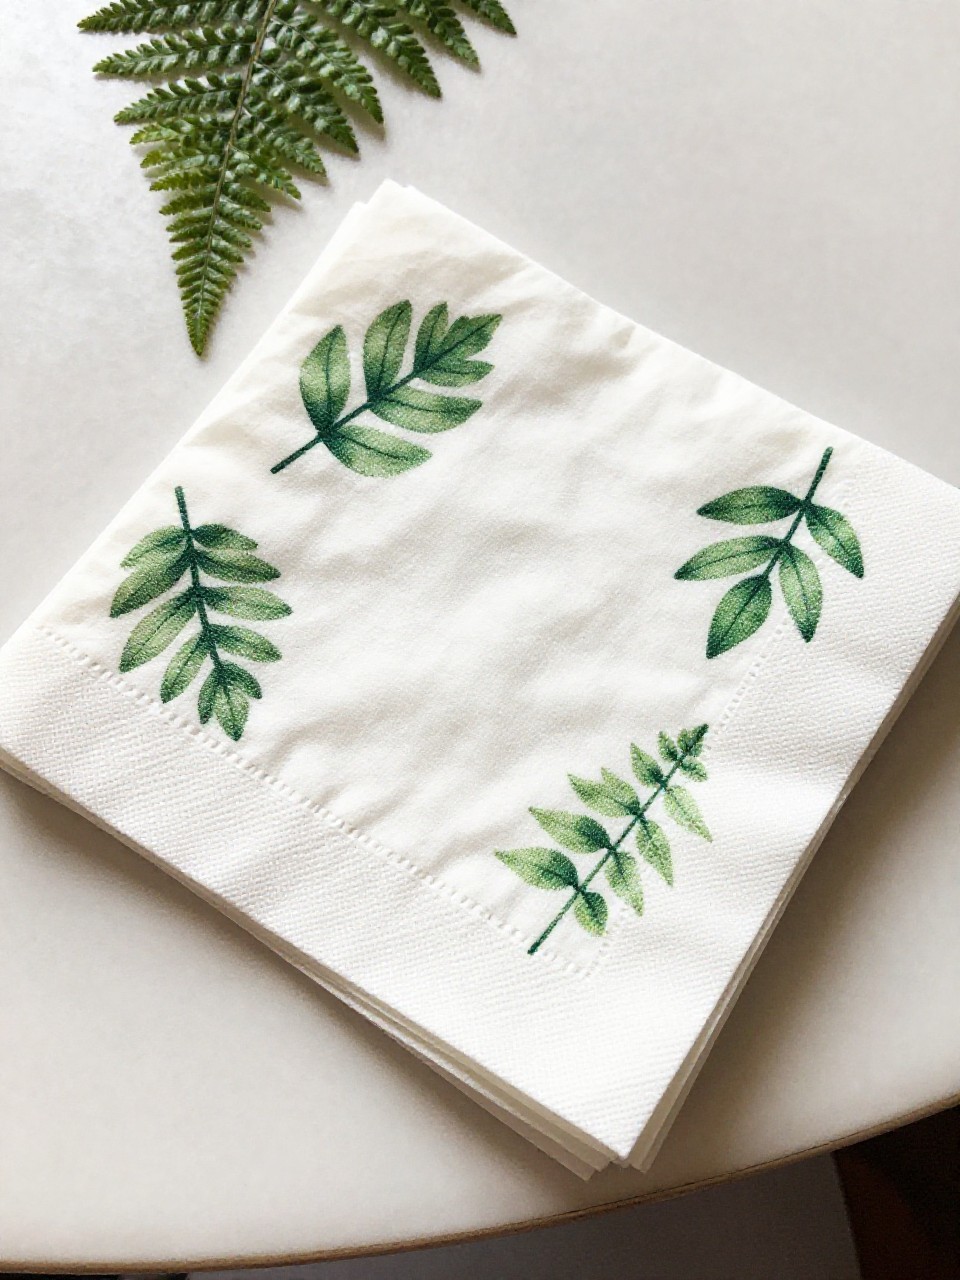
Create your own “printed” linens with leaves from the yard. The imperfect prints feel artsy and spring-fresh.
Materials Needed:
- Plain cotton napkins
- Leaves or ferns (soft, flexible)
- Fabric paint + small roller or foam brush
How to make it:
- Brush a thin coat of fabric paint on the underside of a leaf.
- Press leaf paint-side down on a napkin; cover with scrap paper and roll over once.
- Lift carefully to reveal the print; repeat a scattered pattern.
- Heat-set per paint instructions and wash gently.
7. Wavy Bead Wire Sun Catchers
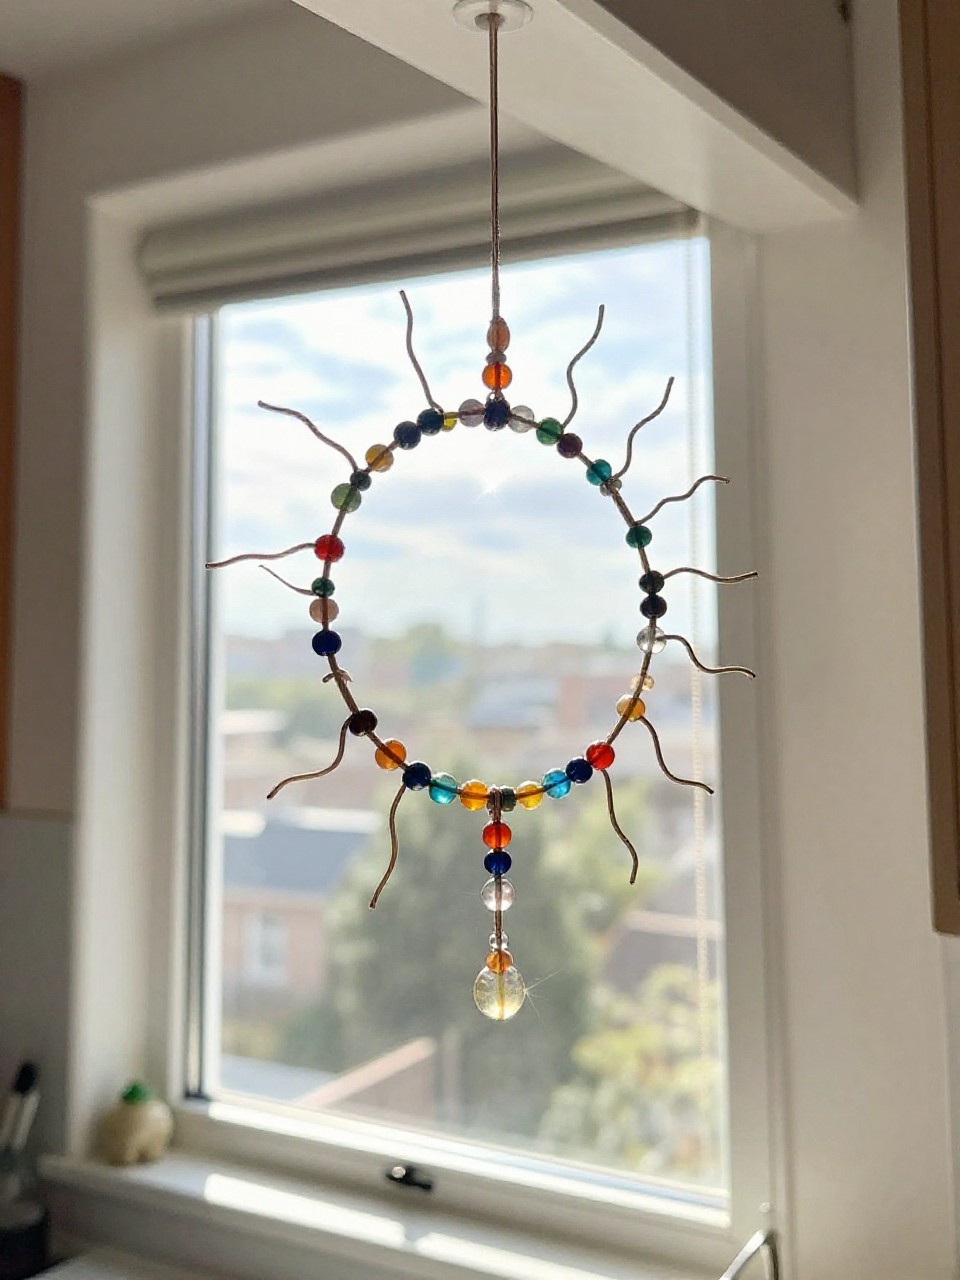
Curvy lines and translucent beads catch the light like tiny rainbows. Hang them in a cluster for playful movement.
Materials Needed:
- 18–20 gauge craft wire
- Assorted glass or acrylic beads
- Wire cutters and round-nose pliers
How to make it:
- Cut a length of wire and bend it into soft waves with pliers.
- Thread beads along the wire, spacing as you like.
- Curl tiny loops at both ends to secure beads.
- Hang with clear fishing line in a sunny spot.
8. Spring Citrus Peel Fire Starters
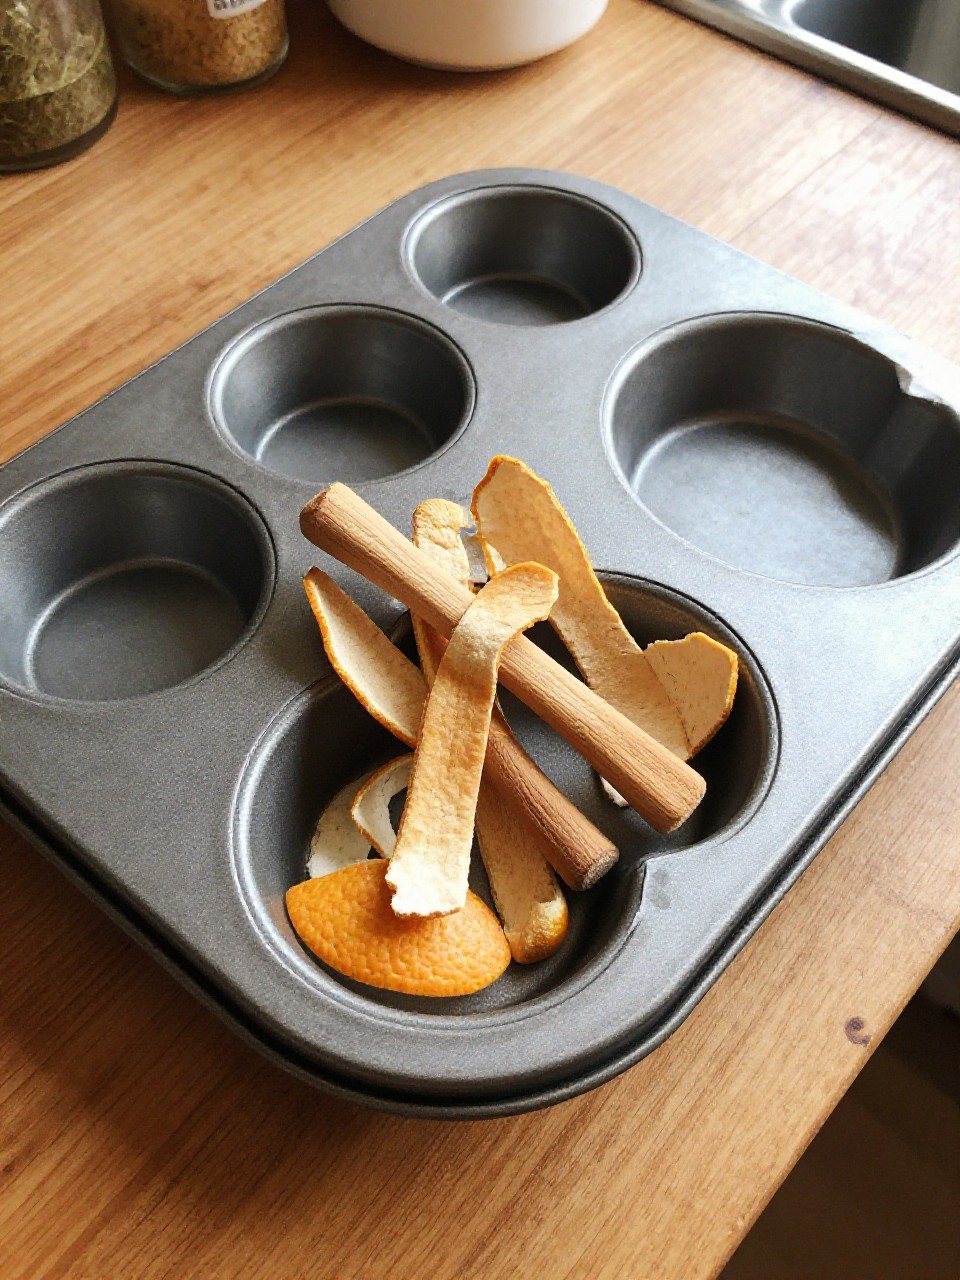
They look like little rustic treats and make your home smell bright. Use them for backyard fire pits on cool spring nights.
Materials Needed:
- Dried citrus peels (orange, lemon)
- Soy wax flakes
- Muffin tin + paper liners
How to make it:
- Dry citrus peels on low heat or air dry until crisp.
- Melt soy wax per instructions and place peels in paper-lined muffin tin.
- Pour wax over peels to fill cups halfway.
- Let harden, pop out, and store in a tin.
9. Painted Arch Wall Art on Canvas Panels
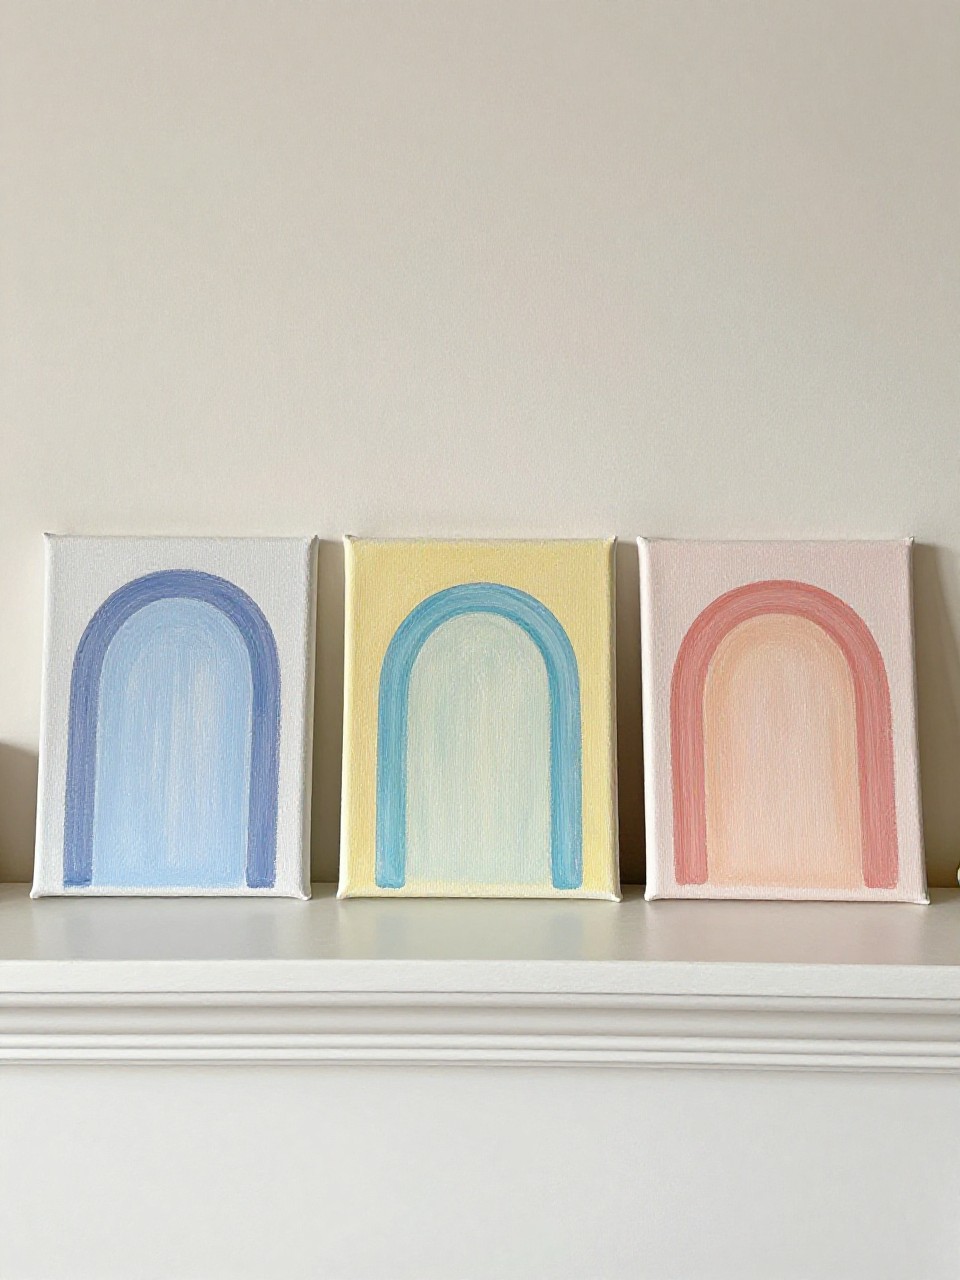
Soft arches feel modern and calming, like boutique decor. The shapes are simple blocks of color that look designer-made.
Materials Needed:
- Small canvas panels or thick watercolor paper
- Acrylic paints in 2–4 coordinating colors
- Painter’s tape and a round object (bowl) as a guide
How to make it:
- Use a bowl to trace half-circles; extend sides to form arches.
- Tape off sections if needed and paint each arch in a solid color.
- Peel tape while paint is slightly tacky for crisp lines.
- Let dry and hang as a trio.
10. Lavender Drawer Sachets from Old Pillowcases
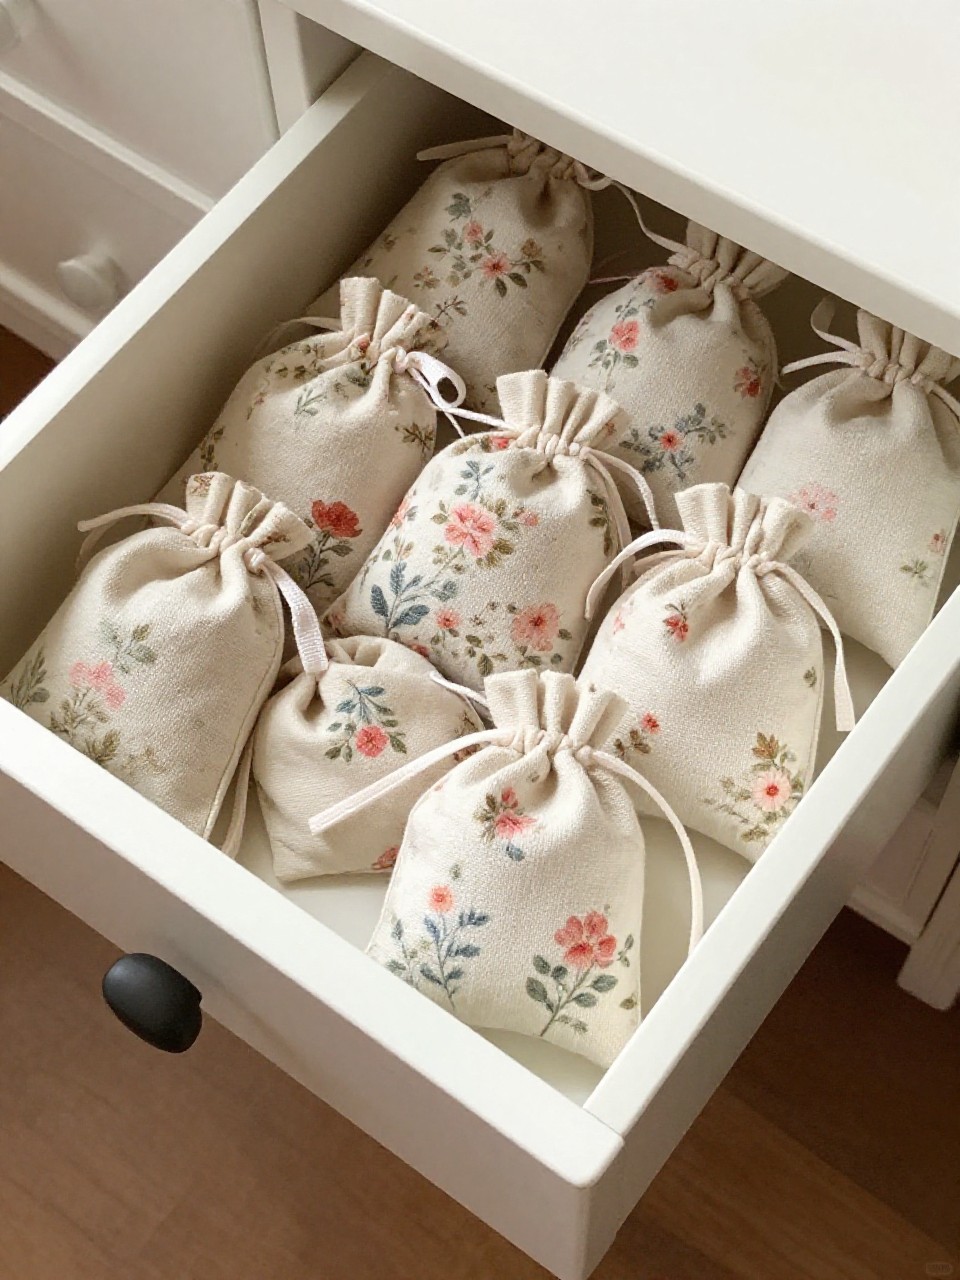
Pretty little pouches that make every drawer smell like a garden. They sew up fast—even with fabric glue.
Materials Needed:
- Old cotton pillowcase or scrap fabric
- Dried lavender (or cedar shavings)
- Needle and thread or fabric glue + ribbon
How to make it:
- Cut fabric into small rectangles (about 4×6 inches).
- Fold right sides together and stitch/glue sides, leaving a top opening.
- Turn the right side out, fill with lavender.
- Fold the top edge in and stitch/glue closed; tie ribbon around.
11. Watercolor Seed Packet Wall Garland

Tiny painted seed envelopes clipped to a string look whimsical and seasonal. Swap packets all spring as you plant.
Materials Needed:
- Mini kraft envelopes
- Watercolor set + brush
- Twine + mini clothespins
How to make it:
- Paint simple blooms or veggie icons on envelopes; let dry.
- Label with seed names using a fine pen.
- String twine across a wall or shelf.
- Clip envelopes to twine for a changing display.
12. Speckled Egg Coasters with Clay and Paint

Cute, modern coasters that look like ceramic eggshells. The tiny speckles add a polished, store-bought finish.
Materials Needed:
- Air-dry clay
- Acrylic paint (pastels) + black paint for speckles
- Round cookie cutter and sealant
How to make it:
- Roll clay to 1/4-inch thick and cut circles; smooth edges with a damp finger.
- Let dry fully; paint in pastel colors.
- Dip a stiff brush in thinned black paint and flick to create speckles.
- Seal and let cure before use.
13. Ribbon-Wrapped Hoop Wreath with Foraged Greenery
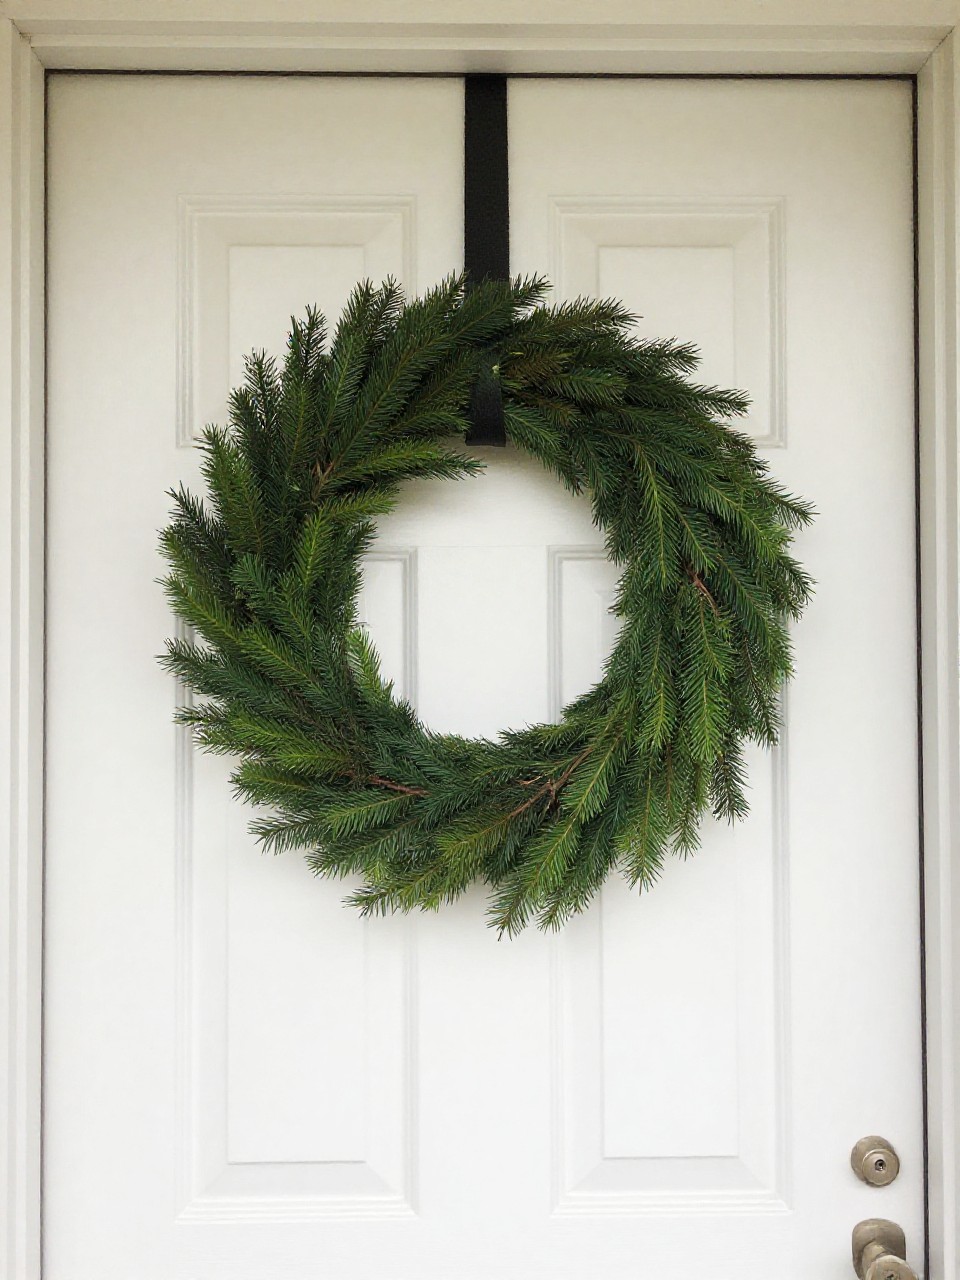
Light and airy, this half-wreath feels modern and minimal. It’s easy to refresh with new clippings each week.
Materials Needed:
- Metal or wooden hoop
- Satin ribbon (1–2 inches wide)
- Foraged greenery or faux stems + floral wire
How to make it:
- Wrap half the hoop with ribbon and secure ends with hot glue or a knot.
- Layer greenery along the bottom half and wire it in place.
- Add a small cluster of blooms on one side for balance.
- Hang with a short ribbon tail.
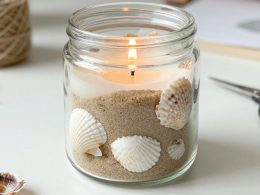
14. Stained Glass Effect Jars with Tissue Paper
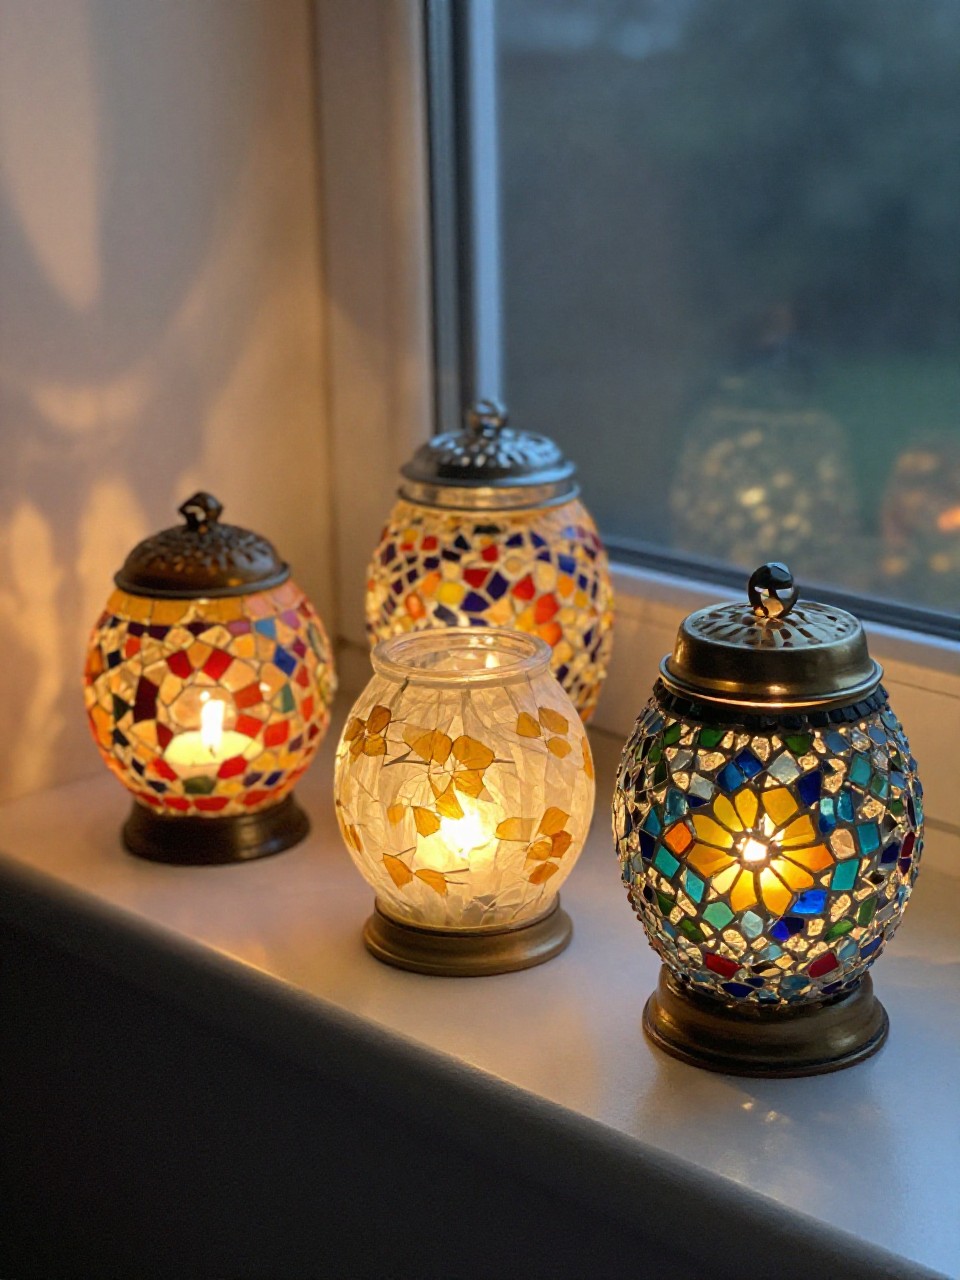
Color-washed jars that glow with candles or sunlight. The torn edges blend into a dreamy mosaic.
Materials Needed:
- Clear glass jars
- Colored tissue paper
- Mod Podge and soft brush
How to make it:
- Tear tissue into small pieces.
- Brush a thin coat of Mod Podge on the jar and layer tissue pieces, overlapping colors.
- Smooth gently and seal with another thin coat.
- Let dry and add a tea light or use as a bud vase.
15. Spring Patterned Doormat with Layered Stencils
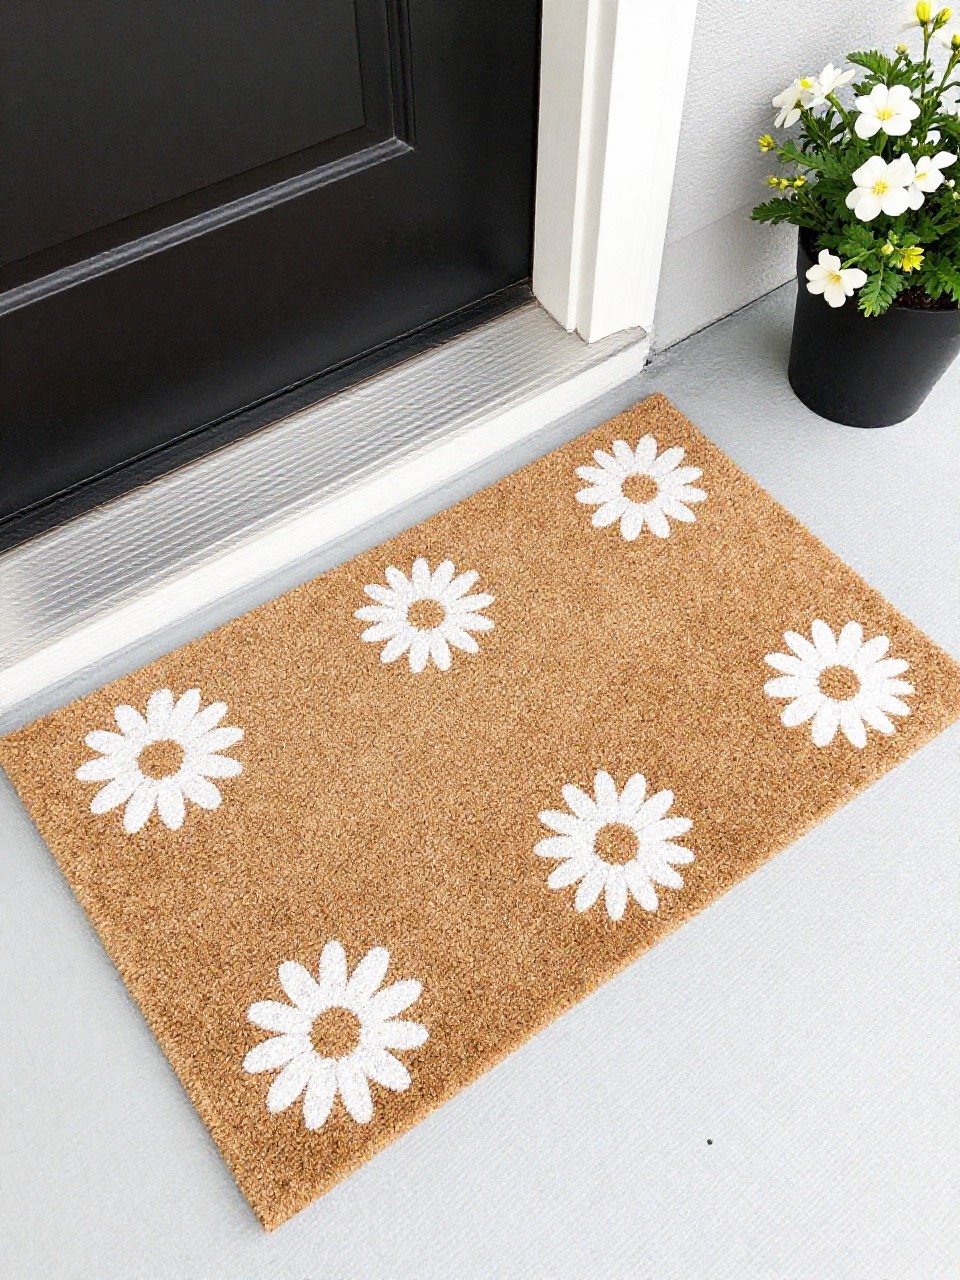
Give your entry a crisp, custom welcome with simple motifs—daisies, dots, or arches. It looks store-bought but takes under an hour.
Materials Needed:
- Plain coir doormat
- Outdoor acrylic paint
- Stencil(s) + foam pouncer
How to make it:
- . Tape stencil to the mat and load the pouncer with a small amount of paint.
- Dab straight up and down for clean edges; repeat the pattern across the mat.
- Layer a second, smaller stencil in a contrasting color for depth.
- Let dry fully before placing outside.