


In This Article Show
Wooden summer signs are an easy way to add a handmade seasonal touch to your porch, entryway, mantel, patio, kitchen, or garden corner. You can keep them simple with paint and stencils, or add small details like rope, shells, ribbon, faux flowers, and greenery for more texture.
These ideas are cute, beginner-friendly, and easy to display around the home. Some feel bright and playful, while others are softer, more coastal, or more garden-inspired, so you can choose a sign that fits your summer decor style.
1. Lemon Branch Wooden Sign
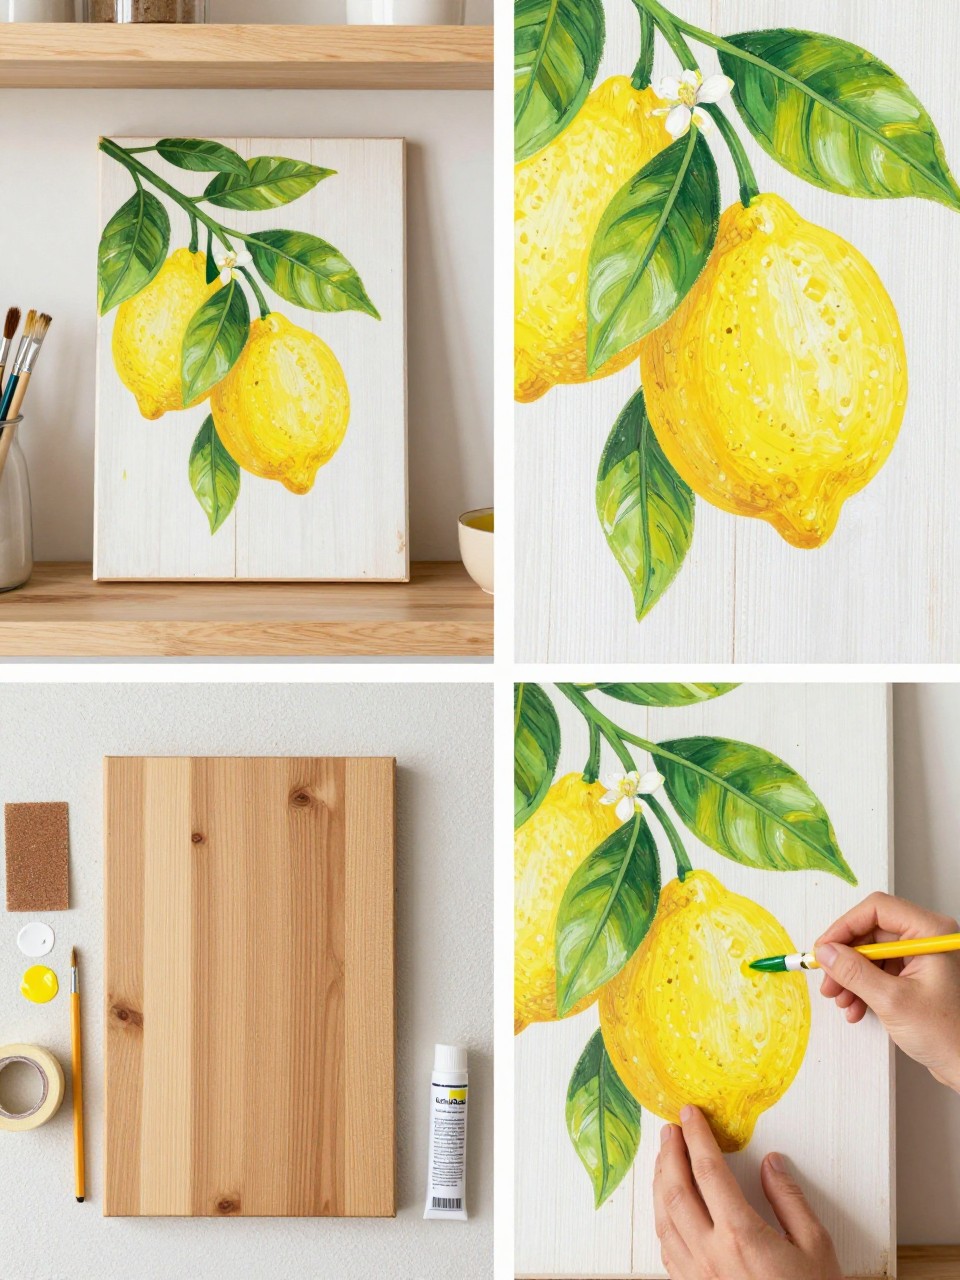
A lemon branch sign feels fresh, bright, and perfect for summer kitchens, porches, or entry tables. The lemon shapes are simple, but the branches and leaves make the design look more finished.
This idea works well on a whitewashed board, natural wood, or a soft blue background. Display it beside a vase of greenery, a fruit bowl, or a small summer candle.
Materials Needed:
- Rectangular wooden board
- Yellow, green, white, and brown paint
- Small paintbrushes
- Pencil
- Sandpaper
- Painter’s tape
- Clear sealer
Steps To Make:
- Sand the board until the surface is smooth.
- Paint the background color and let it dry.
- Sketch a few thin branches with lemons and leaves.
- Paint the lemons first, then add stems, leaves, and blossoms.
- Seal the finished sign before displaying it.
2. Mini Watermelon Wood Slice Sign
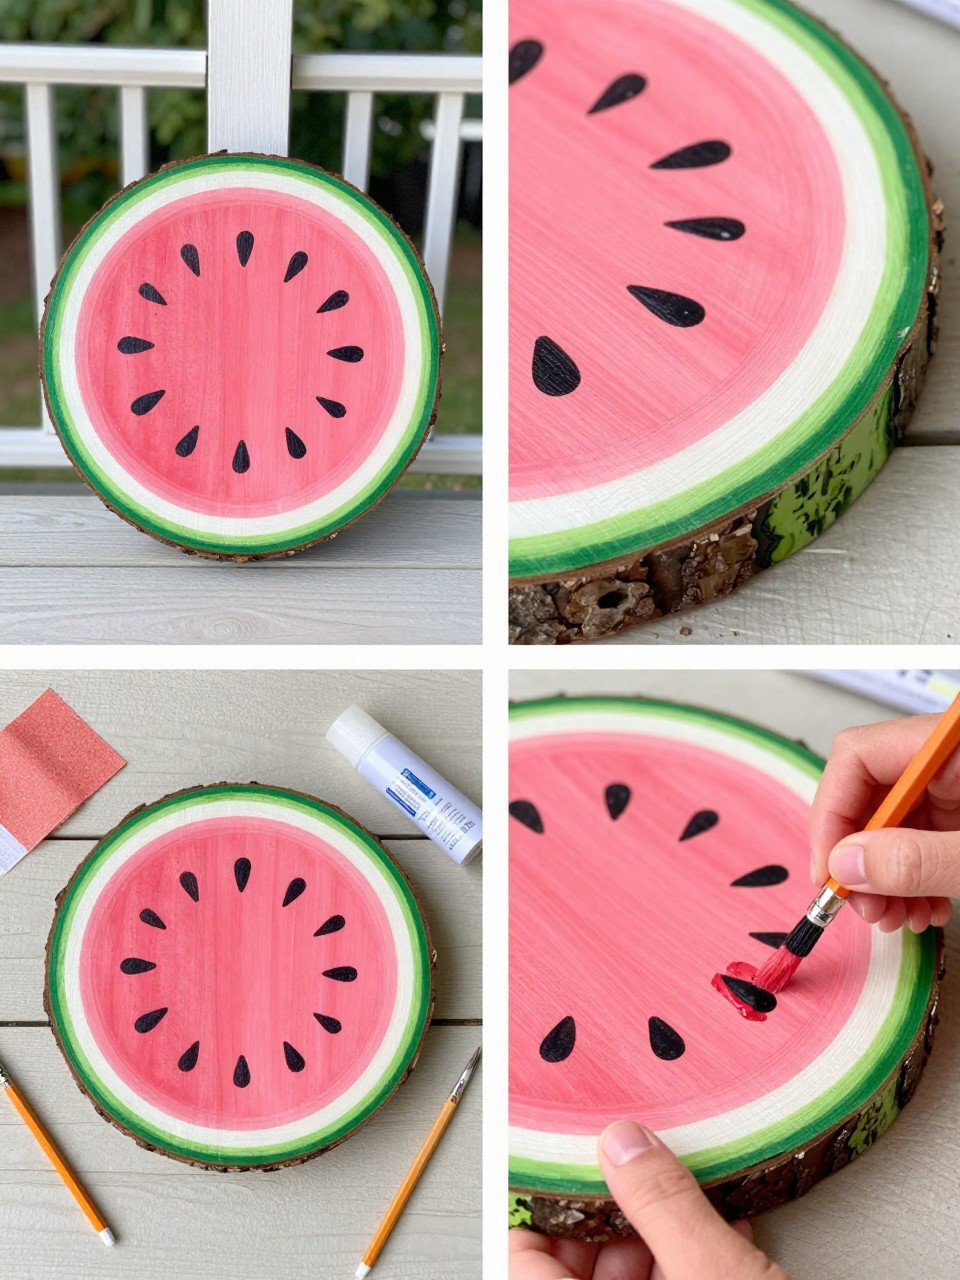
A watermelon wood slice sign is small, cute, and easy to make in one sitting. The round wood slice already gives you a nice shape, so the painted watermelon design comes together quickly.
This is a fun piece for a porch table, summer tiered tray, kitchen shelf, or party setup. The bark edge adds a rustic touch that makes the bright colors stand out.
Materials Needed:
- Round wood slice
- Pink, green, white, and black paint
- Paintbrushes
- Pencil
- Sandpaper
- Clear sealer
Steps To Make:
- Lightly sand the front of the wood slice.
- Paint the center pink, leaving room for the rind.
- Add a white stripe and green outer edge.
- Paint small black seeds once the pink layer dries.
- Seal the sign so it lasts longer.
3. Coastal Shell Wooden Sign
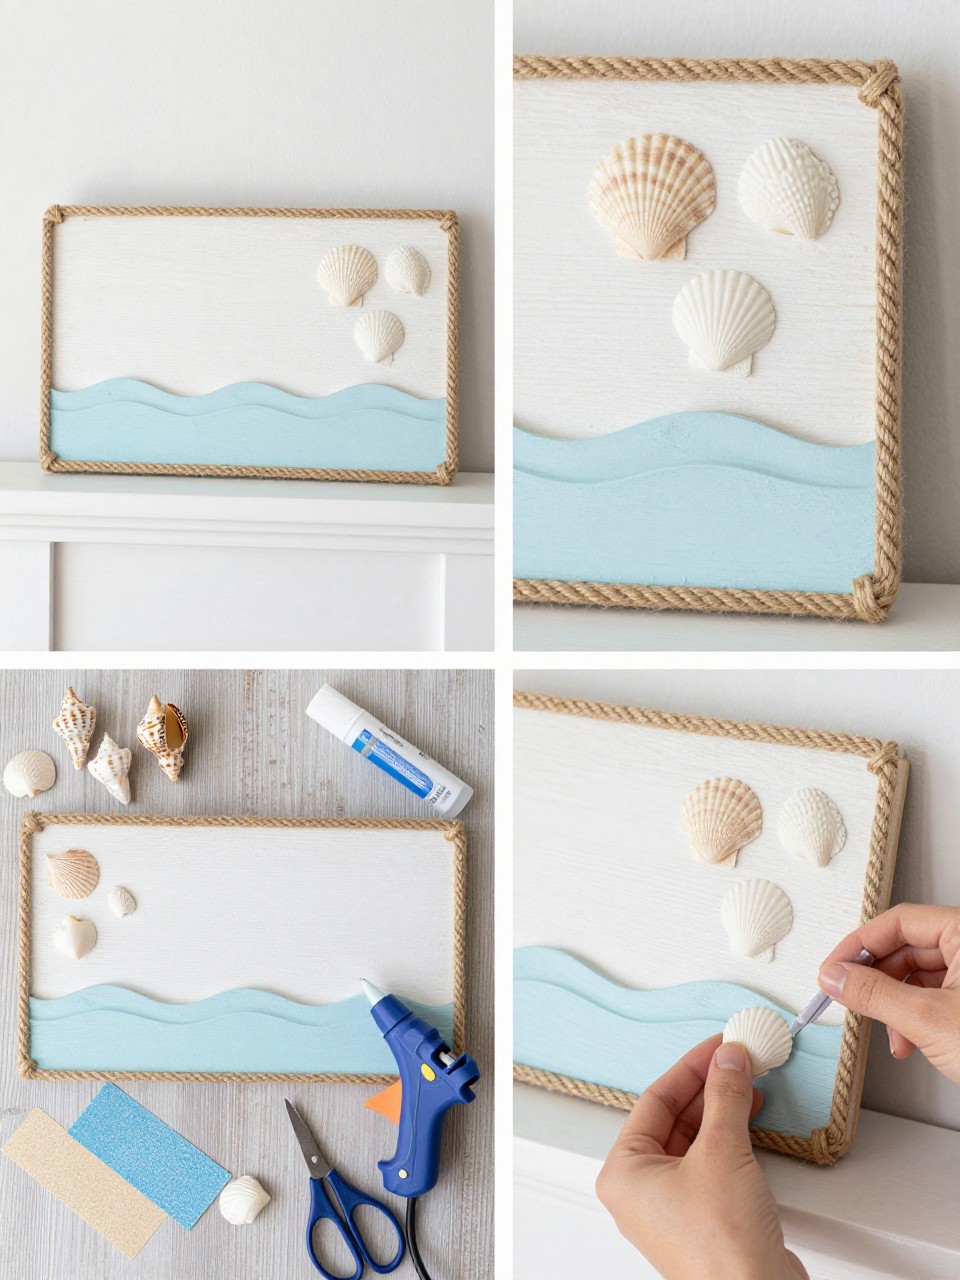
A coastal shell sign is perfect if you want your summer decor to feel calm and beach-inspired. The mix of whitewashed wood, shells, rope, and pale blue paint gives it a soft seaside look.
This sign works well in bathrooms, entryways, covered porches, or living room shelves. Keep the shells grouped in one corner if you want the design to feel clean and simple.
Materials Needed:
- Wooden board
- Seashells
- Jute rope
- Blue and white paint
- Hot glue gun
- Scissors
- Sandpaper
- Clear sealer
Steps To Make:
- Sand the board and paint it with a light whitewash finish.
- Paint a small blue wave or coastal detail.
- Glue jute rope around the edge as a frame.
- Add shells in one corner or along the bottom.
- Let the glue dry, then seal any painted areas.
4. Daisy Garden Porch Sign
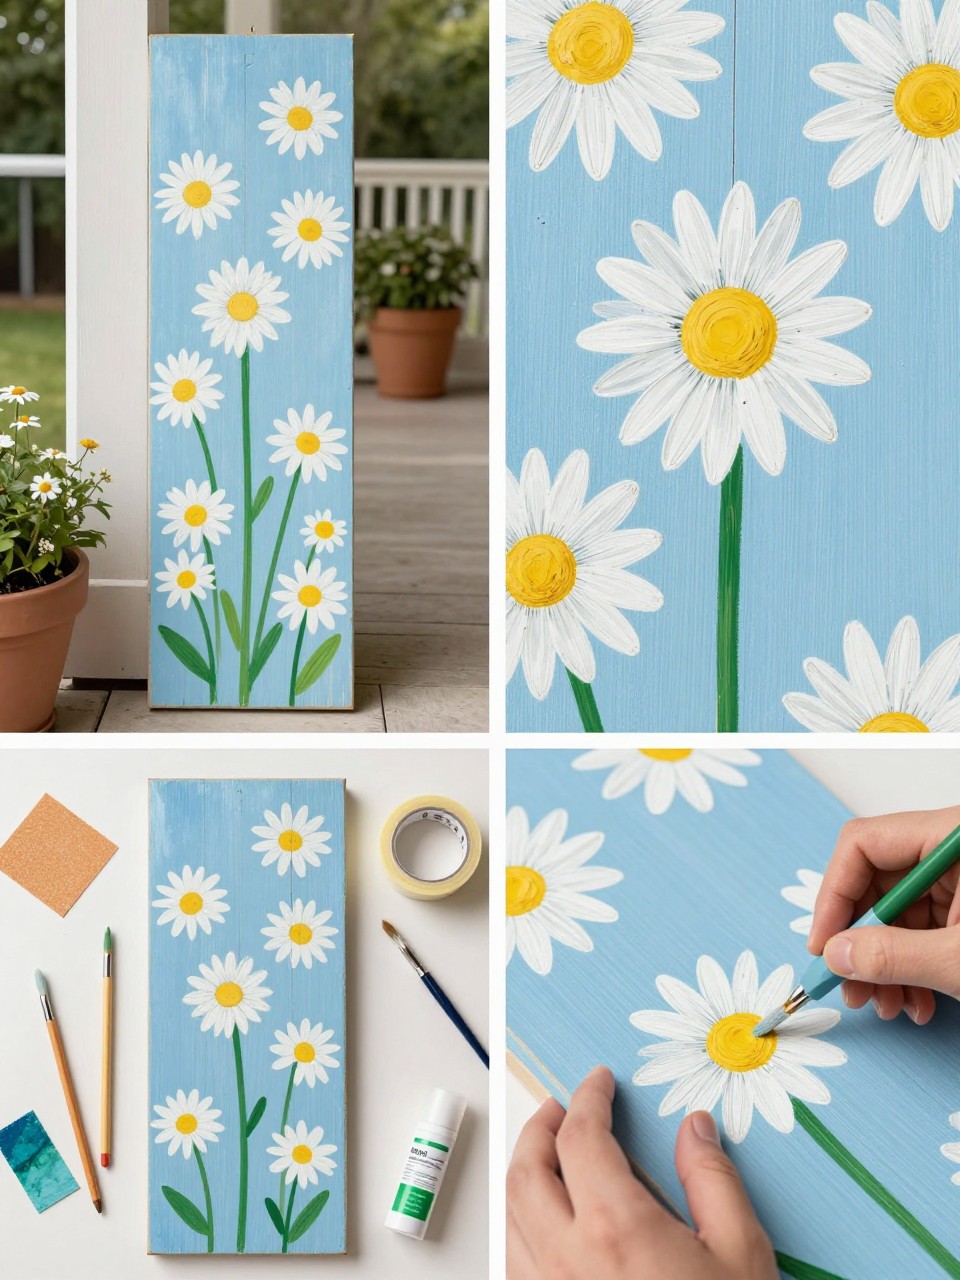
A daisy garden sign is sweet, cheerful, and easy to display near flowers or greenery. The white petals and yellow centers feel bright for summer, while the green stems help the design look fresh.
This idea is beginner-friendly because daisies do not need perfect petals to look pretty. You can make a tall porch sign or a smaller shelf sign using the same design.
Materials Needed:
- Wooden board
- Blue, white, yellow, and green paint
- Paintbrushes
- Pencil
- Sandpaper
- Painter’s tape
- Clear outdoor sealer
Steps To Make:
- Sand the board and wipe away dust.
- Paint the background blue, cream, or white.
- Sketch daisy stems and flower heads.
- Paint the stems, petals, and yellow centers.
- Seal the sign once it is fully dry.
5. Painted Ice Cream Cone Sign
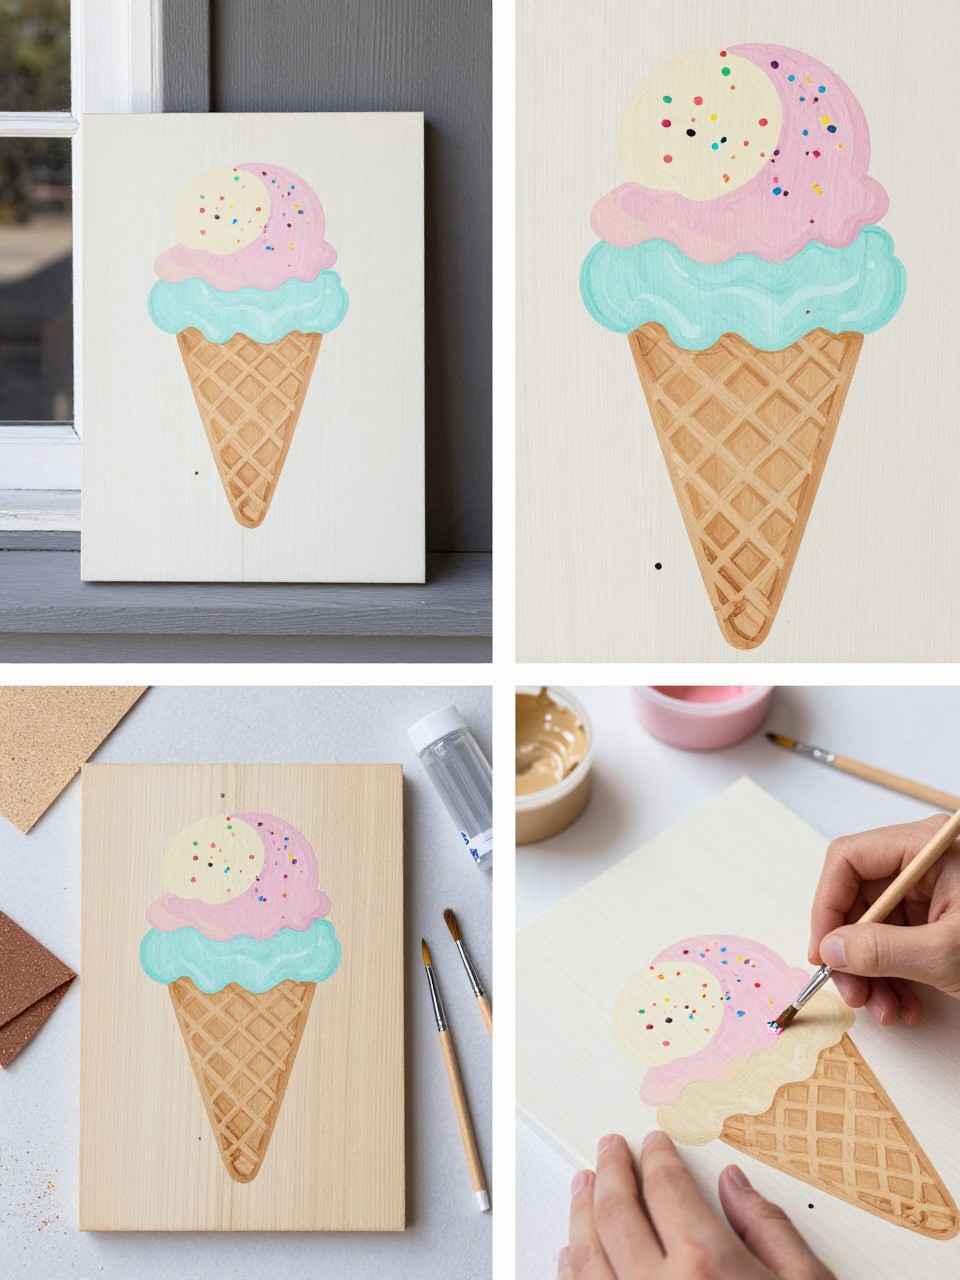
An ice cream cone sign is cute, playful, and great for summer kitchens, kids’ spaces, or party decor. The shapes are easy to paint, and each cone can have a different color or flavor.
This sign looks best when the cones are grouped in a neat row or scattered like little icons. Add waffle lines, sprinkles, and drip details to make it feel more fun.
Materials Needed:
- Small wooden board
- Pastel paint
- Tan and brown paint
- Fine paintbrushes
- Pencil
- Sandpaper
- Clear sealer
Steps To Make:
- Sand the wooden board until smooth.
- Paint the background and let it dry.
- Sketch cone triangles and round scoop shapes.
- Paint the cones and scoops in summer colors.
- Add waffle lines, sprinkles, and a clear sealer.
6. Wooden Sun and Rays Sign
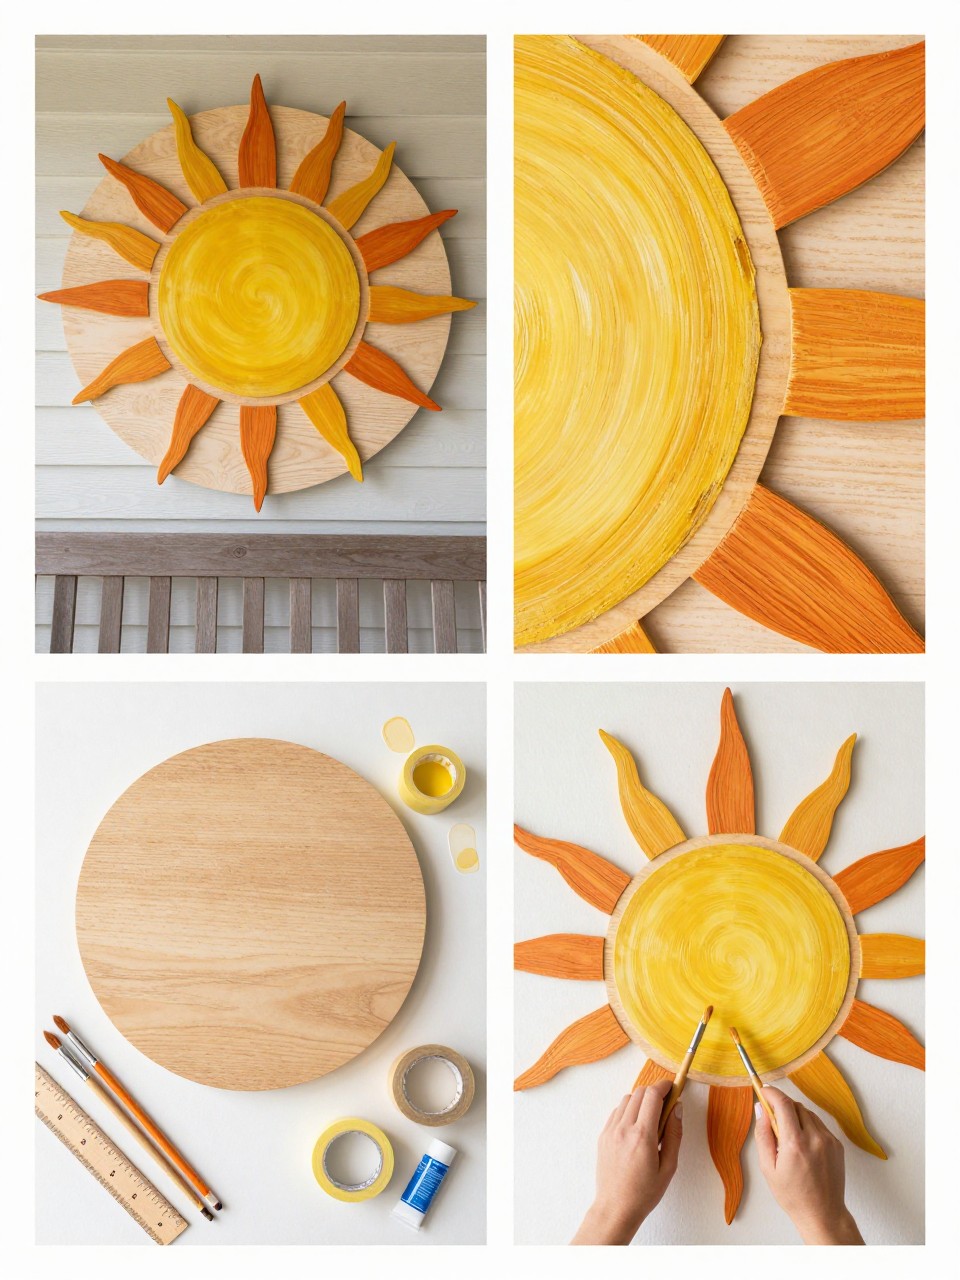
A wooden sun sign is simple, warm, and easy to use in many places around the home. It can brighten a porch wall, entryway, bedroom shelf, or seasonal mantel.
The design is easy to make because it starts with a circle and simple rays. Use yellow, orange, cream, and gold for a sunny summer look that still feels soft.
Materials Needed:
- Round wood blank or square wood board
- Yellow, orange, cream, and gold paint
- Paintbrushes
- Pencil
- Ruler
- Painter’s tape
- Clear sealer
Steps To Make:
- Sand the wood blank and wipe it clean.
- Mark the center of the board.
- Sketch a sun circle and simple rays.
- Paint the rays in warm colors.
- Let the paint dry, then seal the sign.
7. Strawberry Patch Wood Sign
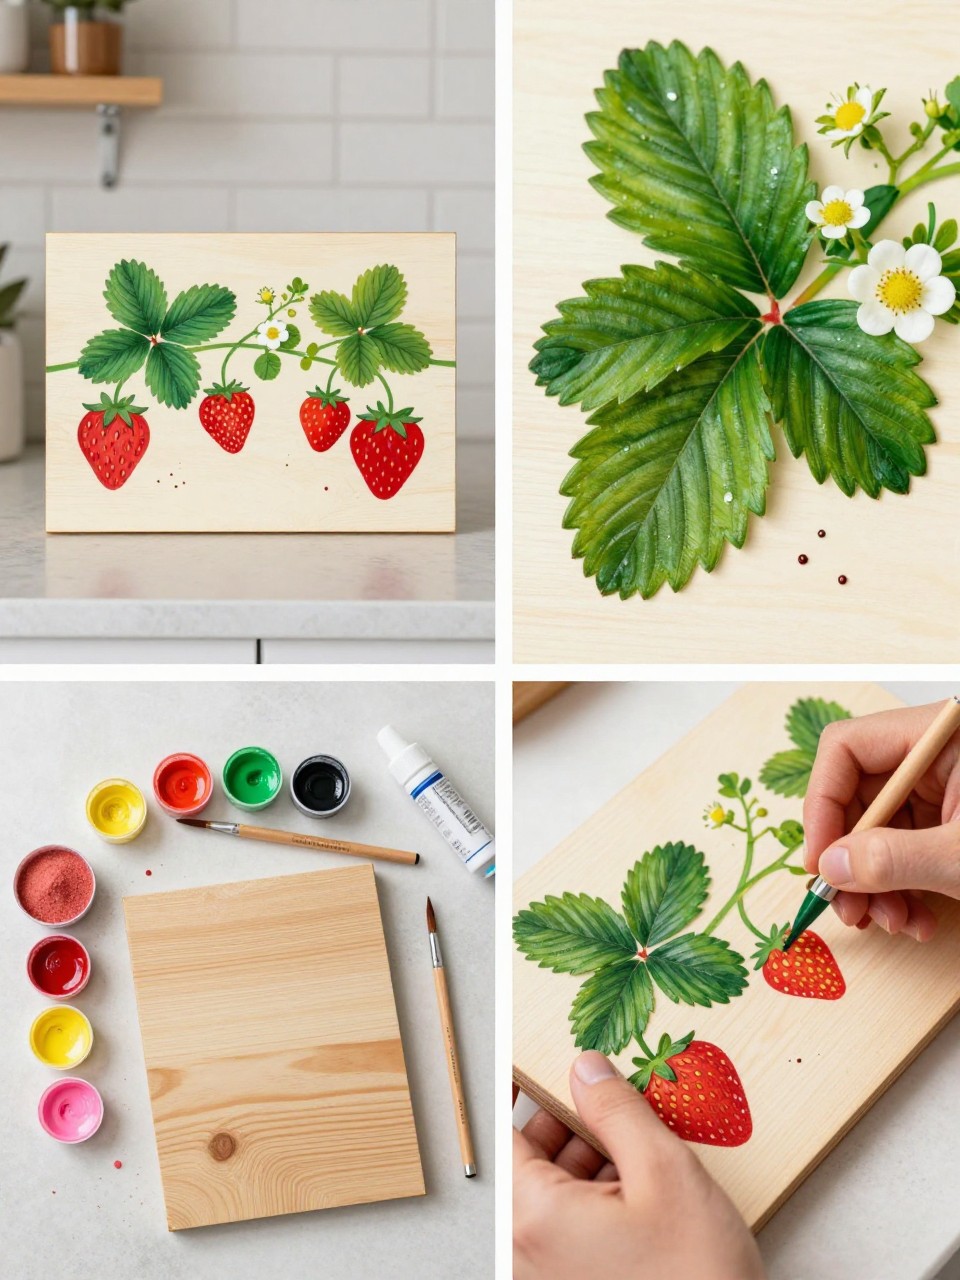
A strawberry patch sign is cute, colorful, and perfect for summer kitchens or garden-themed decor. The red berries pop against a cream or white background, while the vines and blossoms make it feel softer.
This sign is lovely on a shelf, beside a fruit bowl, or near a small herb garden. Paint a loose vine across the board so the design feels natural and not too stiff.
Materials Needed:
- Wooden board
- Red, green, white, yellow, and pink paint
- Fine paintbrushes
- Pencil
- Sandpaper
- Clear sealer
Steps To Make:
- Sand the board and paint a simple background.
- Sketch a curved vine with strawberries and flowers.
- Paint the strawberries red and add green tops.
- Add leaves, flowers, and small seed dots.
- Seal the sign after the paint dries.
8. Rustic Flip-Flop Wood Sign
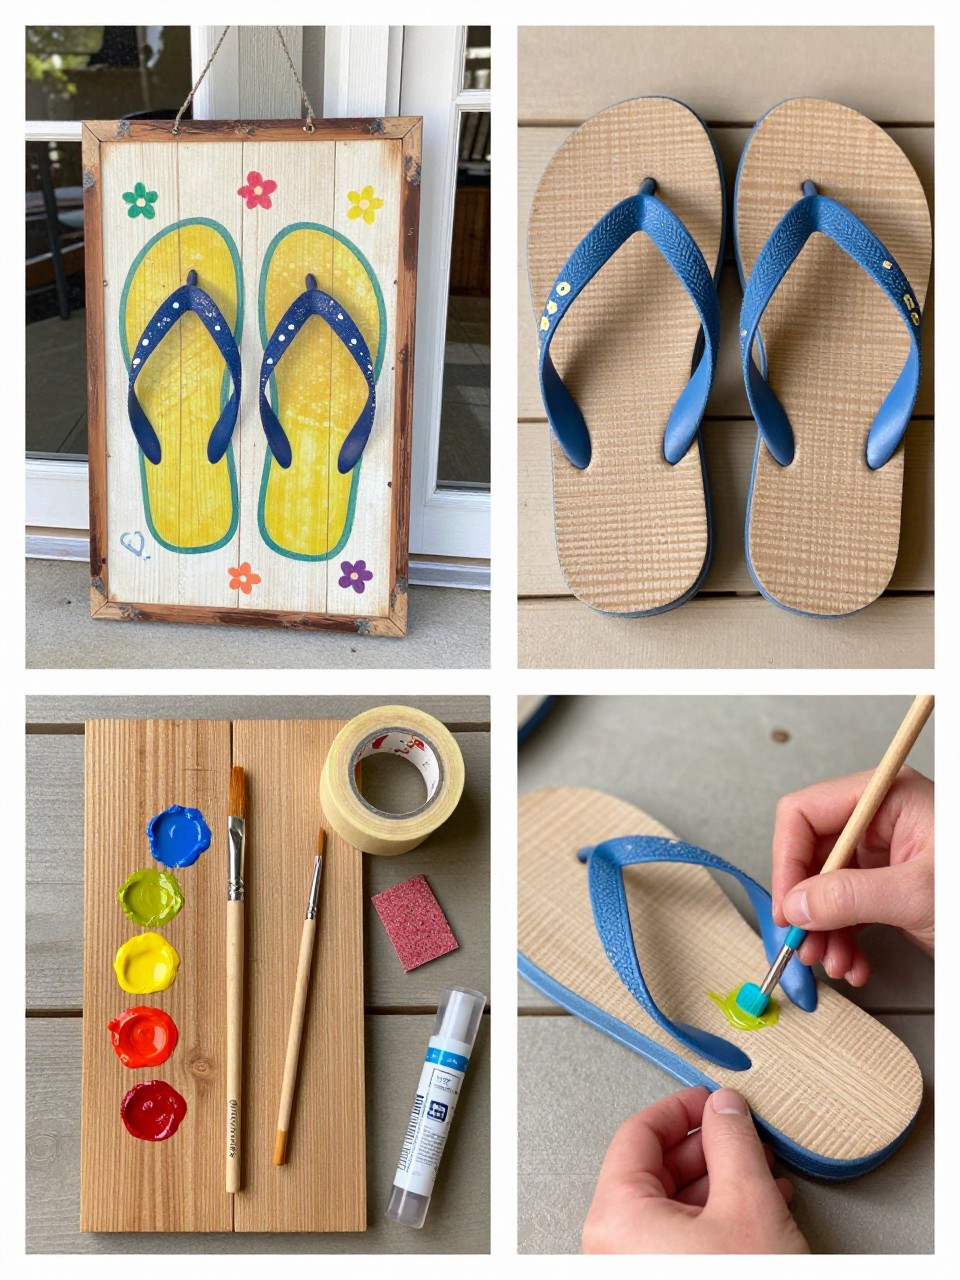
A flip-flop sign is playful and perfect for a pool area, patio door, or family porch. It brings a casual summer feel without needing a complicated design.
You can paint one large pair of flip-flops or several small pairs in different colors. Add stripes, dots, or little flowers to make each pair feel unique.
Materials Needed:
- Wooden board
- Outdoor craft paint
- Fine paintbrushes
- Pencil
- Sandpaper
- Painter’s tape
- Clear sealer
Steps To Make:
- Sand the board and paint the background.
- Sketch one or more flip-flop shapes.
- Paint the soles first, then add strap lines.
- Add small patterns like dots, stripes, or flowers.
- Distress the edges lightly and seal the sign.
9. Summer Flower Crate Sign
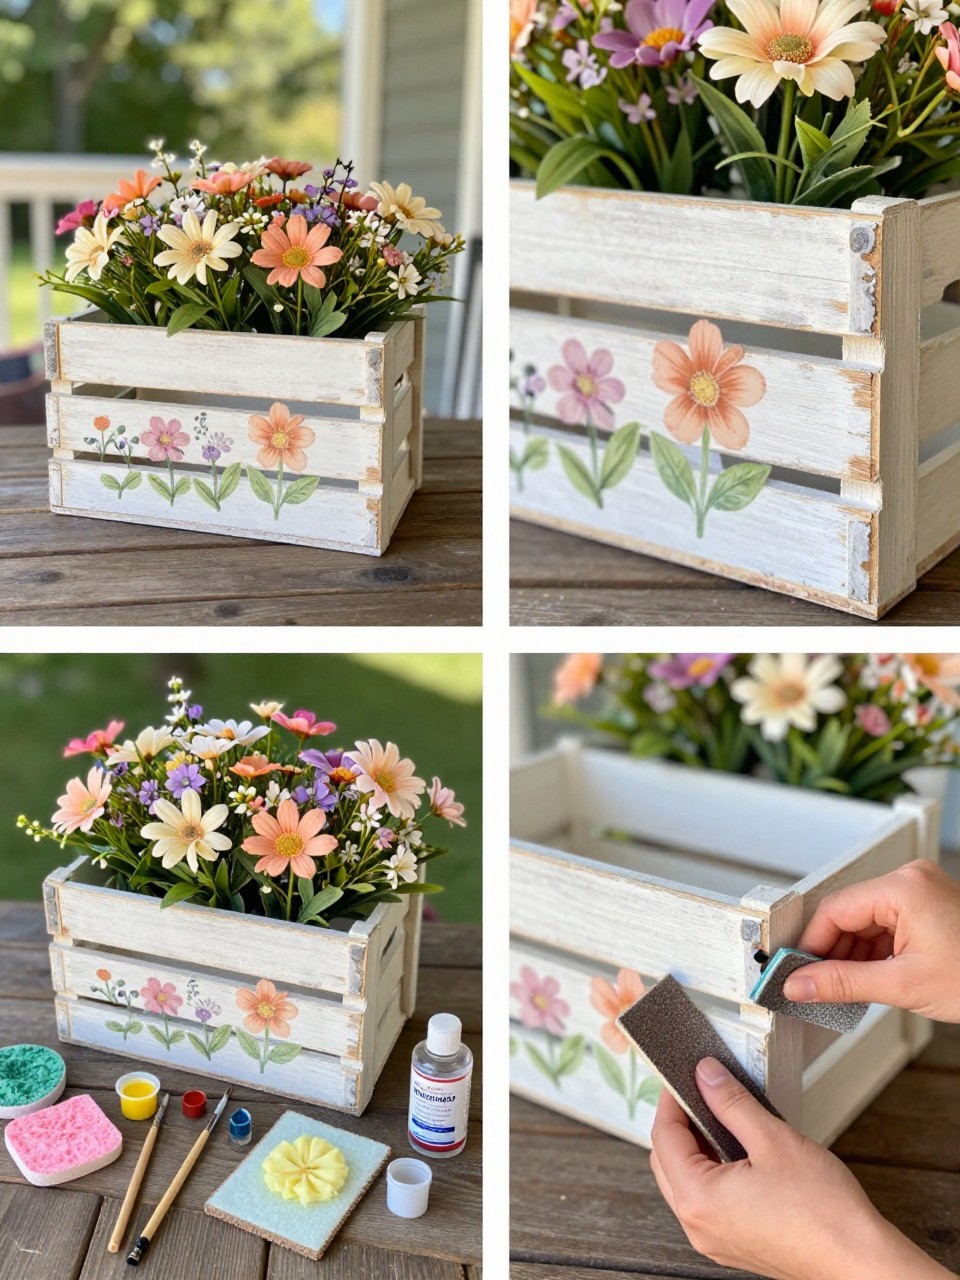
A flower crate sign is both decorative and useful because it can hold faux flowers, small pots, napkins, or porch styling pieces. It gives you a sign and a display container in one project.
This idea works well on porch tables, kitchen counters, and entryway benches. Lightly distress the edges if you want it to feel rustic and handmade.
Materials Needed:
- Small wooden crate
- Outdoor paint
- Paintbrushes
- Sandpaper
- Faux flowers
- Floral foam, optional
- Clear sealer
Steps To Make:
- Sand the crate to smooth rough edges.
- Paint the crate in a summer color or whitewash finish.
- Add small painted flowers, leaves, or simple borders.
- Distress the edges lightly with sandpaper.
- Seal the crate and fill it with faux flowers or greenery.
10. Palm Leaf Wooden Shelf Sign
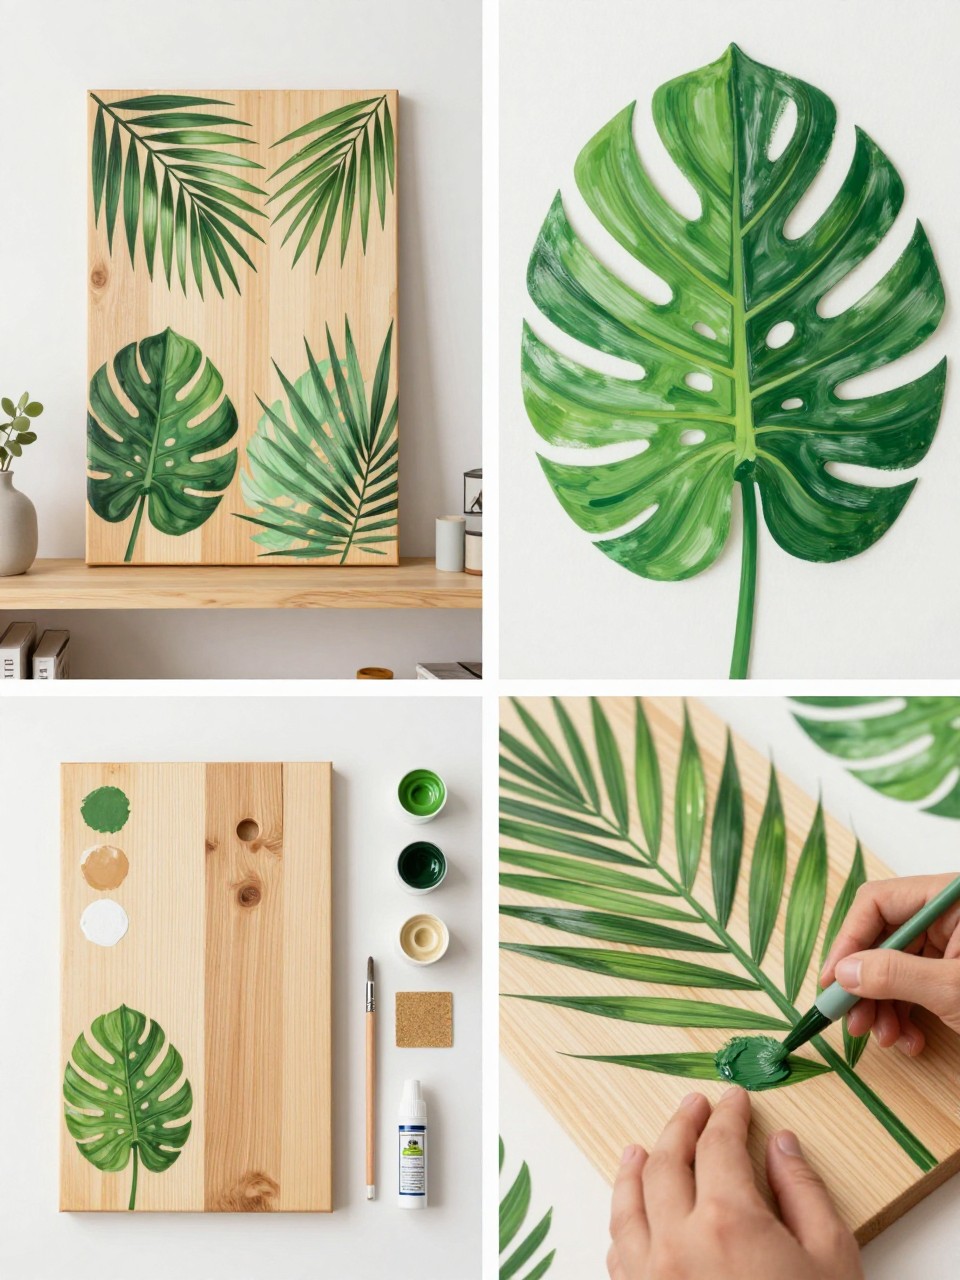
A palm leaf wooden sign is a cute way to bring a tropical summer look indoors. The green leaves feel fresh, but the natural wood keeps the design relaxed and easy to style.
This sign looks great on a shelf, console table, patio bench, or plant stand. Layer a few leaf shapes in different green tones for a fuller look.
Materials Needed:
- Wooden board
- Green, dark green, white, and tan paint
- Paintbrushes
- Pencil
- Leaf reference, optional
- Sandpaper
- Clear sealer
Steps To Make:
- Sand the wood and leave it natural or paint a light background.
- Sketch palm, fern, or monstera-style leaves.
- Paint the main leaves with medium green paint.
- Add darker and lighter green details for the veins.
- Seal the sign before displaying it.
11. Wooden Starfish Door Sign
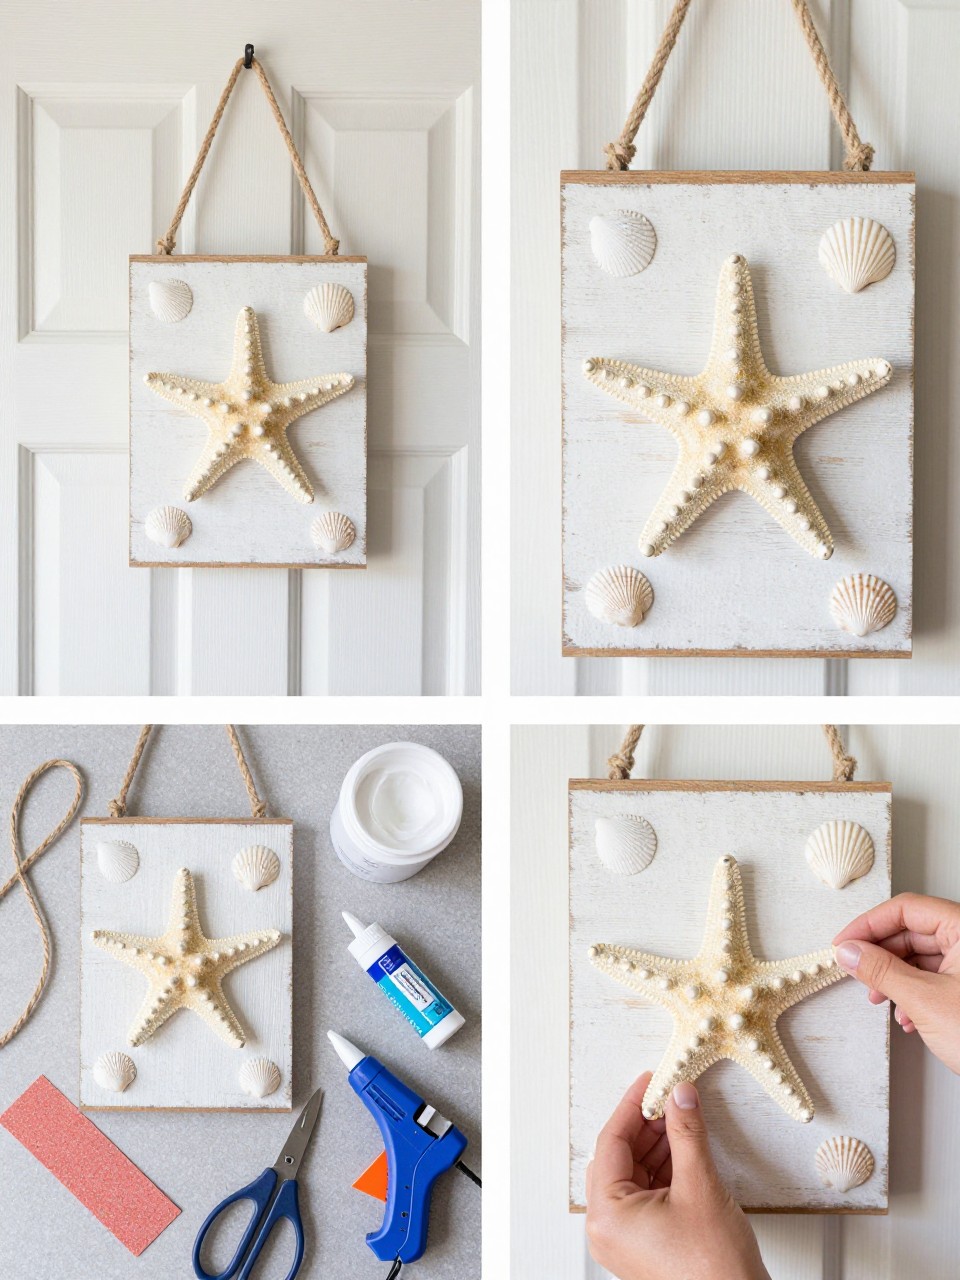
A wooden starfish sign is a pretty choice for coastal summer decor. It is simple to make, and the mix of wood, rope, shells, and starfish gives it texture without needing much paint.
This sign works best on a covered door, porch wall, bathroom door, or entryway hook. Use lightweight faux starfish so the sign is easier to hang.
Materials Needed:
- Small wooden board
- Faux starfish
- Small shells
- Jute rope
- White paint
- Hot glue gun
- Scissors
- Clear sealer
Steps To Make:
- Sand the wooden board and add a light whitewash finish.
- Arrange the starfish and shells before gluing.
- Glue the starfish first, then add shells around it.
- Attach a jute rope hanger to the top.
- Seal the painted wood if the sign will be outside.
12. Painted Summer Fruit Row Sign
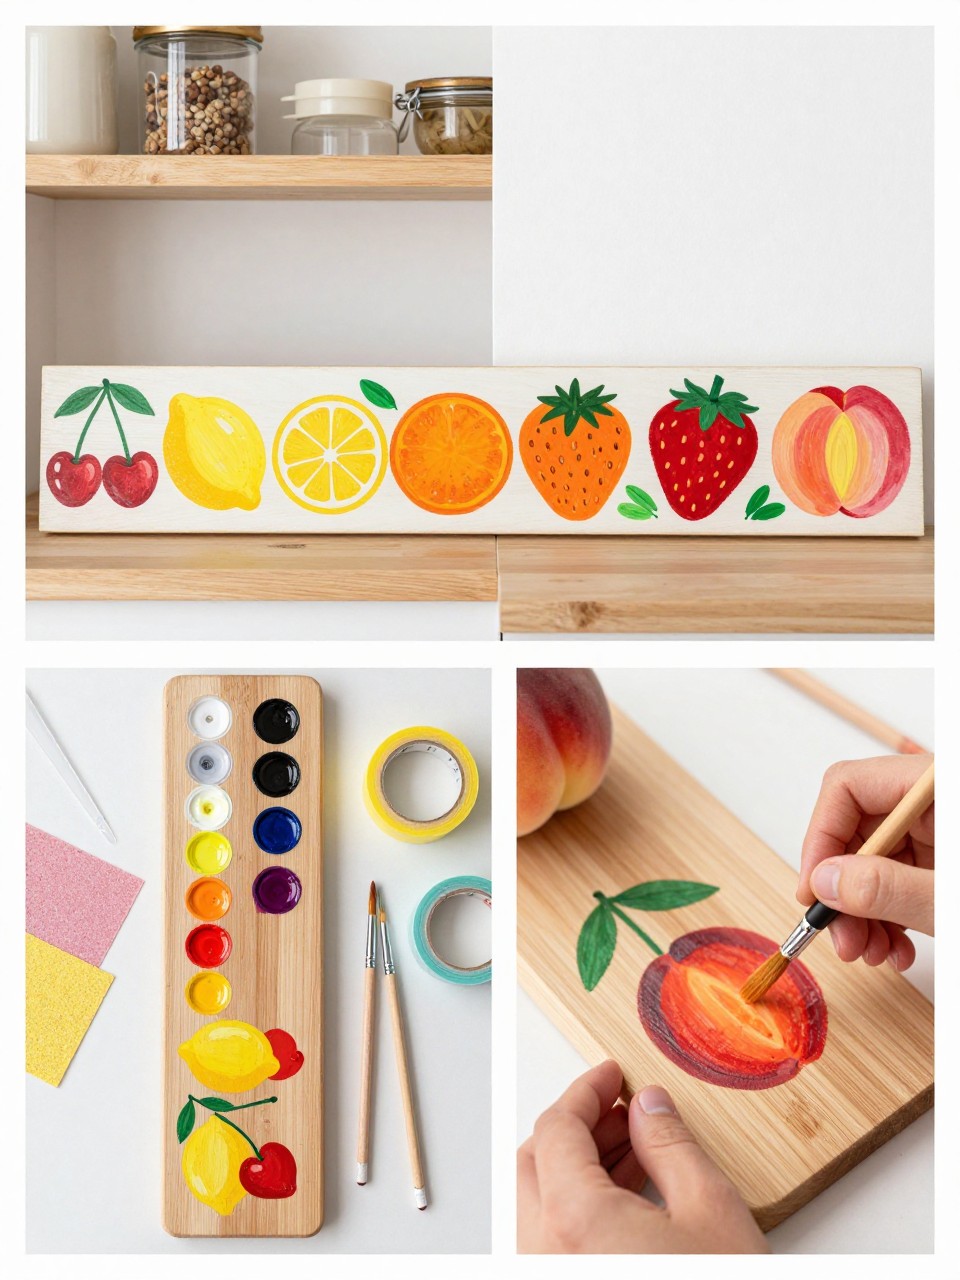
A summer fruit row sign is cute, colorful, and easy to place on a shelf or windowsill. Cherries, lemons, oranges, strawberries, and peaches all use simple shapes, so the design is beginner-friendly.
This works well in a kitchen, dining nook, pantry shelf, or summer party display. Keep the fruit in a neat row for a clean and cheerful look.
Materials Needed:
- Long narrow wooden board
- Fruit-colored craft paint
- Fine paintbrushes
- Pencil
- Sandpaper
- Painter’s tape
- Clear sealer
Steps To Make:
- Sand the board and paint the background if desired.
- Use painter’s tape as a guide for a neat row.
- Sketch simple fruit shapes across the board.
- Paint the fruit and add small leaf details.
- Seal the sign once the paint is dry.
13. Butterfly Garden Wooden Sign
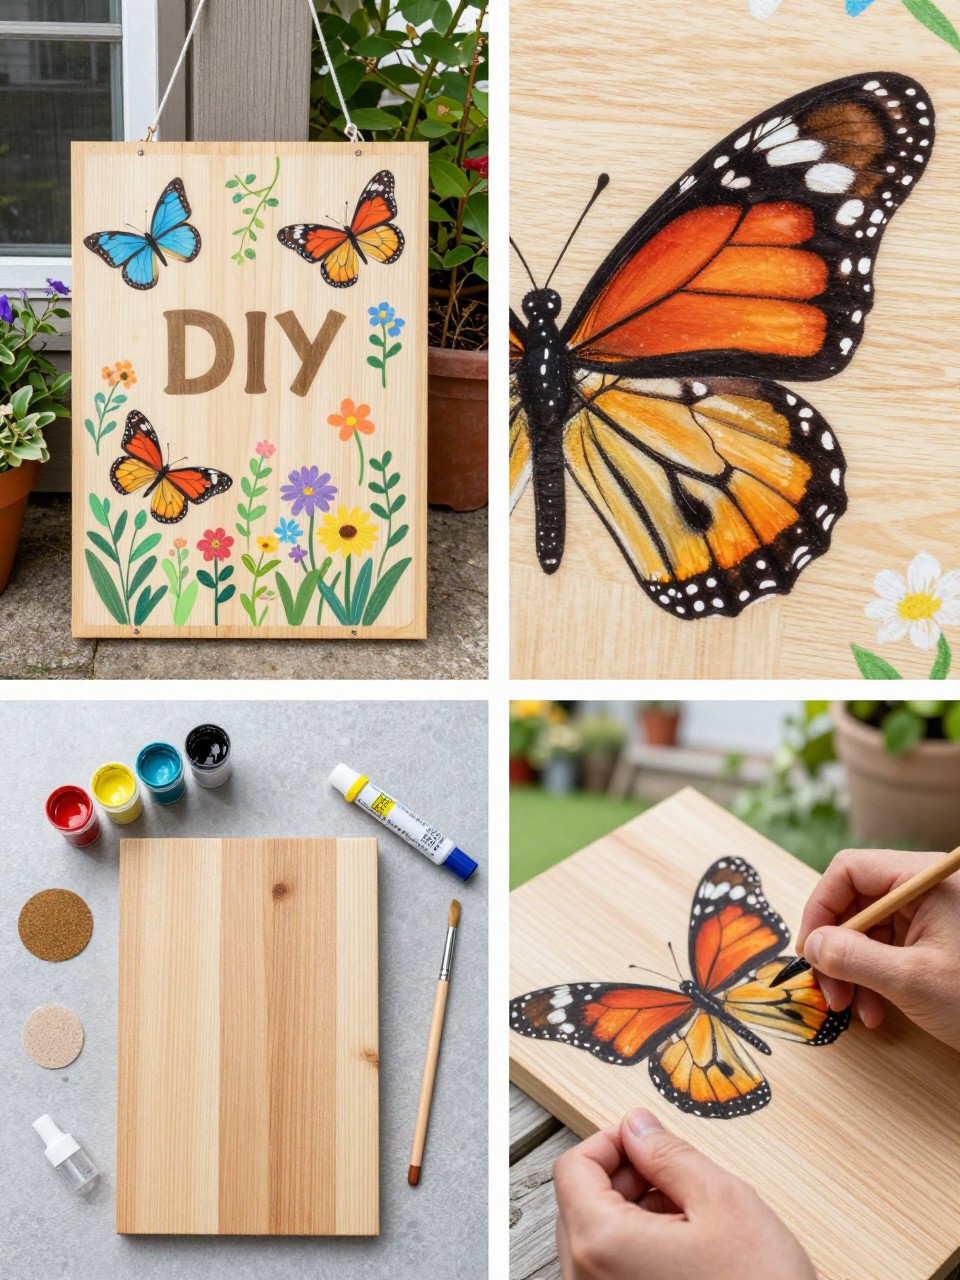
A butterfly garden sign feels light, sweet, and perfect for summer. The butterflies add movement, while the flowers and vines make the sign feel like part of a garden display.
This idea works well near planters, on a porch shelf, or inside a sunroom. Use a stencil for the butterfly shapes if you want cleaner outlines.
Materials Needed:
- Wooden board
- Outdoor paint
- Fine paintbrushes
- Butterfly stencil, optional
- Pencil
- Sandpaper
- Clear outdoor sealer
Steps To Make:
- Sand the wood and paint the background.
- Sketch or stencil butterfly shapes onto the board.
- Paint the wings in soft summer colors.
- Add flowers, leaves, vines, and small dots.
- Seal the sign before placing it outside.
14. Gingham Border Wooden Sign
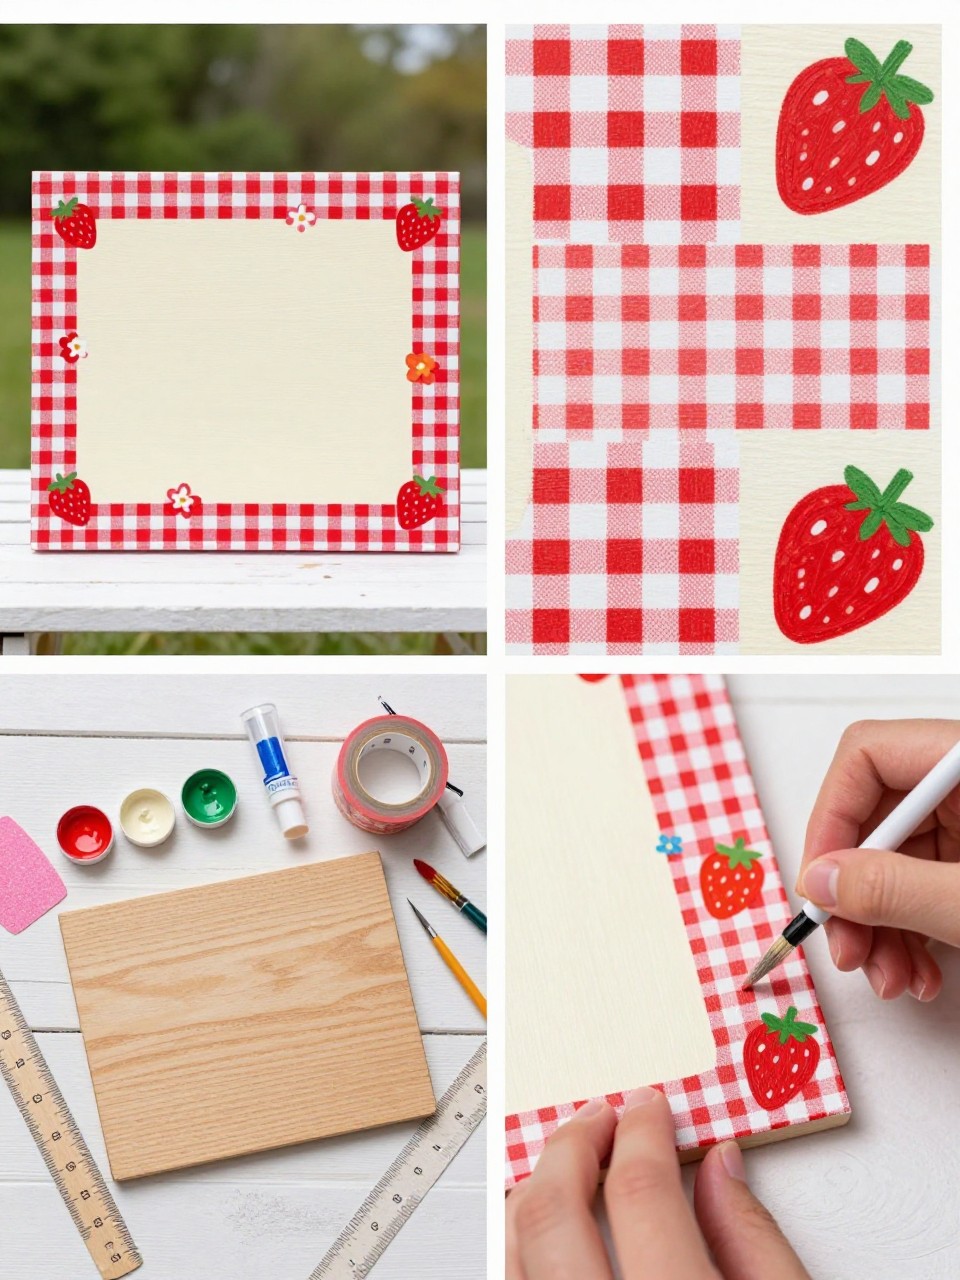
A gingham border sign has a sweet picnic feel that works beautifully for summer. The checked border gives the sign structure, while tiny strawberries or flowers add a cute seasonal detail.
This sign is lovely for kitchens, porch shelves, tiered trays, or picnic party decor. Use painter’s tape and a ruler if you want the border to look neat.
Materials Needed:
- Square wooden board
- Red, white, cream, green, and pink paint
- Painter’s tape
- Ruler
- Paintbrushes
- Sandpaper
- Clear sealer
Steps To Make:
- Sand the wooden board and paint the center cream.
- Tape off a border around the sign.
- Paint small red and white gingham squares around the edge.
- Add tiny strawberries, flowers, or leaf details.
- Let everything dry fully, then seal the sign.