





In This Article Show
Mini pumpkins may be small, but they can still make a big impact when the details are thoughtful. Their size makes them perfect for table settings, shelves, office desks, party favors, and small fall displays. They are also easier to paint, wrap, and decorate when you want a quick project that does not take over your entire craft table.
These mini pumpkin decorating ideas include cute characters, elegant finishes, playful food designs, and tiny scenes that feel fresh for the season.
Most can be made with simple supplies such as paint, felt, yarn, clay, paper, and glue. Try one design on its own, or decorate several mini pumpkins in the same theme to create a fuller display.
1. Tiny Mushroom House Pumpkin

Turn a white mini pumpkin into a tiny mushroom house by building a rounded red cap around the stem with air-dry clay, felt, or painted cardstock. Add white dots across the cap, then attach a small arched door and two windows to the front. A little yellow paint behind the windows can make them look warmly lit.
Arrange moss, pebbles, and miniature fern pieces around the base to create a woodland setting. A narrow pebble path leading to the door will make the design feel more complete. This idea works especially well when several mushroom pumpkins are grouped together like a tiny forest village.
2. Mini Pumpkin Latte
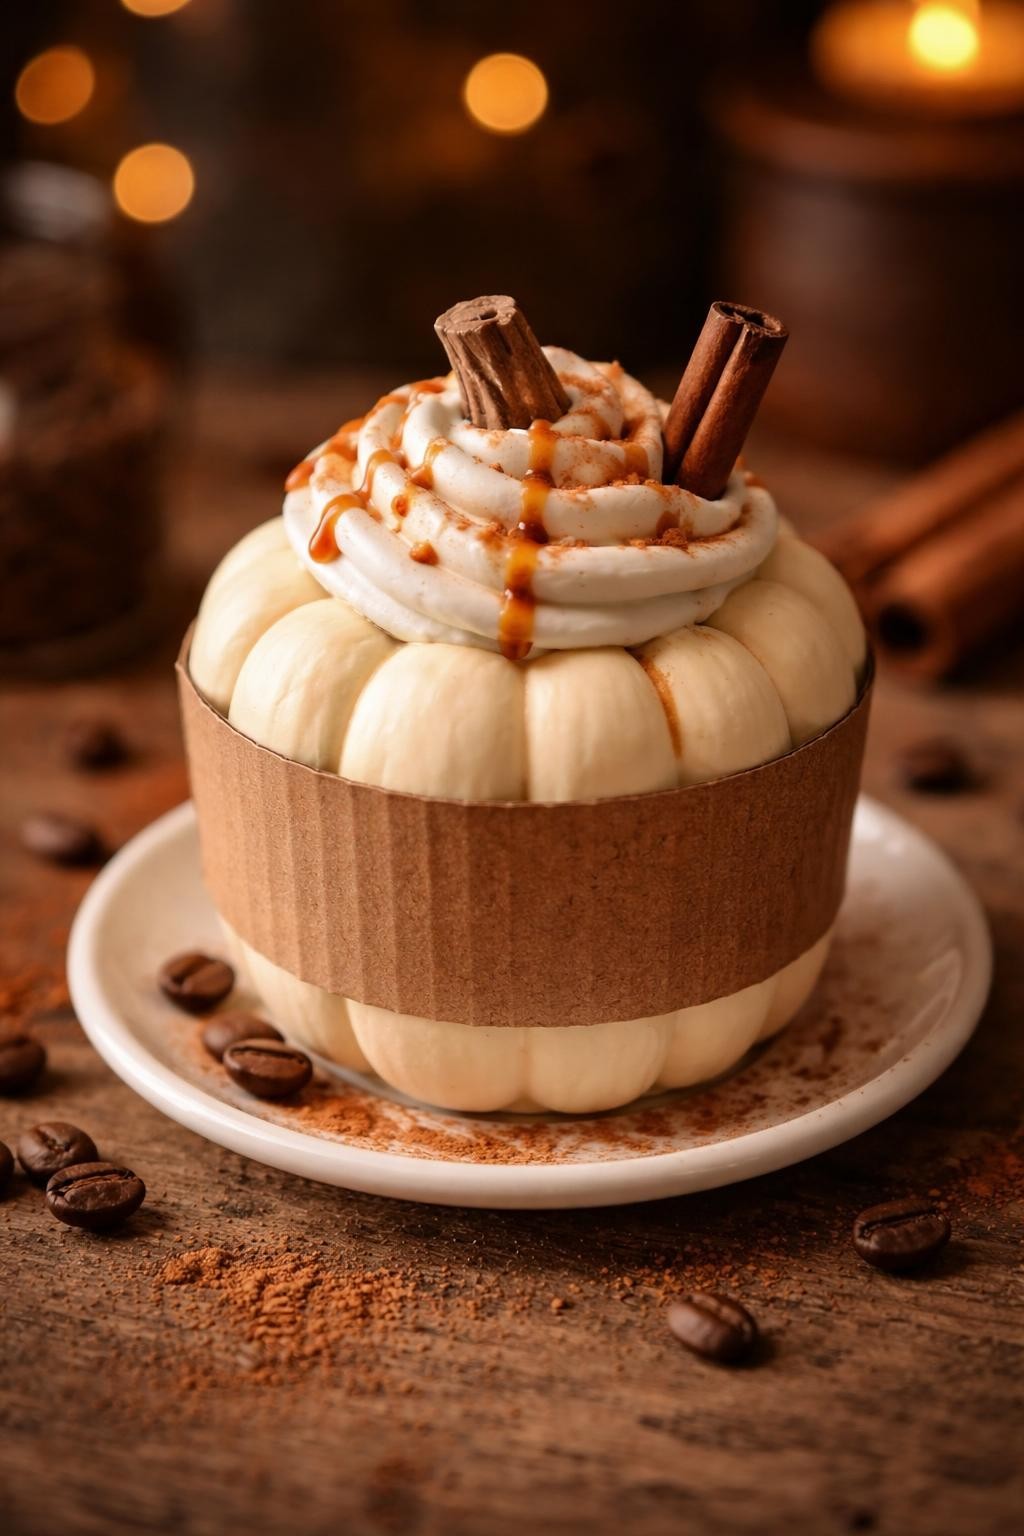
Use a pale mini pumpkin as the body of a small latte cup. Wrap a narrow kraft-paper sleeve around the middle and place the pumpkin on a tiny saucer or round piece of cardboard. Build a swirl of whipped cream around the stem using white clay, thick yarn, or carefully shaped cotton.
Add a small cinnamon stick, a little painted caramel drizzle, and a few coffee beans around the base. The pumpkin’s natural shape already resembles a rounded mug, so only a few details are needed. Make several in different neutral shades for a charming coffee-themed fall centerpiece.
3. Tiny Floral Teacup Pumpkin

Paint a small white pumpkin with delicate roses, leaves, or tiny wildflowers. Attach a curved handle made from wire, lightweight clay, or painted cardboard to one side. A fine metallic gold line around the top can create the look of a vintage teacup rim.
Place the pumpkin on a matching saucer and tuck a few dried flowers around the stem. Keep the floral pattern small so it suits the scale of the pumpkin. This design looks especially lovely as part of a tea-party table setting or a soft, elegant fall display.
4. Little Hedgehog Pumpkin

Cover the back half of a mini pumpkin with short pointed pieces of brown felt or cardstock to create the hedgehog’s spines. Add a small tan face to the front using felt, clay, or thick paper. Finish it with tiny eyes, a round black nose, and two little feet.
Arrange the hedgehog among acorns, moss, and dried leaves for a simple woodland scene. The spikes do not need to be perfectly even. Slight differences in size and angle will make the texture look more natural and give the character extra charm.
5. Painted Blue-and-White Porcelain Pumpkin
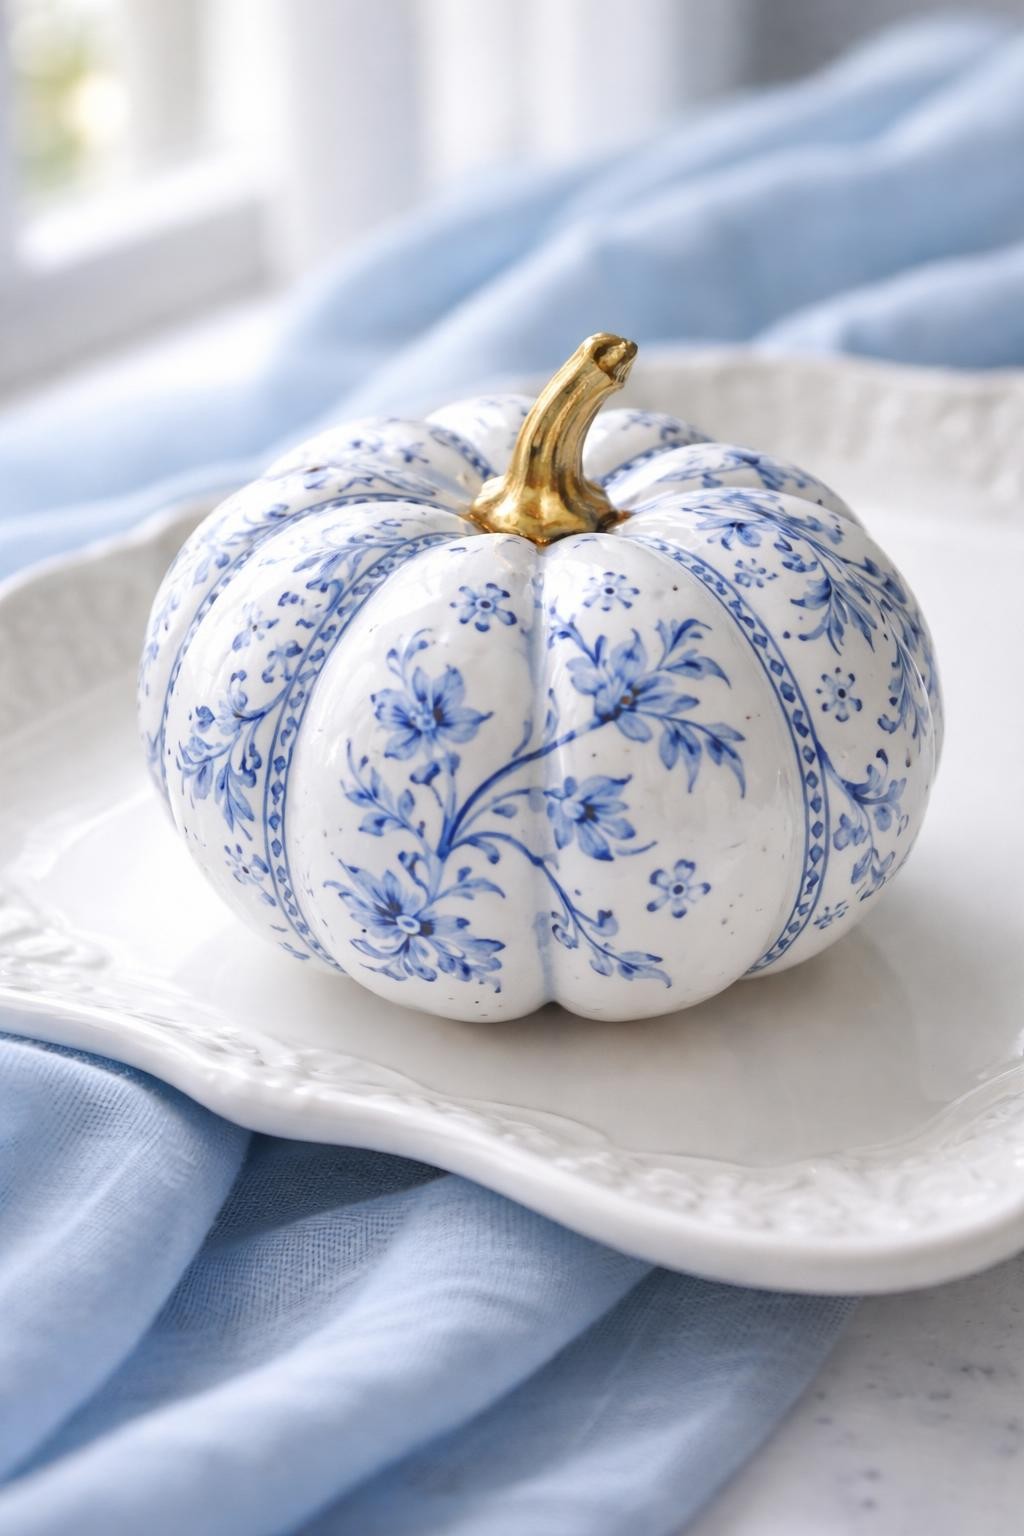
Paint a smooth mini pumpkin white, then decorate it with fine blue flowers, curling vines, and small leaf patterns. Follow the natural ridges of the pumpkin so the artwork appears balanced from every angle. A thin brush or paint marker will help keep the lines clean.
Finish the stem with gold paint and place the pumpkin on a ceramic tray or beside blue-and-white dishes. You can create a matching set by changing the pattern slightly on each pumpkin. The result feels polished enough for a dining table while still being simple to make.
6. Mini Pumpkin Burger

Use a short, wide pumpkin to create the bun of a tiny burger. Paint the upper and lower sections warm golden brown, then add small white sesame seeds across the top. Wrap layers of felt around the middle to represent lettuce, tomato, cheese, and a burger patty.
Keep each layer slightly uneven so the ingredients look stacked rather than perfectly flat. Place the pumpkin beside miniature paper fries or a tiny drink cup to complete the meal. This design is funny, colorful, and easy to recognize from across a room.
7. Mini Pumpkin Snail

Use the mini pumpkin as the shell of a snail and build a long curved body beneath it with air-dry clay, felt, or rolled cardstock. Add two eye stalks, tiny black eyes, and a small smile. Paint a simple spiral pattern on the side of the pumpkin to make the shell effect clearer.
Place the snail on moss with a few tiny mushrooms or leaves nearby. A slightly curved body will make it look as though the snail is moving forward. This idea is especially suitable for children because the shapes are simple and the finished character looks playful.
8. Tiny Disco Ball Pumpkin

Cover a round mini pumpkin with small square mirror stickers, reflective tape pieces, or silver mosaic tiles. Begin at the middle and work around the pumpkin in horizontal rows so the pieces stay evenly spaced. Paint the stem silver to match the reflective surface.
Place the finished pumpkin on a small stand where light can bounce across it. A few miniature party props, such as stars or tiny records, can help create a fun retro display. This design is simple in shape but catches attention because of the movement and shine.
9. Mini Ghost Pumpkin With Floating Arms

Paint a small white pumpkin with two oval eyes and a surprised mouth. Attach curved arms made from felt, foam, or stiff fabric to the sides so they appear to float outward. A little cheesecloth or gauze around the base can create a soft ghostly shape.
Place a warm battery candle behind the pumpkin to cast a gentle glow through the fabric. Keep the expression simple and friendly rather than scary. Several ghost pumpkins lined up together can make a charming mantel or windowsill decoration.
10. Tiny Autumn Donut Pumpkin

Choose a flat mini pumpkin with a low center and paint the top to resemble thick donut icing. Maple brown, pale pink, or cream icing works well for fall. Add tiny painted sprinkles, chopped-nut shapes, or a thin drizzle in a contrasting color.
Paint the lower half in a warm baked-dough shade and keep the edge between the pumpkin and icing slightly uneven. Display it inside a small pastry box or on a dessert plate. A group of differently decorated donut pumpkins can make a fun kitchen counter arrangement.
11. Mini Pumpkin Owl

Build two oversized owl eyes from layered circles of felt or cardstock and attach them to the front of the pumpkin. Add a small triangular beak, pointed ear tufts, and rows of simple feather shapes across the lower half. Neutral browns, cream, rust, and mustard will suit the fall theme.
Place the owl on a small branch or wooden slice to make it appear perched. The eyes should remain the biggest feature, since they give the character its personality. Create several owls with different expressions for a playful little woodland family.
12. Mini Pumpkin Flower Basket

Attach a curved handle made from wire wrapped in jute, raffia, or thin ribbon across the top of a mini pumpkin. Arrange small dried flowers around the stem so they appear to fill the pumpkin like a tiny basket. Choose compact blooms that do not overwhelm its size.
Wrap a narrow ribbon or twine band around the middle for extra texture. These pumpkins can be used as individual place settings, small gifts, or parts of a larger centerpiece. Make each one slightly different while keeping the flower colors consistent.
13. Tiny Campfire Pumpkin Scene
Paint simple cheerful faces on three or four mini pumpkins and give each one a small felt scarf. Arrange them in a circle around a miniature campfire made from short twigs and a warm flickering LED light. Add tiny marshmallows made from white clay or foam to narrow sticks.
Use pinecones, moss, and leaves to create a cozy campsite around the group. Slightly turn each pumpkin toward the fire so they appear to be sitting together. This scene works beautifully as a centerpiece because it tells a complete story while still using very small decorations.