


In This Article Show
Paper is one of the easiest materials children can use to turn a plain pumpkin into something colorful and full of personality. Construction paper, tissue paper, cupcake liners, paper plates, and old magazines can all become funny faces, animals, costumes, and textured patterns. Most of these ideas also avoid carving, which makes them easier for classrooms, family craft nights, and younger children.
These paper pumpkin decorating ideas use simple cutting, folding, tearing, and gluing techniques. Children can follow the basic design or choose their own colors and expressions. Adults can prepare smaller pieces in advance for younger kids and help with scissors or strong glue when needed.
1. Colorful Paper Lion Pumpkin
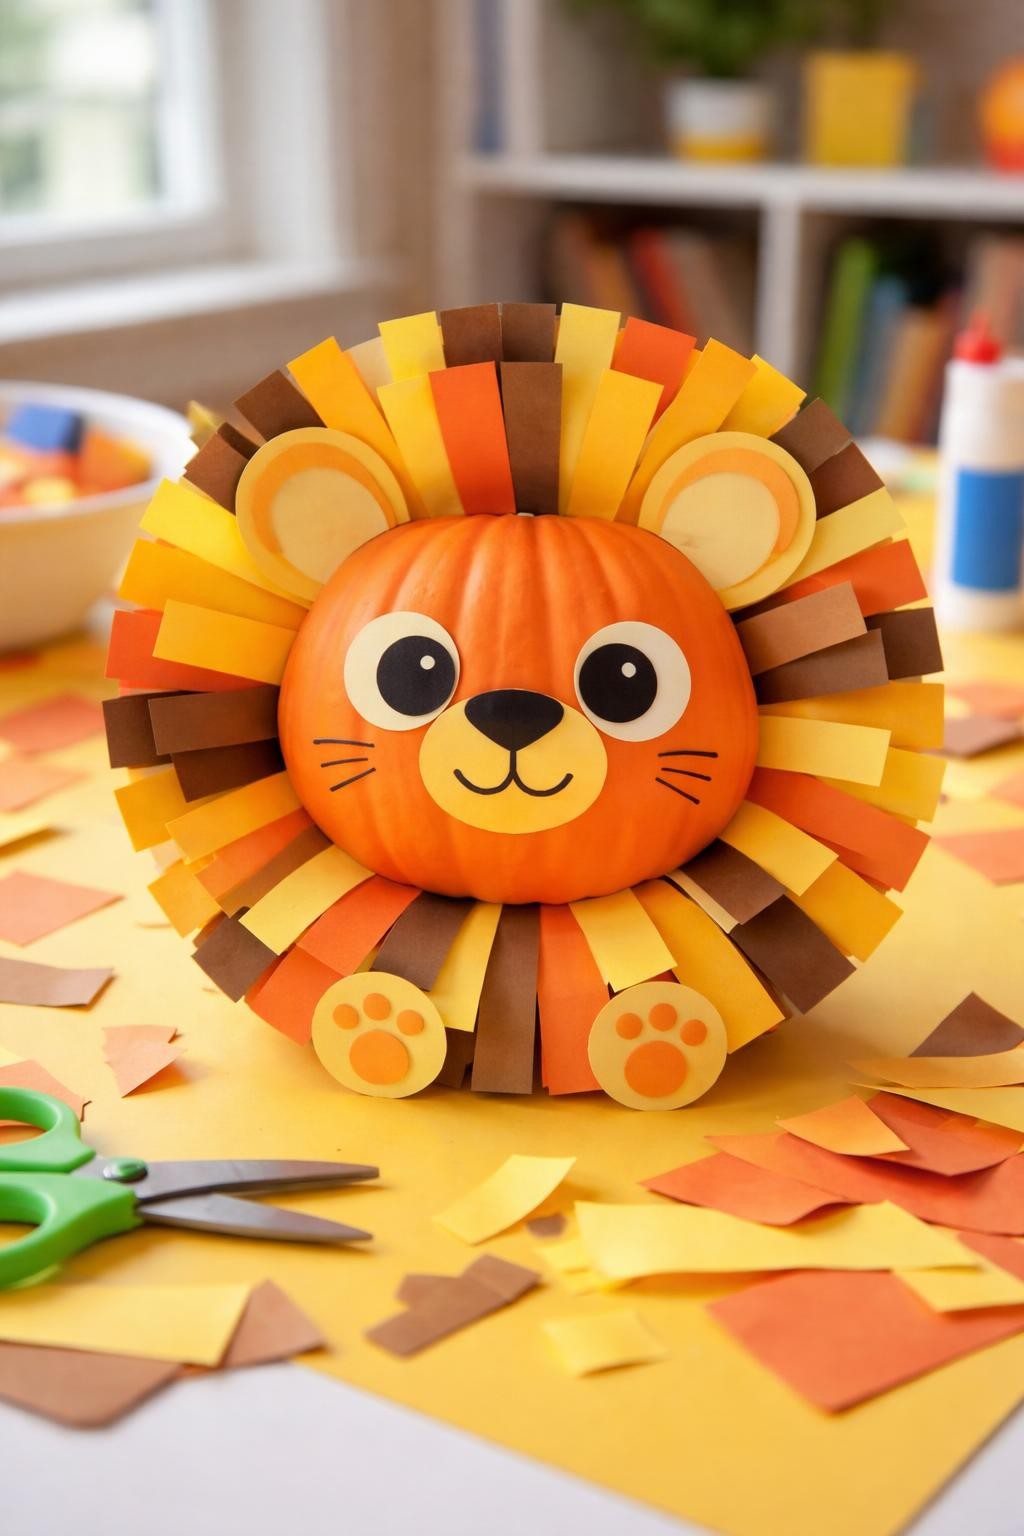
Cut strips of construction paper in several warm colors and glue them around the front half of the pumpkin to create a full lion’s mane. Curl some strips around a pencil or fold them into loops so the mane has extra movement and texture. Add round ears near the stem and a simple face in the center.
Children can make the lion look sleepy, surprised, or excited by changing the shape of the eyes and mouth. Older kids can layer shorter paper pieces over the longer ones for a fuller mane. Small paper paws placed near the base will make the pumpkin look like a complete little character.
2. Tissue Paper Confetti Pumpkin
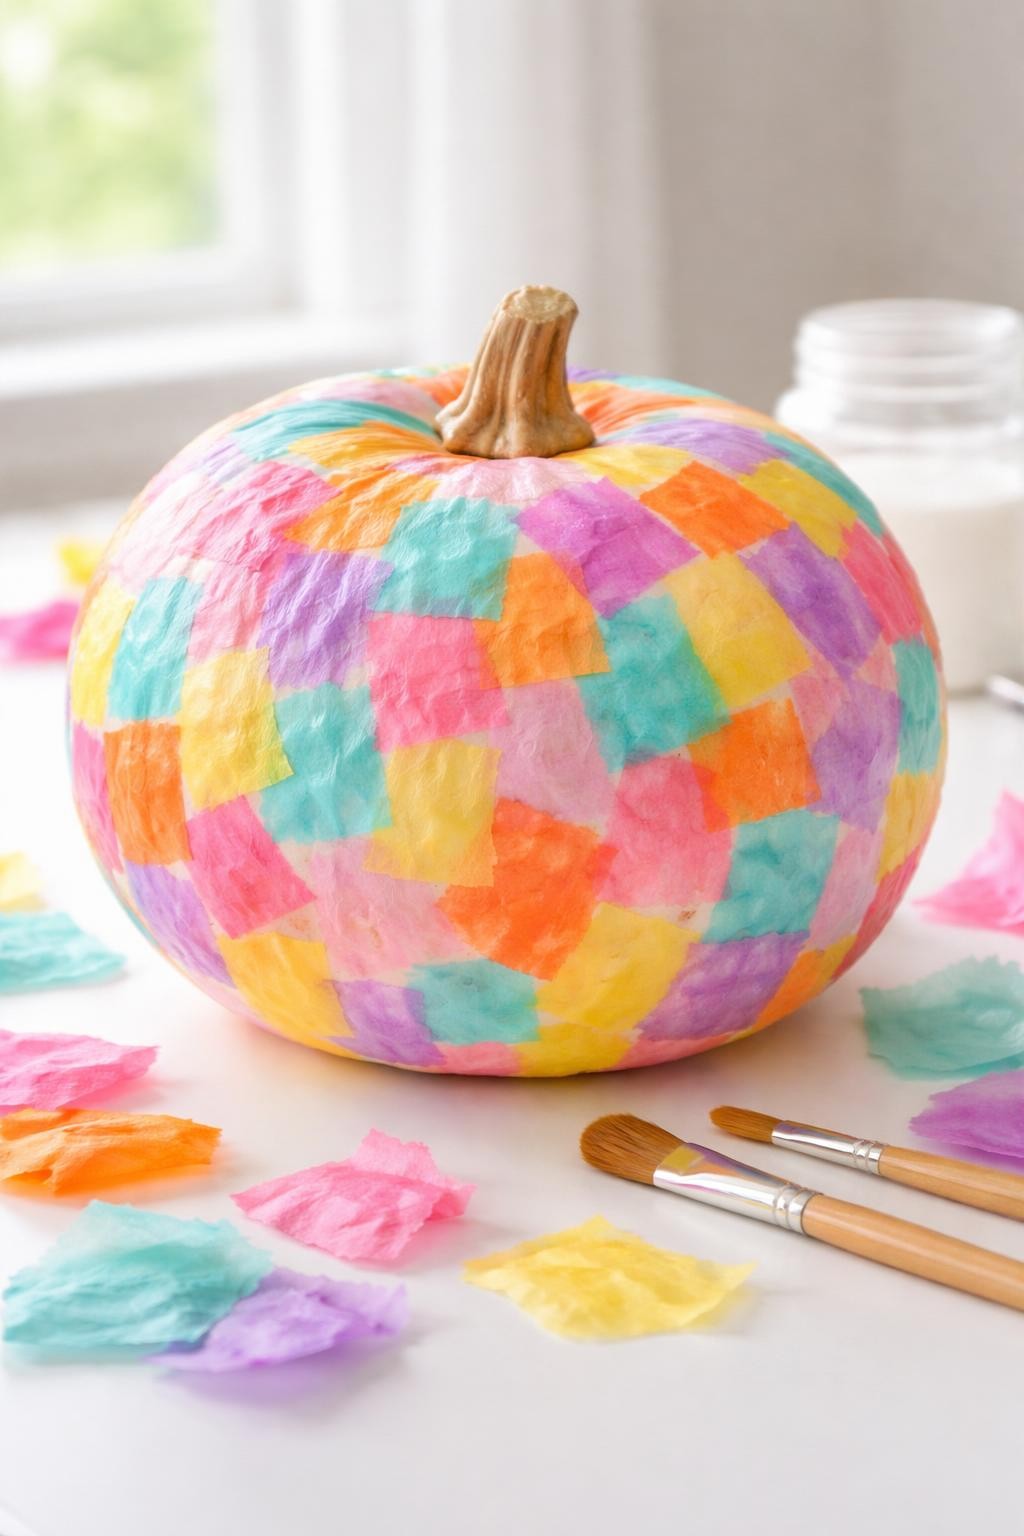
Tear tissue paper into small squares and irregular shapes. Brush a thin layer of child-safe decoupage glue onto one section of the pumpkin, then press the tissue pieces onto the surface. Continue working in small areas until the pumpkin is covered with a cheerful mix of colors.
The pieces do not need to be the same size or perfectly flat. Overlapping colors will create new shades and make the pumpkin more interesting. Finish with another gentle coat of glue over the top and allow it to dry completely before moving the pumpkin.
3. Paper Plate Owl Pumpkin
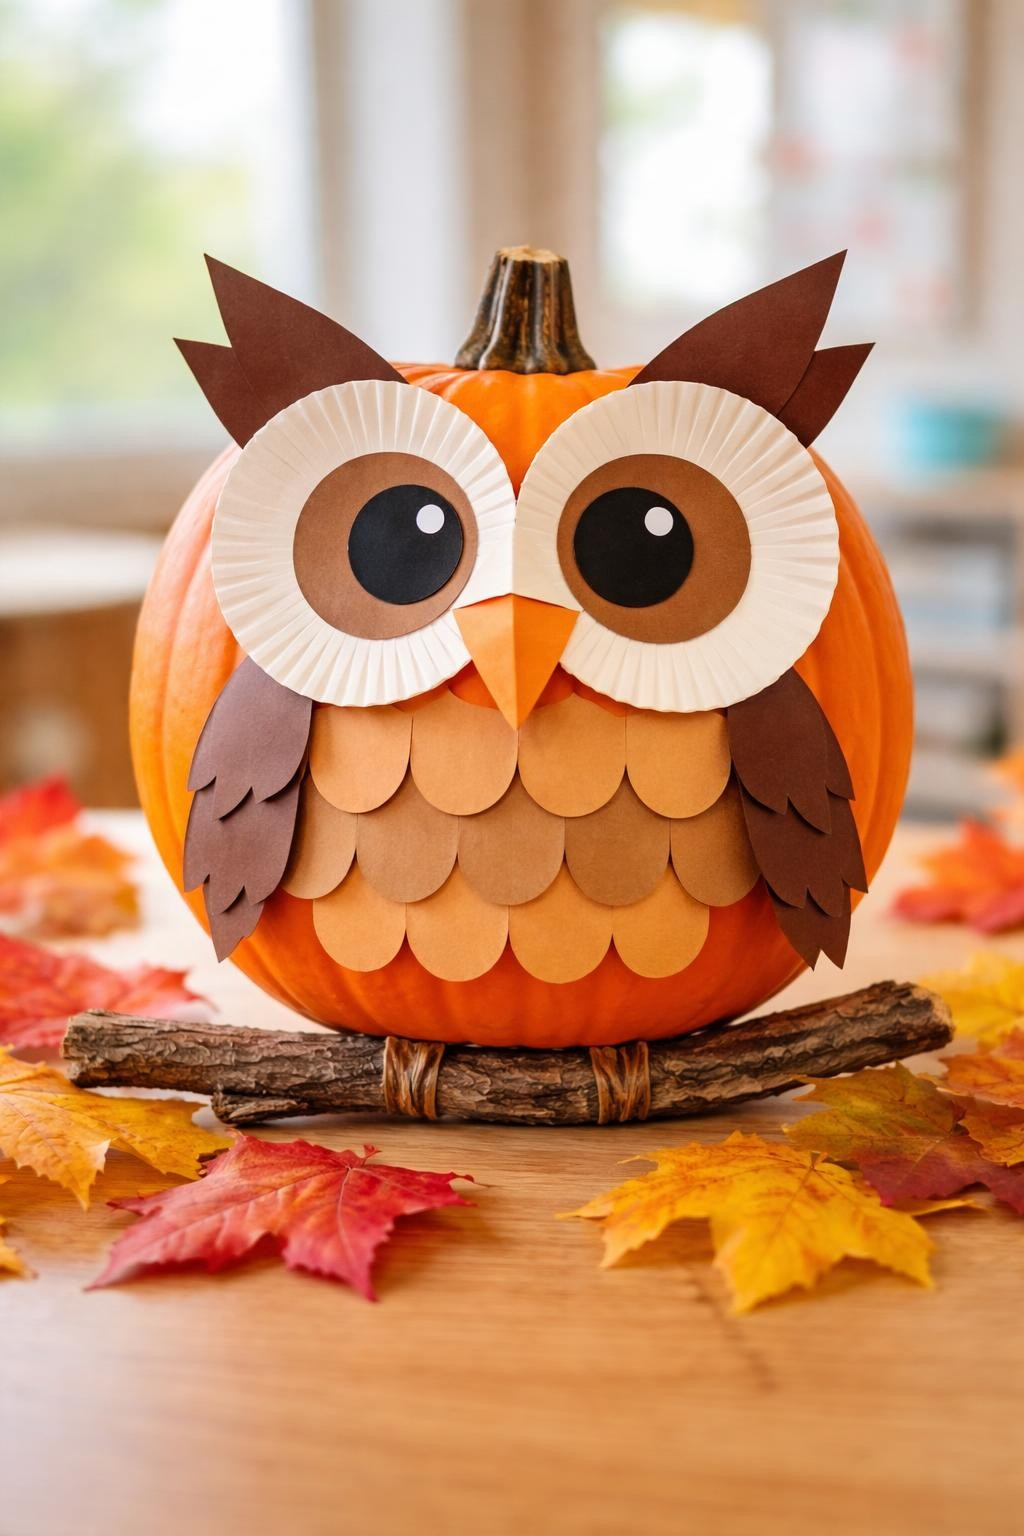
Cut two circles from a paper plate and layer smaller colored paper circles inside them to make large owl eyes. Glue the eyes onto the front of the pumpkin, then add a folded triangular beak and two pointed paper tufts near the stem.
Create chest feathers by cutting paper into rows of small scallops. Layer the rows from the bottom upward so they overlap like real feathers. Children can use traditional brown and cream colors or create bright pink, blue, and purple owls for a more playful pumpkin family.
4. Silly Paper Monster Pumpkin
Let children design a monster with any number of eyes, teeth, horns, and spots. Cut the pieces from construction paper and arrange them on the pumpkin before gluing. Accordion-folded paper strips can become springy arms that stick out from both sides.
The fun comes from making the features intentionally mismatched. One eye can be huge while another is tiny, and the teeth can point in different directions. Give children a tray of pre-cut shapes and let them combine the pieces into their own unusual monster.
5. Rainbow Paper Scale Pumpkin
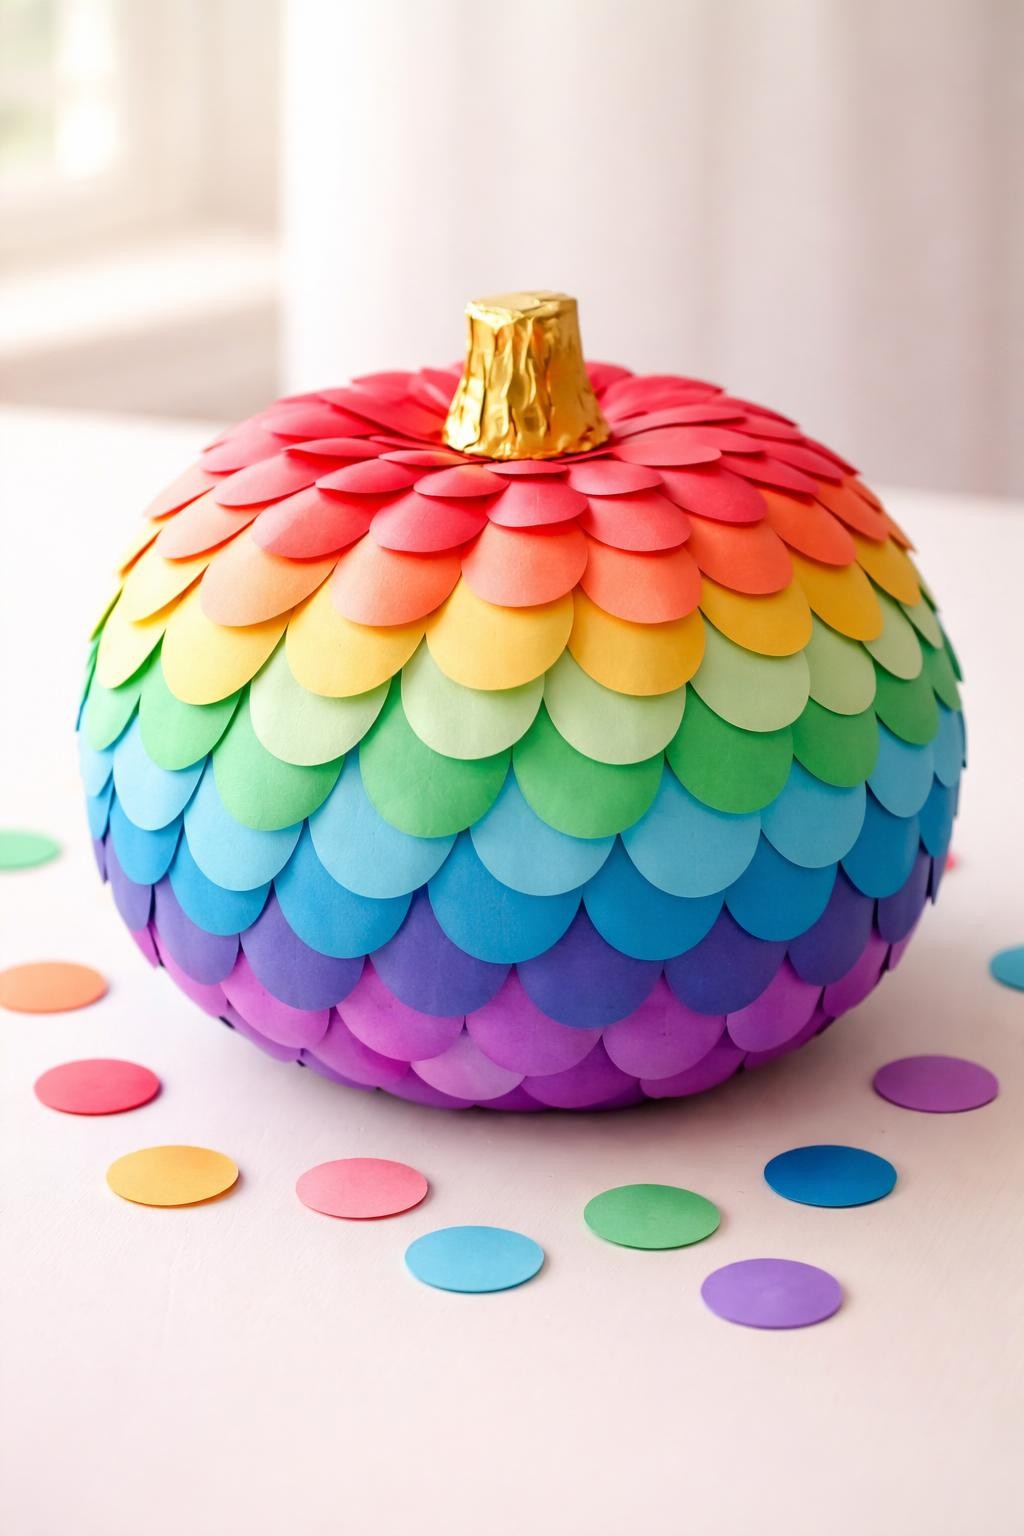
Cut many small circles from colored paper, then fold or cut each circle in half. Begin near the bottom of the pumpkin and glue the half-circles in an overlapping row. Continue upward, changing colors as you go to create a rainbow effect.
Following the pumpkin’s natural curves will help the scales sit neatly. Children can create a full rainbow, alternate two favorite colors, or use different shades of one color. Wrap the stem with metallic paper or ribbon for a simple finishing touch.
6. Paper Crown Pumpkin Prince or Princess
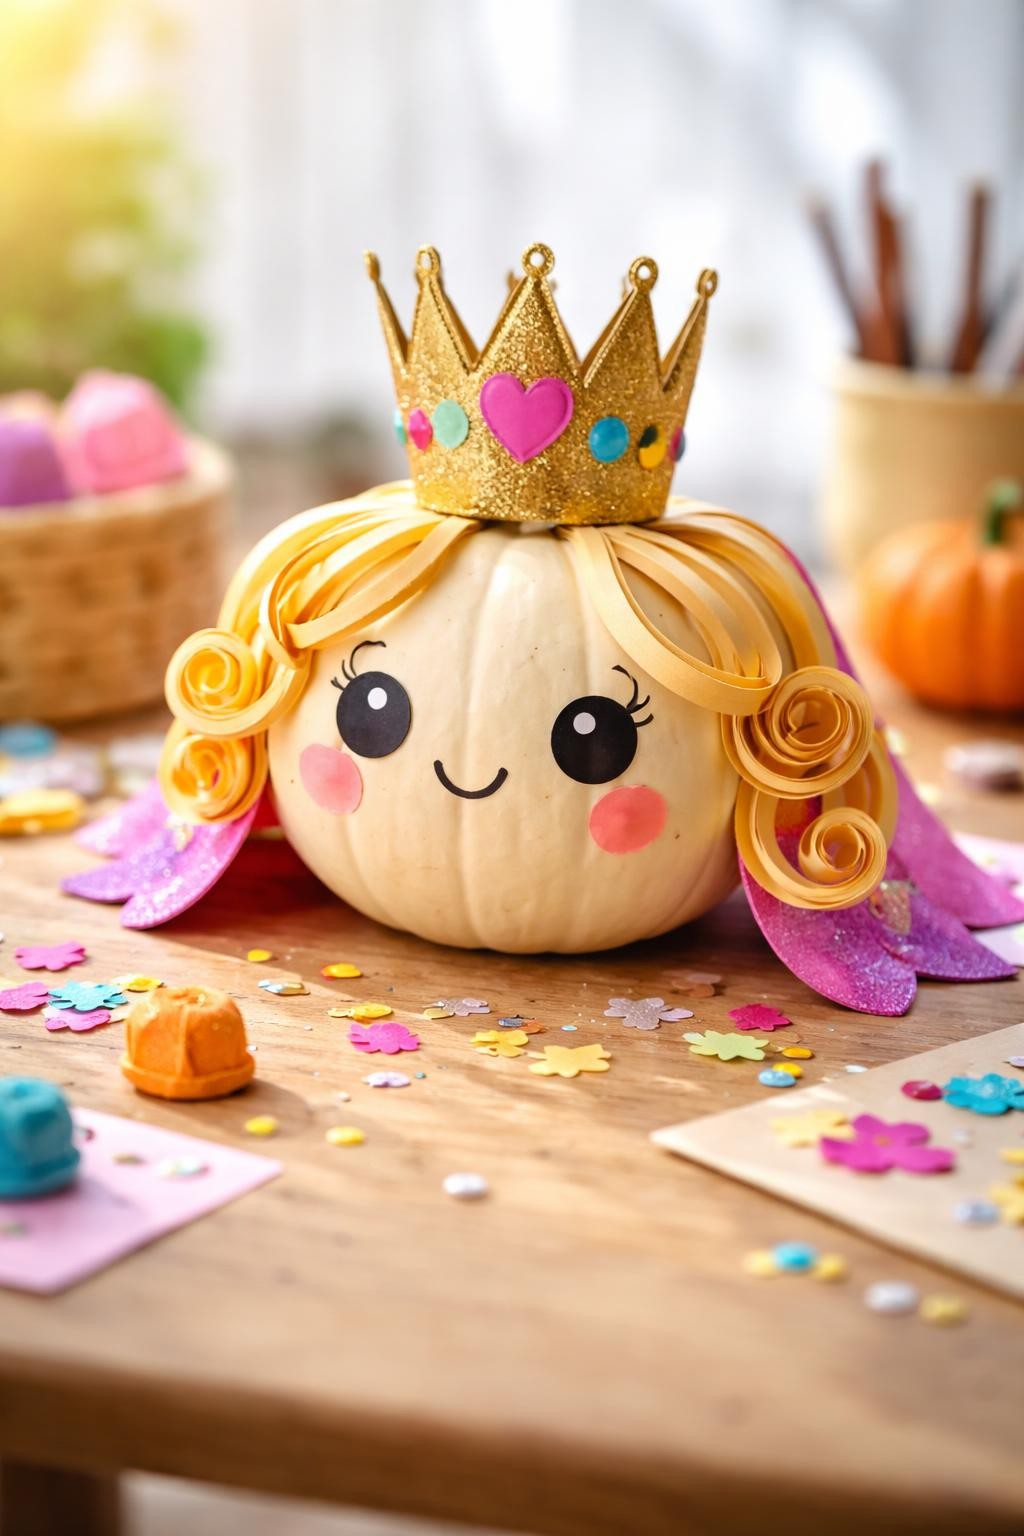
Cut a crown from gold or yellow cardstock and decorate it with paper jewels, stickers, or small foil shapes. Wrap the crown around the stem and secure the ends. Add a friendly face, paper cheeks, and curled strips of paper for hair.
Children can turn the pumpkin into a prince, princess, king, queen, or magical ruler. A rectangle of paper or light fabric can become a cape at the back. Let each child choose a name and personality for the character to make the decorating activity feel more imaginative.
7. Torn Paper Mosaic Pumpkin
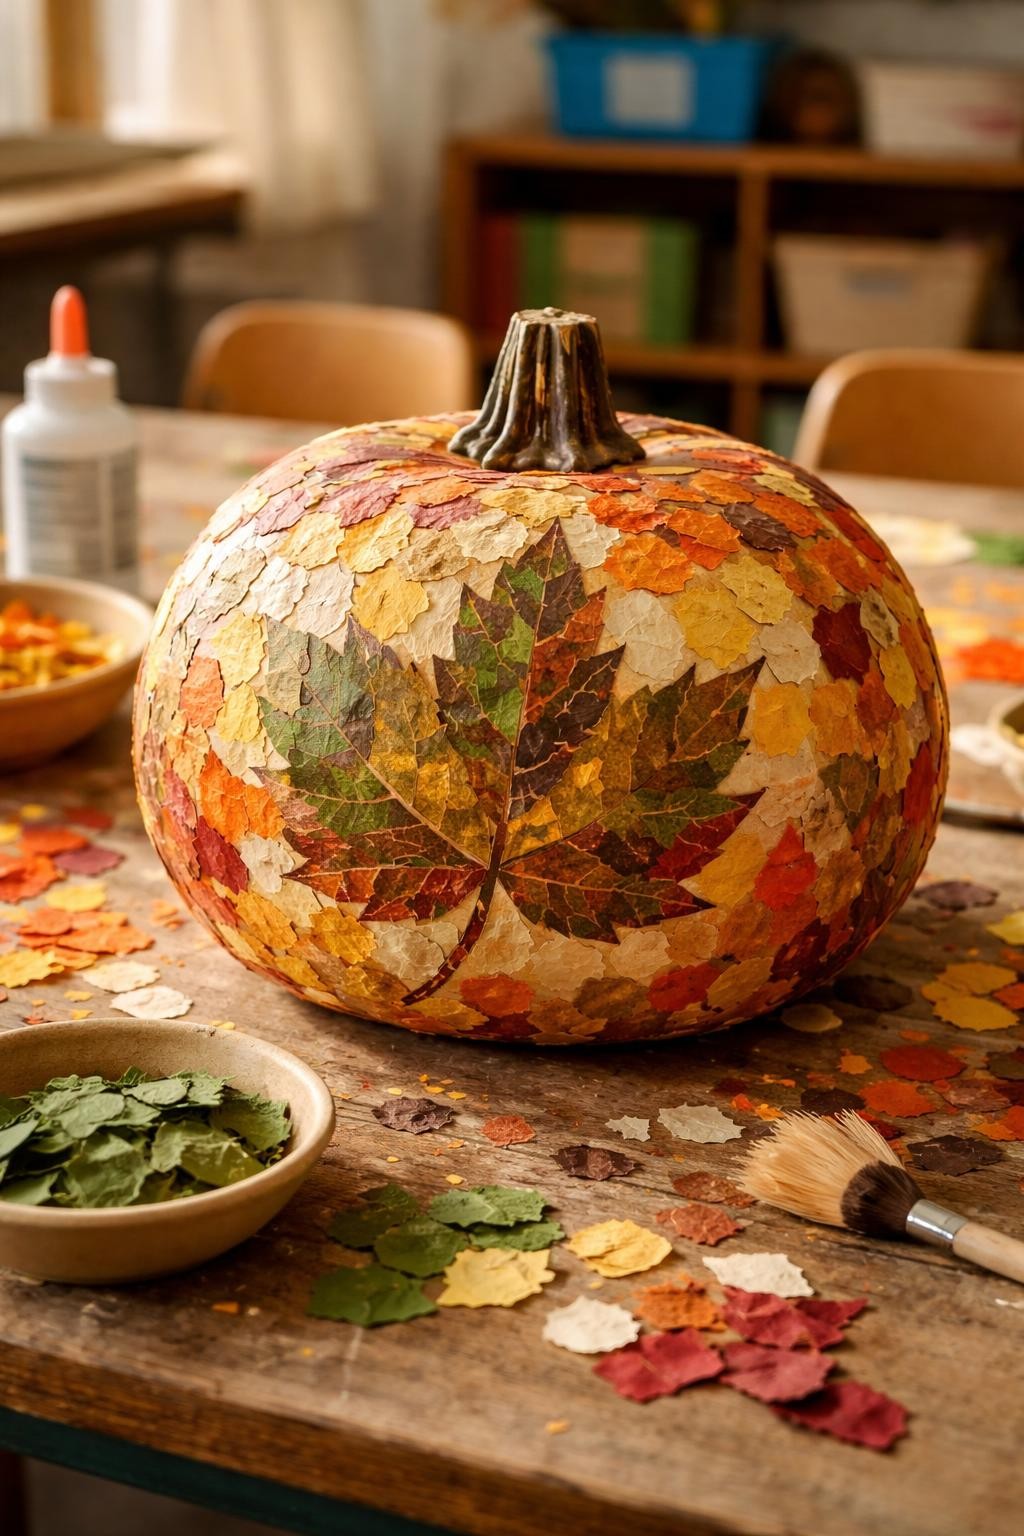
Tear colored paper into small irregular pieces and sort them into shallow bowls. Children can glue the pieces directly onto the pumpkin in a random mosaic or use them to fill a simple shape such as a leaf, heart, star, or letter.
Leave small spaces between some pieces so the design resembles tilework. Torn edges make the project forgiving because nothing needs to be cut evenly. Older children can plan a picture first, while younger children can enjoy covering the pumpkin with a free-form mix of fall colors.
8. Flapping Paper Bat Pumpkin
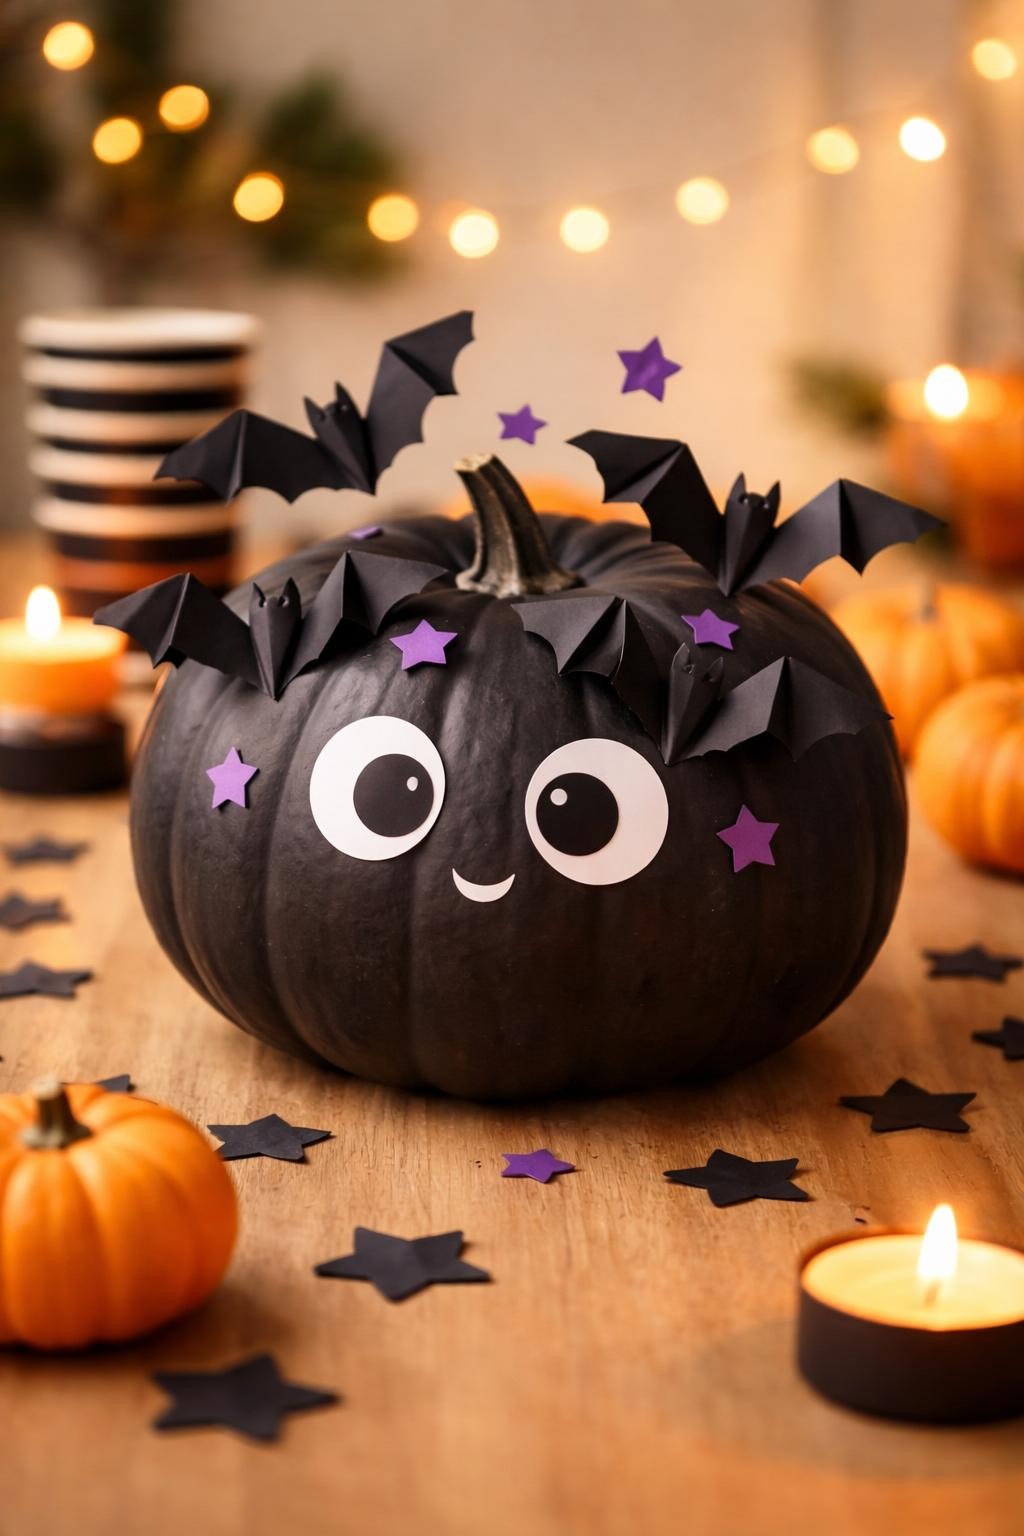
Cut small bat shapes from black construction paper and fold each wing slightly away from the body. Glue only the center of each bat to the pumpkin so the wings remain raised. Arrange them in a loose spiral from the bottom toward the stem.
Add a friendly face to the pumpkin or leave it plain so the flying bats remain the focus. Purple stars, a paper moon, or tiny clouds can fill empty spaces. Children can make the bats in several sizes to create the feeling that some are flying closer than others.
9. Cupcake Liner Flower Pumpkin
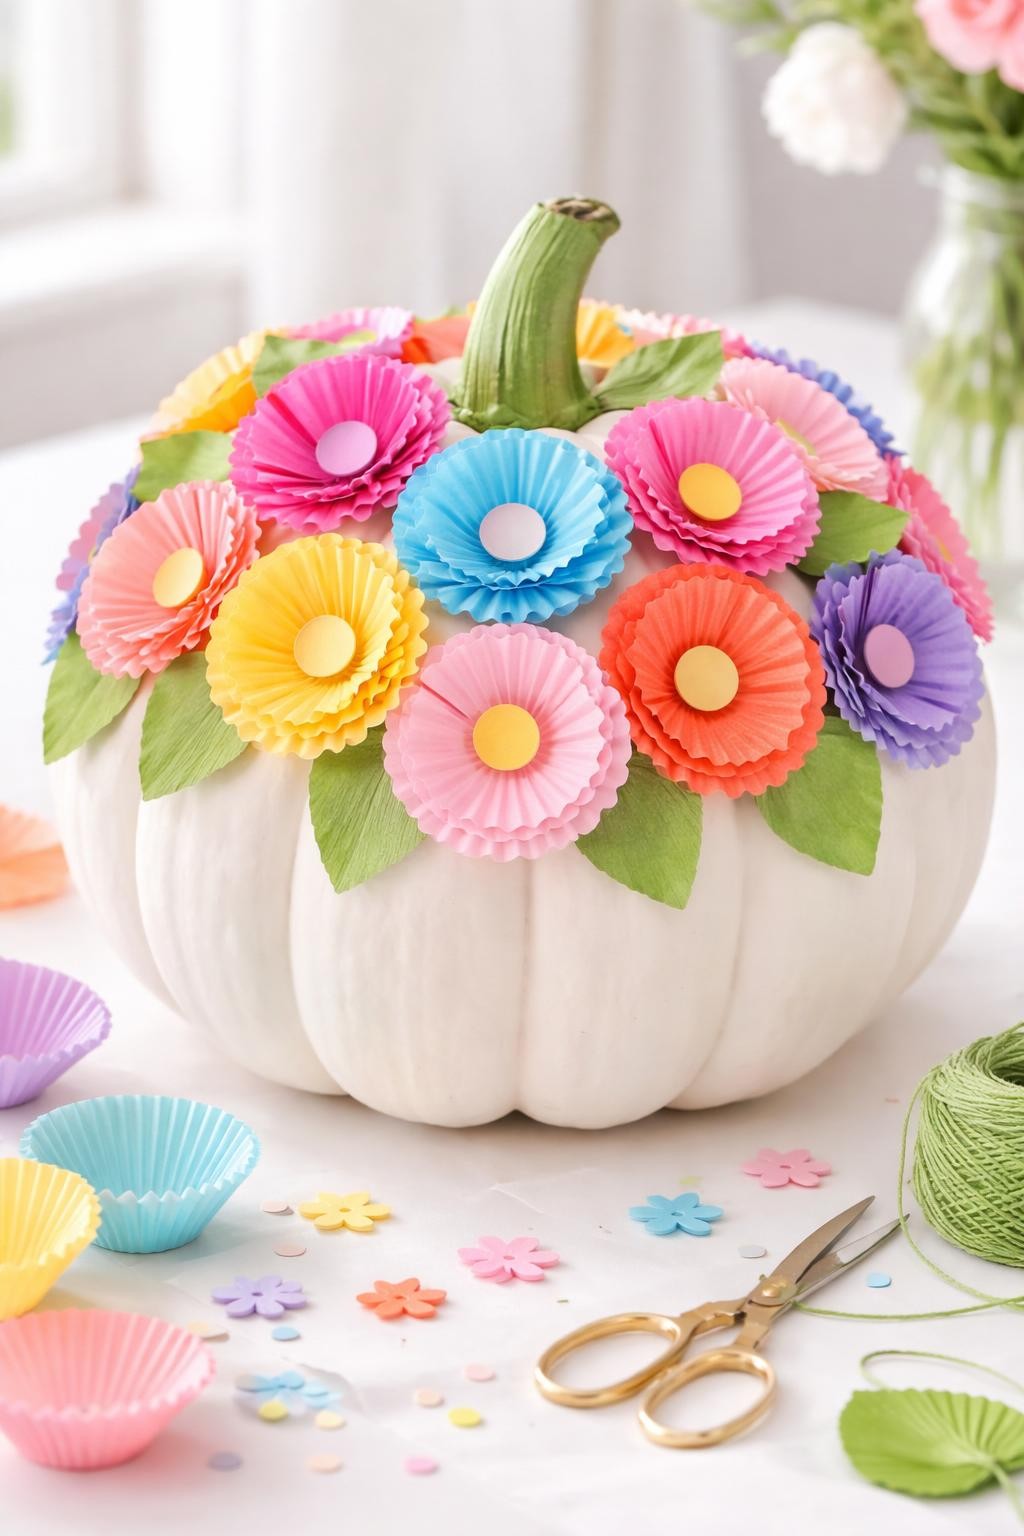
Flatten colorful cupcake liners and fold them into halves or quarters to create flower petals. Layer several folded liners together, then glue a small paper circle in the center. Attach the flowers across the pumpkin, leaving a little space between them for green paper leaves.
Children can cover the entire surface or create one large flower cluster across the front. Mini cupcake liners work well on small pumpkins, while regular liners suit larger ones. Wrapping the stem in green paper will make it look like part of the floral arrangement.
10. Paper Dinosaur Pumpkin
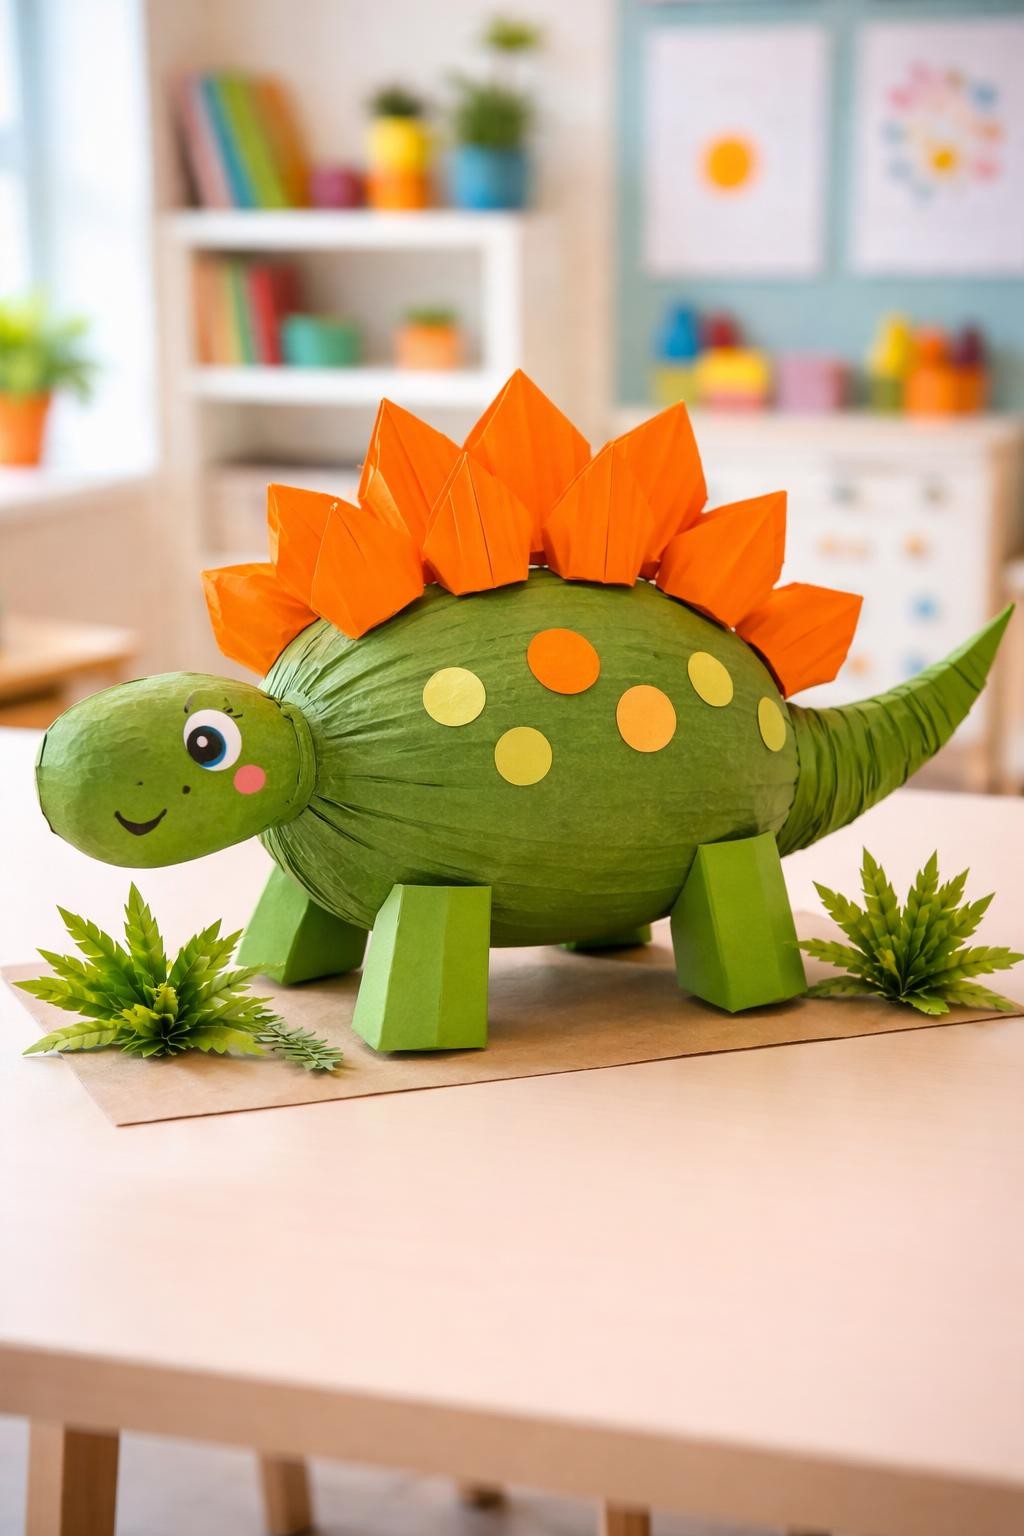
Use the pumpkin as the dinosaur’s body and add a paper head, tail, legs, and back plates. Fold the bottom of each piece into a small tab before gluing so it attaches more securely. Large triangular plates can turn the pumpkin into a stegosaurus, while paper horns can create a triceratops.
Let children choose bright colors and add paper spots, stripes, or scales. The dinosaur does not need realistic proportions. Short legs, an oversized head, and a long curling tail will give it a cute cartoon appearance that is easy for children to assemble.
11. Accordion Paper Turkey Pumpkin
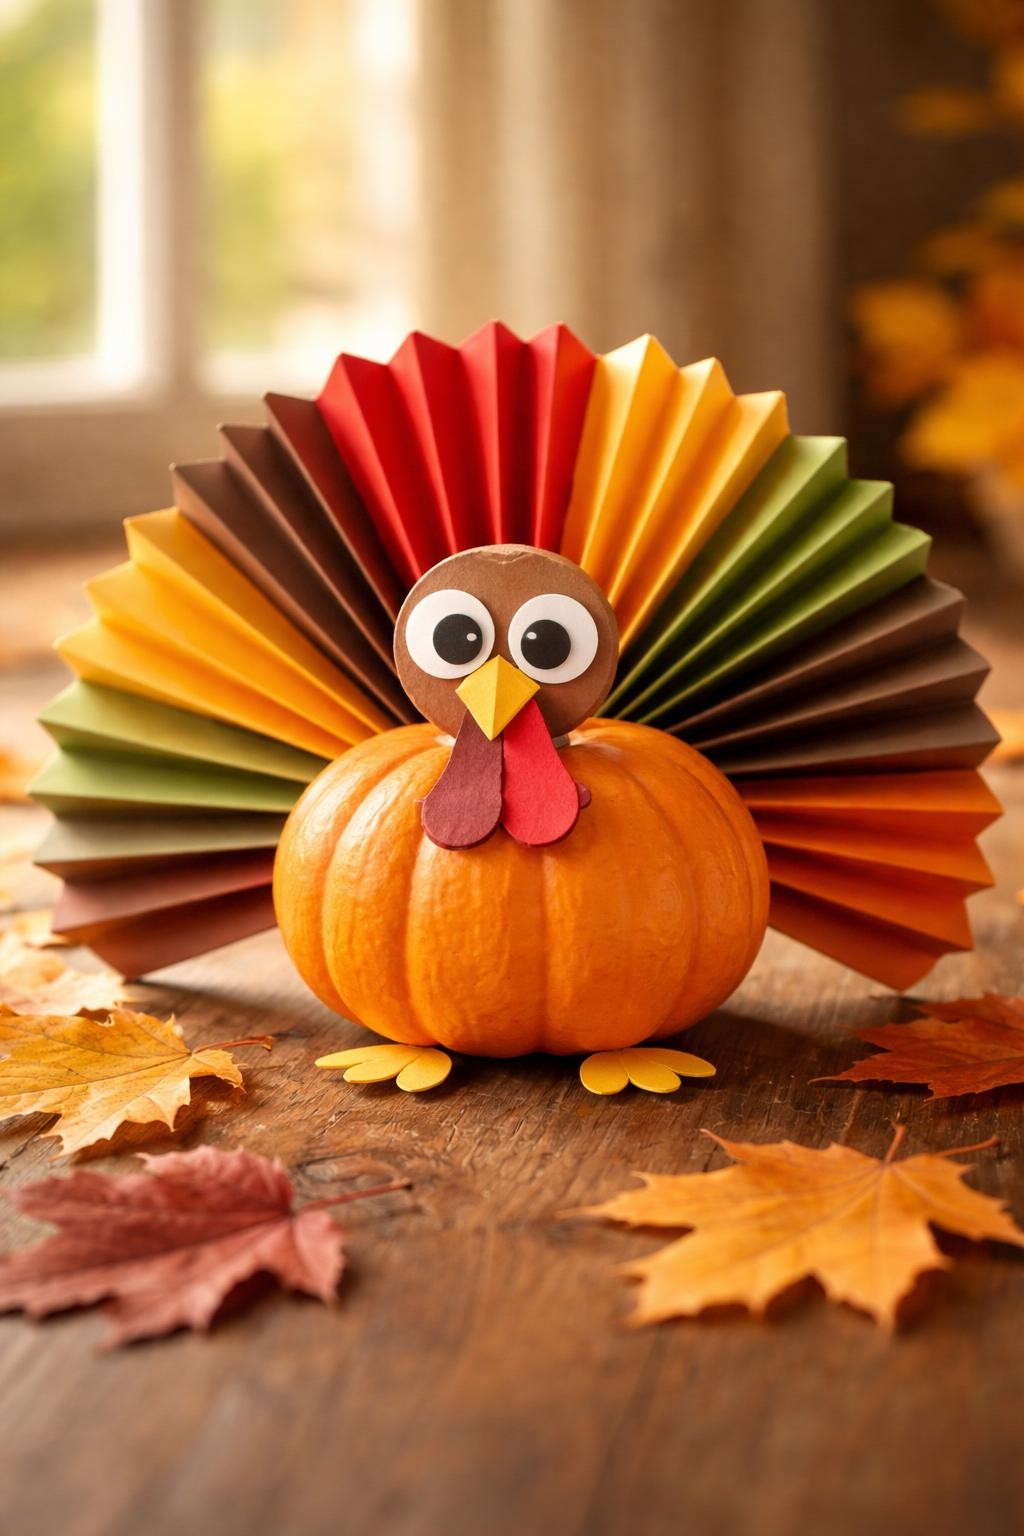
Accordion-fold several strips or sheets of colored paper and fan them open behind the pumpkin. Layer different sizes and colors to create a full turkey tail. Add paper eyes, a folded beak, a red wattle, and two feet to the front.
A small cardboard base can help support the paper fan and keep it upright. Children can decorate each tail section with dots, lines, hand-drawn patterns, or stickers before folding it. This project works well as a Thanksgiving table decoration or classroom display.
12. Magazine Collage Face Pumpkin
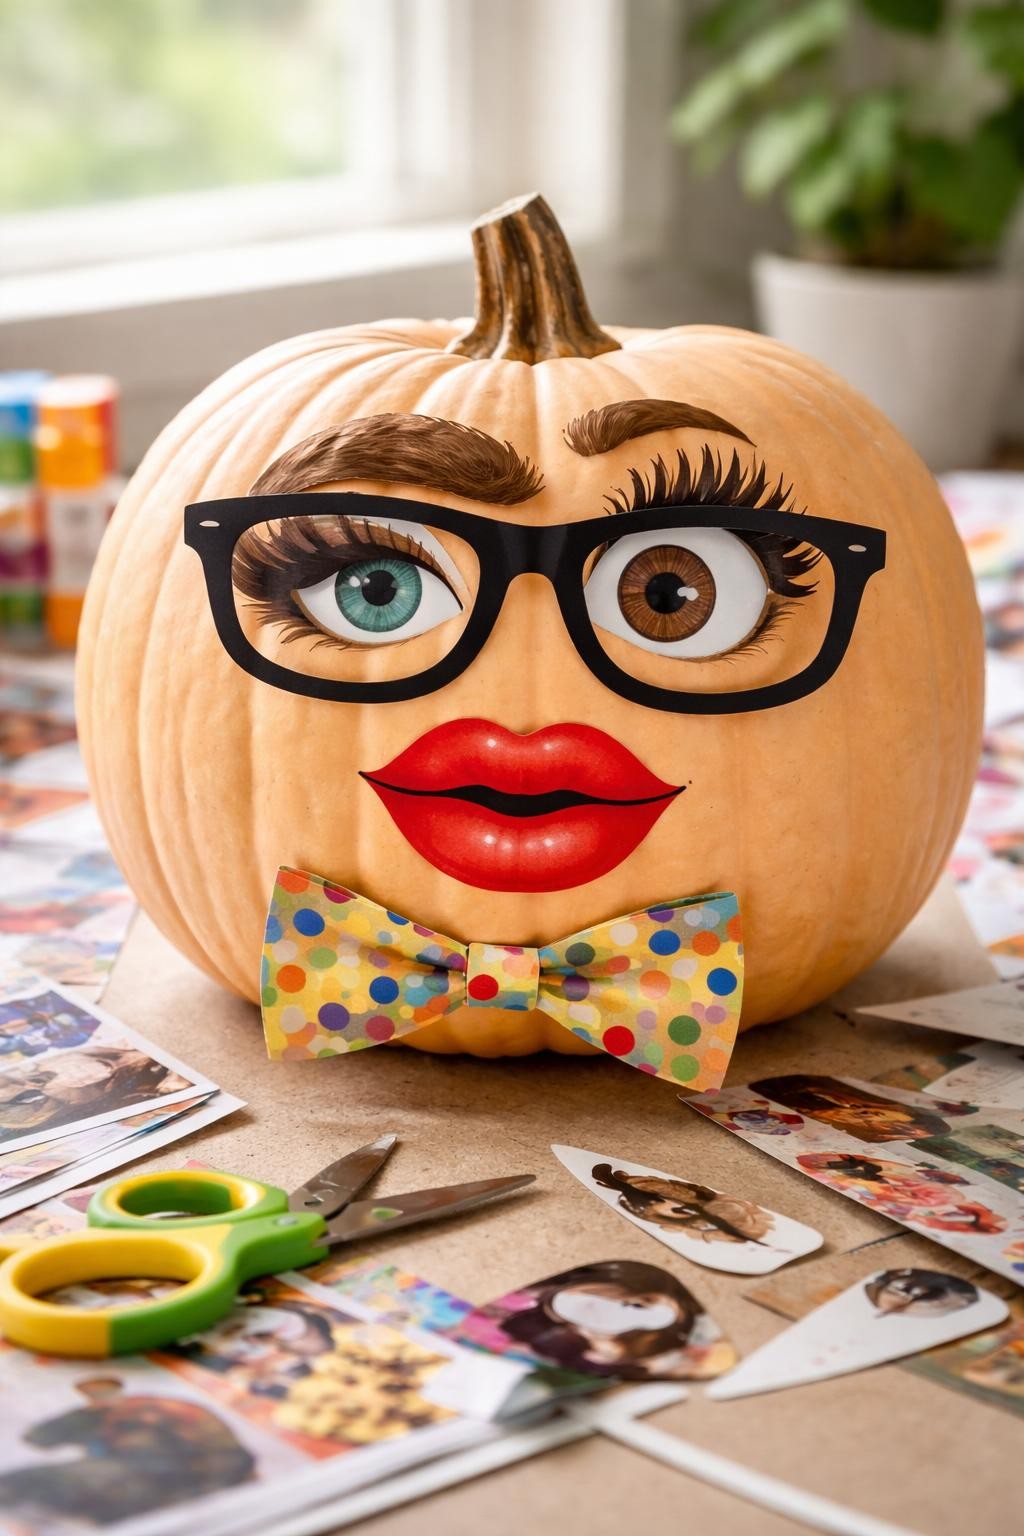
Look through old magazines for eyes, mouths, eyebrows, glasses, hats, and clothing details. Cut out the pieces and arrange them into a funny face on the pumpkin. The features can come from different pictures and do not need to match.
Add paper hair, a bow tie, or a hat to give the character more personality. Children often enjoy testing several facial combinations before choosing one. Use glue dots or removable adhesive first if they want to rearrange the pieces before making the design permanent.
13. Paper Chain Hair Pumpkin
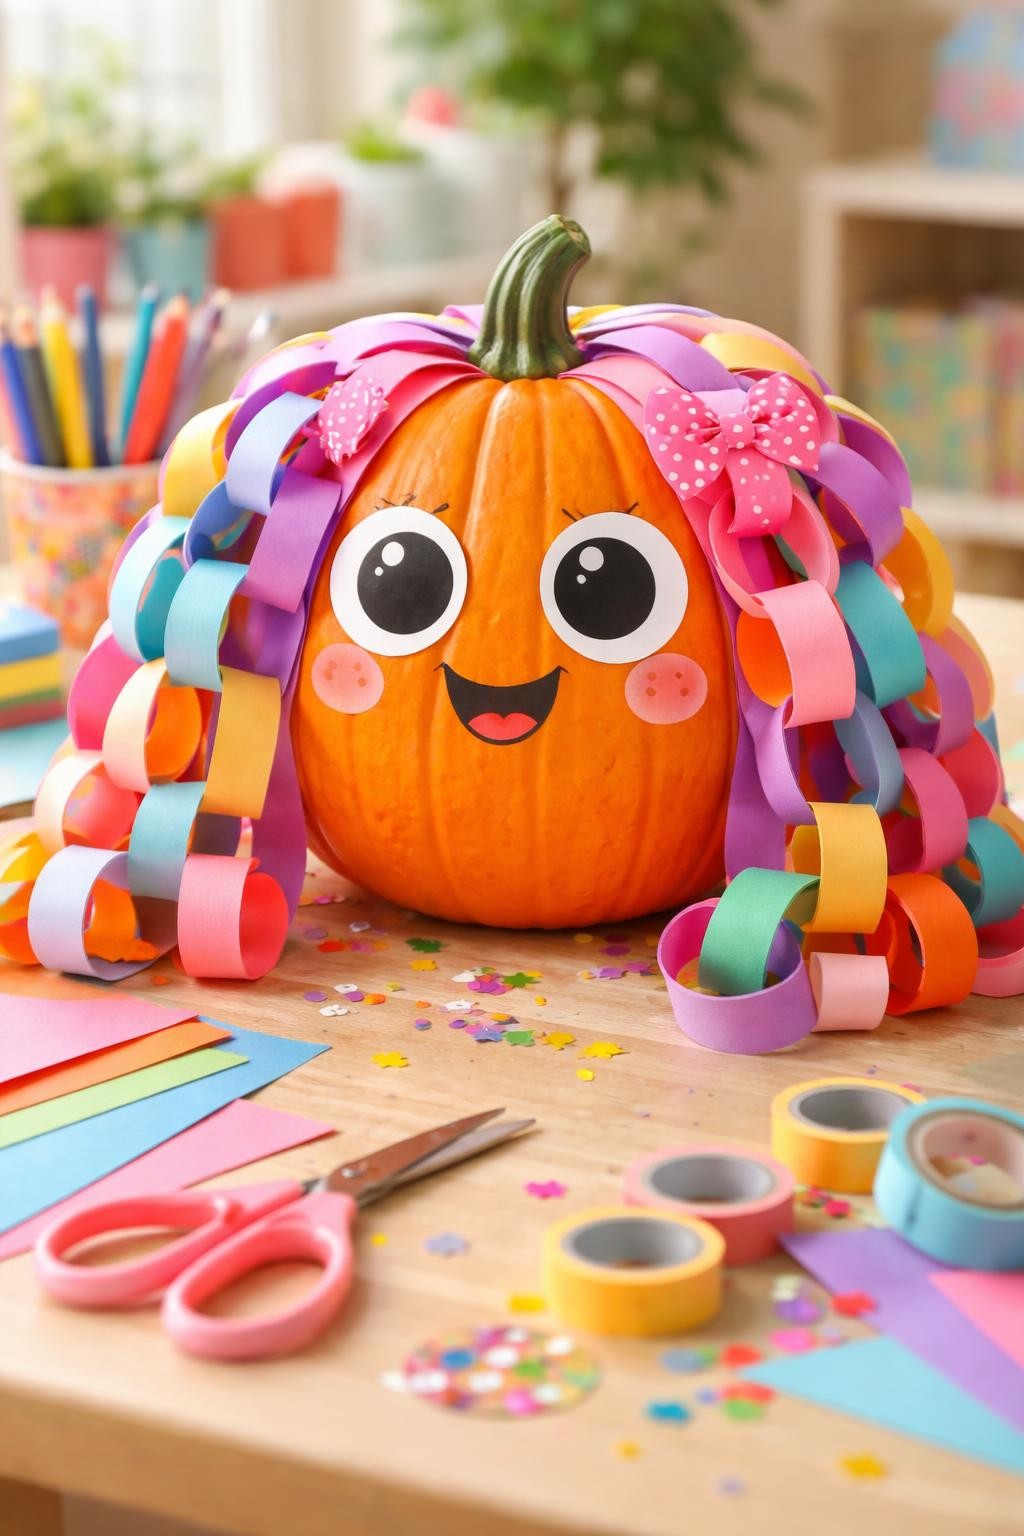
Make short paper chains by looping narrow strips of colored paper through one another. Attach several chains around the stem so they fall down the sides like long hair. Mix the colors or use one color in several shades.
Add a face with freckles, glasses, or rosy cheeks. Paper bows and clips can decorate the chains, while shorter loops can create bangs around the forehead. This activity combines simple paper-chain practice with pumpkin decorating and is easy to adjust for different age groups.
14. Paper Rocket Pumpkin
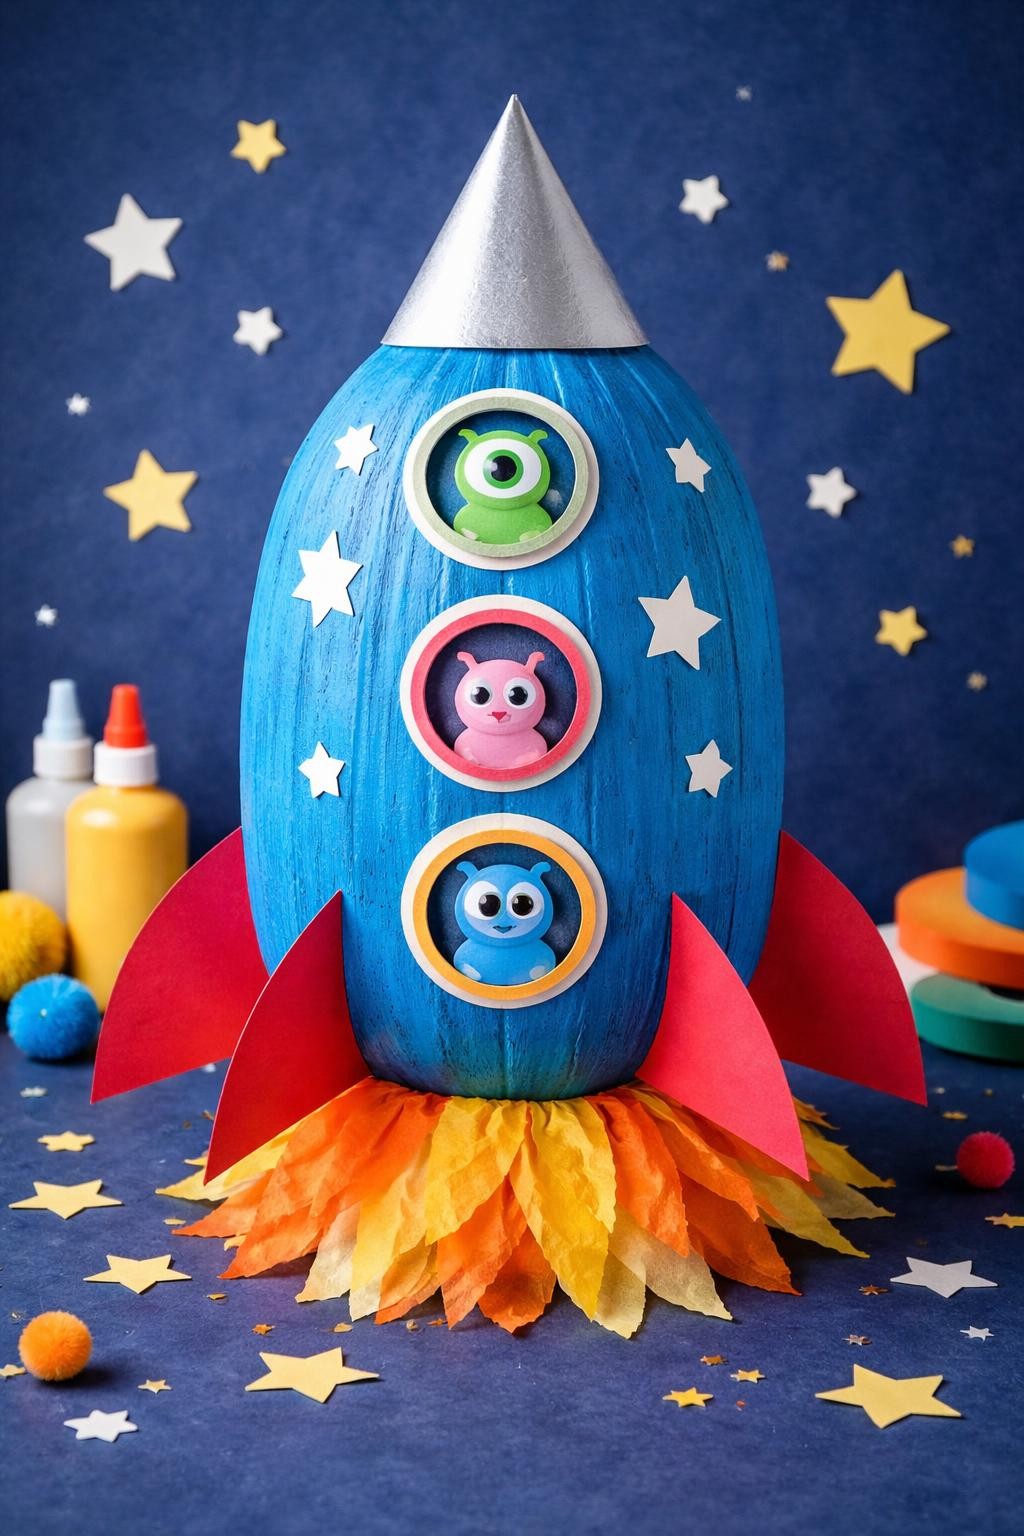
Use a tall pumpkin as the body of a rocket. Create a pointed cone from cardstock and place it over the stem, then attach three or four folded paper fins around the lower half. Layer strips of red, orange, and yellow tissue paper under the base to resemble flames.
Add round windows, stars, control panels, or tiny paper aliens looking outside. Children can paint the pumpkin first or cover sections with colored paper. Display the rocket upright on a sturdy cardboard platform so the paper flames can spread beneath it.
15. Storybook Paper House Pumpkin
Turn the front of a pumpkin into a tiny house using a paper door, windows, shutters, and roof tiles. Layer small brown paper rectangles around the stem to suggest a roof, then add vines, flowers, and a tiny mailbox near the door.
Children can imagine who lives inside and decorate the house to match the character. It might become a fairy cottage, a mouse home, a witch’s house, or a little autumn bakery. Drawing curtains, bricks, flowerpots, and doorknobs onto the paper pieces will add detail without making the project difficult.