




In This Article Show
You do not need advanced painting skills to turn an ordinary pumpkin into a beautiful piece of fall decor. Some of the best designs use basic shapes, limited colors, and small details that are easy to control.
With the right paint and a little patience, even a quick afternoon project can look stylish enough for your porch, mantel, dining table, or entryway.The ideas below combine familiar fall patterns with a few clever designs that feel fresh without being difficult.
Most can be completed with basic acrylic paint, a couple of small brushes, and pumpkins in different shapes and sizes. Choose one design or mix several together to create a complete fall display that looks thoughtful and coordinated.
1. Simple White Polka-Dot Pumpkin

Paint a small or medium orange pumpkin with evenly spaced white dots for a quick design that still feels cheerful. Use the round end of a paintbrush, a pencil eraser, or a small sponge dauber to keep the dots similar in size.
Follow the natural sections of the pumpkin so the pattern looks balanced from every angle. You can leave the stem brown or paint it matte gold for a slightly dressier finish. This design works especially well when grouped with plain cream and orange pumpkins.
2. Painted Color-Block Pumpkin

Divide a pumpkin into two or three wide sections and paint each one a different fall color. A combination of cream, terracotta, and muted olive creates a modern look without requiring precise artwork.
Use painter’s tape to make clean lines, or paint the sections freehand for a softer handmade finish. Keep the stem natural and allow the paint to dry fully before removing the tape. The simple blocks of color make this pumpkin easy to coordinate with pillows, blankets, and other seasonal decorations.
3. Tiny Painted Hearts
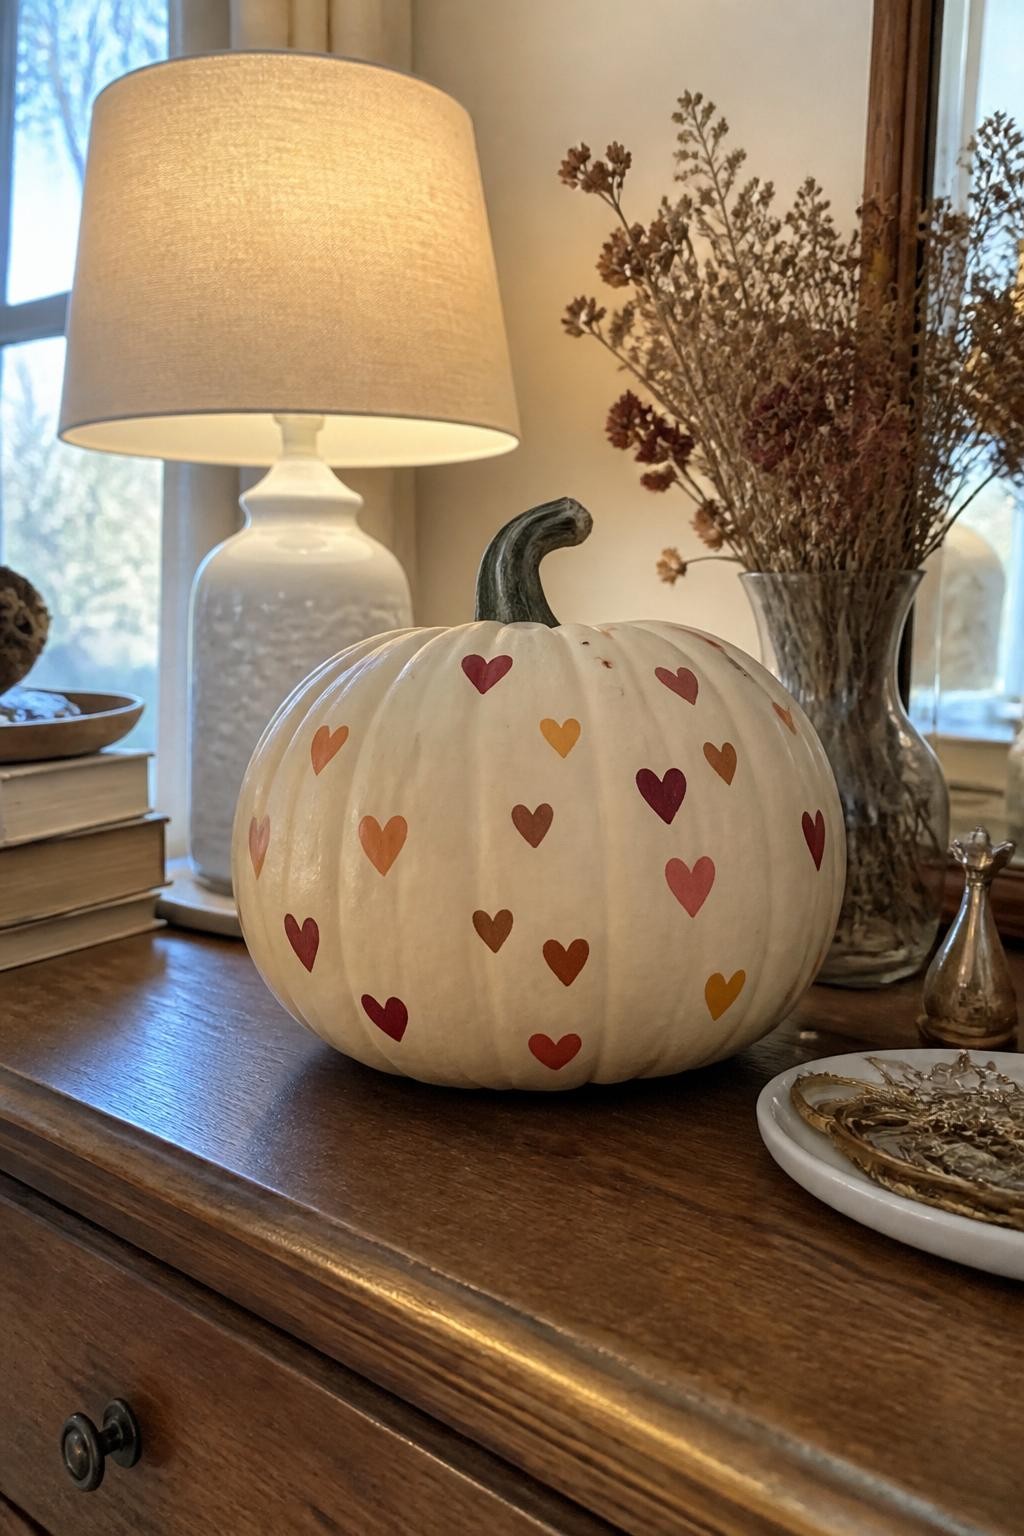
Cover a pale pumpkin with small hearts in warm seasonal shades such as rust, burgundy, mustard, and dusty pink. The hearts can face different directions and vary slightly in size to create a relaxed, playful pattern.
Use the end of a thin brush to make two small dots and pull them downward into a point. This technique is easier than drawing every heart outline first. The finished pumpkin is sweet enough for a child’s room but polished enough for a fall shelf or bedroom display.
4. Bold Vertical Stripes
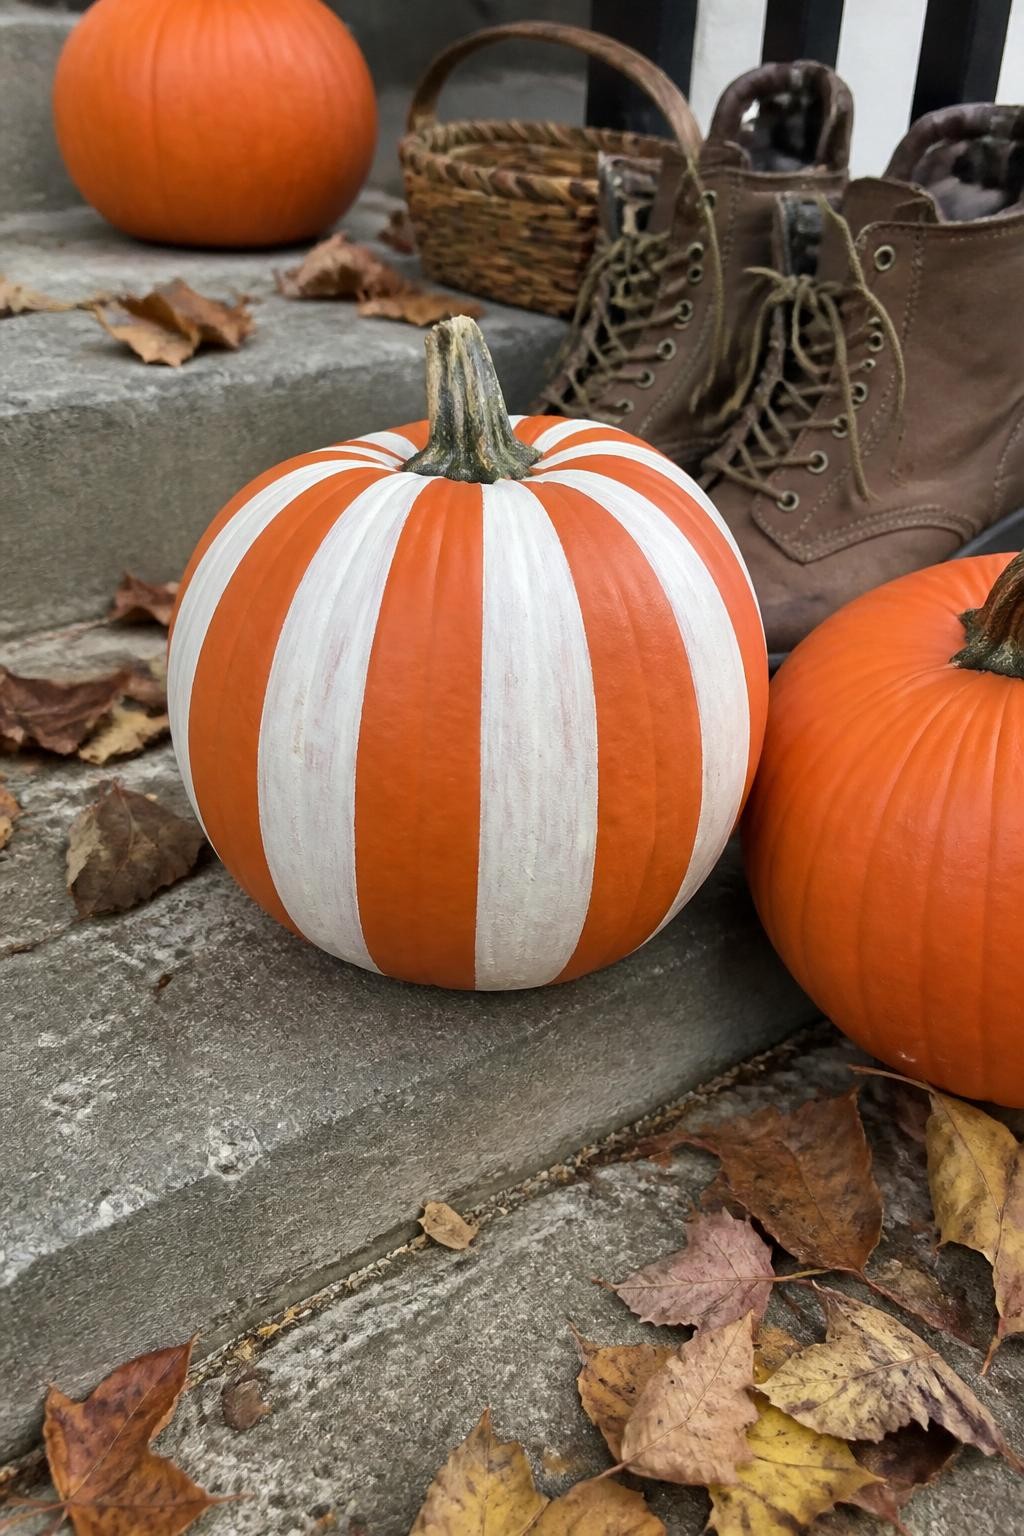
Use the pumpkin’s natural ridges as guides for painting wide vertical stripes. Alternate between the original pumpkin color and one contrasting shade, such as white on orange, black on cream, or dark green on pale beige.
This design is especially useful when you want something graphic but uncomplicated. Paint slowly from the stem to the base, following each curved section. Slight changes in stripe width will make the finished pumpkin feel handmade rather than factory-produced.
5. Easy Leaf Stamp Pumpkin
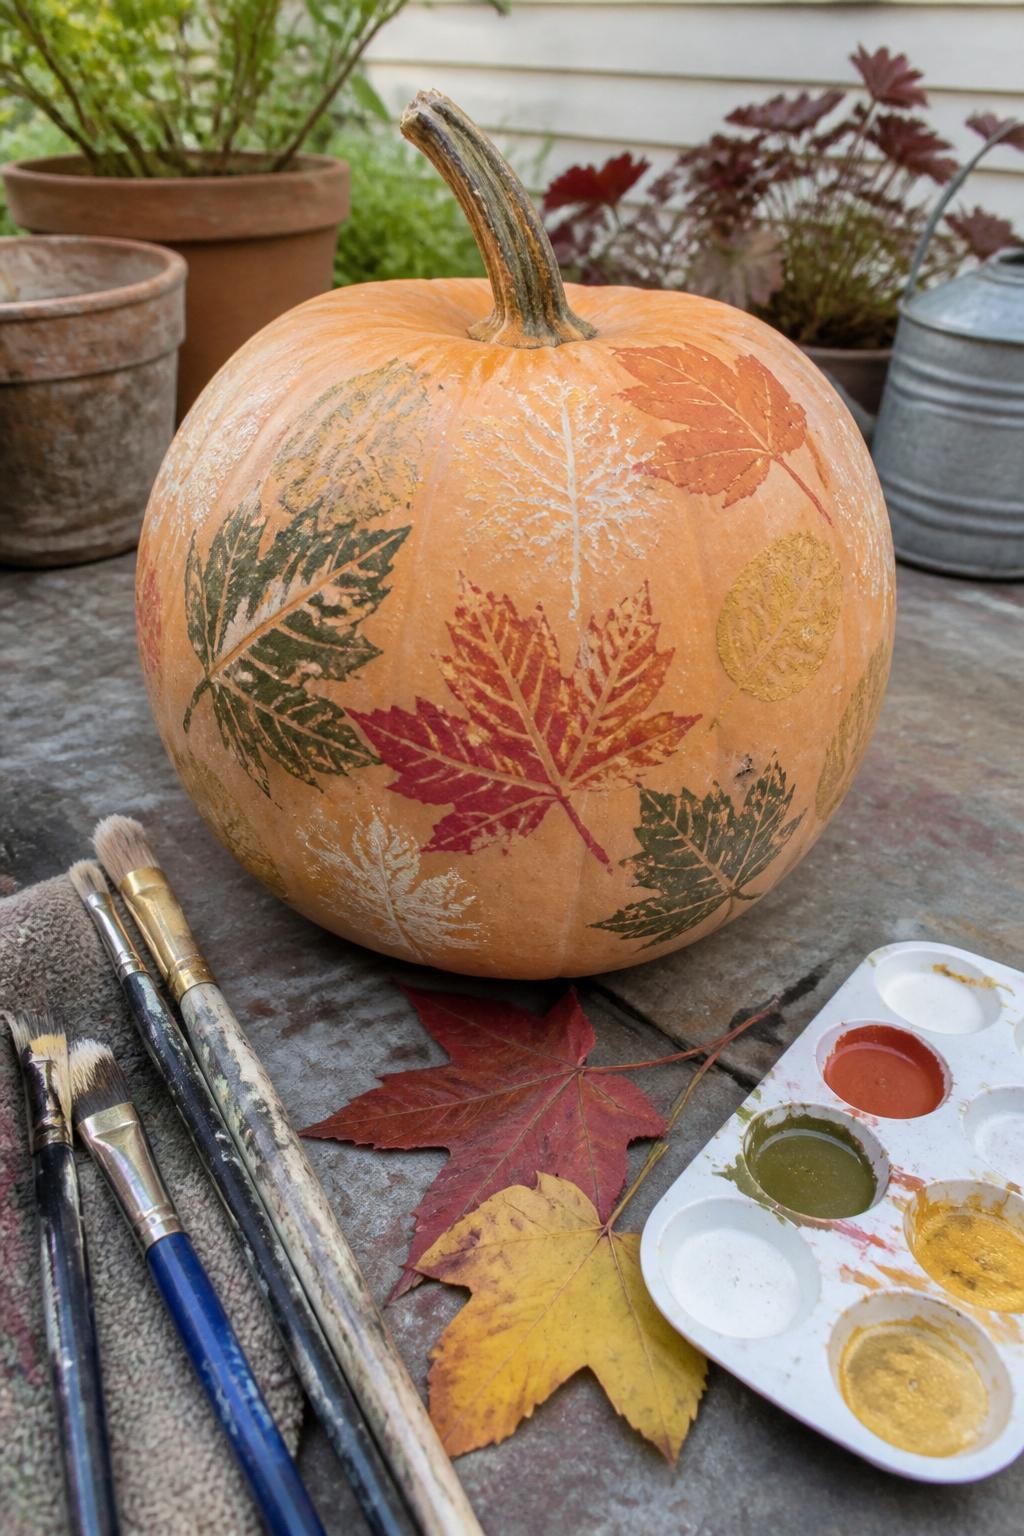
Use a real leaf as a stamp to create detailed shapes without painting them by hand. Brush a thin layer of paint onto the veined side of the leaf, press it carefully against the pumpkin, and lift it away slowly.
Repeat the pattern using one color or several muted fall shades. Gold, rust, dark green, and cream all work well. Overlapping a few leaf prints can create a fuller design, but leaving open space keeps the pumpkin simple and easy to appreciate.
6. Painted Scallop Pattern
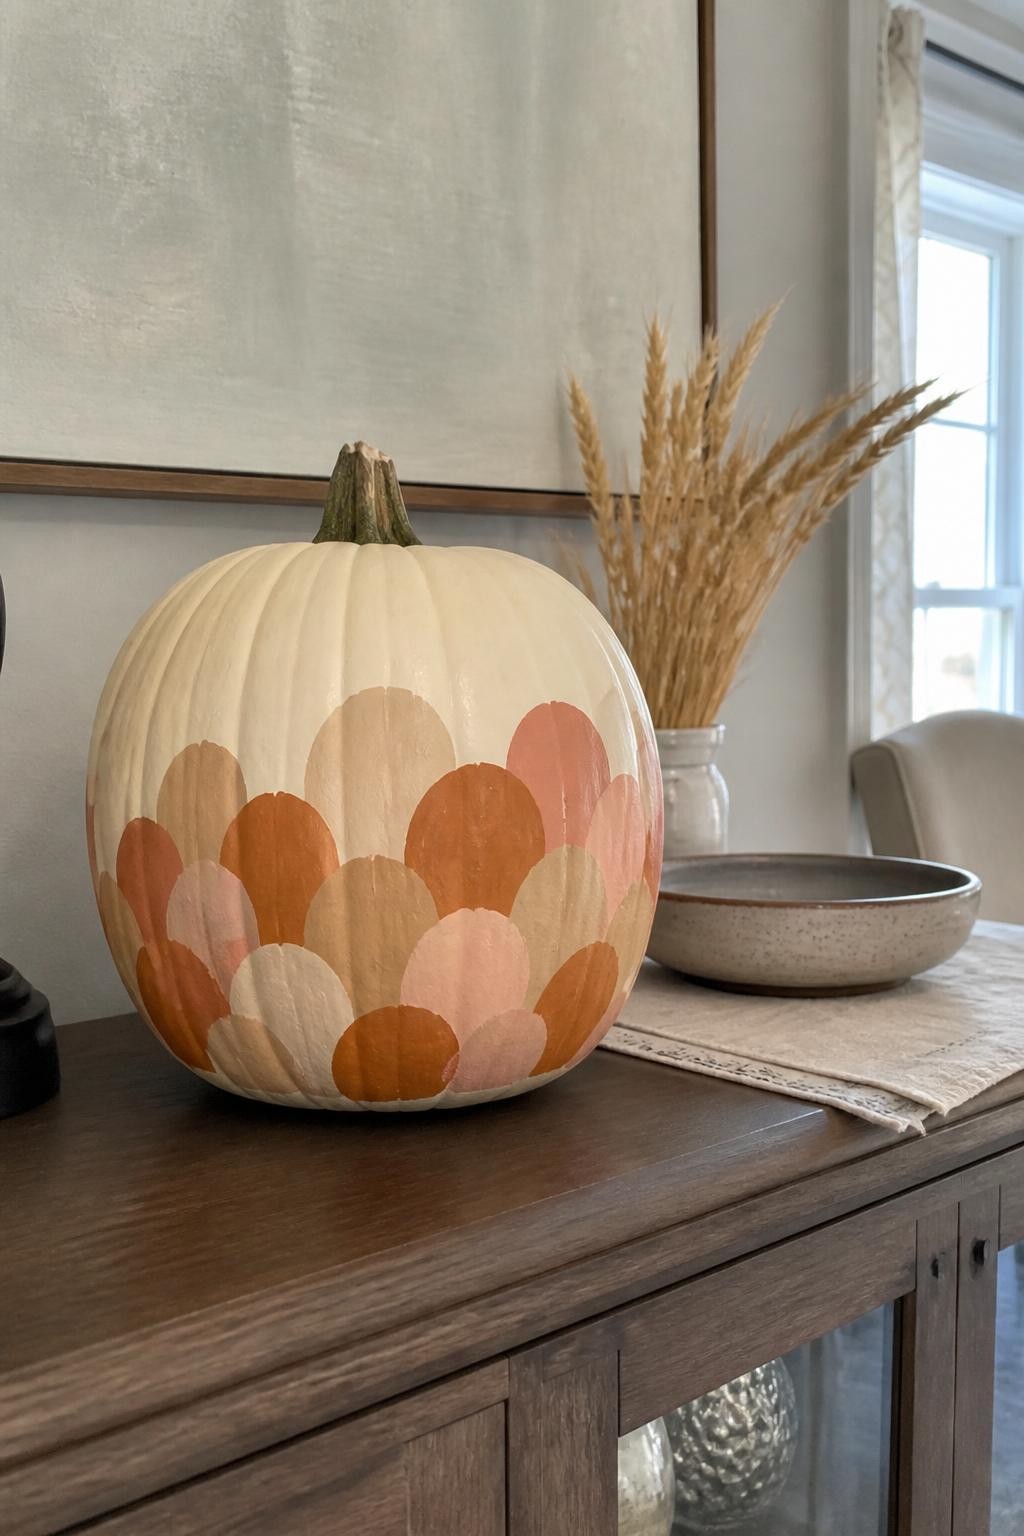
A scallop pattern looks impressive but is made from rows of simple curved shapes. Begin near the bottom of the pumpkin and paint a row of half-circles, then add another row above it with the curves slightly overlapping.
Use two or three related colors, such as peach, burnt orange, and cream, to create a soft layered effect. You can cover the entire pumpkin or paint only the lower half. The repeating pattern gives the pumpkin a decorative tile-like appearance without requiring complicated drawing.
7. Simple Dripping Paint Pumpkin
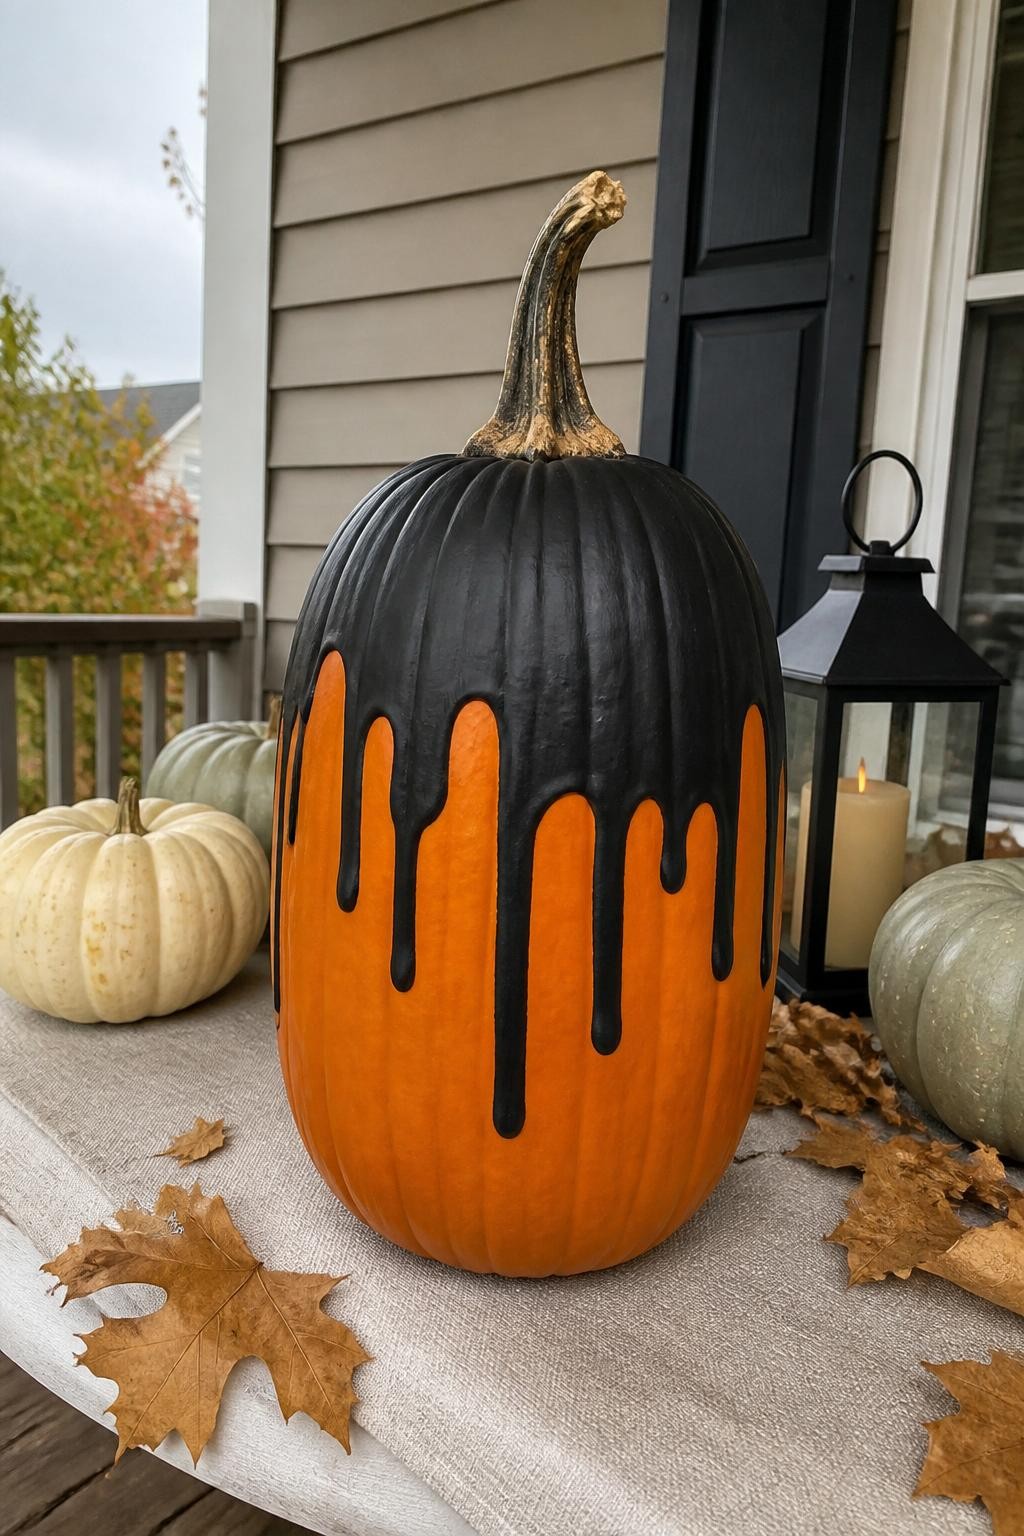
Paint the top of a pumpkin in one bold color and allow several rounded drips to extend down the sides. Black paint over an orange pumpkin creates a dramatic look, while white, sage, or dusty pink gives the design a softer style.
Draw the drip shapes first with a pencil if you want more control, then fill them in with a small brush. Keep the drips at different lengths so the design feels natural. This method is quick, playful, and particularly effective on tall pumpkins.
8. Small Painted Daisies

Give a plain pumpkin a light and cheerful look by adding small daisies across its surface. Paint a tiny mustard or brown center first, then surround it with five or six white petals.
Spread the flowers loosely instead of arranging them in perfect rows. You can add a few small green leaves between them, but the design also looks beautiful with flowers alone. A soft green, pale orange, or beige pumpkin makes a lovely base for this simple floral pattern.
9. Half-Painted Pumpkin
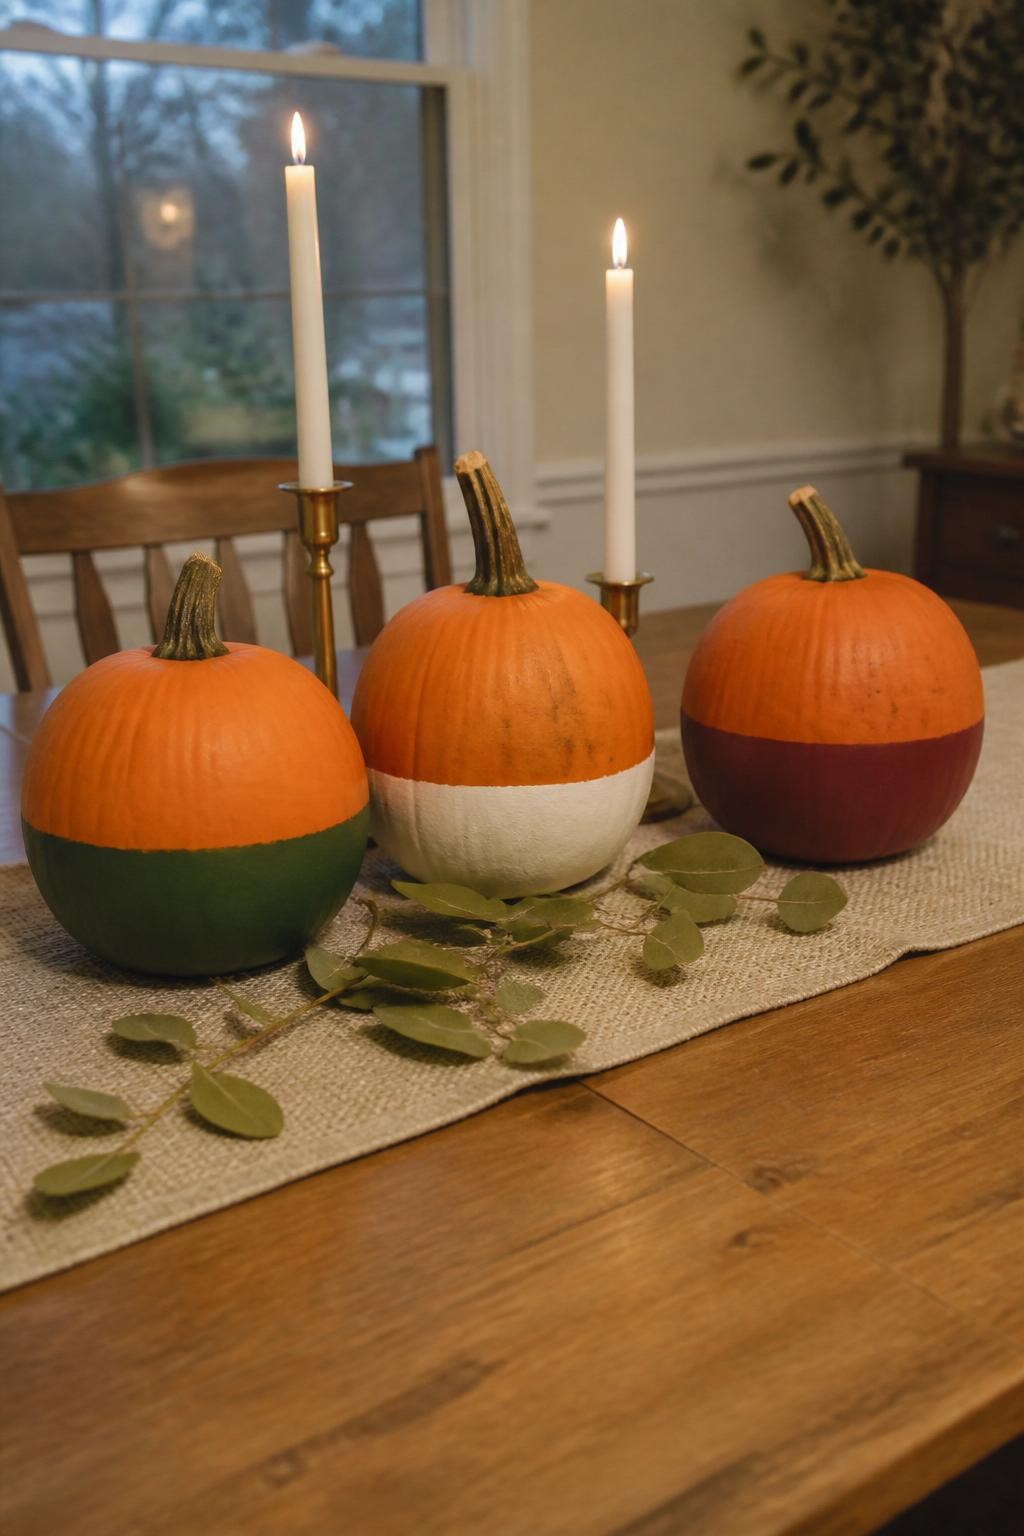
Leave the top half of a pumpkin natural and paint only the bottom section in a solid fall color. Deep green, warm white, navy, burgundy, or matte black can all create a strong contrast against an orange surface.
The dividing line can be straight, curved, or slightly uneven. Use painter’s tape for a crisp edge or paint freehand for a relaxed appearance. This idea is especially useful when you need to decorate several pumpkins quickly while keeping the overall display coordinated.
10. Easy Painted Acorns

Paint small acorns around the lower edge of a cream or light orange pumpkin. Use a simple oval shape for each nut and add a darker curved cap on top, followed by a short stem.
Keep the acorns spaced apart and add a few tiny oak leaves if you want more detail. Brown, tan, rust, and muted gold create a warm woodland palette. This design looks particularly charming beside wooden bowls, pinecones, and other natural fall decorations.
11. Wavy Line Pumpkin

Paint a series of loose wavy lines around the pumpkin for a simple retro-inspired design. Use one contrasting color for a clean look or alternate between two shades such as orange and burgundy, cream and green, or pink and rust.
The lines do not need to be evenly spaced or perfectly smooth. In fact, small differences make the pattern more interesting. This is a forgiving idea for beginners because the natural curves of the pumpkin help disguise uneven brushwork.
12. Simple Starburst Pumpkin
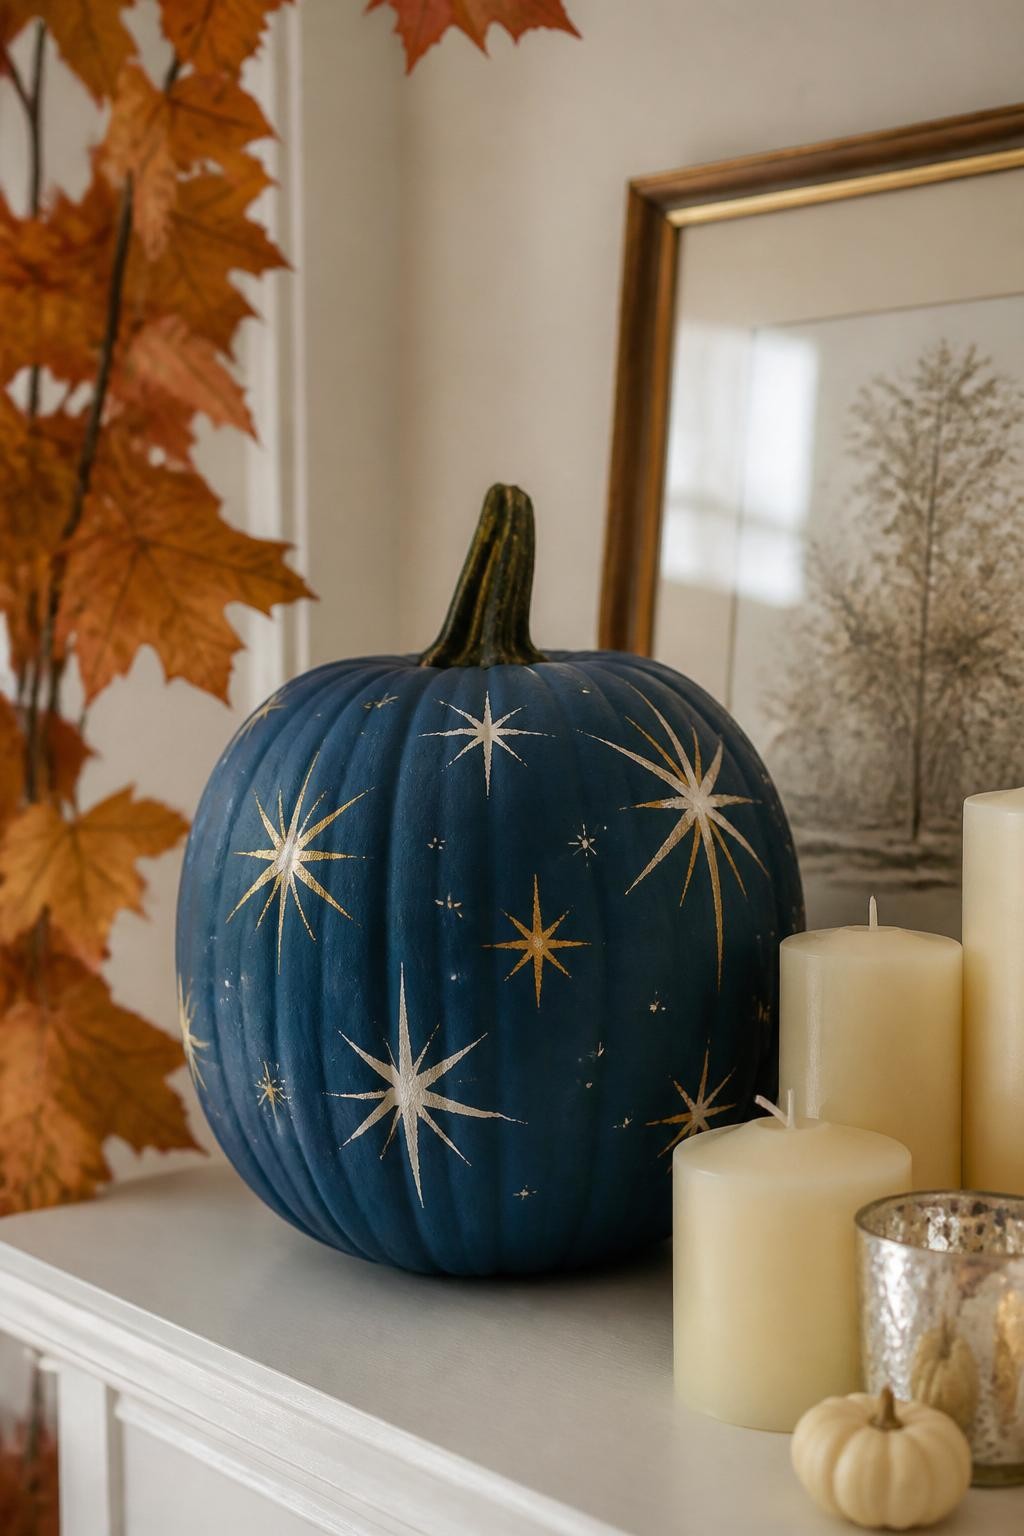
Create a starburst by painting a small center point and adding short lines that extend outward. Repeat the shape around the pumpkin using white, gold, mustard, or another contrasting color.
Space the starbursts loosely so each one remains easy to see. You can make them all the same size or include a mixture of larger and smaller bursts. The finished pattern adds a little shine and movement without requiring difficult drawing or careful shading.
13. Painted Pumpkin Faces
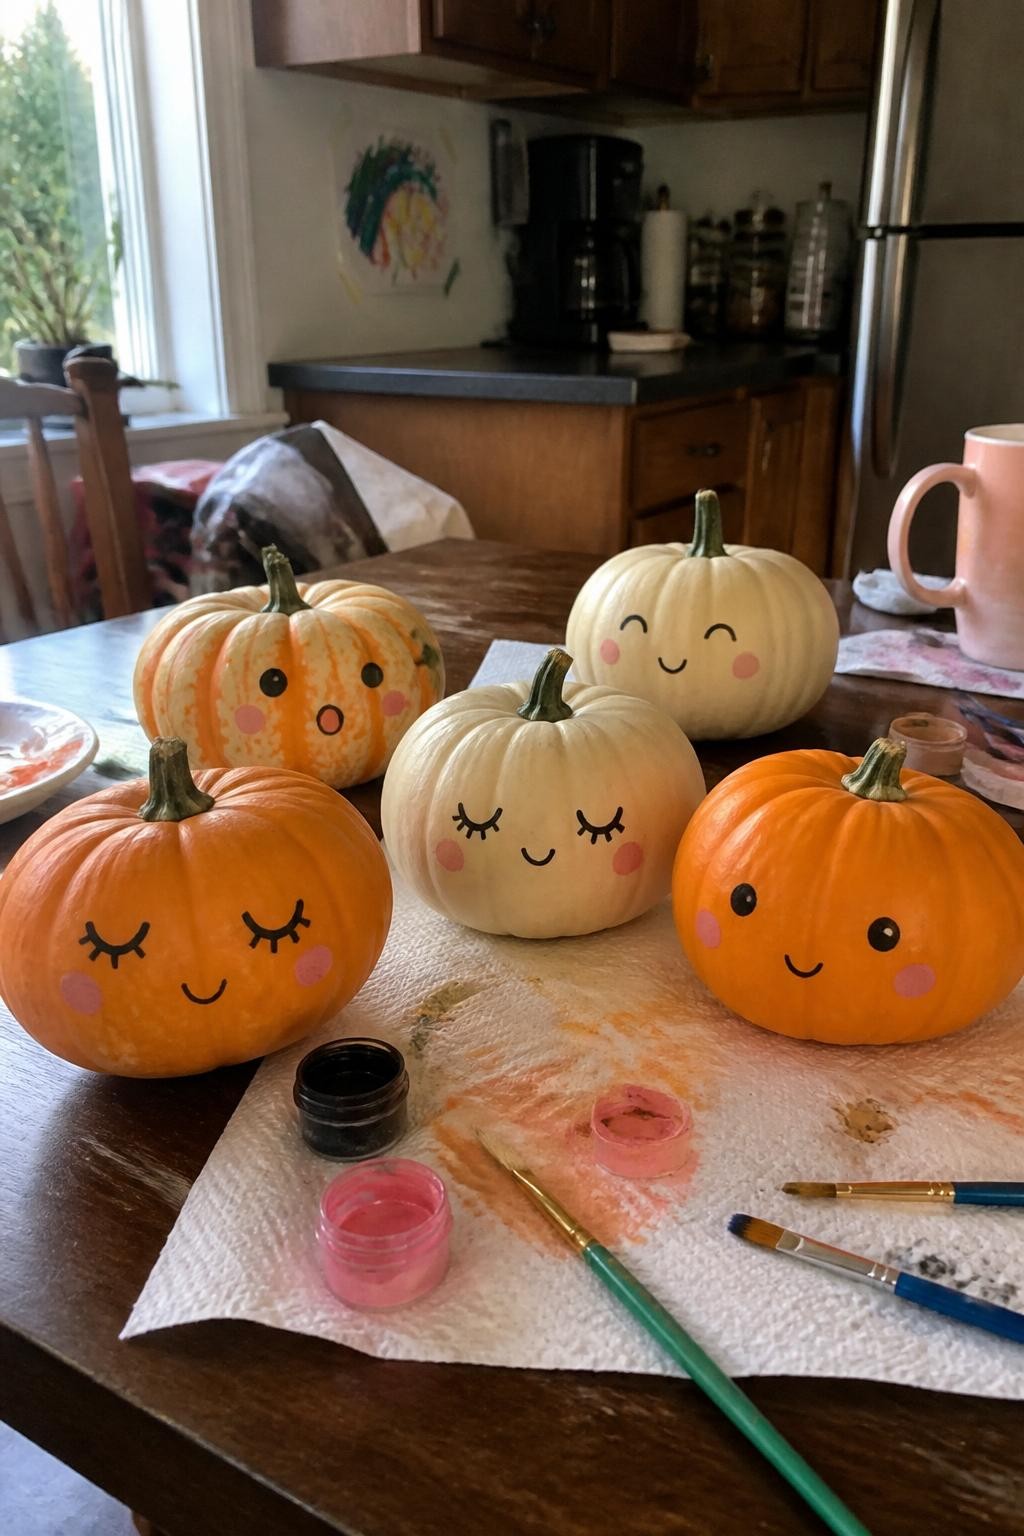
Give several mini pumpkins simple friendly faces using black and white paint. Try closed eyes with eyelashes, small smiles, rosy cheeks, or surprised round expressions rather than complicated character designs.
Each pumpkin can have a different personality, making the group more interesting when displayed together. Keep the features small and leave most of the natural pumpkin visible. These cheerful faces are easy for children and adults to paint during a relaxed fall craft afternoon.
14. Simple Painted Branches

Paint one thin branch across the front of a white, beige, or muted green pumpkin. Add a few small leaves, berries, or buds along the branch using two or three fall colors.
The open design keeps the pumpkin looking clean and elegant while still adding enough detail to make it special. Follow the curve of the pumpkin so the branch appears to grow naturally across the surface. This is a beautiful option for a dining table, guest room, or quiet reading corner.