
In This Article Show
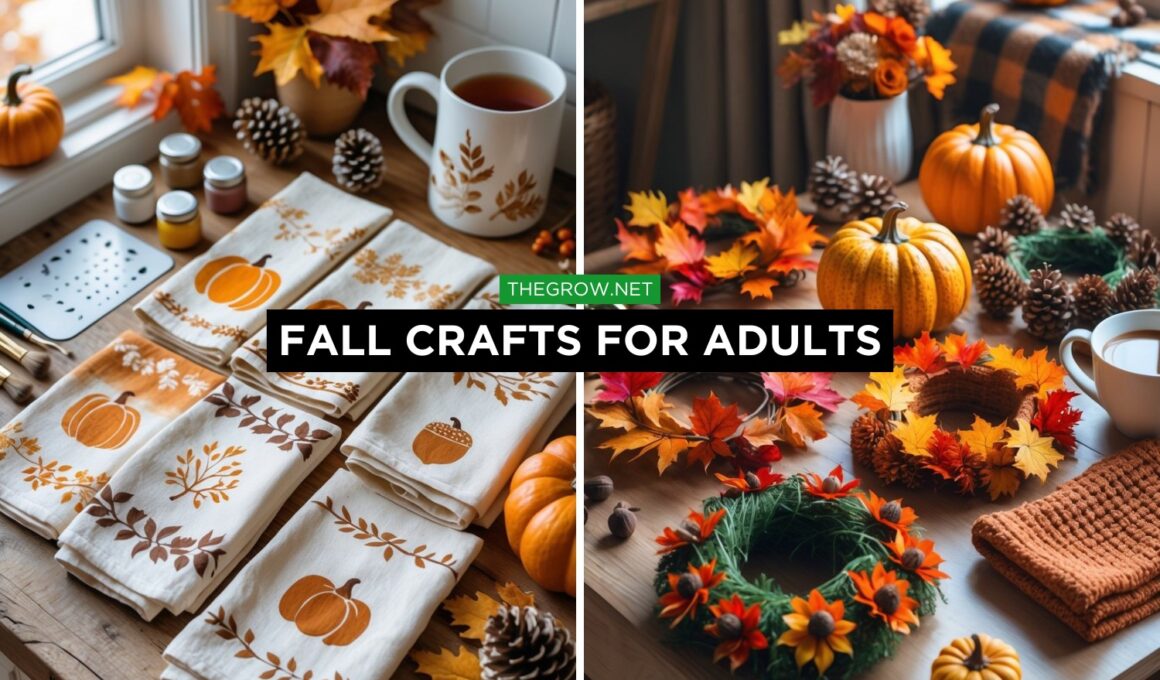
Fall brings the perfect chance to create beautiful decorations for your home. The cooler weather and cozy atmosphere make it an ideal time to work on craft projects that celebrate the season.
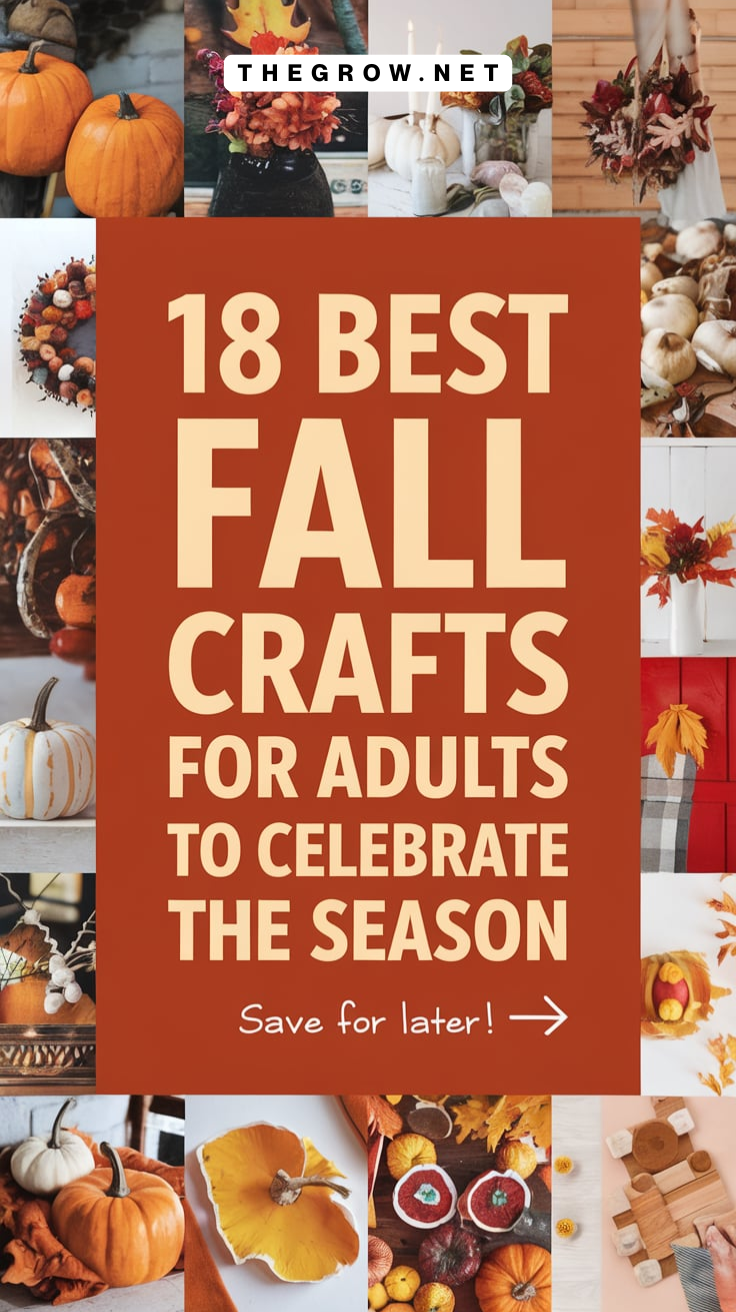
These 18 fall craft ideas will help you make stunning decorations using materials like leaves, pumpkins, yarn, and natural elements. I’ve put together projects that range from simple napkin rings made with cinnamon sticks to more detailed items like knitted throw blankets and hand-painted ceramics.
Each craft uses autumn colors and textures to bring warmth to your living space.
Whether you enjoy working with fabric, clay, wood, or natural materials, you’ll find projects that match your skills and interests.
1. Hand-Stenciled Tea Towels

I find tea towels perfect for fall decorating. They’re easy to make and cost under $2 each.
I use leaf stencils with fabric paint on plain flour sack towels. The results look professional but take minimal skill.
Shop the materials


Materials Needed
- Plain cotton tea towels (white or cream work best) – pre-washed and ironed
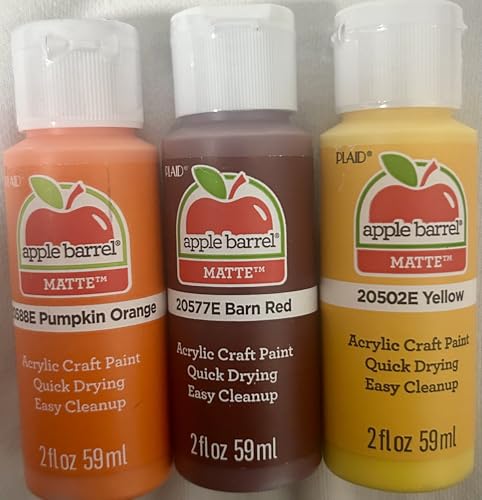
- Fabric paint in fall colors (orange, brown, mustard yellow, rust, deep green)
- Reusable stencils (pumpkins, acorns, leaves, branches, etc.) – or make your own with stencil film
- Stencil brushes or foam pouncers (flat-tipped for dabbing paint evenly)
- Painter’s tape (to secure stencil in place)
- Plastic sheet or cardboard (to place under towel to prevent bleed-through)
- Palette or paper plate (for holding paint)
- Small paintbrushes (for touch-ups and details)
- Iron (to heat-set the paint, if required by your fabric paint brand)
Step-by-Step Instructions
- Step 1: Prepare the Towels
Wash, dry, and iron your tea towels before stenciling. This removes any coating and ensures a smooth surface for paint. - Step 2: Protect Your Work Surface
Place a plastic sheet or cardboard under the towel to stop paint from bleeding through. Smooth the towel flat. - Step 3: Position the Stencil
Lay your stencil where you want the design and secure it with painter’s tape so it doesn’t move. - Step 4: Apply the Paint
Put a little fabric paint on your palette. Dip your stencil brush lightly, dab off excess, and use an up-and-down dabbing motion over the stencil. Apply thin, even coats instead of one heavy layer. - Step 5: Lift the Stencil
Carefully peel the stencil away while the paint is still wet. Let the towel dry flat for 30–60 minutes. - Step 6: Add Details (Optional)
If you’d like, use a fine paintbrush to add shading or extra accents to leaves, pumpkins, or acorns once the first layer is dry. - Step 7: Heat-Set the Design
Check your paint instructions. Most fabric paints need heat-setting. Place a thin cloth or parchment over the design and iron on medium (no steam) for 2–3 minutes per section. - Step 8: Let Cure and Finish
Leave the towels to cure for 24 hours before washing. Wash in cold water and line-dry to keep designs looking fresh.
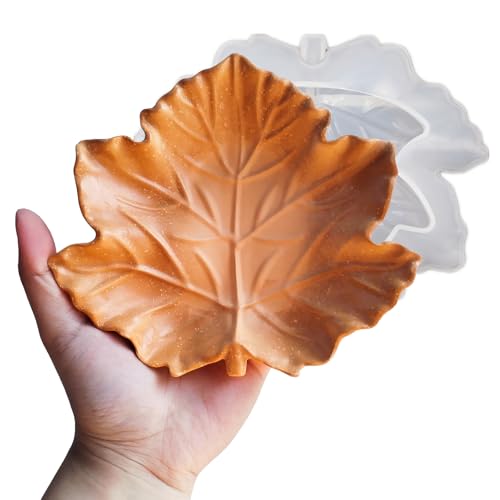
2. Clay Maple Leaf Dish

I love making clay maple leaf dishes for fall decorating. I collect fresh maple leaves from my yard to use as templates. I press the leaves into air-dry clay to create detailed imprints.
Shop the materials


Materials Needed
- Air-dry clay (about 1 lb or 500 g for one dish)
- Large maple leaf (real or faux, with defined veins)
- Rolling pin
- Craft knife or clay cutting tool
- Small bowl (to shape the dish)
- Wax paper or silicone mat (work surface)
- Sandpaper or nail file (for smoothing edges)
- Acrylic paints in fall colors (red, orange, yellow, brown)
- Small paintbrushes and sponges
- Clear acrylic sealer (matte or gloss finish)
Instructions
- Step 1: Prepare the Leaf
Choose a large maple leaf with visible veins. If using a real one, rinse and pat dry so it doesn’t stick to the clay. - Step 2: Roll Out the Clay
Place your clay on wax paper and roll it out to about ¼ inch (6 mm) thick. Keep it even so the dish dries uniformly. - Step 3: Press the Leaf
Lay the leaf on top of the clay, vein-side down. Gently roll over it with the rolling pin to press the vein pattern into the clay. - Step 4: Cut Out the Shape
Use a craft knife to carefully cut around the leaf’s outline. Peel away the excess clay. - Step 5: Shape the Dish
Place the clay leaf inside a small bowl (or drape it over the outside of a bowl) to give it a curved, dish-like shape. Adjust gently with your fingers. - Step 6: Let It Dry
Leave the clay to dry for 24–48 hours (check your clay instructions). Turn it once during drying so both sides cure evenly. - Step 7: Smooth the Edges
Once dry, use fine sandpaper or a nail file to smooth rough edges. Wipe away clay dust with a damp cloth. - Step 8: Paint the Dish
Paint the leaf in fall colors, blending shades of red, orange, and yellow for a natural look. Highlight veins with a darker shade for detail. Let dry. - Step 9: Seal the Finish
Spray or brush on a clear acrylic sealer to protect the paint and give it a nice finish. Let it cure fully before using.
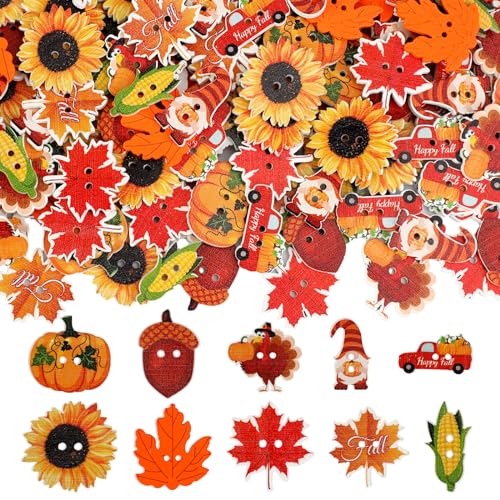
3. Button and Twig Wall Art

I love combining buttons and twigs for unique fall wall art. These natural materials work perfectly together.
I arrange colorful autumn buttons on twigs to create tree designs. The buttons become leaves while twigs form branches.
Shop the materials


Materials Needed
- Twigs or small branches (dry and sturdy, about 8–12 inches long each)
- Craft buttons in fall colors (red, orange, yellow, brown)
- Strong craft glue or hot glue gun with glue sticks
- Canvas board, wooden board, or thick cardstock (white or neutral background works best)
- Scissors or small pruning shears (for cutting twigs)
- Pencil (to sketch your tree outline)
- Ruler (optional, for positioning branches)
- Hanging hardware (if you want to mount it on the wall)
Instructions
- Step 1: Prepare the Twigs
Collect twigs from your yard or use craft store branches. Trim them to different lengths to form a tree trunk and branches. - Step 2: Arrange the Tree Shape
Lay the twigs out on your canvas or board. Start with a main trunk and angle smaller twigs outward like branches. Adjust until you’re happy with the shape. - Step 3: Glue the Twigs
Glue the twigs down using strong craft glue or a hot glue gun. Press firmly and let them dry before moving on. - Step 4: Add the Buttons
Sort buttons by size and color. Place larger buttons near the base of the branches and smaller ones toward the tips, mimicking clusters of fall leaves. - Step 5: Glue the Buttons in Place
Once you’re happy with the arrangement, glue the buttons onto the twigs and surrounding areas. Layer buttons slightly for a fuller effect. - Step 6: Fill in Empty Spots
Use extra buttons to scatter around the tree or background for added texture. - Step 7: Display the Artwork
Let everything dry completely before hanging. Add hanging hardware to the back if needed.
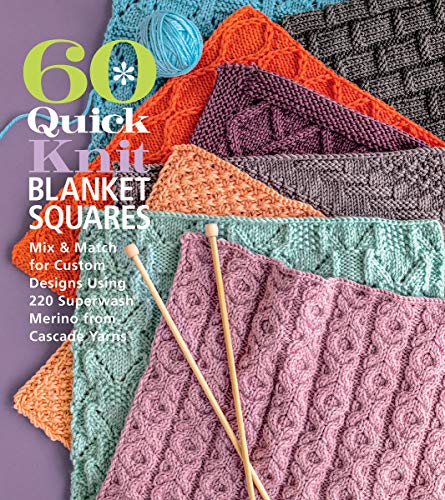
4. Knitted Cozy Throw Blanket

Fall is perfect for starting a knitted throw blanket project. I can work on it while staying warm under the growing blanket. These projects use basic knit and purl stitches that beginners can handle easily.
Shop the materials


Materials Needed
- Super bulky yarn in 2–3 fall shades (approx. 6–8 skeins, depending on blanket size)
- Size US 15 (10 mm) or larger knitting needles (straight or circular for wide width)
- Scissors
- Tapestry needle (for weaving in ends)
- Measuring tape
Instructions
- Step 1: Choose Your Size
Decide how big you want your throw blanket (a standard lap throw is about 40 x 60 inches). This will guide how many stitches to cast on. - Step 2: Cast On Stitches
Using your first color yarn, cast on about 60–70 stitches for a lap blanket. Adjust based on desired width and needle size. - Step 3: Knit the Rows
Work in a simple knit stitch (garter stitch) for a soft, stretchy feel, or alternate knit and purl (stockinette) for a smoother look. - Step 4: Add Stripes of Color
Switch yarn colors every 10–15 rows to create bold fall stripes. Tie off old yarn and weave in ends neatly as you go. - Step 5: Continue Knitting
Repeat rows until the blanket reaches your desired length. Keep tension even for a uniform look. - Step 6: Bind Off
When finished, bind off your stitches loosely to keep the edges flexible. - Step 7: Weave in Ends
Use your tapestry needle to weave all yarn ends securely into the stitches on the back of the blanket. - Step 8: Block the Blanket (Optional)
If you want super neat edges, lightly dampen the blanket, shape it flat, and let it air dry to “block” it into place.
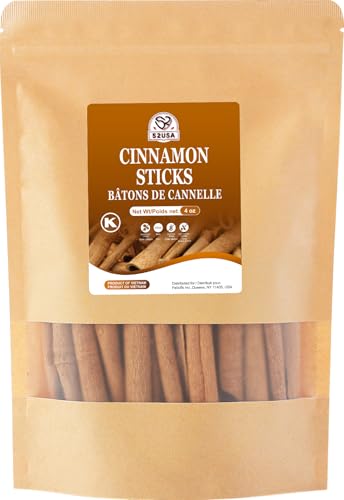
5. Cinnamon Stick Napkin Rings

I love making these simple napkin rings with cinnamon sticks. They smell amazing and look perfect on fall tables.
I bundle three cinnamon sticks together with twine. Then I hot-glue them to plain napkin rings.
Shop the materials


Materials Needed
- Cinnamon sticks (4–6 inches long, about 6 sticks per napkin ring)
- Jute twine, raffia, or rustic string
- Scissors
- Cloth napkins (to style with finished rings)
Instructions
- Step 1: Gather the Cinnamon Sticks
Choose cinnamon sticks that are roughly the same length and thickness for a neat look. Six sticks per napkin ring works best. - Step 2: Bundle the Sticks
Line up the cinnamon sticks side by side. Adjust until they form a tight bundle. - Step 3: Cut the Twine
Cut a piece of jute twine about 18 inches long. This gives enough length to wrap securely and tie. - Step 4: Wrap the Bundle
Place the napkin ring bundle on the center of the twine. Wrap the twine around the middle several times, pulling it snug. - Step 5: Secure the Knot
Tie a double knot at the back of the bundle to hold it in place. Trim off excess twine or leave short tails for a rustic effect. - Step 6: Add to Napkins
Roll or fold your napkin, then slip it through the center of the bundle to finish your napkin ring.
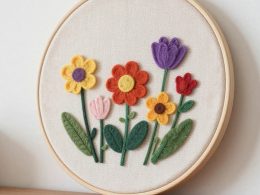
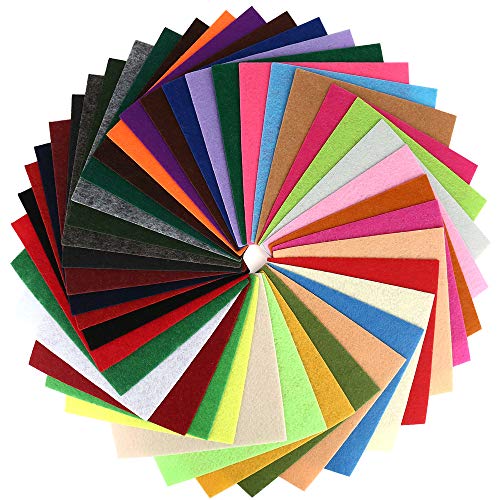
6. Embroidery Hoop Fall Leaf Art

I love making embroidery hoop leaf art for fall decorating. This craft uses felt leaves arranged inside wooden hoops.
I cut leaf shapes from colored felt. Then I arrange them on burlap or fabric inside the hoop.
Shop the materials


Materials Needed
- Embroidery hoop (6–10 inches, wood or plastic)
- Light-colored fabric (cotton, linen, or muslin works well)
- Embroidery floss in fall colors (red, orange, yellow, gold, green, burgundy)
- Embroidery needle
- Scissors
- Pencil or water-soluble fabric pen (for sketching leaf outlines)
- Printed leaf templates (optional, for tracing designs)
Instructions
- Step 1: Prepare the Fabric
Cut your fabric so it’s at least 2 inches larger than your hoop on all sides. Place it inside the embroidery hoop and tighten until smooth and firm. - Step 2: Sketch the Design
Lightly draw your leaf shapes on the fabric using a pencil or water-soluble pen. You can trace real leaves, print templates, or freehand draw. - Step 3: Thread Your Needle
Choose embroidery floss in fall shades. Use all six strands for bold lines, or separate into 3 strands for finer details. - Step 4: Outline the Leaf
Start with a simple backstitch or stem stitch to outline each leaf. Follow the drawn lines carefully. - Step 5: Fill the Leaf
Use satin stitch or long-and-short stitch to fill the inside of each leaf. Blend colors by switching thread shades as you stitch. - Step 6: Add Veins and Details
Use a darker shade of floss to stitch the veins inside the leaf. A stem stitch works well for thin, curved lines. - Step 7: Finish the Back
When all leaves are complete, trim excess fabric around the hoop. Tuck and glue the fabric to the inner hoop or stitch a backing fabric for a neat finish. - Step 8: Display the Art
Hang your hoop as wall decor, prop it on a mantel, or gift it as a handmade keepsake.
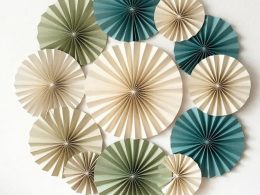
7. Paper Quilling Pumpkin Decoration

I love making paper quilled pumpkins for fall decor. This craft uses rolled paper strips to create beautiful pumpkin shapes.
The technique works well for beginners. I roll orange paper into coils and shape them into pumpkin forms.
Shop the materials


Materials Needed
- Quilling paper strips in fall colors (orange, yellow, brown, white, green)
- Quilling tool (slotted tool or needle tool)
- Craft glue (clear-drying)
- Foam or cardboard pumpkin base (or styrofoam ball trimmed to pumpkin shape)
- Scissors
- Tweezers (optional, for placing small coils)
- Ruler (to keep strip lengths consistent)
Instructions
- Step 1: Prepare the Base
If you’re using a foam or cardboard pumpkin, make sure it’s clean and smooth. This will serve as the base for your quilled strips. - Step 2: Make Basic Coils
Take quilling strips and roll them using a quilling tool. Secure the end with a tiny dab of glue. Make several tight and loose coils in different colors for variety. - Step 3: Create Shapes
Pinch some coils into teardrops, marquise (eye shapes), or scrolls to mimic pumpkin ridges and decorative patterns. - Step 4: Attach to Pumpkin Base
Apply a thin line of glue along a section of the pumpkin and press down your quilled shapes. Work in rows or sections, alternating colors for a striped effect. - Step 5: Fill the Pumpkin
Continue gluing quilled strips and shapes until the entire surface is covered. Place tighter coils toward the edges and larger shapes in the middle for balance. - Step 6: Make the Stem
Use green quilling strips to create a rolled, upright spiral for the stem. Secure with glue and attach it to the top of the pumpkin. - Step 7: Add Details
Optional: Add small green scrolls around the stem as vines, or tiny yellow coils to resemble pumpkin blossoms. - Step 8: Let Dry
Allow the glue to dry fully before moving or displaying your pumpkin.
8. Pumpkin Spice Scented Candles

I love making pumpkin spice candles for fall. You need soy wax, wicks, jars, and essential oils like cinnamon and nutmeg.
Mix the oils to create that perfect pumpkin spice smell. Pour into jars and let cool.
Shop the materials


Materials Needed
- Soy wax flakes (or paraffin/beeswax, about 1 lb for 4 small candles)
- Pumpkin spice fragrance oil (or blend of cinnamon, clove, nutmeg, vanilla, and pumpkin essential oil)
- Candle dye (optional, orange or caramel shades)
- Cotton or wood wicks with wick stickers or metal bases
- Heatproof containers (glass jars or tins)
- Pouring pitcher or double boiler
- Thermometer
- Stirring stick (wooden skewer or spoon)
- Scissors (to trim wicks)
Instructions
- Step 1: Prepare the Jars
Clean and dry your candle jars. Stick the wick to the bottom center of each jar using a wick sticker or a dab of hot glue. Keep the wick upright with a pencil or wick holder. - Step 2: Melt the Wax
Using a double boiler, melt soy wax flakes slowly over medium heat. Stir occasionally until the wax reaches about 180°F (82°C). - Step 3: Add Color (Optional)
If you want your candles tinted, stir in candle dye chips or liquid dye while the wax is still hot. - Step 4: Add Pumpkin Spice Fragrance
Remove the melted wax from heat. When it cools to around 150°F (65°C), stir in your pumpkin spice fragrance oil (about 1 oz per pound of wax). Mix thoroughly. - Step 5: Pour the Wax
Carefully pour the scented wax into your jars, leaving about ½ inch (1.25 cm) of space at the top. Hold the wick in place as you pour. - Step 6: Cool and Set
Let the candles cool undisturbed at room temperature for 24 hours. The wax will harden and shrink slightly as it sets. - Step 7: Trim the Wick
Trim wicks down to about ¼ inch (6 mm) before lighting. - Step 8: Burn and Enjoy
Light your pumpkin spice candle and let the cozy fall scent fill your home.
9. Pinecone Owl Figurines

I love making these simple owl crafts using pinecones I collect outdoors. They’re perfect for fall decorating and cost almost nothing to create.
I use felt pieces for wings and faces, then add googly eyes with hot glue. The pinecone’s natural shape works perfectly as the owl’s body.
Shop the materials


Materials Needed
- Pinecones (medium to large, dry and clean)
- Wooden beads, felt circles, or large buttons (for eyes)
- Small black beads or buttons (for pupils)
- Felt in brown, tan, and yellow (for wings, eyebrows, and beaks)
- Hot glue gun and glue sticks
- Scissors
- Small twigs (optional, for owls to perch on)
Instructions
- Step 1: Prepare the Pinecones
Choose pinecones with open scales. If they’re damp, bake them at 200°F (93°C) for 30 minutes to dry and remove bugs. - Step 2: Make the Eyes
Cut two small circles of felt or use wooden discs as a base. Glue black beads, buttons, or smaller felt circles in the center for pupils. - Step 3: Attach the Eyes
Glue the completed eyes to the top front of the pinecone. Position them close together for a classic owl look. - Step 4: Add the Beak
Cut a small triangle from yellow felt. Glue it just below the eyes. - Step 5: Add Wings
Cut two teardrop-shaped pieces of felt in brown or tan. Glue one to each side of the pinecone to look like wings. - Step 6: Add Eyebrows (Optional)
For extra character, cut thin strips of felt or use small twigs. Glue above the eyes for “eyebrows.” - Step 7: Perch and Display
If you’d like, glue the owl to a twig base or small wooden slice to make it stand upright. Let everything set before displaying.
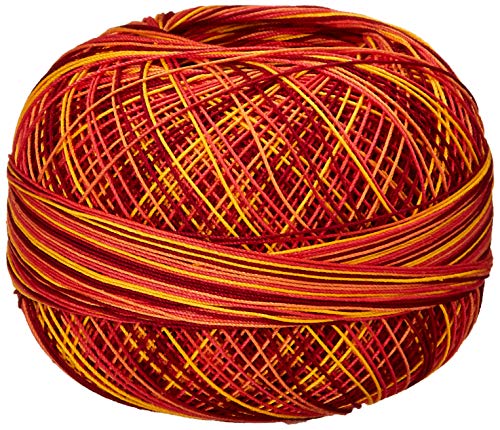
10. Crocheted Fall Coasters

I love making crocheted coasters for autumn. They protect my tables from drinks while adding cozy fall vibes to my home.
Pumpkin coasters are perfect for beginners. I can make leaf designs too.
Shop the materials


Materials Needed
- Worsted weight yarn in fall colors (orange, burgundy, mustard, brown, cream, green for stems)
- Crochet hook size H/8 (5.0 mm) or size recommended for yarn
- Scissors
- Yarn needle (for weaving in ends)
- Stitch markers (optional, to keep track of rounds)
Instructions
- Step 1: Start with a Magic Ring
Make a magic ring with your main fall color yarn. Chain 2 (counts as the first stitch). - Step 2: Create the Center
Work 10–12 double crochets into the magic ring. Pull the ring tight and slip stitch to join the round. - Step 3: Build the Rounds
For the second round, chain 2 and place 2 double crochets in each stitch around. Slip stitch to join. - Step 4: Add More Rounds
Continue crocheting in rounds, alternating colors for a striped effect. Increase evenly (for example, 1 double crochet in the first stitch, 2 in the next, repeat) to keep the coaster flat. - Step 5: Shape Like a Pumpkin (Optional)
Switch to cream yarn and crochet a small raised pumpkin in the center. Add a green chain for the stem. - Step 6: Finish Off
Once the coaster is about 4–5 inches across, slip stitch to join and fasten off. Weave in all loose ends with a yarn needle. - Step 7: Make a Set
Repeat the process with different color combinations to create a full set of fall coasters.
11. Pressed Leaf Art Frame

I love making pressed leaf art because it’s simple and beautiful. I collect fresh fallen leaves and press them between parchment paper using a heavy book.
Once dried, I arrange the leaves on a poster board inside a picture frame.
shop the materials


Materials Needed
- Freshly fallen leaves in various colors and shapes
- Heavy book or leaf press
- Parchment paper or blotting paper
- Picture frame with glass (shadow box style works best for dimension)
- White or neutral cardstock (as background)
- Craft glue or double-sided tape
- Tweezers (for precise placement)
- Scissors (optional, to trim stems)
Instructions
- Step 1: Collect the Leaves
Choose leaves in peak color that are still flat and pliable. Avoid brittle or damp leaves. - Step 2: Press the Leaves
Place leaves between parchment paper sheets inside a heavy book or leaf press. Stack additional books on top. Leave for 7–10 days until fully dry and flat. - Step 3: Prepare the Frame
Remove the backing of your frame. Cut a piece of cardstock to fit as your background. - Step 4: Arrange the Leaves
Lay the pressed leaves on the cardstock. Play with spacing, shapes, and color combinations until you find a layout you like. - Step 5: Attach the Leaves
Use small dots of craft glue or strips of double-sided tape to secure each leaf to the cardstock. Be gentle — pressed leaves are fragile. - Step 6: Assemble the Frame
Place the cardstock with leaves inside the frame. Secure the backing and ensure leaves don’t shift. - Step 7: Display
Hang your framed leaf art on a wall or place it on a shelf for seasonal decor.
12. Rustic Burlap Wreath

I love making burlap wreaths because they’re simple and beginner-friendly. You can create one in less than an hour with basic supplies. Burlap adds a cozy, farmhouse feel to any fall display.
shop the materials
Materials Needed
- Foam or straw wreath form (12–16 inches wide)
- Burlap ribbon or burlap fabric strips (about 3–4 inches wide)
- Hot glue gun and glue sticks
- Scissors
- Faux fall leaves (orange, yellow, red)
- Pinecones, acorns, or mini pumpkins (for decoration)
- Twine or floral wire (for hanging)
Instructions
- Step 1: Prepare the Wreath Base
Choose a foam or straw wreath form. If using straw, keep it wrapped in plastic to avoid shedding. - Step 2: Wrap with Burlap
Starting at the back of the wreath form, hot glue one end of the burlap ribbon in place. Wrap the burlap around the entire form, slightly overlapping each layer until it’s completely covered. Glue the end securely at the back. - Step 3: Arrange the Decorations
Lay out your faux leaves, pinecones, and acorns on one side or around the entire wreath. Experiment with placement until you find a balanced look. - Step 4: Glue the Decorations
Attach each leaf and pinecone using hot glue. Press firmly for a few seconds to ensure they stick. Layer smaller pieces (like acorns) in front for depth. - Step 5: Add a Hanger
Cut a piece of twine or floral wire and loop it around the top of the wreath to create a hanger. - Step 6: Finishing Touches
Fill in any gaps with extra leaves or pinecones. Trim loose glue strings for a clean look. - Step 7: Display
Hang your rustic wreath on a front door, mantel, or wall to welcome the fall season.
13. Felted Wool Pumpkin

I love making felted wool pumpkins from old sweaters. This simple craft costs about five dollars and takes one afternoon.
I wrap wool around a foam pumpkin base. Then I glue the pieces in place for easy fall decor.
Shop the materials


Materials Needed
- Wool roving or thick wool yarn (in pumpkin colors: orange, mustard, burgundy, cream)
- Felting needle and foam block (if using roving) OR hot glue (if using yarn wrapping method)
- Styrofoam or foam ball (for the pumpkin base)
- Brown or green felt (for the stem) OR a small twig
- Scissors
- Hot glue gun (optional, for attaching stem)
- Upholstery needle and extra yarn (for creating pumpkin grooves)
Instructions
- Step 1: Prepare the Base
Use a foam or Styrofoam ball as the pumpkin base. You can also crumple newspaper or stuff fabric into a ball shape if you prefer a no-foam option. - Step 2: Cover with Wool
For Wool Roving: Pull small pieces of roving and layer them over the base. Use a felting needle to poke the wool repeatedly into the base until it clings and smooths out. Continue until fully covered.
For Wool Yarn: Wrap yarn tightly around the foam ball, overlapping slightly until no surface shows. Secure the ends with glue. - Step 3: Shape the Pumpkin Grooves
Thread a long piece of yarn into an upholstery needle. Insert through the center of the pumpkin, loop it around the outside, and pull tight to create a groove. Repeat 5–6 times evenly spaced to form pumpkin sections. - Step 4: Add the Stem
Cut a small piece of brown felt and roll it into a tube, or use a twig for a natural look. Glue it into the top center of the pumpkin. - Step 5: Finishing Touches
Add a curly tendril with green yarn or felt if you’d like. Arrange several pumpkins together in different sizes for a festive display.
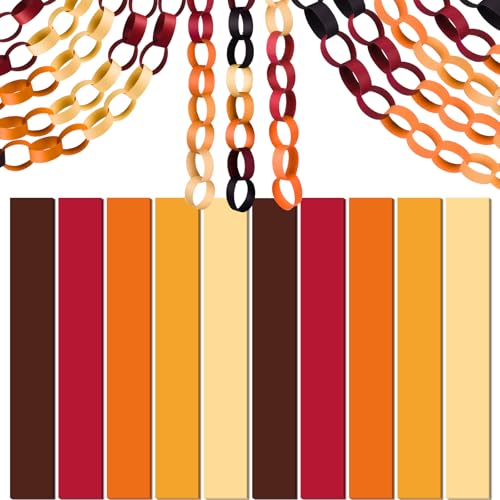
14. Autumn Leaf Garland

I love making leaf garlands because they bring fall colors indoors. I collect colorful leaves from my yard and preserve them with beeswax.
I thread the leaves together to create beautiful decorations for my home.
Shop the MATERIALS


Materials Needed
- Faux fall leaves (or pressed/dried real leaves if you prefer natural)
- Pinecones (various sizes)
- Twine or jute string (about 6–8 feet, depending on space)
- Hot glue gun and glue sticks
- Scissors
- Wooden beads or acorns (optional, for accents)
- Needle (if threading items directly onto twine)
Instructions
- Step 1: Prepare the Leaves and Pinecones
If using faux leaves, remove them from stems. If using real pressed leaves, make sure they’re fully dry and sturdy. Collect pinecones in different sizes for variety. - Step 2: Cut the Twine
Measure the space where you’ll hang the garland. Cut twine 12–18 inches longer than needed to allow for tying or draping. - Step 3: Attach the Leaves
Glue or thread leaves evenly along the twine, spacing them about 4–6 inches apart. Alternate colors for a natural fall blend. - Step 4: Add Pinecones and Accents
Glue pinecones between clusters of leaves. You can also add wooden beads or acorns by threading them onto the twine. - Step 5: Secure the Ends
Tie loops at both ends of the twine for easy hanging. Reinforce with hot glue if the garland is heavy. - Step 6: Hang and Adjust
Drape your garland across a mantel, stair railing, or window. Adjust spacing once it’s hung so it looks balanced.
15. Mason Jar Candle Holders

I love making mason jar candle holders for fall decor. They create warm, cozy lighting perfect for autumn evenings.
Wide-mouth jars work best for easy candle placement. I fill them with corn, acorns, or colorful leaves before adding candles.
Shop the materials

Materials Needed
- Mason jars (any size, wide-mouth jars work best)
- Tealight or votive candles (real or LED)
- Faux fall leaves (or pressed/dried real leaves)
- Pinecones, acorns, or cinnamon sticks (for fillers)
- Twine, raffia, or ribbon (for wrapping)
- Hot glue gun and glue sticks
- Scissors
Instructions
- Step 1: Clean the Jars
Wash and dry mason jars thoroughly so glue and decorations stick properly. - Step 2: Add Leaves Inside
Place faux or dried leaves inside the jar, pressing them gently against the glass. Position them so the candlelight will glow through. - Step 3: Add Fillers
Drop in small pinecones, acorns, or cinnamon sticks around the inside edges of the jar for extra fall detail. - Step 4: Insert the Candle
Place a tealight or votive candle in the center of the jar. LED candles are a safe alternative, especially for kids’ rooms or parties. - Step 5: Decorate the Outside
Wrap twine, raffia, or ribbon around the top of the jar. Tie a bow or knot, and glue in place if needed. For extra flair, attach a small leaf or cinnamon stick to the bow. - Step 6: Light and Display
Light your candle and place the jars on a table, mantel, or porch for a warm fall glow.
16. Wheat Bundle Wall Hanging

I love making wheat bundle wall hangings because they bring rustic charm to any room. The natural texture of dried wheat creates a beautiful fall display.
I start by gathering dried wheat stalks from craft stores. I tie them together with twine or ribbon to form bundles. I can hang these bundles on walls or doors. They work well in kitchens, living rooms, or entryways.
Shop the materials


Materials Needed
- Dried wheat stalks (about 25–40 stems, depending on bundle size)
- Twine, jute rope, or raffia
- Scissors or garden shears
- Hot glue gun (optional, for securing extra accents)
- Decorative ribbon (optional, for a polished finish)
- Hanging hook or loop.
Instructions
- Step 1: Gather the Wheat
Sort through dried wheat stalks and pick pieces of similar length. Trim the bottoms with scissors or shears so they’re even. - Step 2: Arrange the Bundle
Hold the wheat in your hand, fanning it out slightly at the top for fullness while keeping the stems tight at the base. Adjust until you’re happy with the shape. - Step 3: Secure with Twine
Wrap twine tightly around the base of the stalks several times. Tie a knot to hold the bundle together. For extra strength, double-wrap with raffia or rope. - Step 4: Add Decorative Touches
Optional: Attach a ribbon bow around the twine for a seasonal accent. You can also glue in small faux leaves, pinecones, or berries for more texture. - Step 5: Create the Hanger
Tie a loop of twine at the back of the bundle so it can hang on a wall hook or nail. - Step 6: Display
Hang the wheat bundle upright for a classic farmhouse look, or upside down for a rustic harvest vibe.
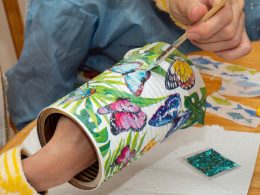
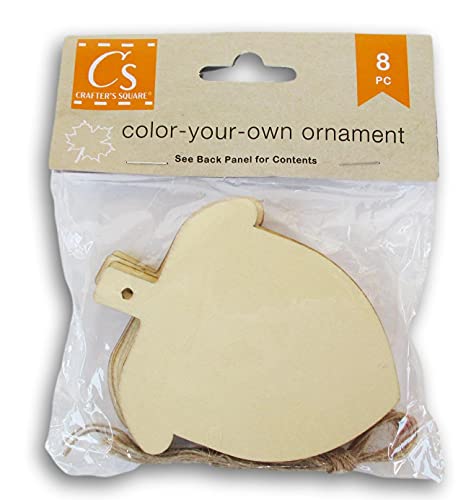
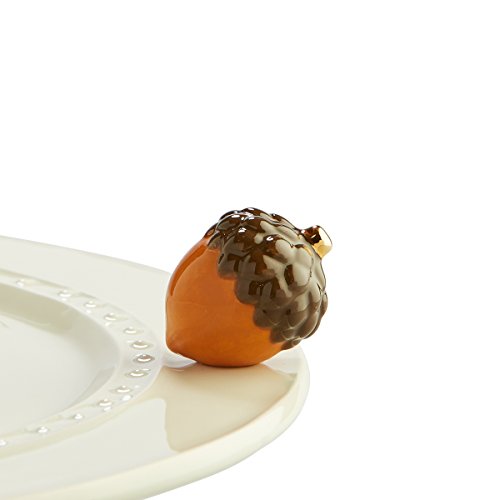
17. Hand-Painted Ceramic Acorns

I love making hand-painted ceramic acorns for fall decor. These durable pieces last for years, unlike real acorns.
I start with plain ceramic acorn shapes from craft stores. Then I paint them with bright autumn colors like orange, gold, and deep red.
Shop the materials
Materials Needed
- Plain ceramic or wooden acorn shapes (craft store or online)
- Acrylic paints in fall colors (orange, mustard yellow, deep red, brown)
- Small detail paintbrushes (flat and fine-tip)
- Palette or paper plate (for mixing colors)
- Cup of water and paper towels (for cleaning brushes)
- Clear acrylic sealer (matte or gloss finish)
- Optional: metallic paint (gold or bronze for accents)
Instructions
- Step 1: Prepare the Acorns
Wipe ceramic or wooden acorns with a damp cloth to remove dust. Let dry completely. - Step 2: Base Coat
Paint the bottom (nut) part of each acorn in a fall color like orange, mustard, or red. Use two thin coats for even coverage, letting each coat dry. - Step 3: Paint the Cap
Paint the acorn cap in brown, bronze, or even metallic gold for contrast. Use a fine brush to outline clean edges between the cap and base. - Step 4: Add Details
Use darker paint to add shading or streaks on the nut for texture. You can also add fine lines or dots on the cap to mimic natural acorn patterns. - Step 5: Dry and Seal
Allow the painted acorns to dry fully. Spray or brush on a clear acrylic sealer to protect the paint and give a glossy or matte finish. - Step 6: Display
Arrange the finished acorns in a wooden bowl, scatter them across a fall table setting, or use them in a wreath or garland.
18. DIY Wooden Pumpkin Centerpiece

I love making wooden pumpkin centerpieces for fall. They last longer than real pumpkins and add rustic charm to any table.
I start with basic wood pieces and paint them orange or leave them natural.
Shop the materials


Materials Needed
- Wooden pumpkin cutouts (from a craft store or cut from scrap wood)
- Sandpaper (medium and fine grit)
- Acrylic paints (orange, white, cream, or any fall colors)
- Small paintbrushes (flat and detail brushes)
- Painter’s tape (optional, for clean lines)
- Wooden dowel or stick pieces (for stems)
- Hot glue gun and glue sticks
- Clear matte or gloss sealant spray
- Raffia, twine, or greenery (optional for accents)
Instructions
- Step 1: Prep the Wood
Lightly sand the wooden pumpkin cutouts to smooth any rough edges. Wipe clean with a cloth. - Step 2: Base Coat
Paint the entire pumpkin in your chosen base color (e.g., orange or cream). Let it dry fully before moving to the next step. - Step 3: Add Stripes or Details
Using painter’s tape or freehand, paint alternating sections in contrasting colors like white and orange for a bold look. Apply 2 coats for full coverage. - Step 4: Distress for Rustic Effect
Lightly sand edges or ridges with fine-grit sandpaper to give the pumpkins a weathered, farmhouse-style appearance. - Step 5: Attach the Stem
Glue a small wooden dowel or stick piece to the top center of each pumpkin to serve as the stem. Hold in place until the glue sets. - Step 6: Seal and Protect
Spray the finished pumpkins with a clear acrylic sealer to protect the paint and give them a polished finish. - Step 7: Assemble the Centerpiece
Arrange your painted pumpkins on a tray, wooden box, or directly on the table. Add raffia, greenery, pinecones, or candles for extra charm.