


In This Article Show
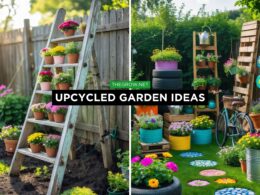
Keeping kids busy, calm, and creative can be tough, especially on rainy days or when you need a quick classroom activity. This list gives you simple, garden-themed crafts that turn paper, recyclables, and a few basic supplies into colorful projects.
Each idea is easy to set up and fun to finish, so kids feel proud of what they make. Let’s dig in and explore 15 amazing garden crafts for kids that bring flowers, bugs, and tiny plots of green to life.
1. Paper Plate Flower Garden

This craft becomes a bright paper plate filled with layered flowers, green stems, and a painted sky. Kids love choosing colors and building petals, and the round plate makes it easy for beginners to design a full garden scene.
Materials Needed:
- Paper plate (white or painted sky blue)
- Colored paper (petals, leaves, stems)
- Glue stick
- Markers or crayons
- Child-safe scissors
How to make it:
- Paint or color the plate sky blue and let it dry.
- Cut paper petals, circles for flower centers, and long strips for stems.
- Glue stems at the bottom, then layer petals and centers to make flowers; add leaves.
- Draw details like grass, clouds, and dots; let dry and hang.
2. Egg Carton Caterpillar

A row of egg carton cups turns into a cheerful caterpillar with painted segments and googly eyes. Kids enjoy picking colors for each bump and giving it a cute face; it’s quick, tactile, and great for little hands.
Materials Needed:
- Cardboard egg carton (cut into a strip of 5–6 cups)
- Paint and brushes
- Googly eyes
- Pipe cleaners (for antennae)
- Glue
How to make it:
- Cut a strip of connected egg cups and paint each cup; let dry.
- Poke two small holes in the head cup and twist in pipe cleaner antennae.
- Glue on googly eyes and paint a smile or dots.
- Display on a windowsill garden scene or play with it gently.
3. Handprint Flower Bouquet

This project makes a bouquet where each flower is a child’s painted handprint, arranged on paper stems. Kids love seeing their own handprints turn into blooms, and it makes a sweet keepsake for spring.
Materials Needed:
- Construction paper (background and stems)
- Washable paint
- Glue stick or tape
- Green paper for stems/leaves
- Marker for details
How to make it:
- Paint a child’s hand and press onto colored paper for several prints; let dry and cut around them.
- Glue green stems to a background sheet.
- Attach handprint “flowers” to stem tops and add paper leaves.
- Draw a bow at the base and add dots or lines to decorate.
4. Popsicle Stick Garden Fence Art

This craft looks like a tiny garden fence lined with paper flowers and a friendly bug perched on top. Kids enjoy building the fence shape and decorating it, and it’s an easy level project with a cute 3D feel.
Materials Needed:
- Popsicle sticks
- White paint (optional) and brush
- Glue
- Colored paper or foam flowers
- Sticker bugs or drawn paper bugs
How to make it:
- Lay sticks side by side and glue two crosswise to form a fence; paint white if desired and dry.
- Cut small triangles off the tops for picket points (optional).
- Glue on flowers and a little bug near the top.
- Add vines or grass details with marker and prop it up to display.
5. Rock Bug Family

Smooth stones become a family of bright ladybugs, bees, and beetles with painted patterns and tiny wings. Kids like choosing rock shapes, painting spots and stripes, and lining them up in a pretend garden.
Materials Needed:
- Smooth pebbles or small rocks (washed and dried)
- Acrylic paint and brushes
- Paint pens or markers (for details)
- Googly eyes (optional)
- Clear sealer (optional)
How to make it:
- Paint base colors on rocks and let dry.
- Add stripes, dots, wings, and faces with paint pens or small brushes.
- Glue on googly eyes if you like and seal when dry for outdoor use.
- Arrange them around potted plants or on a windowsill.
6. Cupcake Liner Flowers

Flattened cupcake liners turn into ruffled flowers with button or paper centers on green straw stems. Kids enjoy mixing patterns and stacking liners to make big, fluffy garden blooms.
Materials Needed:
- Cupcake liners (assorted colors/patterns)
- Paper straws or craft sticks (green)
- Buttons or paper circles
- Glue
- Green paper for leaves
How to make it:
- Flatten liners and stack 2–3 for each flower; glue a button or paper circle in the center.
- Glue the flower to the top of a straw or stick.
- Cut and attach paper leaves to the stem.
- Place in a small jar or tape to a card for display.
7. Mason Jar Herb Starter

A clear jar becomes a tiny herb garden with labeled popsicle stick markers and a sprinkle of seeds. Kids love checking sprouts each day and feeling proud of growing something they can taste.
Materials Needed:
- Small mason jar or clean glass jar
- Potting soil
- Herb seeds (basil, mint, or parsley)
- Popsicle stick plant marker
- Marker and washi tape (optional label)
How to make it:
- Fill the jar with soil, leaving an inch at the top.
- Sprinkle herb seeds and cover lightly with soil.
- Water gently, add a labeled stick marker, and decorate the jar with tape.
- Place near a sunny window and mist as needed.
8. Paper Straw Garden Windmills

These mini windmills spin on a straw stem and look like playful pinwheel flowers in a garden bed. Kids enjoy the simple folding, the quick spinning result, and choosing fun paper patterns.
Materials Needed:
- Square scrapbook paper (double-sided if possible)
- Paper straw
- Push pin or brad
- Small bead (optional for smoother spin)
- Tape
How to make it:
- Fold the square corner to corner both ways and cut small slits along each crease toward the center.
- Bring every other corner point to the center and secure with a brad (add bead first if using).
- Tape the brad legs to the top of a straw so it can spin.
- Blow gently to watch your garden windmill turn.
9. Thumbprint Garden Bugs Art

A sheet of paper fills with tiny thumbprint ladybugs, bees, and snails crawling across drawn leaves and flowers. Kids love pressing their thumbs in paint and turning prints into characters with simple pen lines.
Materials Needed:
- White or light-colored cardstock
- Washable stamp pads or paint
- Fine-tip black pen
- Markers or crayons
- Wet wipes for cleanup
How to make it:
- Press thumbs in ink or paint and stamp prints across the paper.
- Use pen to add wings, stripes, legs, and faces to each bug.
- Draw leaves, stems, and flowers to build a garden scene.
- Add color accents and let dry flat.
10. Toilet Roll Flower Pots

Painted toilet paper tubes become mini “pots” holding paper flowers with cheerful faces. Kids enjoy painting, cutting, and arranging a tiny bouquet that stands up on its own.
Materials Needed:
- Toilet paper rolls
- Paint and brushes
- Colored paper for flowers and leaves
- Glue and tape
- Markers and small pom-poms (optional)
How to make it:
- Paint tubes in terracotta or bright colors; let dry and cut small slits for “feet” so they stand.
- Cut paper flowers and leaves; glue to green paper stems.
- Place stems inside the tube and secure with tape or a paper base.
- Add pom-pom centers or drawn smiles; display on a shelf.
11. Leaf Rubbing Garden Collage

A large page fills with colorful leaf rubbings layered into a textured garden with crayon flowers and bug doodles. Kids love the “magic” of veins appearing as they rub and the freedom to build a big scene.
Materials Needed:
- Real leaves (different shapes)
- Thin paper or newsprint
- Crayons (paper peeled)
- Glue stick
- Markers for details
How to make it:
- Place leaves under thin paper with veins facing up.
- Rub crayons sideways over the paper to reveal leaf patterns.
- Cut or tear sections and glue into a garden collage.
- Add flowers, stems, and bugs with markers to finish.
12. Paper Plate Garden Snail

A coiled paper plate becomes a big snail shell covered in painted swirls and shiny sequins, with a smiling paper head. Kids enjoy the simple shape and decorating the shell with patterns and sparkle.
Materials Needed:
- Paper plate
- Paint, markers, or crayons
- Colored paper (for head and antennae)
- Sequins or stickers (optional)
- Glue and scissors
How to make it:
- Cut a spiral into the plate from the rim toward the center to suggest a shell (optional) or leave whole.
- Paint or color swirls and patterns on the plate; let dry.
- Cut and glue on a snail head and antennae to the edge.
- Add sequins or stickers and prop it upright to display.
13. Seed Mosaic Flower Art

Seeds in different sizes and colors form a sunflower or daisy on sturdy cardstock, like a textured garden mosaic. Kids enjoy sorting, gluing, and seeing the picture slowly appear piece by piece.
Materials Needed:
- Heavy cardstock or cardboard
- Assorted seeds (sunflower, lentils, beans, chia)
- Pencil for sketching
- White glue
- Small spoon or tweezers (optional)
How to make it:
- Lightly sketch a large flower with a big center and petals.
- Spread glue in sections and sprinkle or place seeds by color and size.
- Fill petals, center, and background with contrasting seeds.
- Let dry flat overnight before displaying.
14. Bottle Cap Garden Critters

Plastic or metal bottle caps become tiny beetles, spiders, and ladybugs with painted tops and pipe cleaner legs. Kids love turning trash into treasure and arranging a whole critter crew in a pretend garden.
Materials Needed:
- Bottle caps (cleaned)
- Acrylic paint and paint pens
- Pipe cleaners
- Googly eyes
- Glue
How to make it:
- Paint caps in bright colors and let dry.
- Bend pipe cleaners into legs and glue under the rim or to a cardboard base.
- Draw spots, stripes, and faces; add googly eyes.
- Group critters near potted plants or on a leaf tray.
15. Mini Fairy Garden in a Tray

A shallow tray turns into a tiny garden with a pebble path, moss “grass,” a bottle-cap pond, and a little paper house. Kids enjoy arranging the pieces like a scene and changing it over time.
Materials Needed:
- Shallow tray or pie tin
- Pebbles and small stones
- Craft moss or green felt
- Bottle caps, twigs, and leaves
- Paper house or small figurines
How to make it:
- Line the tray with moss or felt for grass.
- Add a pebble path, a twig fence, and a bottle-cap “pond.”
- Fold and place a simple paper house; tuck in leaves for trees.
- Rearrange anytime and display on a shelf or windowsill.