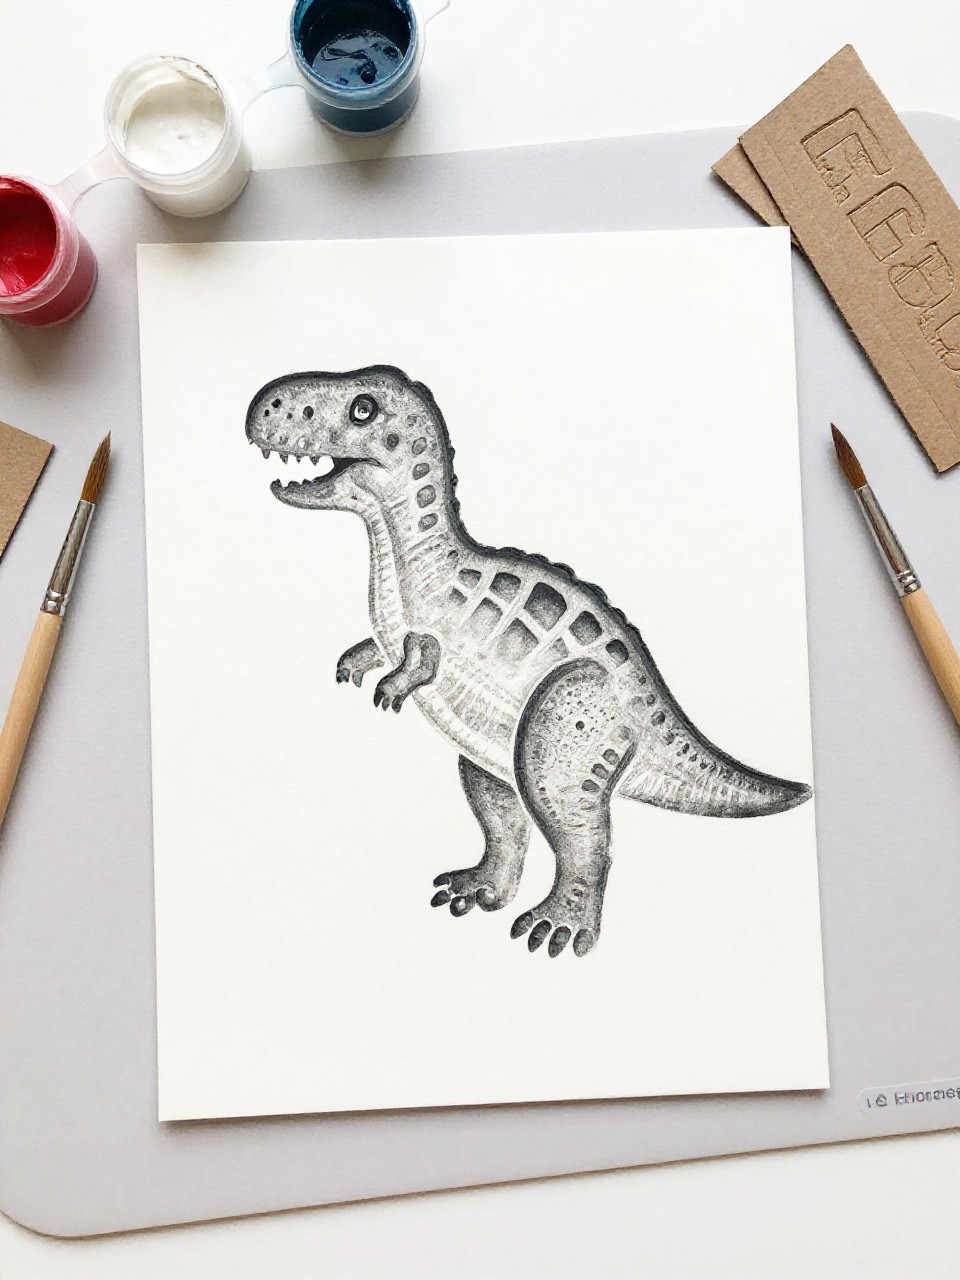
In This Article Show
Keeping kids busy can be hard, especially on rainy days or when you need a quick classroom activity. If your child loves dinosaurs, these easy paper crafts are perfect for playtime and learning.
This list gives you fun, simple ideas you can make with basic supplies you probably already have.
From masks to puppets, each project helps kids imagine and create—let’s jump into the dinosaur paper fun!
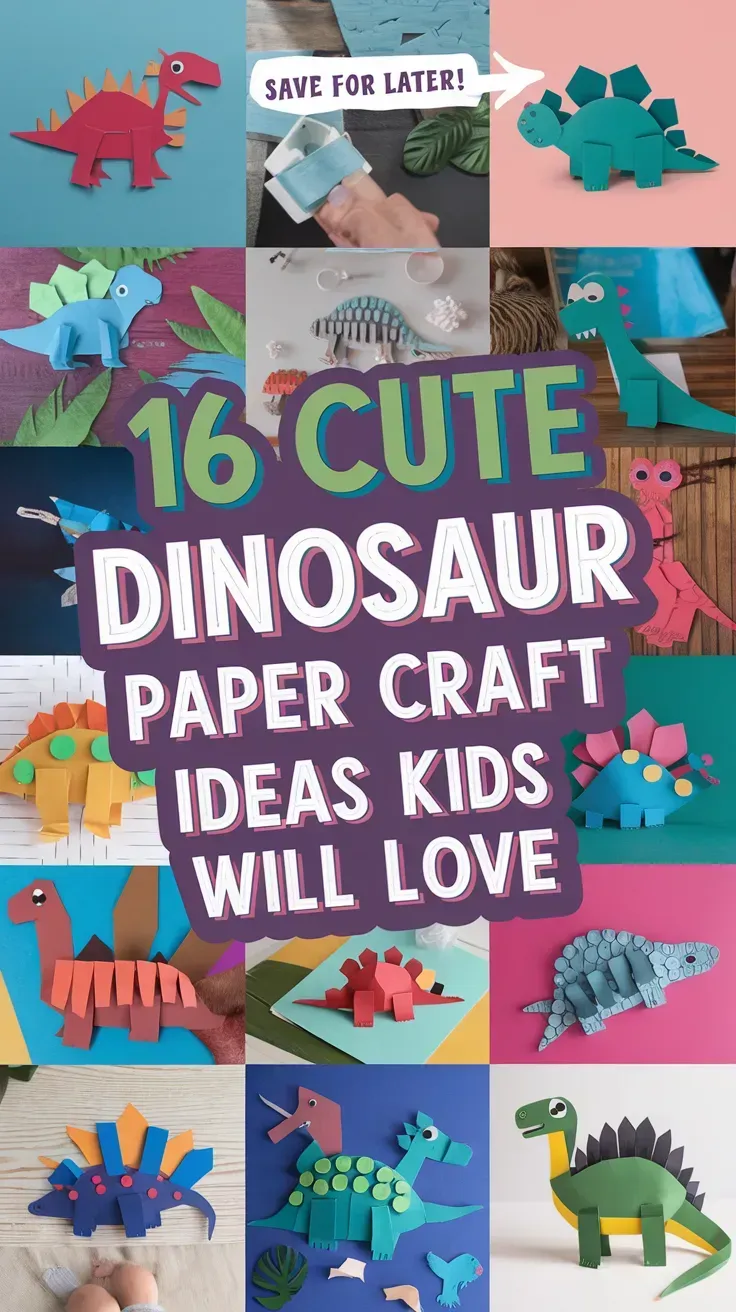
1. Paper Plate Dinosaur Mask
This mask turns a simple paper plate into a friendly dinosaur face with cut-out eyes, spiky paper frills, and a big smile. Kids love trying on different dinosaur “characters,” and the bold shapes make it easy for beginners.
Materials Needed:
- Paper plate (full size)
- Colored construction paper (for spikes and frill)
- Elastic string or craft stick
- Markers or crayons
- Glue stick and scissors
How to make it:
- Cut two eye holes in the paper plate and a mouth shape if desired.
- Cut triangles from coloured paper and glue them around the top for spikes and frills.
- Add nostrils, spots, and teeth with markers or glued-on paper pieces.
- Tape an elastic string to the sides or glue on a craft stick handle; let dry before wearing.
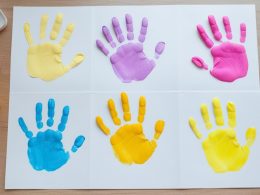
2. Handprint Stegosaurus Art
This craft turns a traced hand into a stegosaurus, where the fingers become the back plates and the palm forms the body. Kids love seeing their own handprint become a dinosaur, and it makes a sweet keepsake.
Materials Needed:
- Construction paper (body color + background)
- Pencil for tracing
- Markers or crayons
- Googly eye (optional)
- Glue stick and scissors
How to make it:
- Trace a child’s hand on colored paper and cut it out with the fingers pointing up.
- Glue the handprint onto a background sheet as the stegosaurus body and plates.
- Draw legs, a tail, and spots; add a googly eye or draw one.
- Write the child’s name and date; let glue dry and display.
3. Popsicle Stick T-Rex Puppet
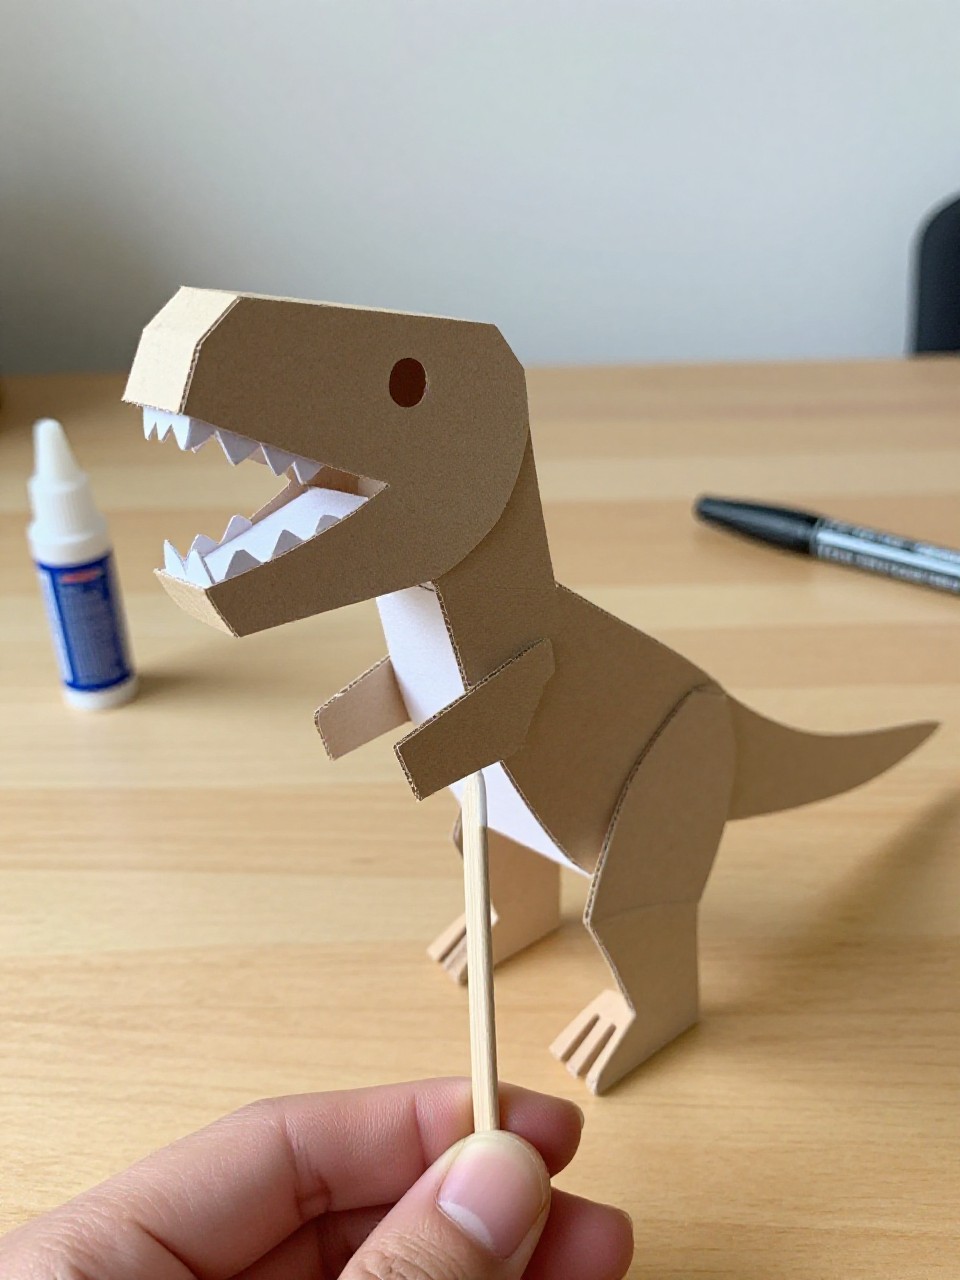
A bold T-Rex head made from layered paper mounts onto a popsicle stick for roaring puppet play. Kids enjoy moving it around, acting out stories, and adding sharp—but safe—paper teeth.
Materials Needed:
- Popsicle stick (jumbo preferred)
- Green or brown cardstock
- White paper (teeth)
- Black marker
- Glue stick and scissors
How to make it:
- Cut two matching T-Rex head shapes from cardstock.
- Glue one head to the top of the stick, then glue the second head on the back to sandwich it.
- Add white paper teeth, an eye, nostril, and scales with marker.
- Let dry, then use for dino roars and puppet shows.
4. Dinosaur Footprint Stamping Art
This painting creates rows of dino footprints across paper using simple cardboard triangle and oval stamps. Kids love the repeat pattern and the surprise of lifting the stamp to reveal crisp tracks.
Materials Needed:
- White or kraft paper sheet
- Scrap cardboard (cut into stamp shapes)
- Washable paint (green, brown, gray)
- Paper plate (palette)
- Baby wipes or paper towels
How to make it:
- Cut cardboard into small triangles and ovals; tape a small tab to hold.
- Pour paint on a plate and dab the stamps lightly.
- Press stamps to the paper in footprints, making trails that crisscross.
- Let dry flat; hang as a prehistoric mural.
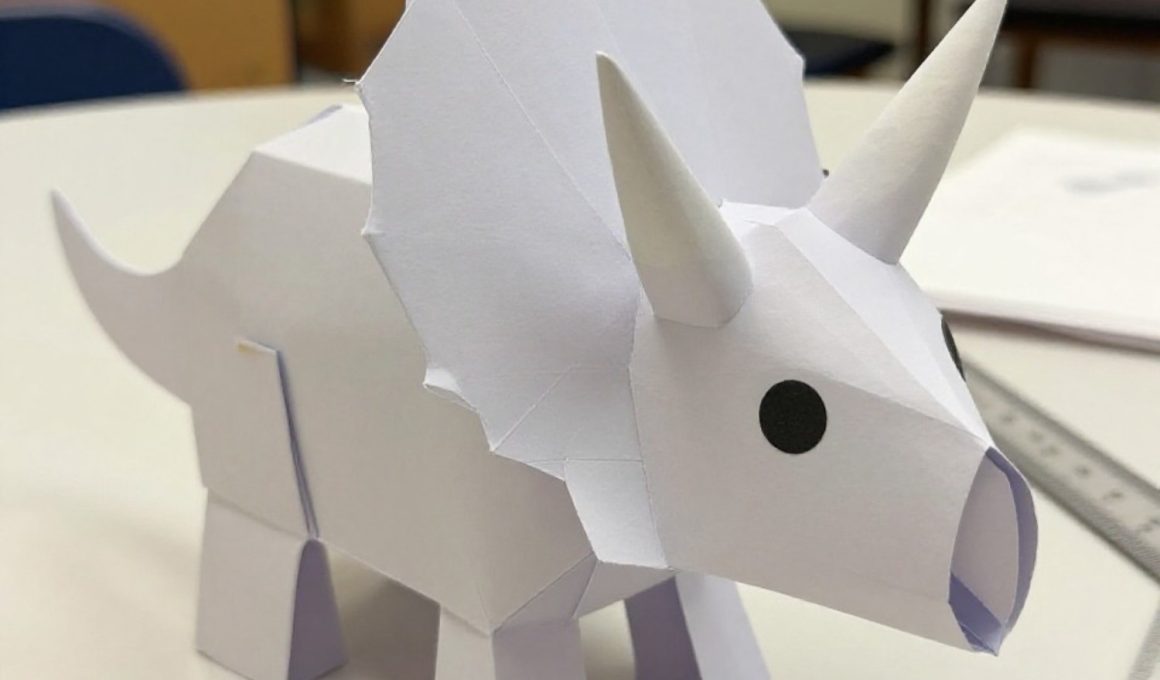
5. Accordion Paper Triceratops
This cheerful triceratops uses a folded accordion body for a bouncy, wiggly look and 3 paper horns. The folding is simple and satisfying, and kids enjoy making the dinosaur “walk” on the table.
Materials Needed:
- Colored construction paper (two colors)
- Black marker
- Googly eyes (optional)
- Glue stick and scissors
- Ruler for folding
How to make it:
- Cut a long strip for the body and fold it back and forth into an accordion.
- Cut and glue on a head with frill, three horns, and a tail in a contrasting color.
- Draw toes and spots; add eyes.
- Stand it up and gently tap to make it wiggle.
6. Paper Plate Brachiosaurus
A paper plate becomes a long-necked brachiosaurus by cutting the body from the curve and adding a tall neck and tail. Kids love the big shape and enjoy painting gentle patterns on the “skin.”
Materials Needed:
- Paper plate
- Construction paper (for neck, tail, legs)
- Washable paint and brush or markers
- Googly eye (optional)
- Glue stick and scissors
How to make it:
- Cut a large oval from the paper plate for the body.
- Cut a long neck, tail, and four legs from colored paper and glue to the body.
- Paint or color spots and stripes; add an eye.
- Let dry and stand it up with folded paper leg tabs if desired.
7. Dino Egg Surprise Cards
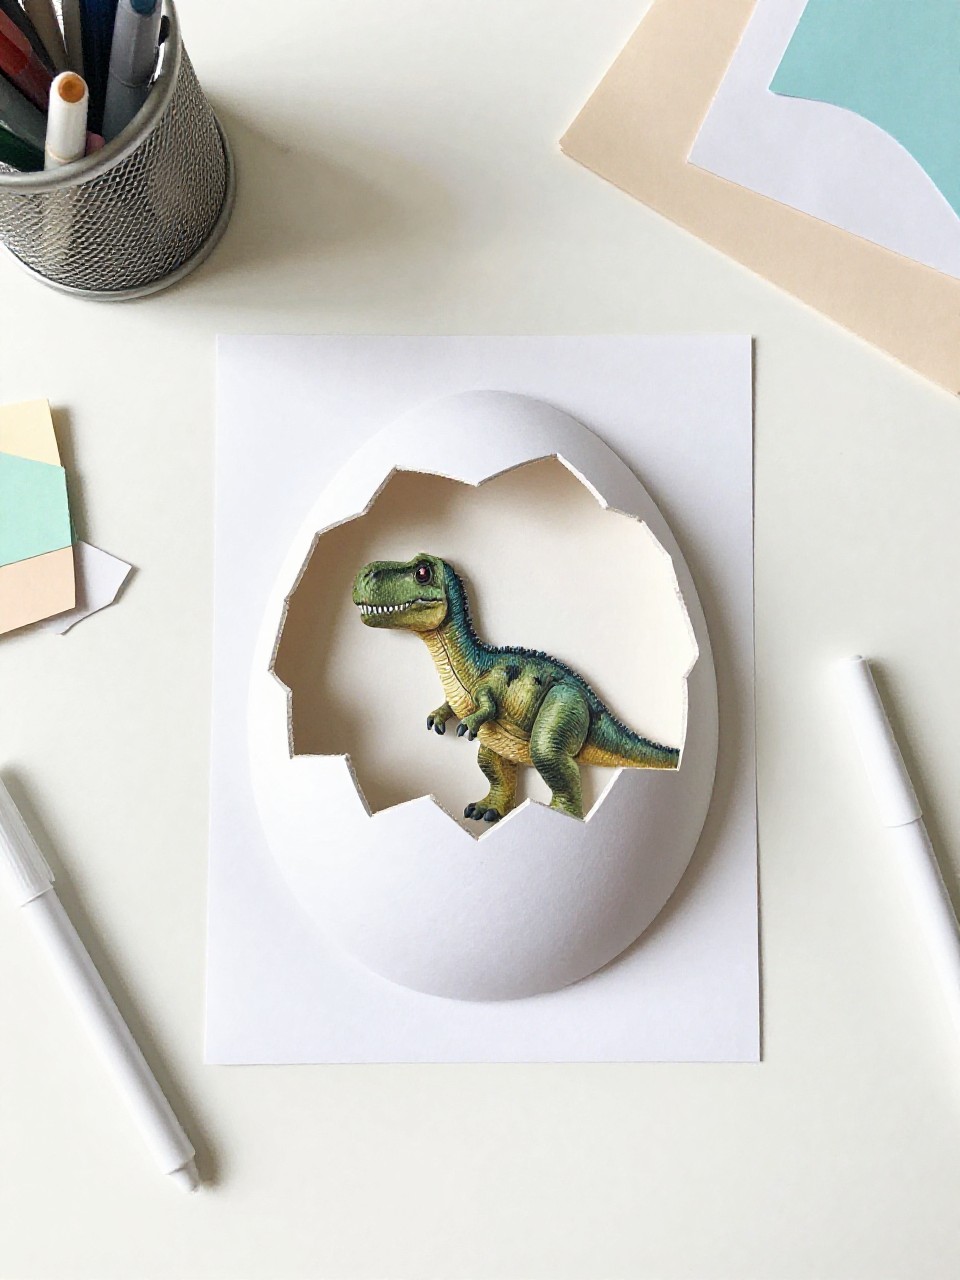
These interactive cards look like spotted dinosaur eggs that open to reveal a baby dino inside. Kids love the peekaboo moment and giving them as gifts or classroom notes.
Materials Needed:
- Cardstock (for egg and card base)
- Colored paper (baby dino)
- Brads or washi tape hinge
- Markers
- Scissors and glue
How to make it:
- Fold a card and cut an oval “egg” from cardstock, then cut a zigzag crack across it to make two halves.
- Attach the top half to the card with a brad or washi hinge.
- Cut and glue a small baby dino inside; add spots to the egg.
- Write a message and let any glue dry before opening and closing.
8. Paper Cup Parasaurolophus
A paper cup turns upside down to become the stout body, topped with a curved head crest made from paper. Kids enjoy the silly shape and the chance to design bright, patterned crests.
Materials Needed:
- Paper cup
- Construction paper (head, crest, tail, legs)
- Markers or paint
- Googly eyes (optional)
- Glue and scissors
How to make it:
- Turn the cup upside down as the body.
- Cut and glue on a head with a long curved crest, plus tail and legs.
- Decorate the body and crest with dots, stripes, and scales.
- Let dry and display as a little desk buddy.
9. Dinosaur Shadow Puppets
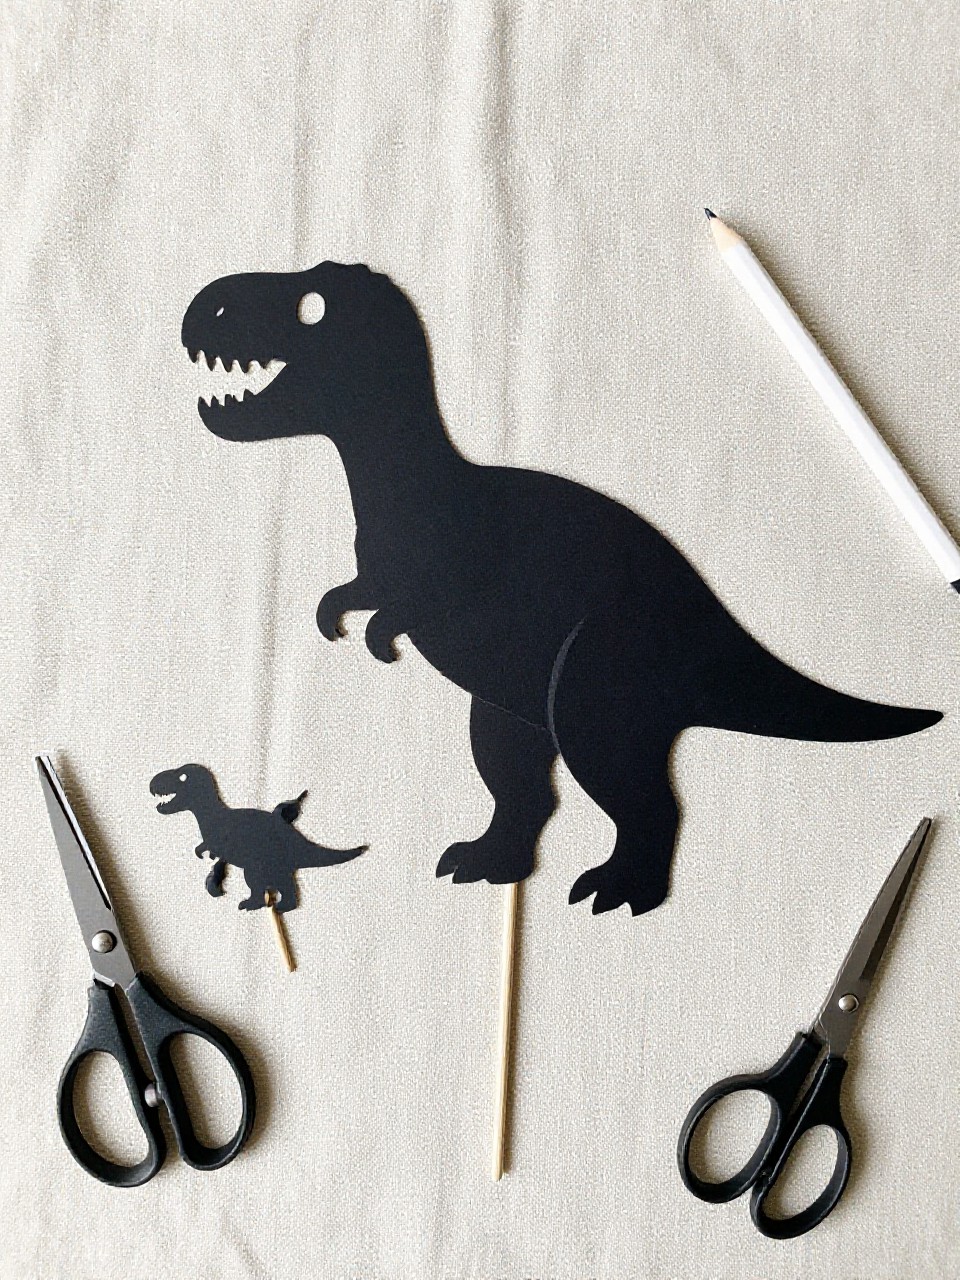
Silhouette dinosaur shapes mounted on sticks make crisp shadows for simple storytelling on a wall or behind a sheet. Kids love turning off the lights and creating their own dino theater.
Materials Needed:
- Black cardstock
- Wooden skewers or popsicle sticks
- White chalk pencil (for tracing)
- Tape or glue
- Scissors
How to make it:
- Draw or trace simple dinosaur outlines on black cardstock.
- Cut them out and tape a stick to the back of each shape.
- Add small cutouts for eyes or spikes if desired.
- Shine a flashlight on a wall or sheet and perform a dino show.
10. Torn-Paper Mosaic Stegosaurus

This collage uses torn bits of paper to fill a stegosaurus outline, giving it a textured, colorful look. Kids enjoy ripping paper and choosing colors, and the edges make a cool “scaly” effect.
Materials Needed:
- Printed or drawn stegosaurus outline
- Assorted colored paper scraps
- Glue stick
- Black marker
- Scissors (optional)
How to make it:
- Draw or print a large stegosaurus shape on a sheet.
- Tear colored paper into small pieces and glue them inside the outline.
- Add plate shapes in a contrasting color; outline edges with marker.
- Let dry and mount on a contrasting background.
11. Fold-and-Cut Brontosaurus Garland
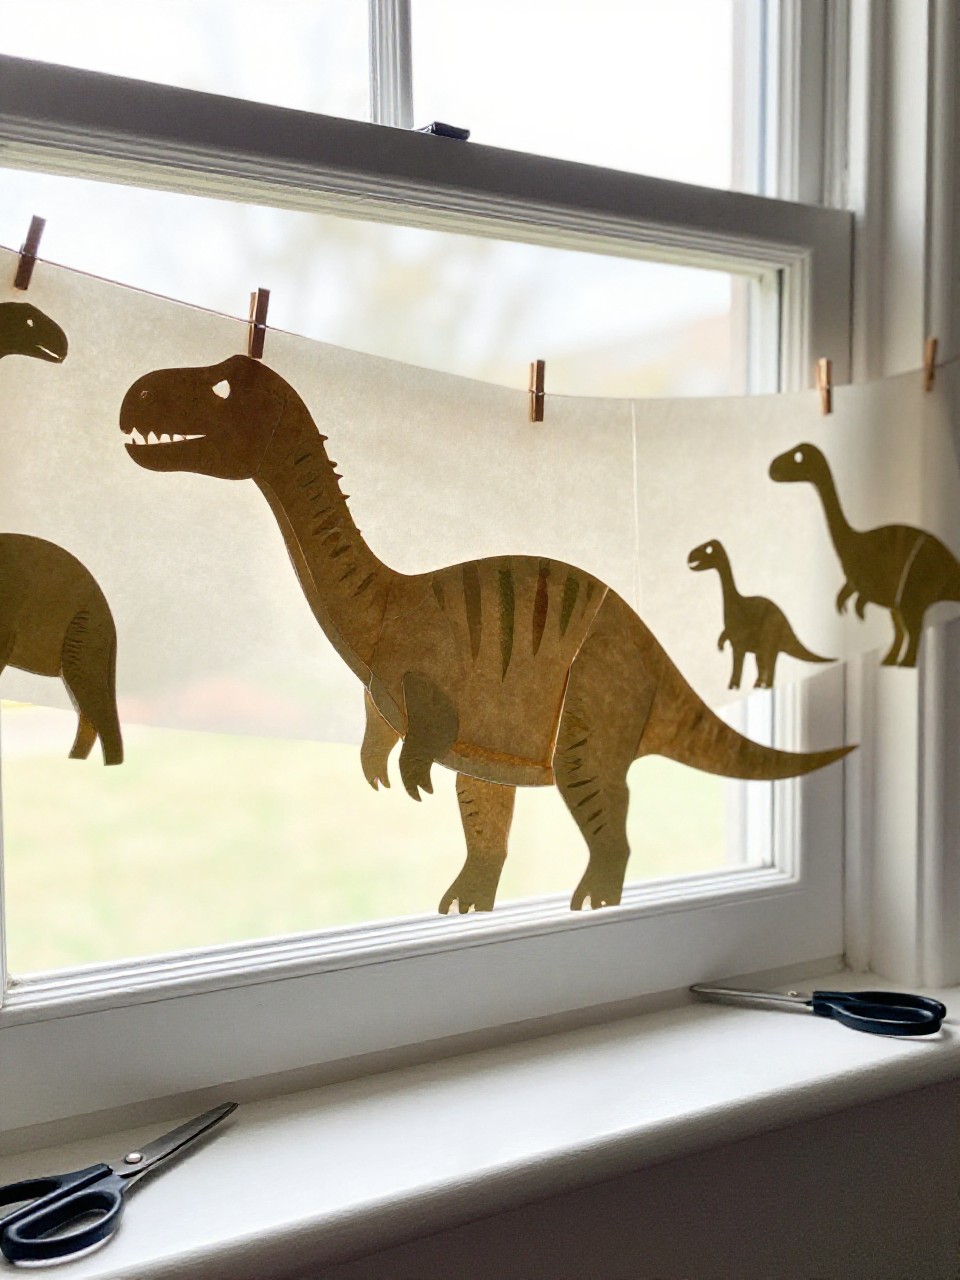
A chain of connected brontosauruses makes a fun window or bulletin board garland. Kids love the surprise of unfolding the paper to see a whole row of dinos holding tails.
Materials Needed:
- Long strip of lightweight paper
- Pencil
- Scissors
- Markers
- String and tape (optional for hanging)
How to make it:
- Fold the paper accordion-style into equal panels.
- Draw a simple brontosaurus profile making sure the tail touches the edge fold.
- Cut around the outline, leaving the tail connection uncut at the folds; unfold.
- Add eyes and spots; tape to string to hang as a garland.
12. Clothespin Chomping Raptor
A painted clothespin becomes a snapping raptor mouth, with paper jaws and teeth that open and close. Kids enjoy the clicky bite action and making gentle “nibbles” on paper.
Materials Needed:
- Wooden clothespin
- Acrylic or washable paint
- White and colored paper (teeth and head)
- Black marker
- Glue
How to make it:
- Paint the clothespin and let it dry.
- Cut two small jaw shapes and glue one to each moving side of the clothespin.
- Add paper teeth, an eye, and stripes with marker.
- Test the chomp and display on a note or bookmark.
13. Paper Bowl Dino Nest with Eggs
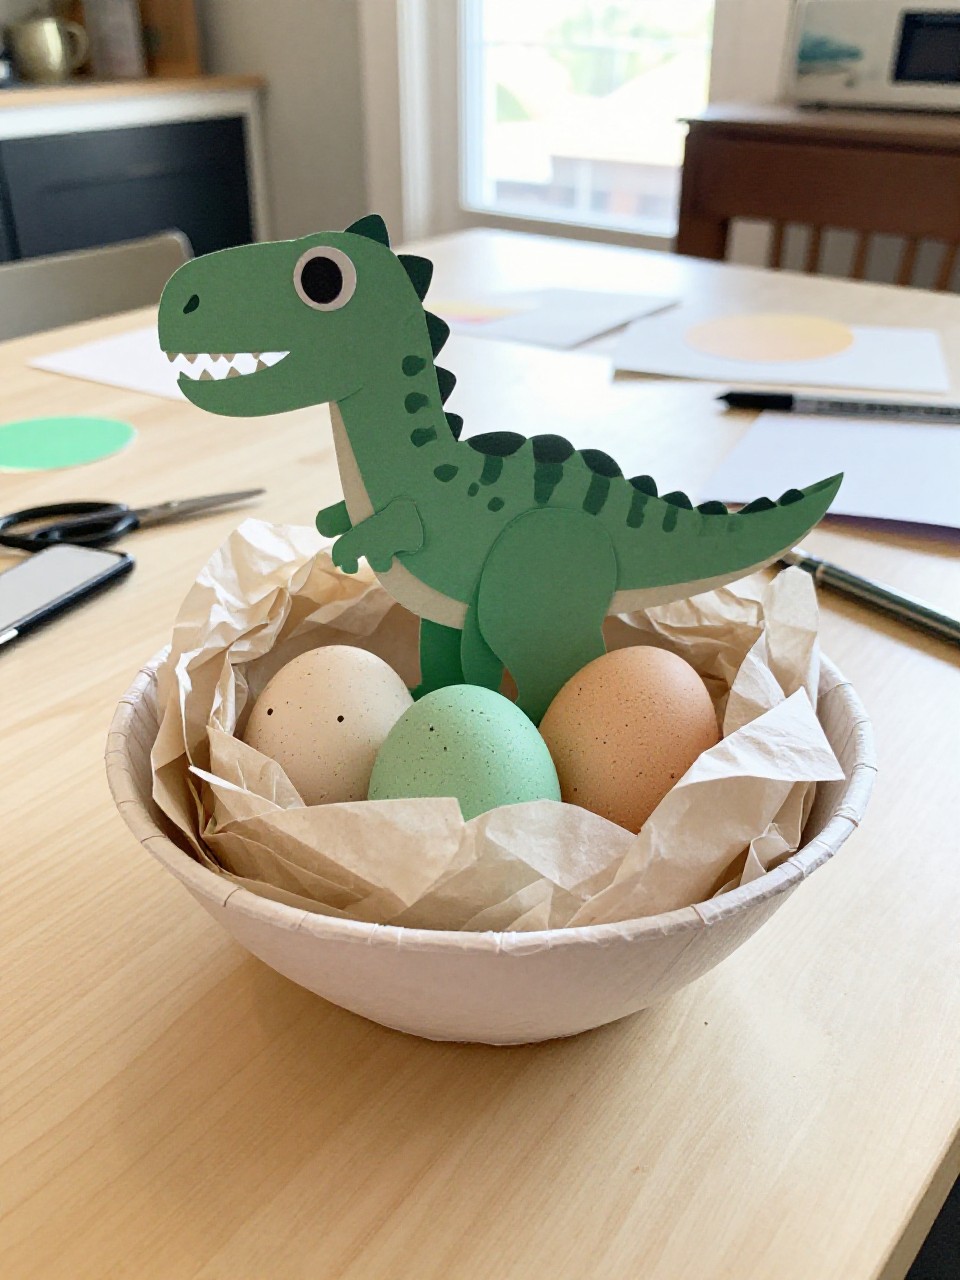
A paper bowl becomes a cozy nest filled with speckled paper eggs and a tiny baby dino head peeking out. Kids love arranging the nest and choosing patterns for their eggs.
Materials Needed:
- Paper bowl
- Brown tissue paper or shredded paper
- Cardstock (eggs, baby dino)
- Markers or paint
- Glue and scissors
How to make it:
- Line the bowl with tissue or shredded paper as nesting material.
- Cut oval eggs from cardstock and decorate with spots and stripes.
- Make a small baby dino head to peek from a cracked egg.
- Arrange eggs in the nest and glue lightly to hold.
14. Spiral Paper Pterodactyl Mobile
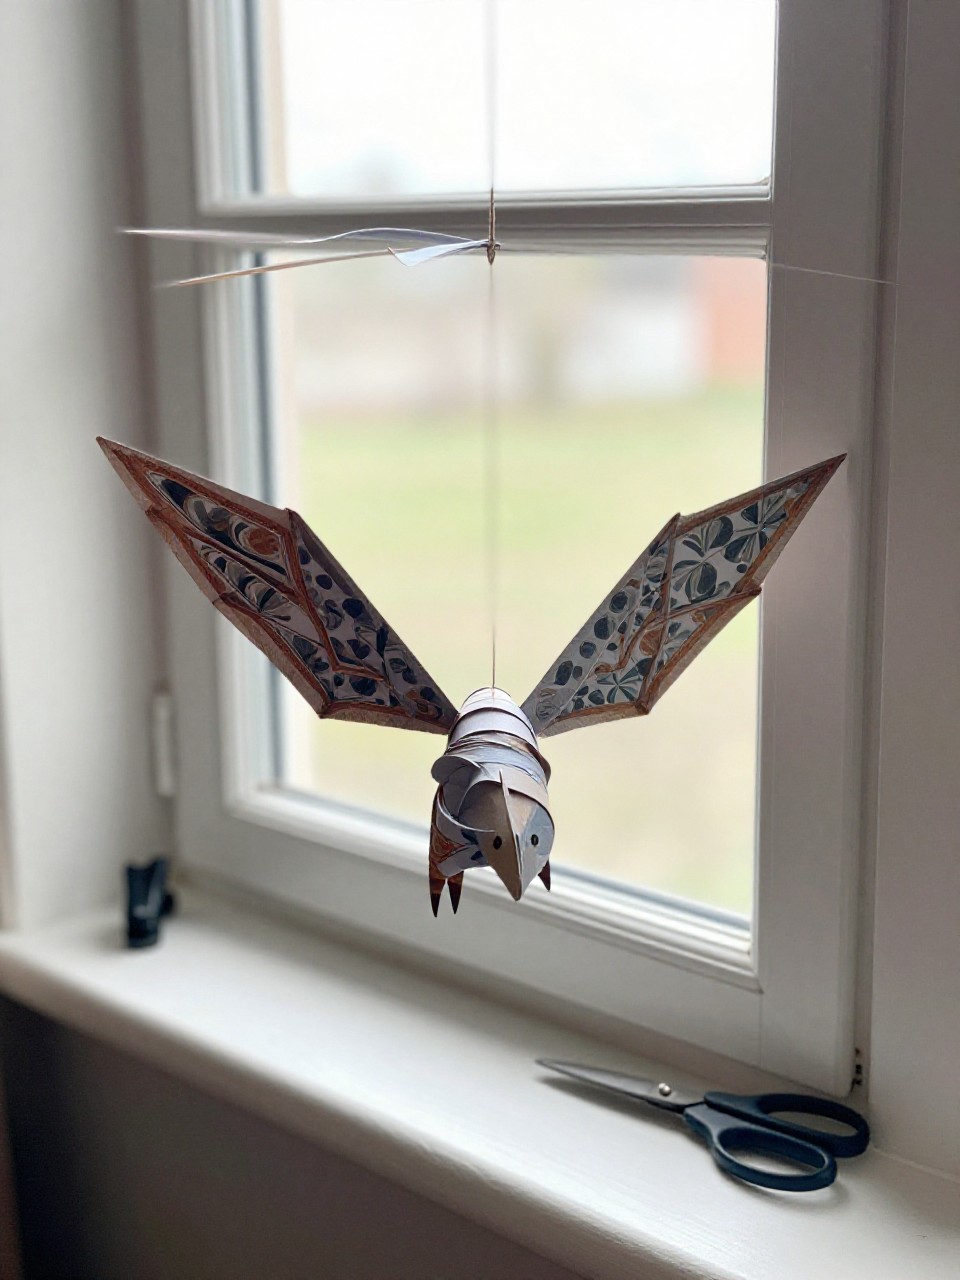
A spiral-cut paper becomes a dangling body with wings, making a floating pterodactyl that twirls in the air. Kids enjoy watching it spin and choosing bright wing patterns.
Materials Needed:
- Lightweight colored paper
- Pencil and compass or round object
- String or thread
- Marker
- Scissors and hole punch
How to make it:
- Draw and cut a circle, then cut it into a spiral from outer edge to center.
- Cut and glue wing shapes across the upper spiral section; add a small head and beak.
- Punch a hole at the top and tie a string.
- Hang near a vent or window and watch it twirl.
15. Cut-and-Fold Dino Standee Scene
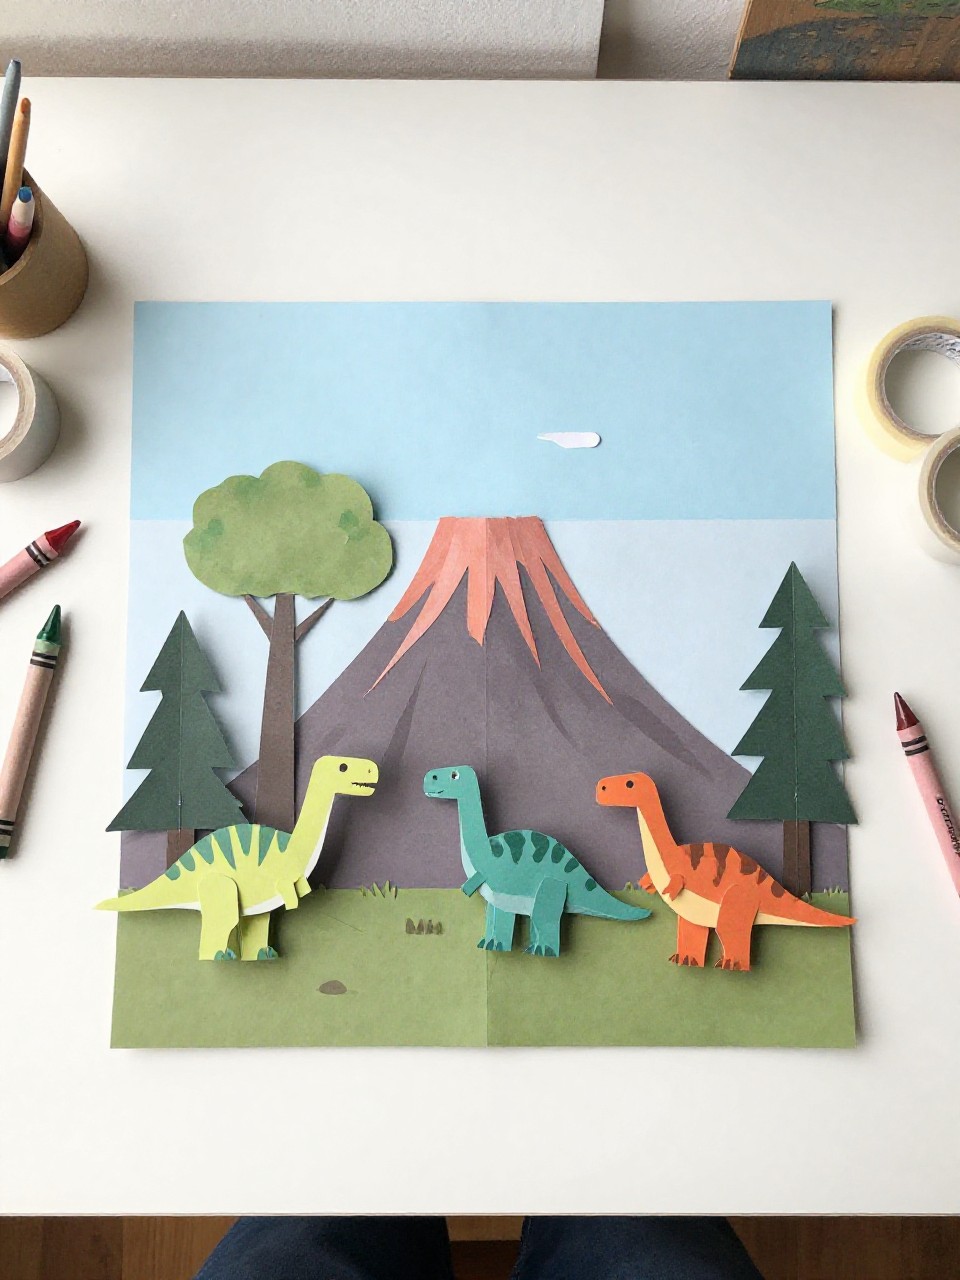
This tabletop scene features a volcano backdrop with simple cut-and-fold standing dinosaurs in front. Kids love arranging the scene and moving dinos around for pretend play.
Materials Needed:
- Cardstock (background and dinos)
- Markers or crayons
- Glue stick (optional)
- Scissors
- Tape (for stands)
How to make it:
- Draw and color a volcano and sky on a cardstock sheet for the backdrop.
- Draw and cut out simple dinosaurs; color them.
- Make stands by folding small cardstock strips into triangles and tape to the backs of dinos.
- Set up the scene and play.
16. Origami Dino Bookmarks
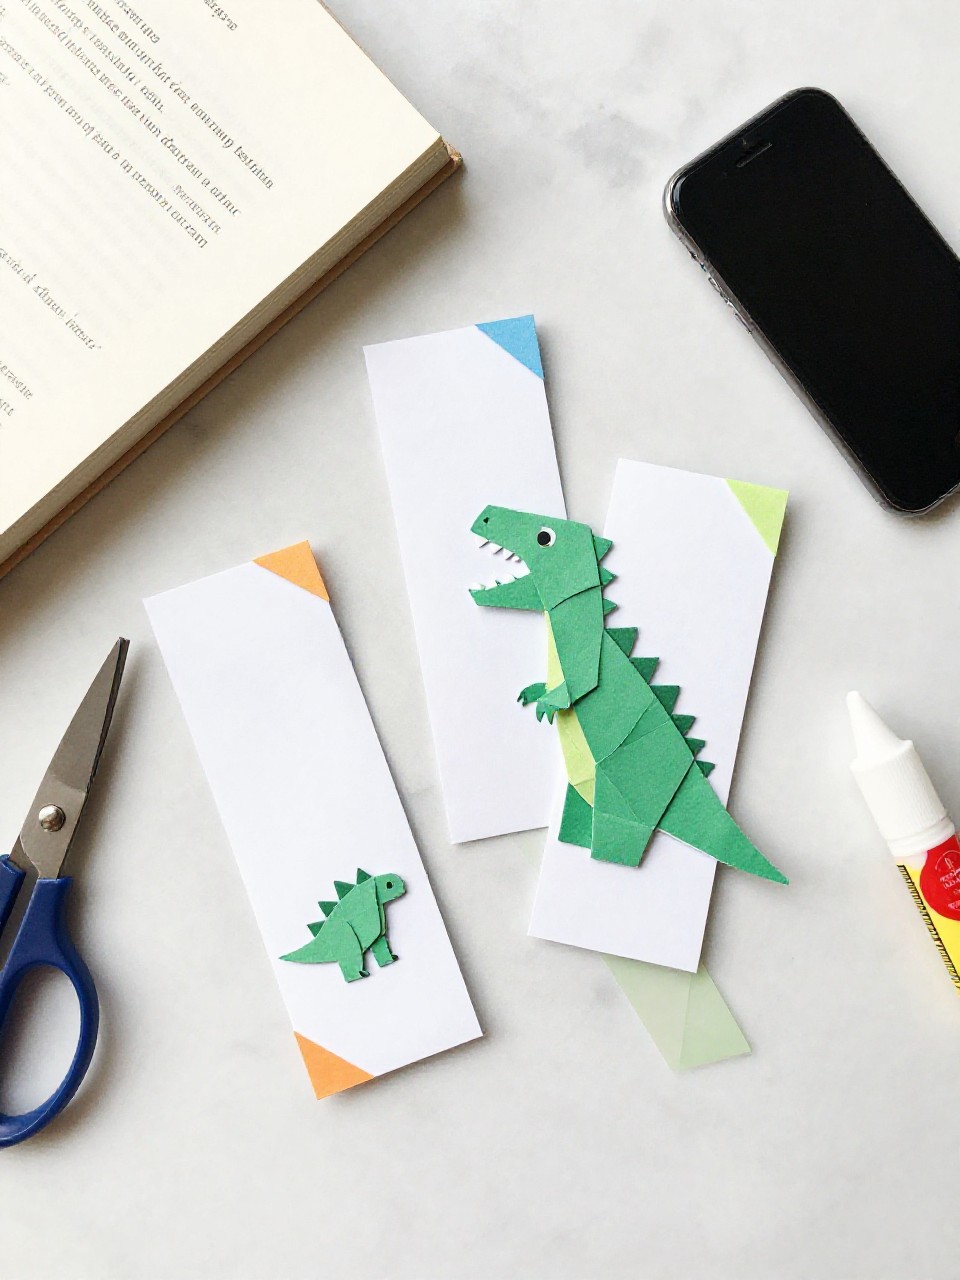
These corner bookmarks fold into cute dinosaur heads with paper spikes that stick out from the page. Kids like making sets in different colors and using them for reading time.
Materials Needed:
- Square origami paper
- Colored paper (for spikes and teeth)
- Glue stick
- Black marker
- Scissors
How to make it:
- Fold a square into a corner bookmark base (triangle with pocket).
- Cut and glue small triangles for spikes and teeth onto the flap.
- Draw eyes and scales with marker.
- Slip onto a book corner and enjoy.