
In This Article Show
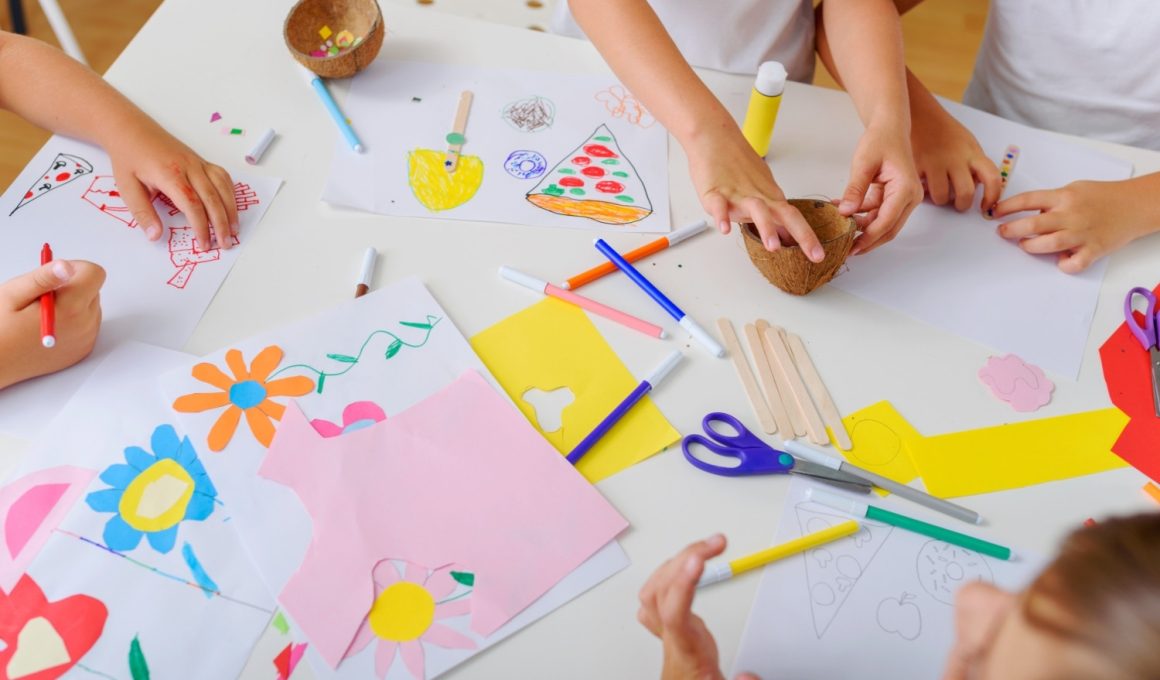
Keeping kids busy in summer can be tough, especially when the days are long and attention spans are short. Whether you’re at home, in a classroom, or planning a rainy-day activity, quick and simple projects can save the day.
This list brings you easy, colorful crafts that feel like summer—think sunshine, oceans, picnics, and backyard fun. Each idea uses common supplies and gives kids a satisfying result they’ll want to display. Let’s dive into these sunny projects!
1. Paper Plate Sunshine Face

A bright yellow sun with a happy face and bold ray “petals” made from paper strips or painted handprints. Kids love choosing the facial expression and making extra-long rays that feel cheerful and bold—great for beginners.
Materials Needed:
- Paper plate (white)
- Yellow paint or crayon
- Orange and yellow construction paper strips
- Black marker
- Glue stick
How to make it:
- Paint or color the paper plate yellow; let it dry.
- Cut paper strips for rays and glue them around the plate’s back edge.
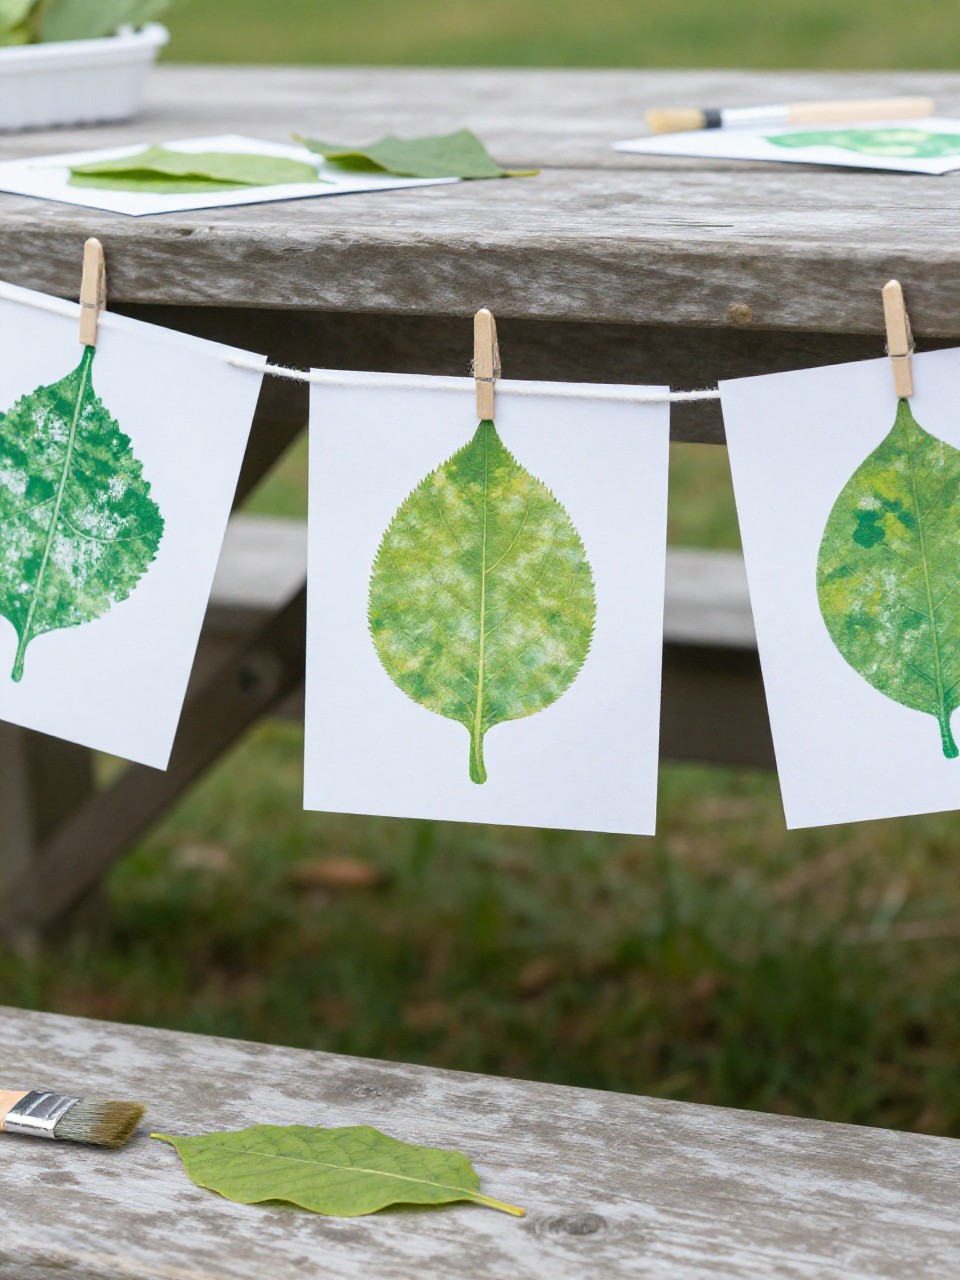
- Draw eyes, nose, and a big summer smile on the front.
- Add rosy cheeks or glitter, then hang in a sunny window.
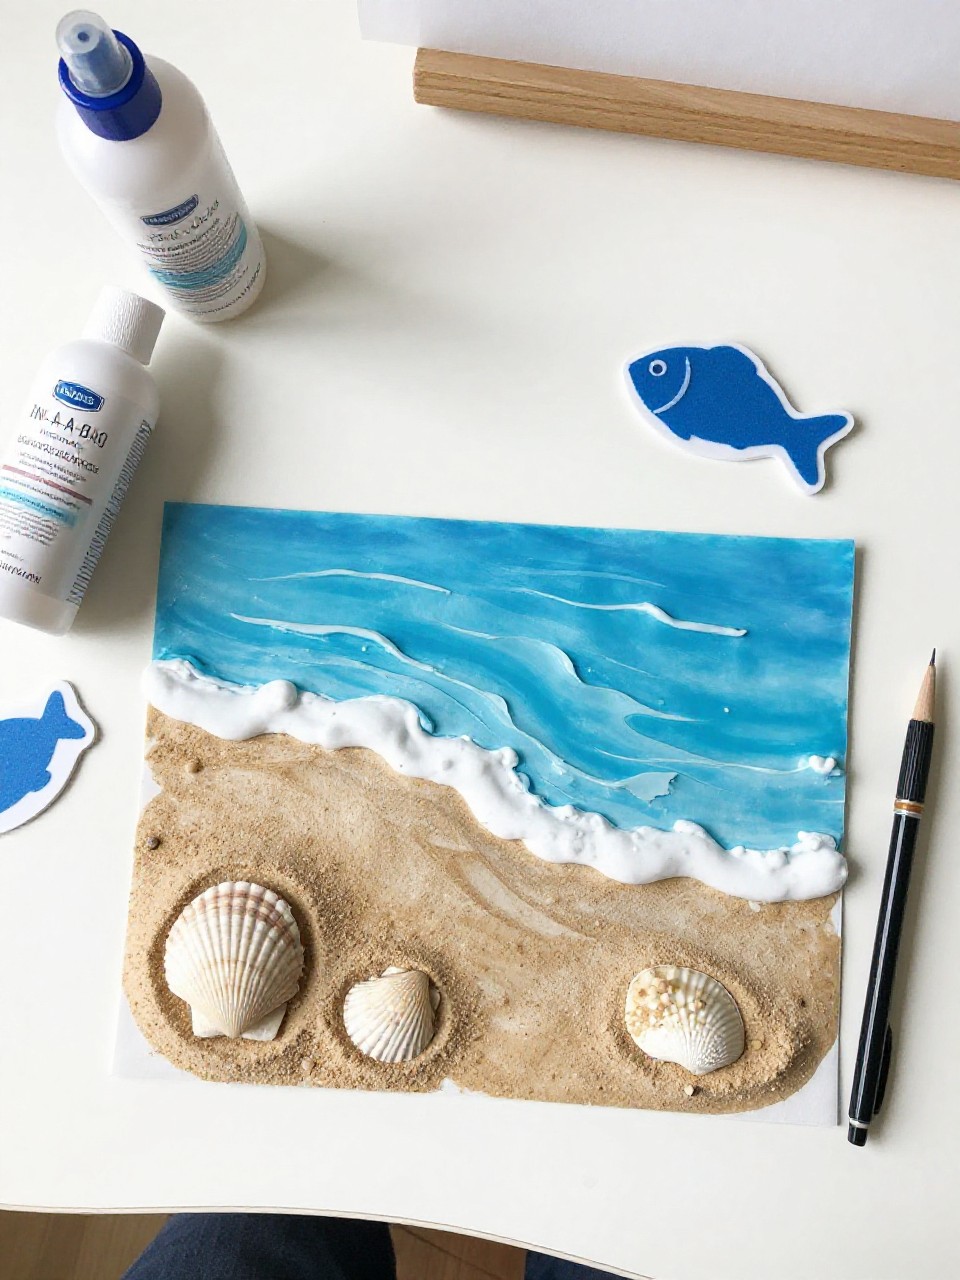
2. Ocean Wave Collage
Layered blue paper strips and tissue become rolling summer waves with a simple paper boat or fish on top. Kids enjoy tearing paper, choosing textures, and arranging waves for a calming, beachy scene.
Materials Needed:
- Blue construction paper (various shades)
- White tissue paper (foam)
- Cardstock background
- Glue stick
- Optional: small boat or fish cutouts
How to make it:
- Tear or cut blue strips and glue them in wavy layers on the background.
- Add white tissue along edges for sea foam.
- Glue a small boat or fish cutout riding the waves.
- Press flat, then display like a mini seascape.
3. Watermelon Paper Fan
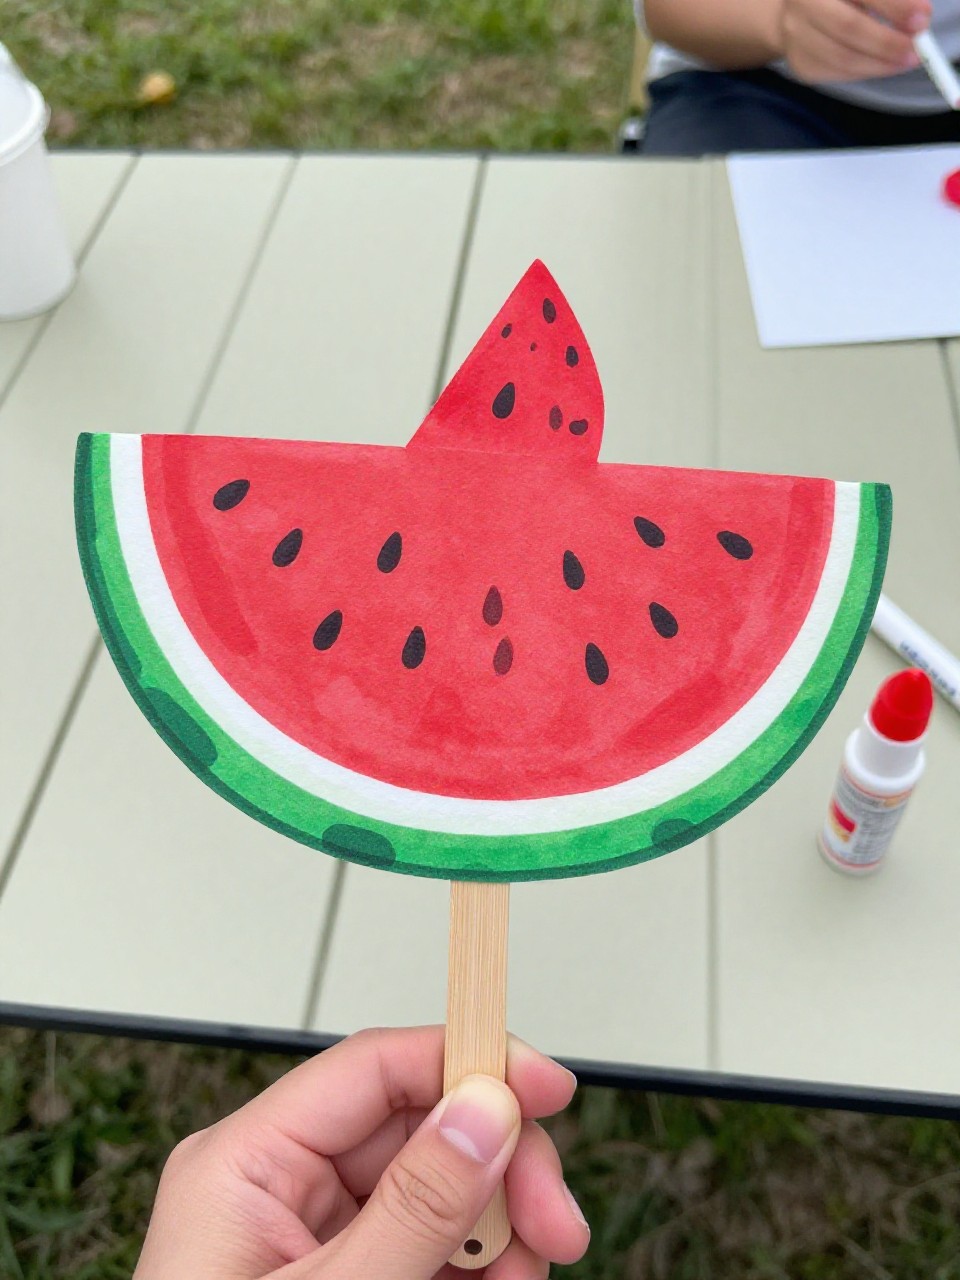
A folding hand fan that looks like a juicy slice of watermelon with black seed dots and a green rind edge. Kids love how it actually works to keep them cool on hot days, and the painting is quick and satisfying.
Materials Needed:
- White printer paper
- Markers or paint (red/pink, green, black)
- Craft stick or popsicle stick
- Tape or glue
- Stapler (optional)
How to make it:
- Color the paper red/pink with a green stripe along one long edge; add black seed dots.
- Accordion-fold the paper along the short side.
- Pinch one end, secure to a craft stick with tape or staples.
- Fan open and wave for instant summer breeze.
4. Sea Turtle Egg Carton Craft

A cute sea turtle made from an egg carton cup body, painted green with a paper shell pattern and friendly eyes. Kids enjoy transforming simple scraps into a lovable ocean animal that stands on its own.
Materials Needed:
- Egg carton cups
- Green paint and brush
- Green construction paper (flippers, head, tail)
- Googly eyes or marker
- Glue
How to make it:
- Cut out an egg carton cup and paint it green; let dry.
- Cut flippers, head, and tail from paper.
- Glue paper parts under the cup; add eyes and shell spots.
- Dry fully, then slide your turtle across the “sand.”
5. Popsicle Stick Beach Sign

A mini beach sign that says “Beach,” “Surf,” or “Summer,” made from painted popsicle sticks tied together with twine. Kids like picking beachy colors and writing simple words that feel like a vacation.
Materials Needed:
- Popsicle sticks
- Acrylic paint or markers
- Twine or yarn
- Glue
- Black marker
How to make it:
- Paint sticks in ocean blues, sandy tans, or sunny yellows; let dry.
- Glue 3–5 sticks side by side with two cross-sticks on back for support.
- Tie twine at the top for hanging; write a short summer word.
- Hang on a doorknob or backpack.
6. Bubble Wrap Starfish Prints

Starfish prints made by pressing bubble wrap painted with coral or orange onto paper, then adding dots and faces. Kids love the bumpy texture and the surprise print reveal every time they press.
Materials Needed:
- Bubble wrap piece
- Paint (orange, coral, yellow)
- White cardstock
- Black marker
- Optional: glitter glue
How to make it:
- Cut a starfish shape from bubble wrap or use a rectangle for stamping.
- Paint the bumpy side and press onto cardstock.
- Add eyes, smiles, and dotted patterns with marker or paint.
- Let dry and add a little glitter for sparkle.
7. Nature Sun Catchers

Colorful sun catchers made by sticking pressed flower petals and leaves onto clear contact paper to hang in a window. Kids enjoy gathering summer nature and seeing sunlight glow through their designs.
Materials Needed:
- Clear contact paper
- Pressed petals and leaves (or tissue paper bits)
- Paper frame (construction paper ring)
- String or yarn
- Scissors
How to make it:
- Cut two equal contact paper squares; peel one and place sticky side up.
- Arrange petals and leaves in a simple pattern.
- Seal with the second piece; trim and add a paper frame.
- Punch a hole, tie yarn, and hang in a sunny window.
8. Pool Noodle Boats

Tiny sailboats made from pool noodle slices with a paper sail and a straw mast that really float. Kids love racing them in a tub, sink, or kiddie pool and changing sail colors.
Materials Needed:
- Pool noodle slice (1–2 inches thick)
- Drinking straw
- Foam sheet or cardstock (sail)
- Toothpick (optional flag)
- Marker
How to make it:
- Cut a slit in the noodle slice for the straw mast.
- Cut a triangle sail, poke two holes, and slide onto straw.
- Push straw into the slit; add a tiny flag if you like.
- Test float and decorate the sail with a name.
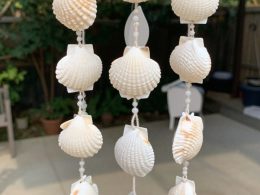
9. Seashell Mosaic Frame
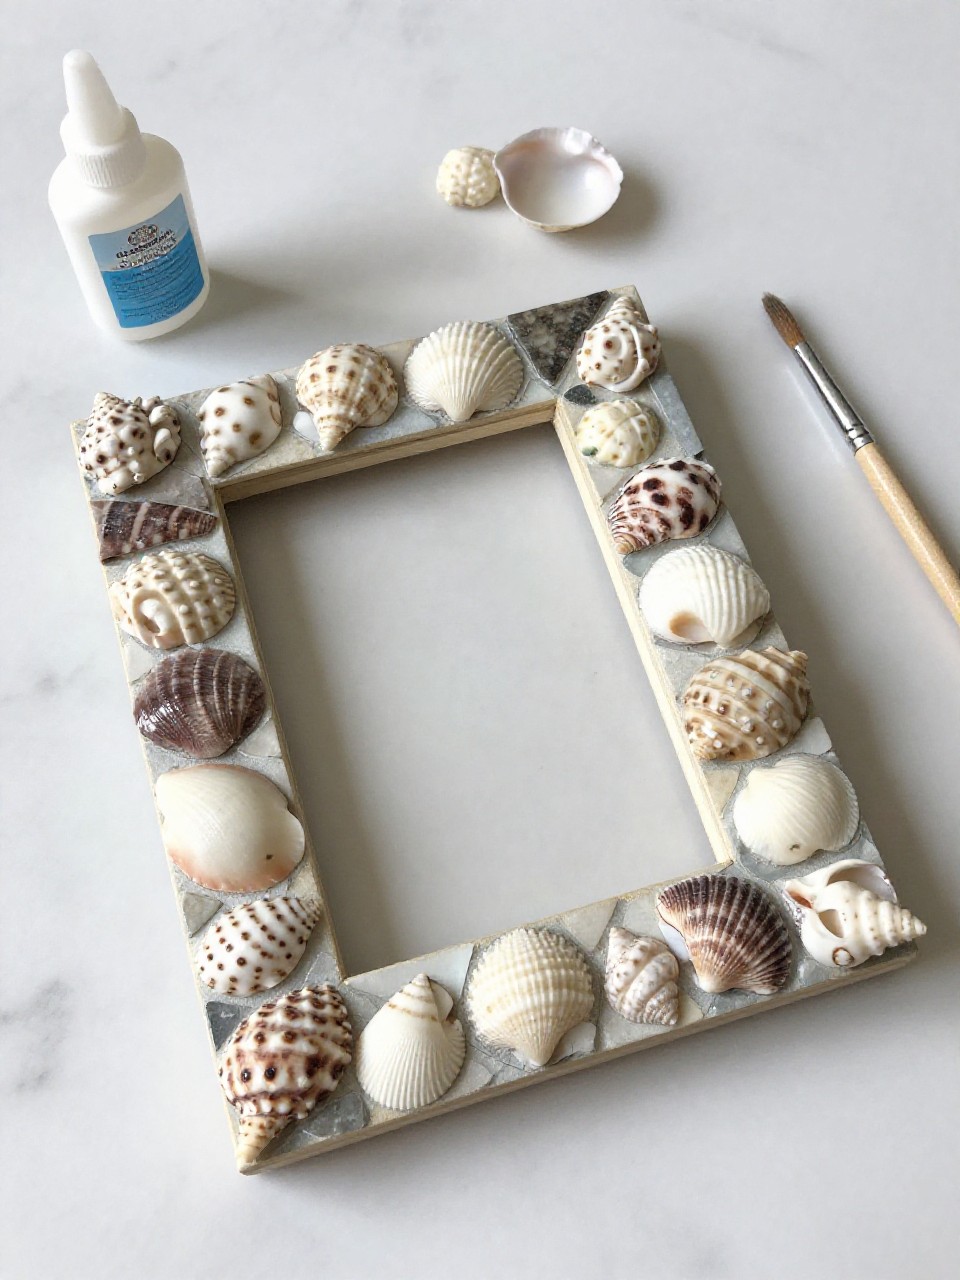
A picture frame decorated with seashells and tiny beach finds, perfect for a summer photo. Kids enjoy arranging shells and creating a textured border that feels special and keeps memories.
Materials Needed:
- Plain wooden frame or cardboard frame
- Seashells and small pebbles
- White glue or tacky glue
- Acrylic paint (optional)
- Ribbon (optional hanger)
How to make it:
- Paint the frame if desired; let dry.
- Glue shells and pebbles around the border.
- Fill small gaps with tiny shells or sand sprinkles.
- Let dry flat, add a summer photo, and display.
10. Handprint Campfire Art

A paper campfire using red, orange, and yellow handprints as flames over simple brown “logs.” Kids love seeing their hands turn into a cozy summer campfire scene.
Materials Needed:
- Red, orange, yellow paper (or paint for prints)
- Brown construction paper
- Cardstock background
- Glue stick
- Black marker
How to make it:
- Trace and cut handprints from warm-colored paper (or stamp painted hands).
- Glue two brown paper strips as crossed logs on the background.
- Layer handprints above the logs like flames.
- Add little sparks or stars with marker.
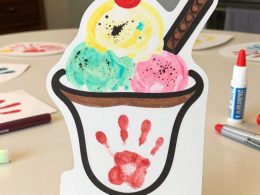
11. Ice Cream Cone Pom-Pom Art

A sweet collage that looks like an ice cream cone topped with colorful pom-poms and sprinkles. Kids love picking “flavors” and building tall stacks that feel playful and summery.
Materials Needed:
- Cardstock background
- Brown paper (cone)
- Pom-poms (assorted colors)
- White glue
- Sequins or paper sprinkles (optional)
How to make it:
- Cut and glue a triangle cone onto the background; draw waffle lines.
- Glue pom-poms in scoops above the cone.
- Add sequins or paper bits as sprinkles and a red pom-pom cherry.
- Let dry flat and display like a dessert menu.
12. Rainbow Windsock
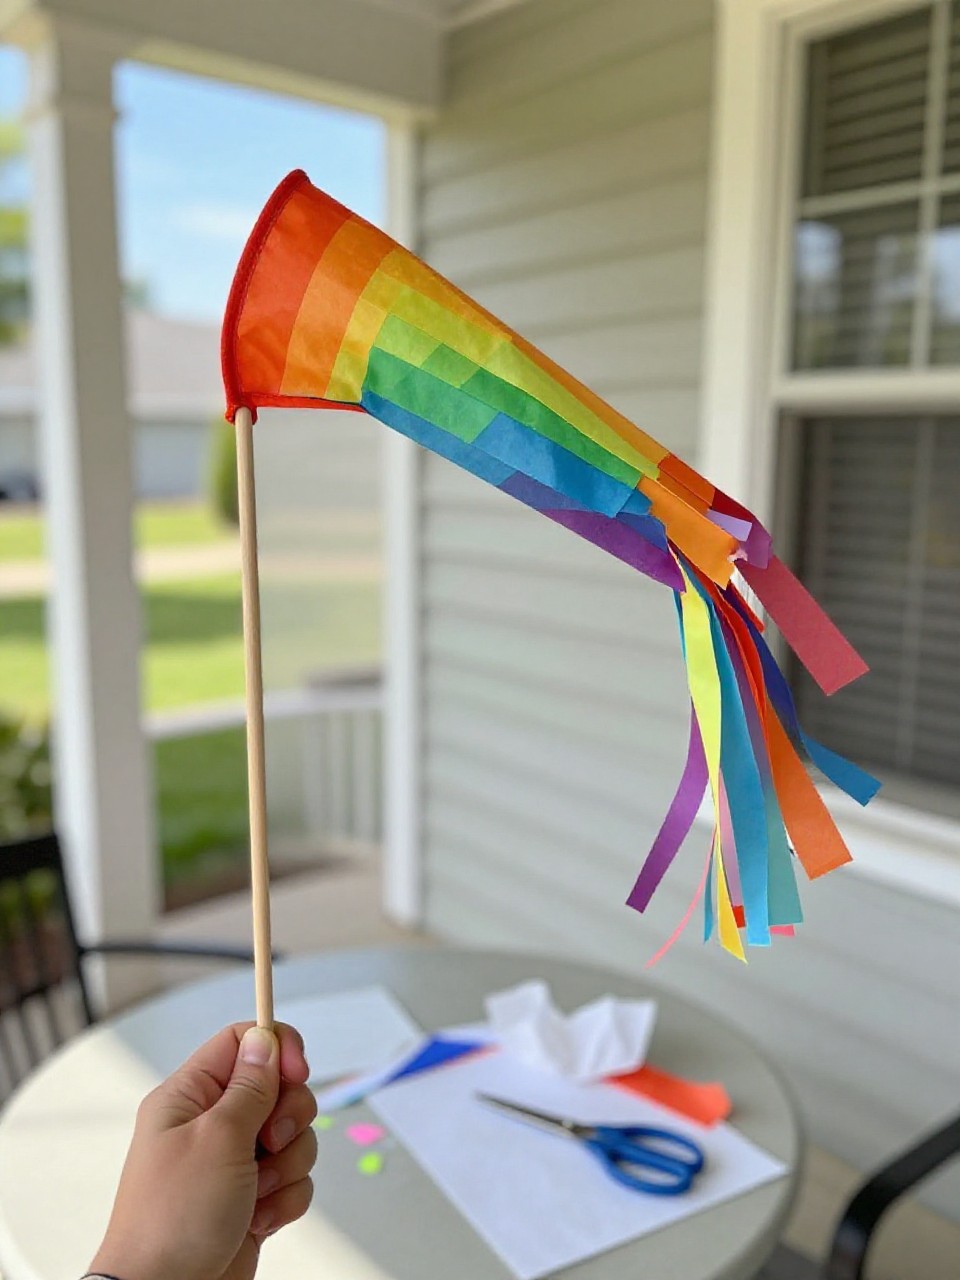
A hanging windsock with a painted cup or can on top and long rainbow streamers that dance in summer breezes. Kids enjoy choosing colors and watching it flutter outdoors.
Materials Needed:
- Paper cup or clean tin can (edges taped)
- Acrylic paint or markers
- Tissue paper or ribbon (rainbow colors)
- String for hanging
- Glue or tape
How to make it:
- Paint or color the cup/can; let dry.
- Glue or tape long tissue/ribbon strips inside the rim to hang down.
- Punch two holes, tie string for a hanger.
- Hang on a porch or tree branch and watch it flow.
13. Beach-In-A-Bag Sensory Art
A sealable bag filled with hair gel “water,” sand, shells, and tiny foam fish to squish and move around. Kids love the cool, squishy feel and arranging mini beach scenes without any mess.
Materials Needed:
- Quart-size zip bag
- Clear hair gel (blue dye optional)
- Clean sand
- Small shells or foam fish
- Tape
How to make it:
- Spoon gel into the bag; tint with a drop of blue if desired.
- Add a thin layer of sand, shells, and small fish shapes.
- Seal and tape the top edge to prevent leaks.
- Press and swirl to make waves and tide pools.
14. Sunprint Leaf Flags
Simple bunting flags that show leaf and flower shapes made by sun printing with diluted paint or sun-reactive paper. Kids enjoy the magic of seeing shapes appear after time in the summer sun.
Materials Needed:
- Light-colored fabric or cardstock triangles
- Leaves and flowers
- Washable paint diluted with water (or sunprint paper)
- Paintbrush and tray
- String and clothespins or tape
How to make it:
- Brush diluted paint on the triangles; quickly place leaves/flowers on top.
- Set in bright sun until mostly dry, then lift plants to reveal silhouettes.
- Punch holes and string up the flags.
- Hang as a garden or porch banner.
15. Jellyfish Cup Dangler
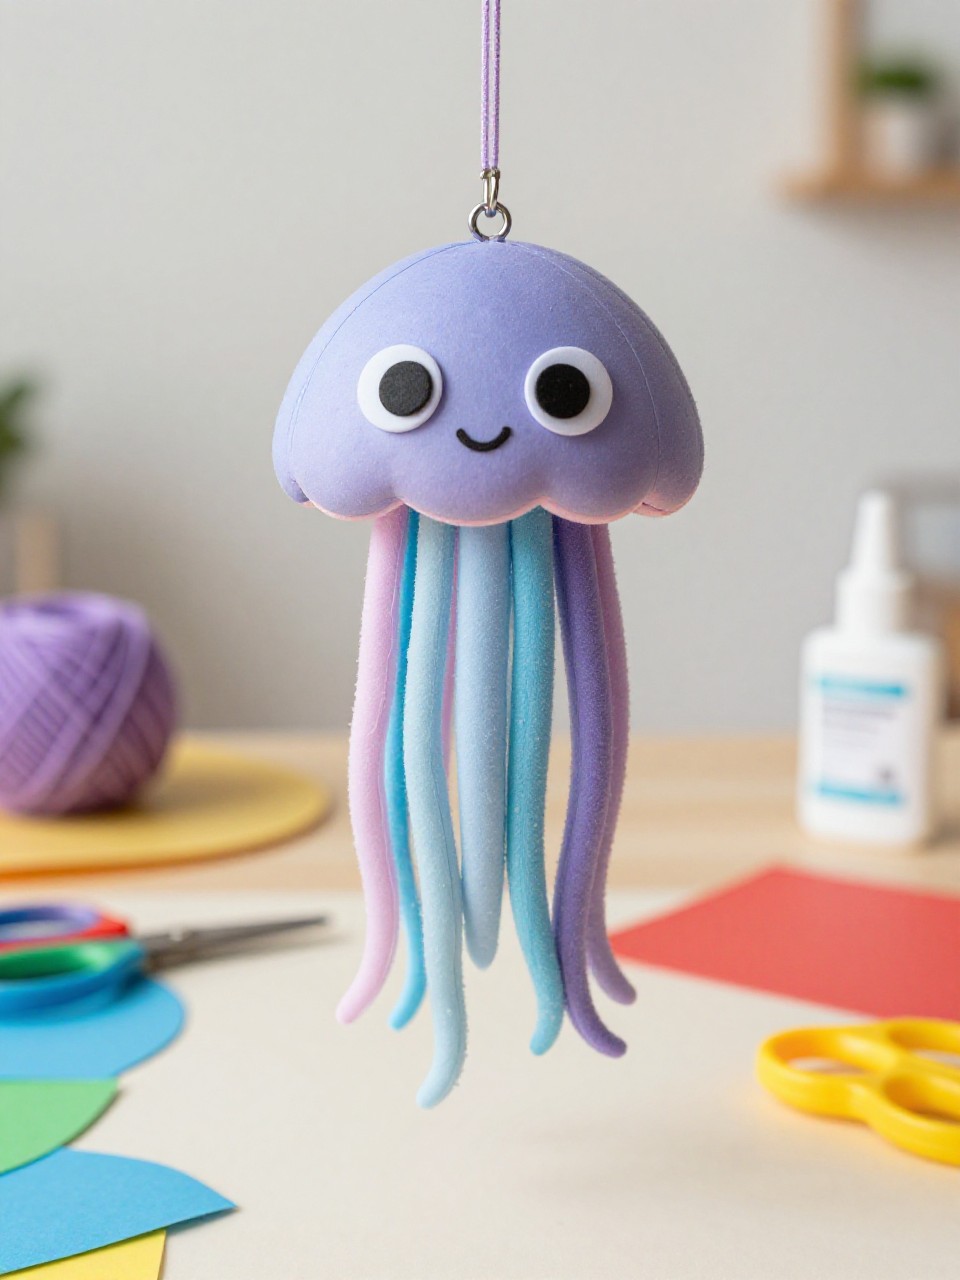
A jellyfish made from an upside-down paper cup with yarn or ribbon tentacles and a friendly face. Kids like the wiggly movement and adding lots of colorful strands for an under-the-sea vibe.
Materials Needed:
- Paper cup
- Paint or markers
- Yarn or ribbon (tentacles)
- Googly eyes or marker
- Tape or glue
How to make it:
- Paint or color the cup; let it dry and add a cute face.
- Cut yarn or ribbon strands and tape them inside the cup rim to dangle.
- Punch a hole on top and tie a loop for hanging.
- Hang from a shelf or doorway and watch it sway.