


In This Article Show
Keeping kids busy can be tough, especially on rainy days or when you need a quick classroom activity. Paper cup and paper glass crafts are perfect because they’re simple, low-mess, and turn into adorable toys or decorations. In this list, you’ll find fun, beginner-friendly projects that use basic paper cups and a few supplies.
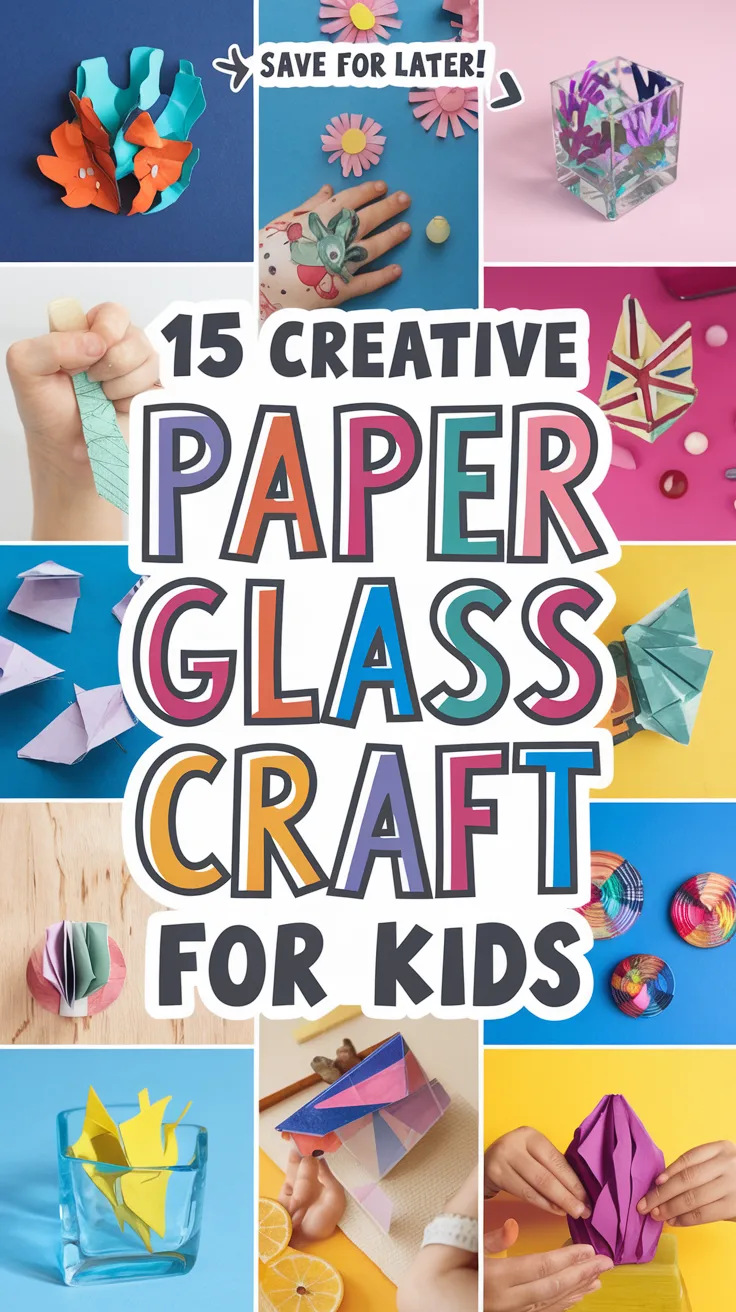
Let’s jump into 15 creative paper glass craft ideas that will spark smiles and keep little hands happily making.
1. Rainbow Stacked Paper Cup Tower

This craft makes a cheerful rainbow tower using colored paper cups stacked and glued in layers. Kids love building it like blocks and seeing the bright arc take shape; it’s easy and satisfying for beginners.
Materials Needed:
- Paper cups in rainbow colors (or white cups plus markers/paint)
- Glue stick or school glue
- Cardboard base
- Markers for faces or patterns [optional]
- Glitter glue [optional]
How to make it:
- Cut a rectangular cardboard base to fit your tower.
- Arrange cups upside down in rows by color, then glue each cup to the base.
- Add doodles, faces, or patterns on cup fronts.
- Let dry, then display on a shelf or windowsill as a happy rainbow.
2. Paper Cup Butterfly Planter
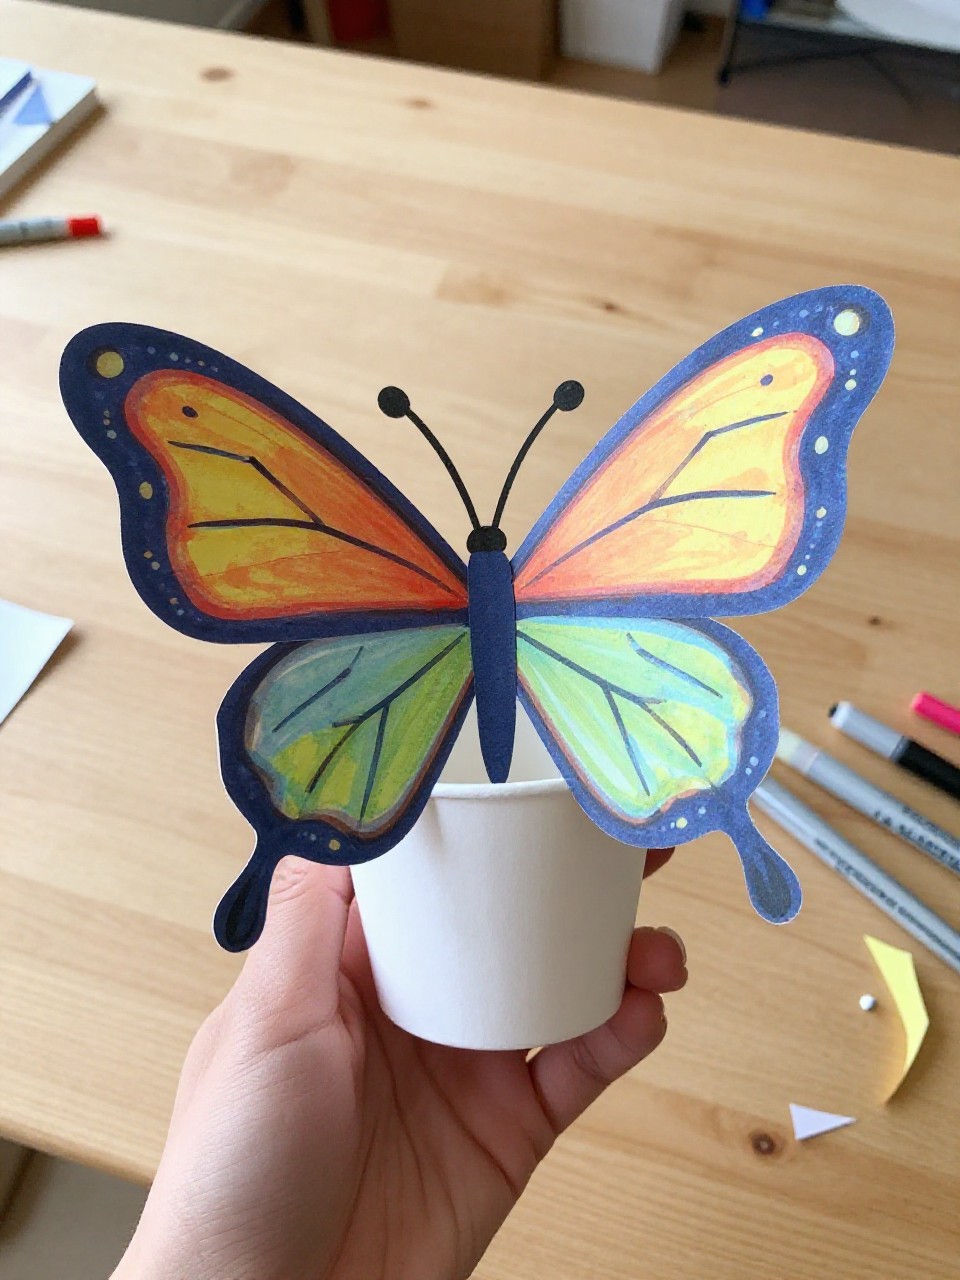
A decorated paper cup becomes a tiny “planter” with paper wings and antennae, looking like a butterfly resting on a flowerpot. Kids enjoy choosing wing patterns and turning a plain cup into a friendly garden friend.
Materials Needed:
- Paper cup (any size)
- Colored paper for wings
- Pipe cleaner for antennae
- Markers or crayons
- Tape or glue
How to make it:
- Draw and cut two large butterfly wings from colored paper.
- Glue or tape the wings to the back of the cup.
- Curl a pipe cleaner and tape inside the cup rim for antennae, then draw eyes and patterns.
- Add paper flowers inside the cup for display.
3. Animal Face Paper Cup Puppets
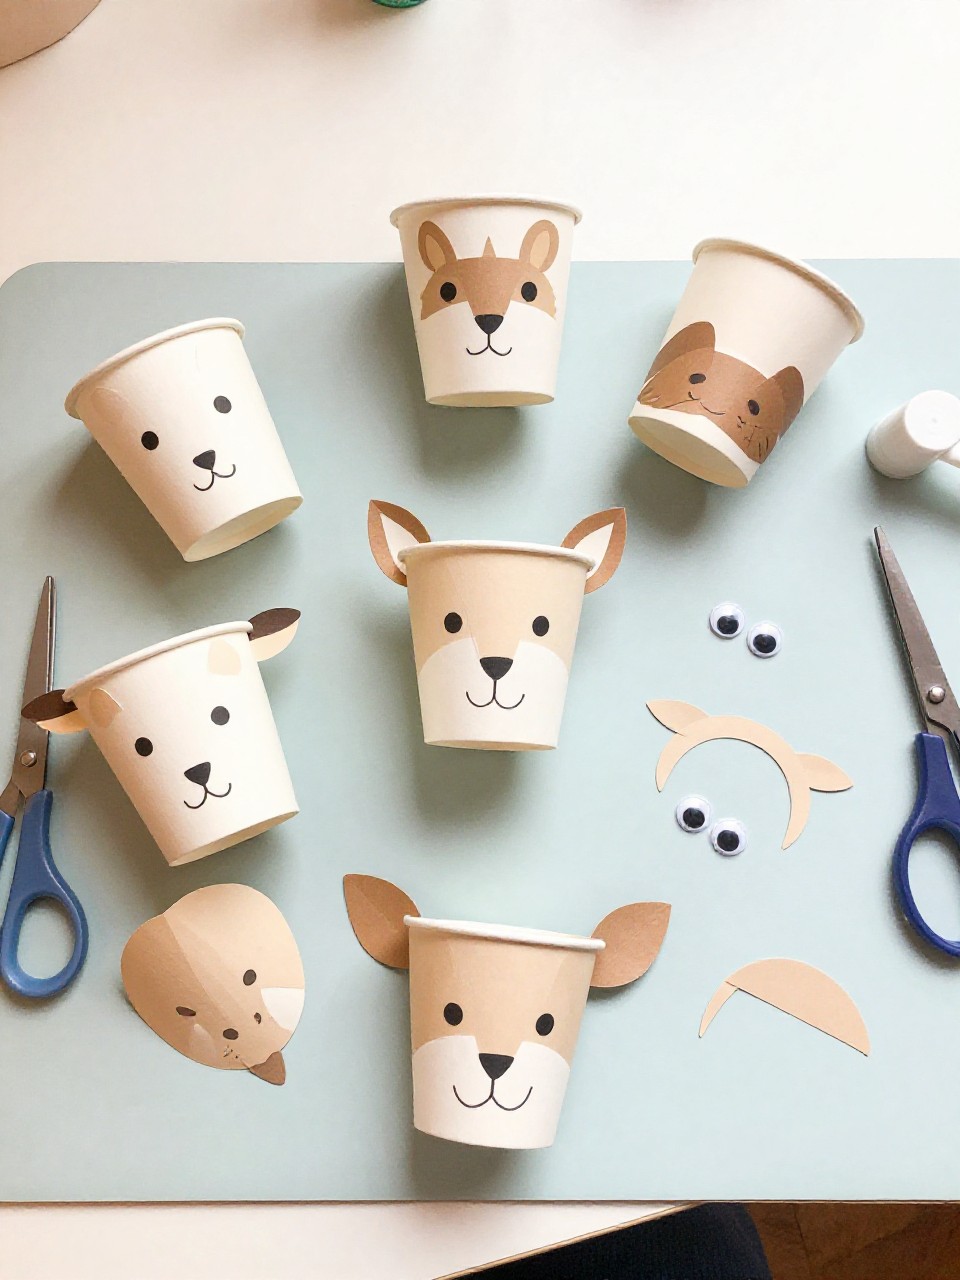
Turn paper cups into cute animal puppets like cats, dogs, or pandas with ears, noses, and hand-drawn faces. Kids love acting out stories and can switch animals quickly by flipping new cups.
Materials Needed:
- Paper cups
- Colored paper for ears and noses
- Black marker
- Glue stick
- Googly eyes [optional]
How to make it:
- Choose an animal and draw its face on the cup.
- Cut ears and a nose from colored paper and glue to the rim or front.
- Add googly eyes or draw your own, plus whiskers and spots.
- Let dry and put on a puppet show.
4. Paper Cup Rocket Ship
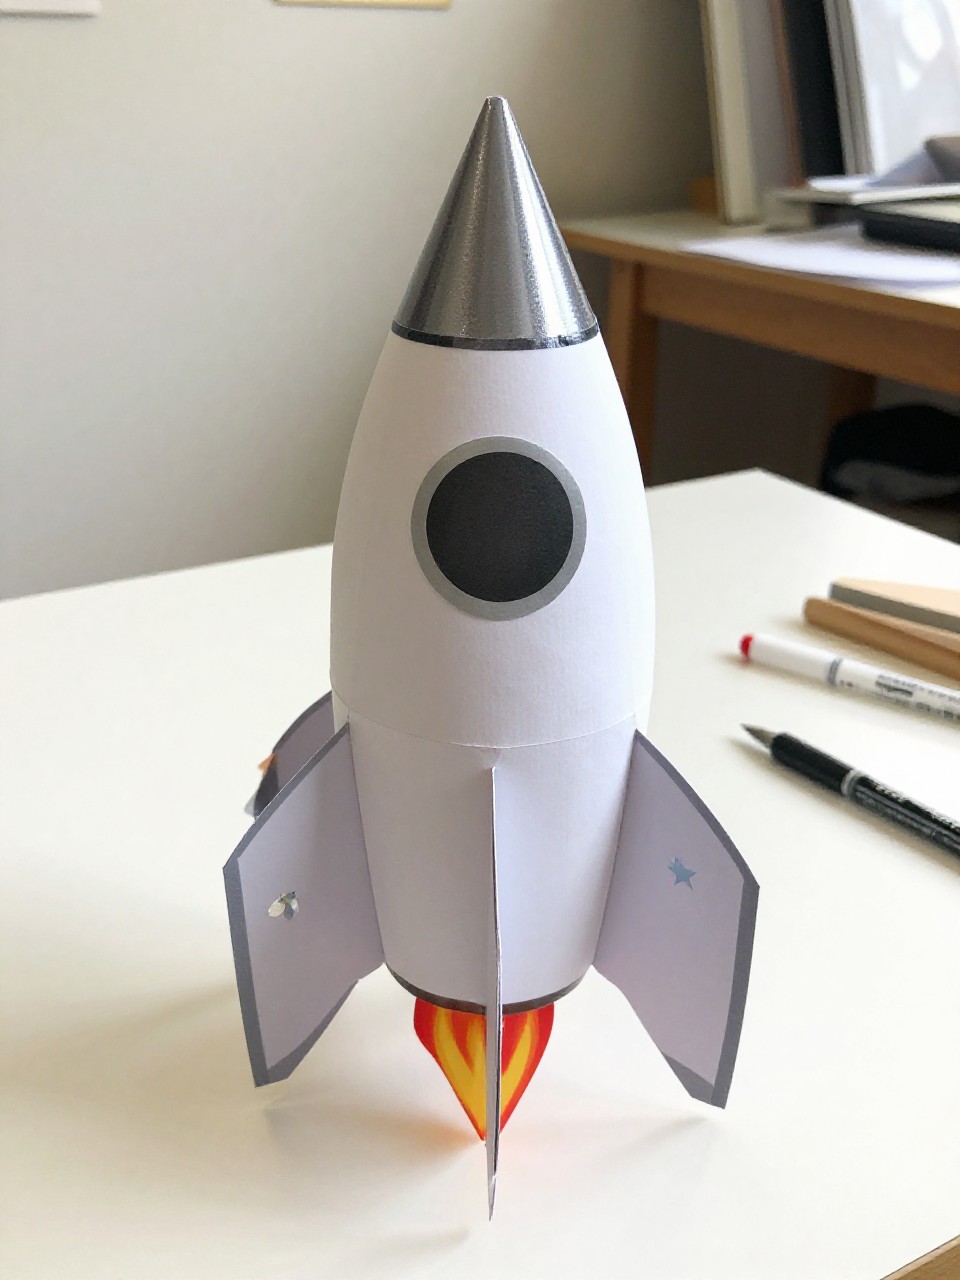
This craft looks like a mini rocket with a pointed cone top, fins, and flame strips peeking out. Kids enjoy “launching” it around the room and decorating their own space design.
Materials Needed:
- Paper cup
- Colored paper (red/orange for flames, silver/blue for body)
- Tape or glue
- Markers or star stickers
- String [optional for hanging]
How to make it:
- Wrap the cup in colored paper and tape it smooth.
- Cut a circle, form a cone, and tape it to the cup’s bottom as the nose.
- Add triangle fins on the sides and glue flame strips into the open end.
- Decorate with stars, then hang by a string or play with it.
5. Paper Cup Jellyfish Dangler
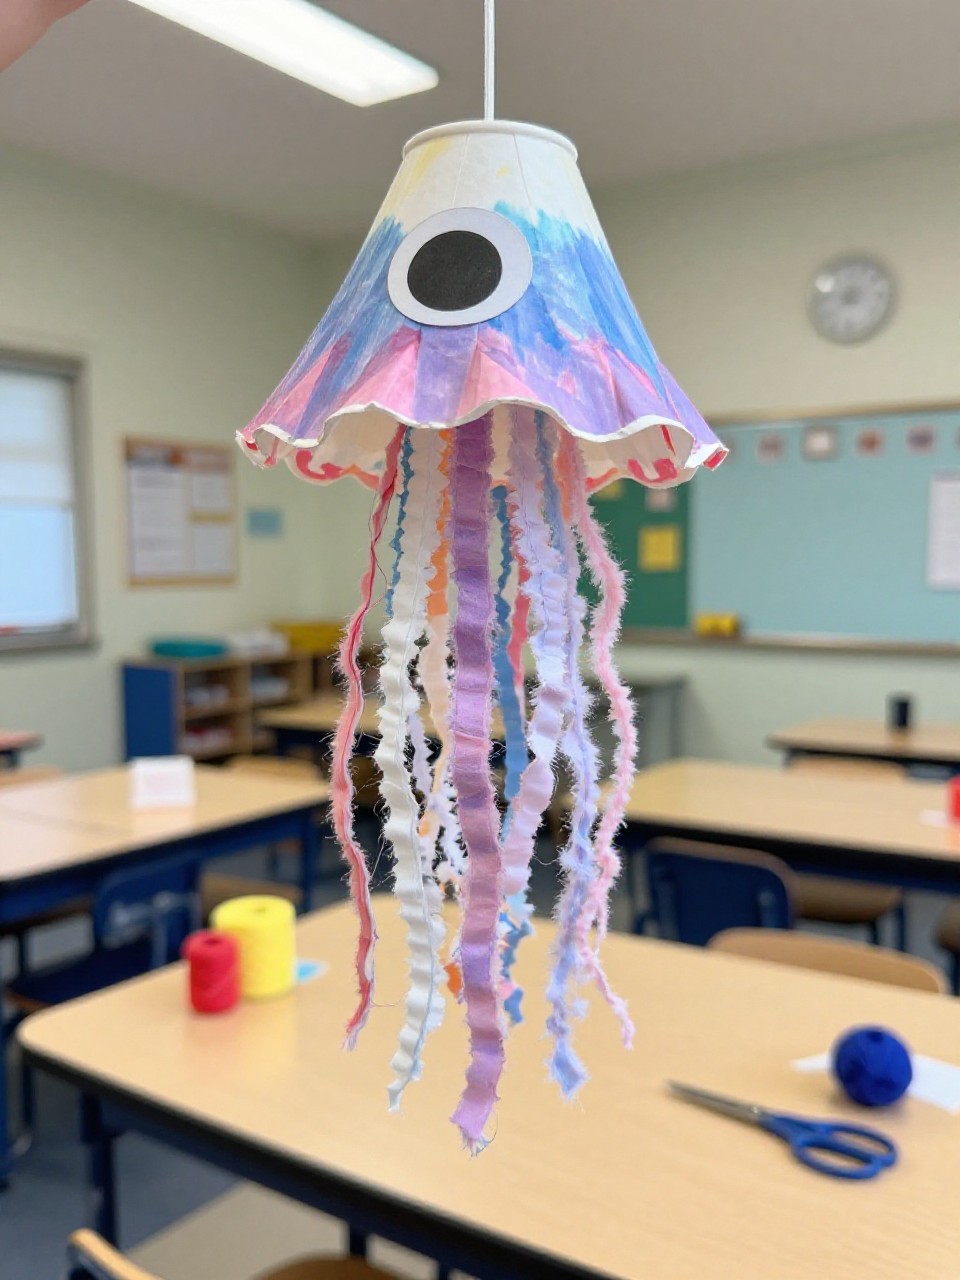
A painted cup becomes a jellyfish with ribbon or yarn tentacles hanging underneath. Kids love the wiggly movement and soft colors, and it’s an easy beginner project.
Materials Needed:
- Paper cup
- Paint or markers
- Yarn or ribbon for tentacles
- Hole punch
- Googly eyes [optional]
How to make it:
- Color or paint the outside of the cup and let dry.
- Punch 6–8 holes around the rim.
- Tie yarn or ribbon lengths through each hole as tentacles; add eyes.
- Hang it by a string through the top or display from a shelf.
6. Stacking Snowman Cups
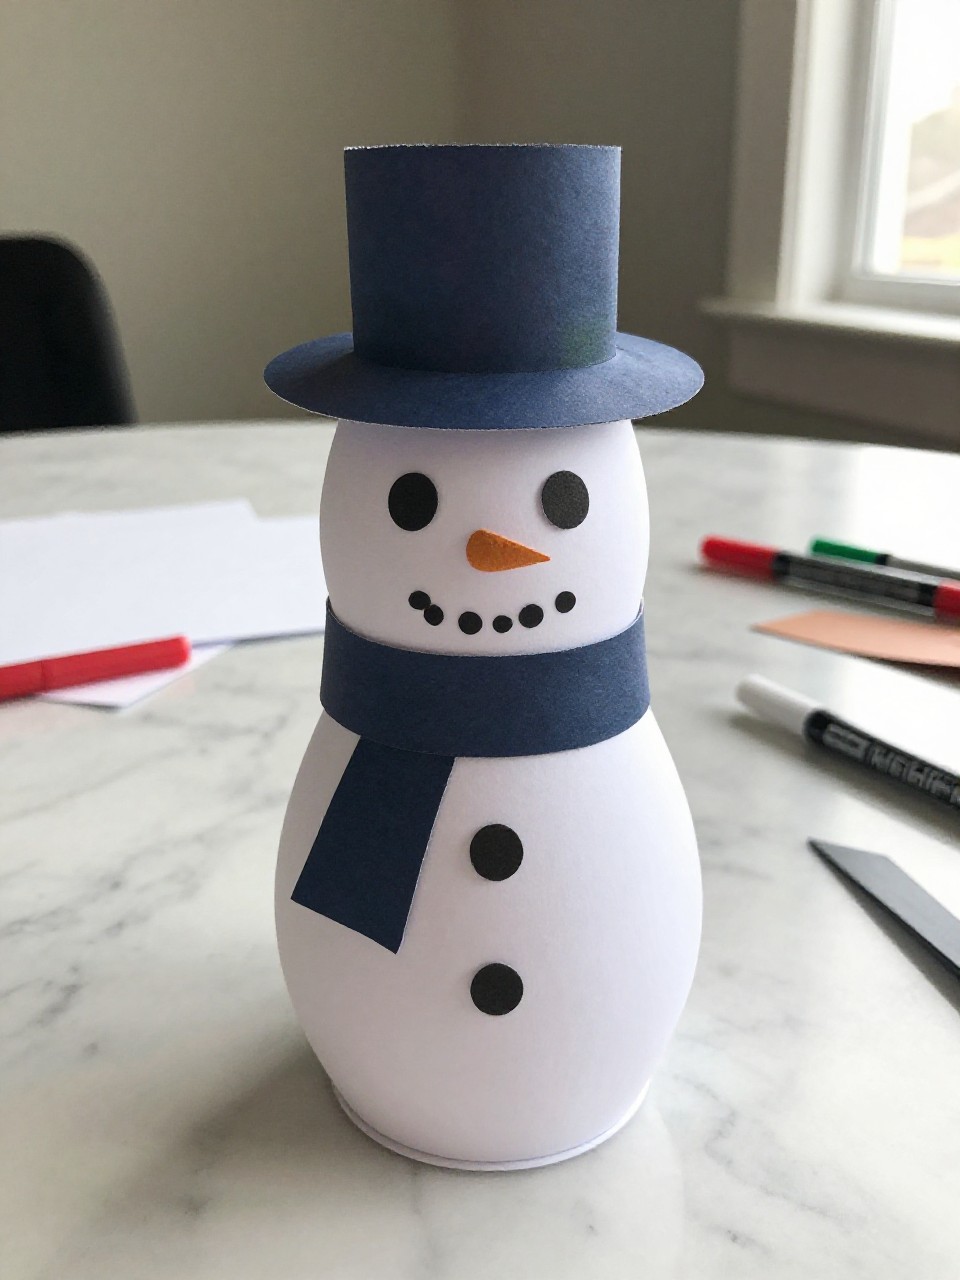
Three white paper cups stack into a snowman with a paper scarf, carrot nose, and top hat. Kids enjoy building and unstacking the snowman while changing face styles.
Materials Needed:
- White paper cups
- Colored paper (orange, black, any for scarf)
- Markers
- Glue stick or tape
- Cotton balls [optional]
How to make it:
- Draw buttons on one cup, a face on another, and leave one plain for the middle.
- Cut and glue a paper carrot nose, hat, and scarf.
- Stack the cups face on top, then middle, then buttons.
- Add cotton “snow” and display on a table.
7. Paper Cup Flower Pot Bouquet
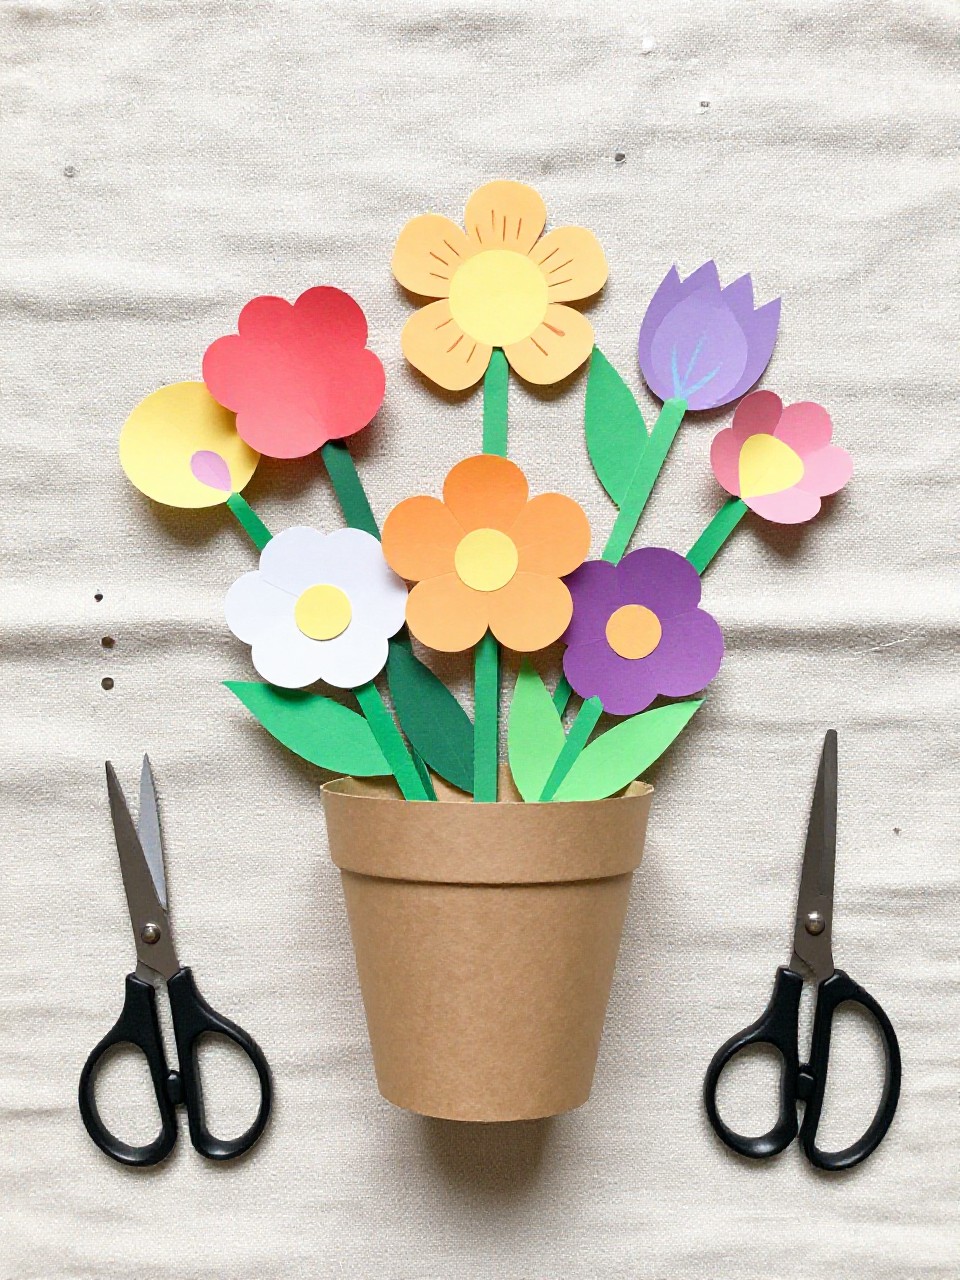
Cups become mini “pots” holding paper flowers on straw stems, creating a bright bouquet. Kids enjoy mixing colors and arranging blooms like tiny florists.
Materials Needed:
- Paper cups
- Colored paper for flowers and leaves
- Drinking straws or craft sticks
- Glue stick
- Stickers or sequins [optional]
How to make it:
- Decorate the outside of the cup with patterns or stickers.
- Cut flower shapes and glue to straw tips; add leaves.
- Crumple scrap paper to fill the cup, then stick stems inside.
- Adjust flowers and display as a cheerful bouquet.
8. Paper Cup Owl Lantern
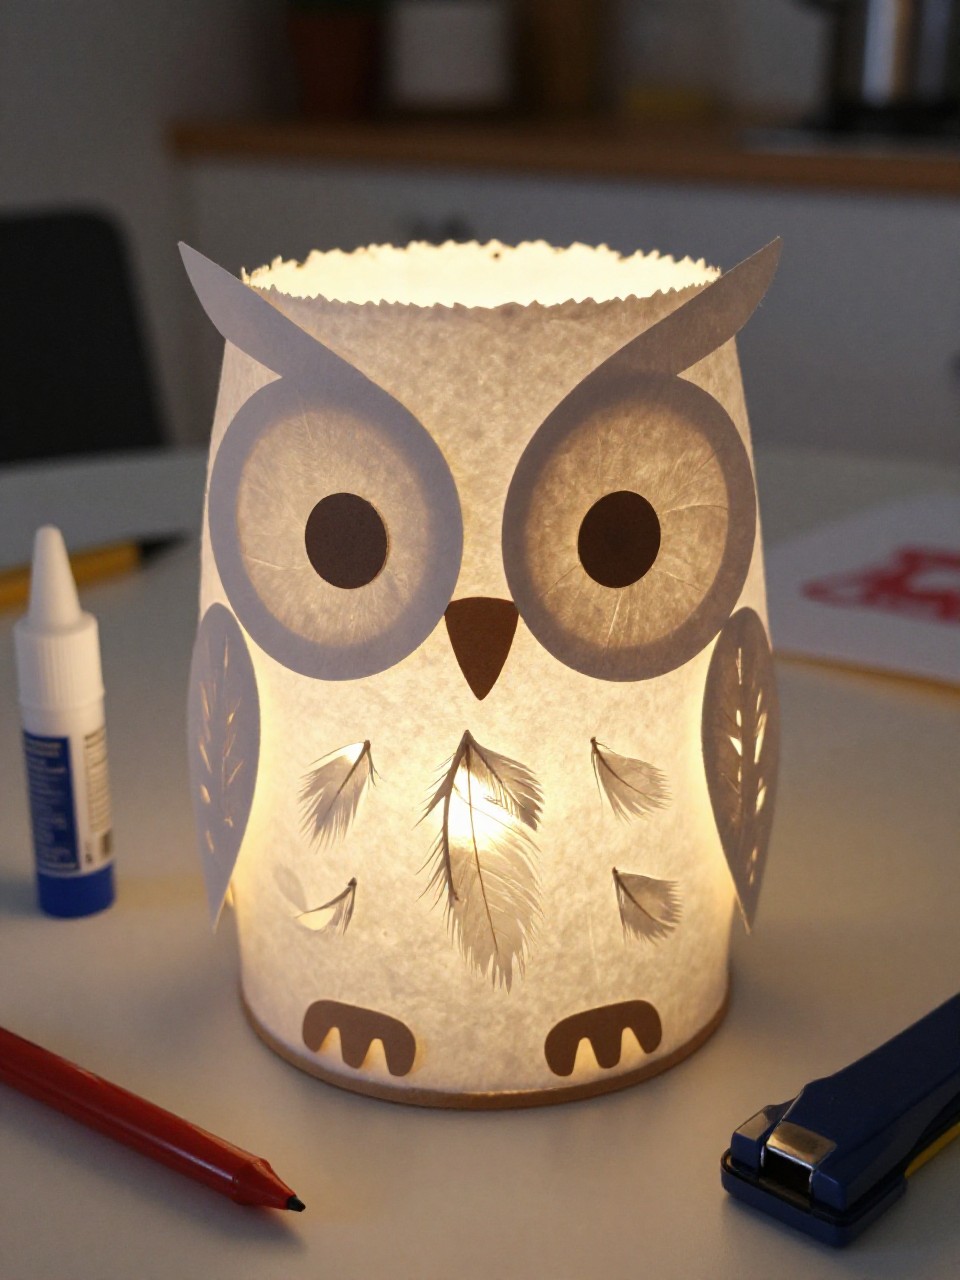
A cup turns into a cozy owl with big eyes, wings, and a tea-light glow inside. Kids love the calm, night-time feel and the cute feathery details.
Materials Needed:
- Paper cup
- Battery tea light
- Colored paper for eyes, beak, wings
- Hole punch or push pin for small “feather” holes
- Glue stick
How to make it:
- Lightly punch small holes around the cup for a feather pattern.
- Cut and glue large eyes, a beak, and two wings on the cup.
- Place a battery tea light under the upside-down cup.
- Switch on and enjoy the soft owl glow.
9. Paper Cup Mini Drums
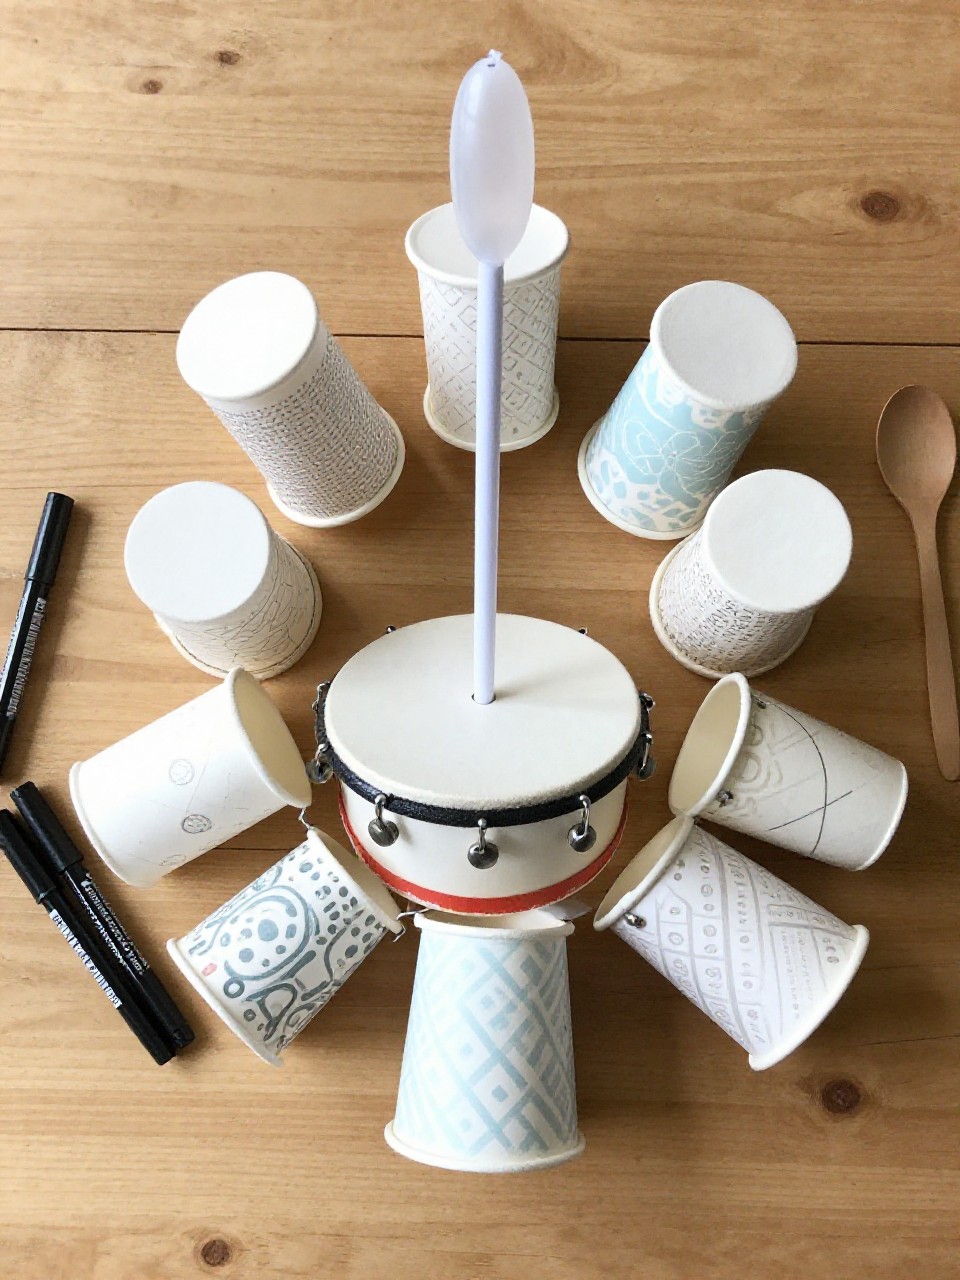
Two cups taped rim-to-rim with a paper “skin” make small hand drums to tap. Kids enjoy decorating patterns and playing a quick rhythm.
Materials Needed:
- 2 paper cups
- Balloon or parchment paper for drum top
- Rubber band or tape
- Markers/paint
- Wooden spoon or stick [optional]
How to make it:
- Decorate the outside of both cups.
- Tape the two cups together at the rims.
- Stretch a balloon piece or parchment over one end and secure with a rubber band.
- Let dry and drum with fingers or a stick.
10. Paper Cup Garden Windmill
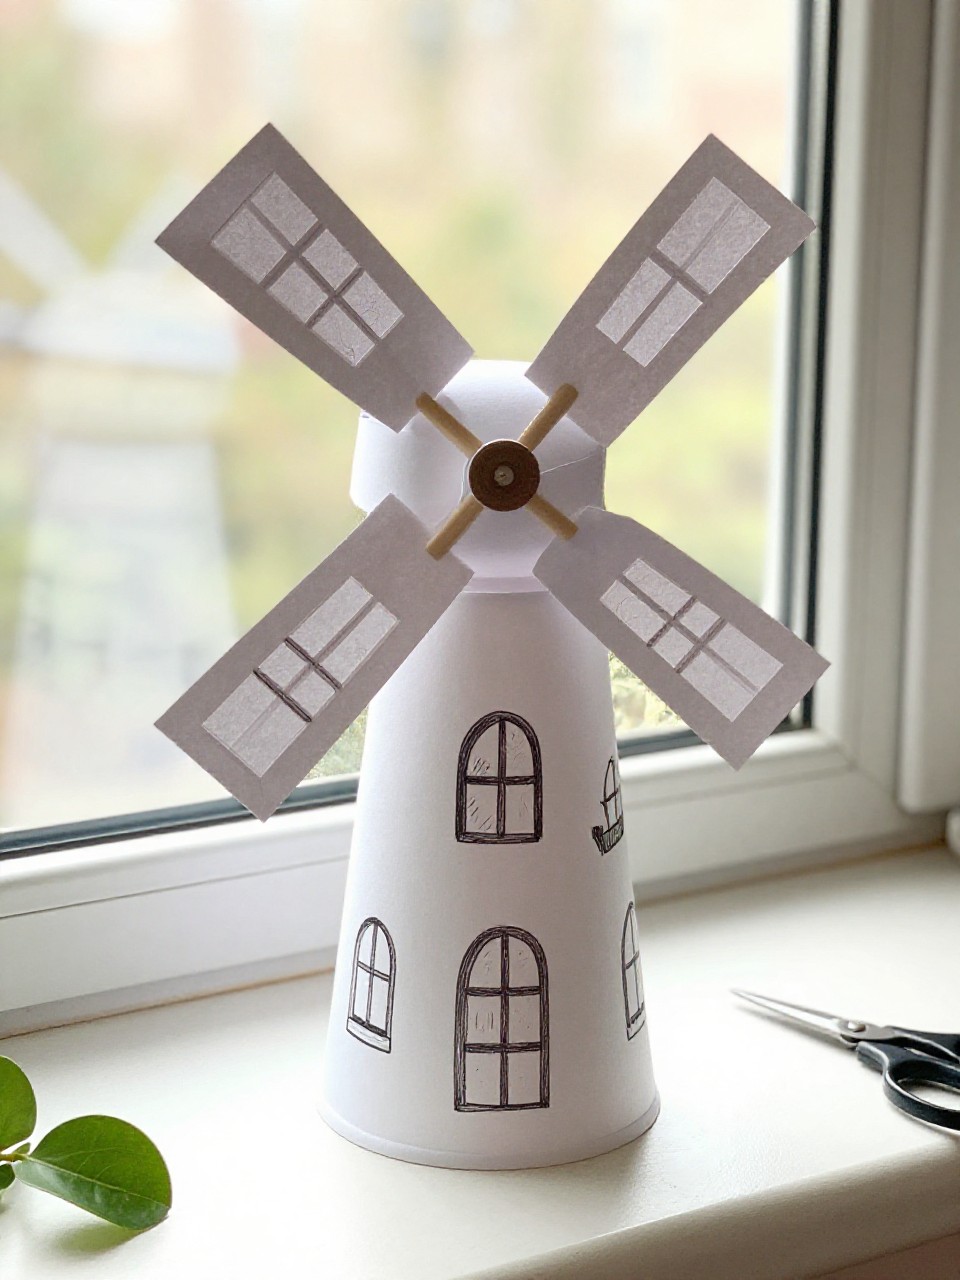
A decorated cup with rotating paper blades looks like a tiny windmill for a pretend garden. Kids enjoy spinning the blades and choosing bright, farmhouse colors.
Materials Needed:
- Paper cup
- Paper fastener (brad)
- Colored paper for blades and door
- Pencil to poke a hole
- Markers
How to make it:
- Draw windows and a door on the cup; color as desired.
- Cut four long paper blades, cross them, and poke a center hole.
- Poke a hole near the top front of the cup and attach blades with a brad.
- Spin gently and set in a play garden scene.
11. Paper Cup Unicorn Holder

This cup becomes a magical unicorn pencil holder with a horn, ears, and flowers. Kids love the sparkle and turning a simple cup into useful desk decor.
Materials Needed:
- Paper cup
- Glitter paper or foil for horn
- Colored paper for ears and flowers
- Markers for eyes
- Glue stick
How to make it:
- Draw sleepy eyes and lashes on the cup front.
- Roll a small cone horn from glitter paper and glue to the rim; add paper ears.
- Make tiny paper flowers and glue around the horn.
- Let set, then use to hold pencils or brushes.
12. Paper Cup Caterpillar Train

Several cups linked with yarn become a long caterpillar with a smiling face and antennae. Kids enjoy deciding the length and arranging colors in fun patterns.
Materials Needed:
- 4–6 paper cups
- Yarn or ribbon
- Hole punch
- Markers
- Pipe cleaners for antennae
How to make it:
- Punch a hole in the front and back of each cup.
- Thread yarn through all the cups to connect them like a train.
- Draw a happy face on the front cup and add pipe cleaner antennae.
- Pull gently to wiggle your caterpillar around.
13. Paper Cup Aquarium Peekaboo

A cup turns into a tiny “aquarium” with fish hanging inside on strings and a clear window cutout. Kids love peeking in to see fish bobbing when the cup moves.
Materials Needed:
- Paper cup
- Clear plastic from packaging [optional window]
- Blue paper or paint
- Thread or fishing line
- Stickers or paper fish shapes
How to make it:
- Cut a window on one side of the cup; paint or line the inside blue.
- Make small paper fish and hang them from the cup rim with thread.
- Tape clear plastic over the window if desired.
- Gently shake to watch fish swim and display on a shelf.
14. Paper Cup Crown Stack

A set of cups becomes a playful crown by trimming points around the rim and stacking two for height. Kids enjoy wearing their shiny, decorated crown for pretend play.
Materials Needed:
- 2 paper cups
- Gold paint or yellow paper
- Sequins or gems
- Glue stick
- Elastic string [optional]
How to make it:
- Cut triangle points around the rim of one cup to form a crown top.
- Paint gold or wrap with yellow paper; add sequins or gems.
- Nest the second cup inside for strength and height; glue together.
- Add elastic if you want to wear it; let dry and model your crown.
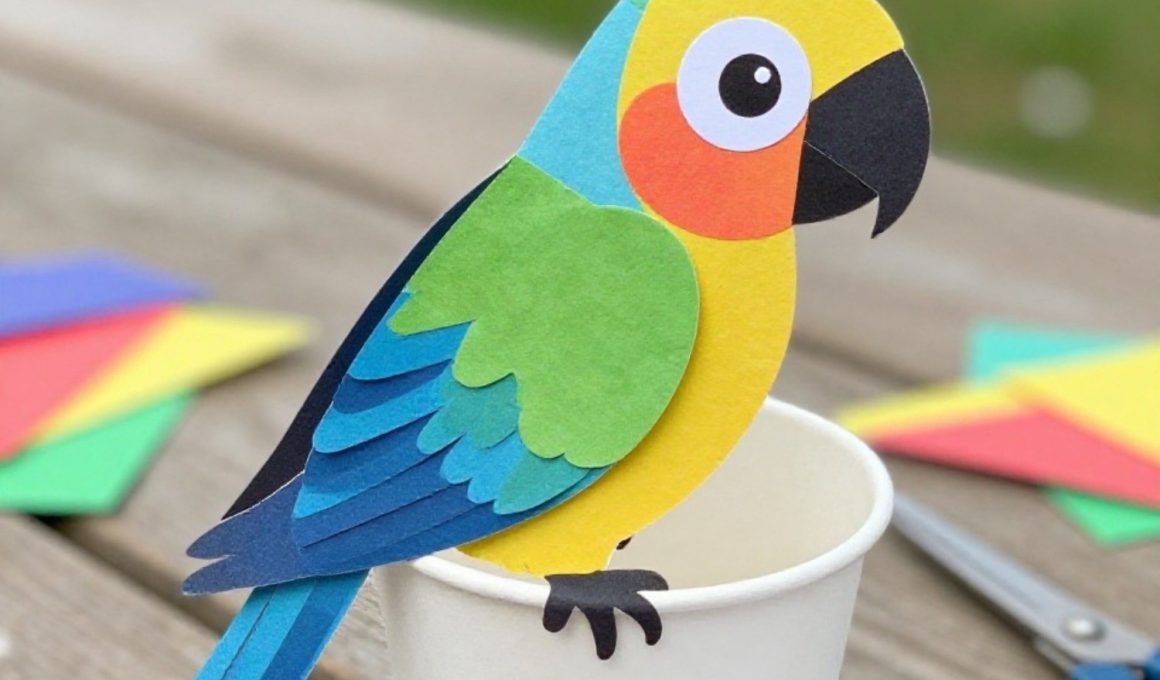
15. Paper Cup Parrot Perch

A brightly colored parrot body is made from a cup with paper wings, tail, and beak, perched on a straw. Kids enjoy choosing bold feather colors and making the parrot “talk.”
Materials Needed:
- Paper cup
- Colored paper for wings, tail, beak
- Drinking straw or stick for perch
- Markers
- Glue stick or tape
How to make it:
- Color the cup in parrot shades or wrap with bright paper.
- Cut and glue large wings to the sides, a long tail on back, and a beak on front.
- Draw eyes and feather lines.
- Tape a straw under the cup as a perch and display standing in a cup of beans.