


In This Article Show
Summer break is exciting, but long days can leave kids asking what to do. If you’re looking for simple, low-mess projects for home, camp, or the classroom, this list is for you.
These ideas are bright, summery, and easy to set up with basic supplies. You’ll find quick crafts that keep hands busy and minds happy—perfect for lazy afternoons or rainy days. Let’s jump into fun summer crafts kids can make this year.
1. Paper Plate Sun Shakers
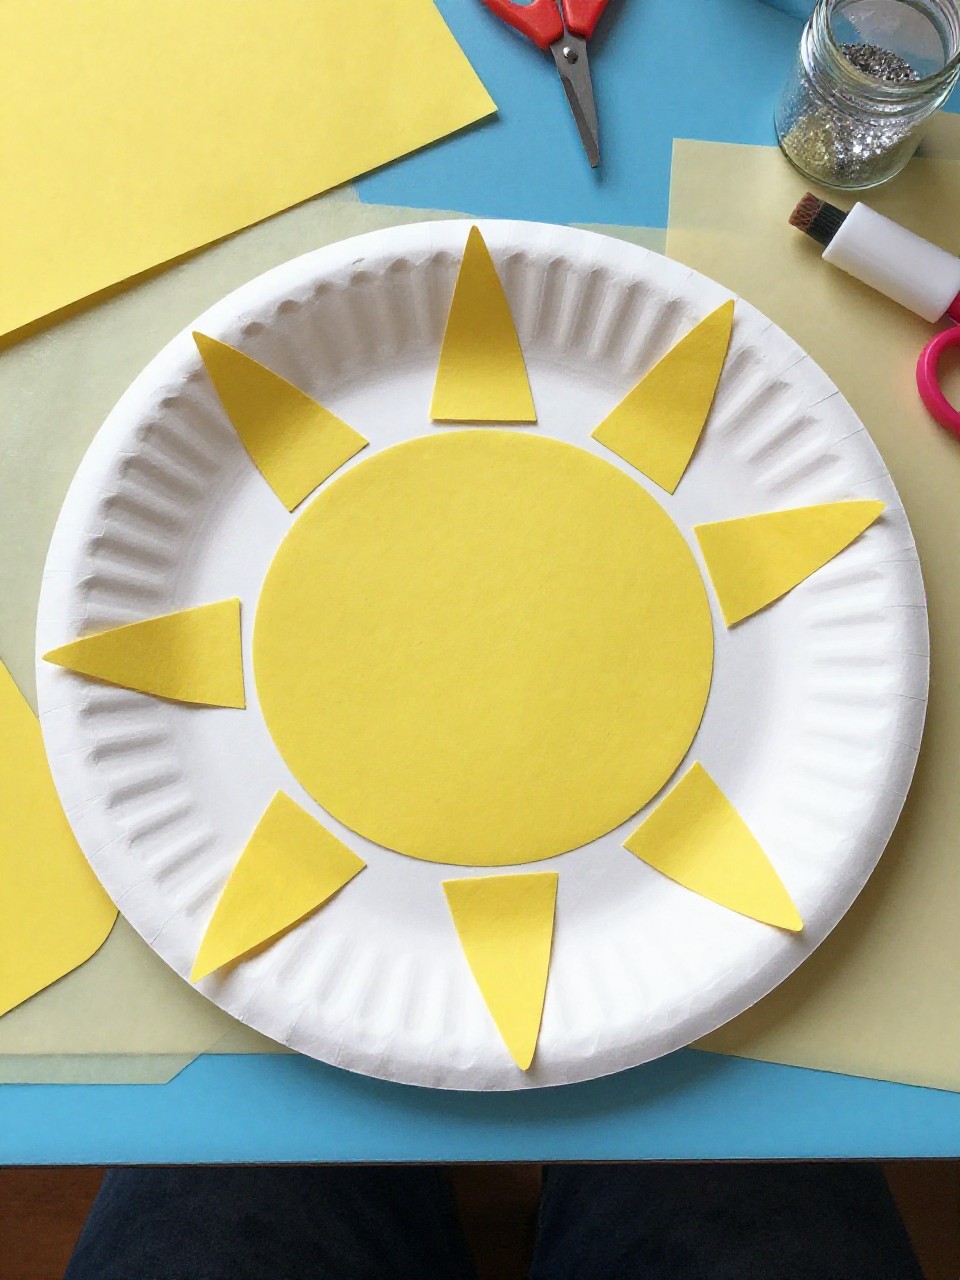
A smiling sunshine with glittery rays and a gentle rattle inside makes a cheerful, summery craft. Kids love shaking the sun to hear the sound, and decorating each ray feels rewarding and easy for beginners.
Materials Needed:
- 2 paper plates (yellow or painted yellow)
- Dried rice or beans (for shaker sound)
- Yellow/orange construction paper (for rays)
- Glue or stapler
- Markers, stickers, glitter (optional)
How to make it:
- Paint or color the plates yellow if needed; let dry.
- Add a spoon of rice/beans to one plate and staple or glue the second plate on top.
- Cut paper triangles for rays and glue around the sun’s edge; draw a face.
- Add glitter or stickers; shake gently and display.
2. Ocean Wave Sensory Bottle
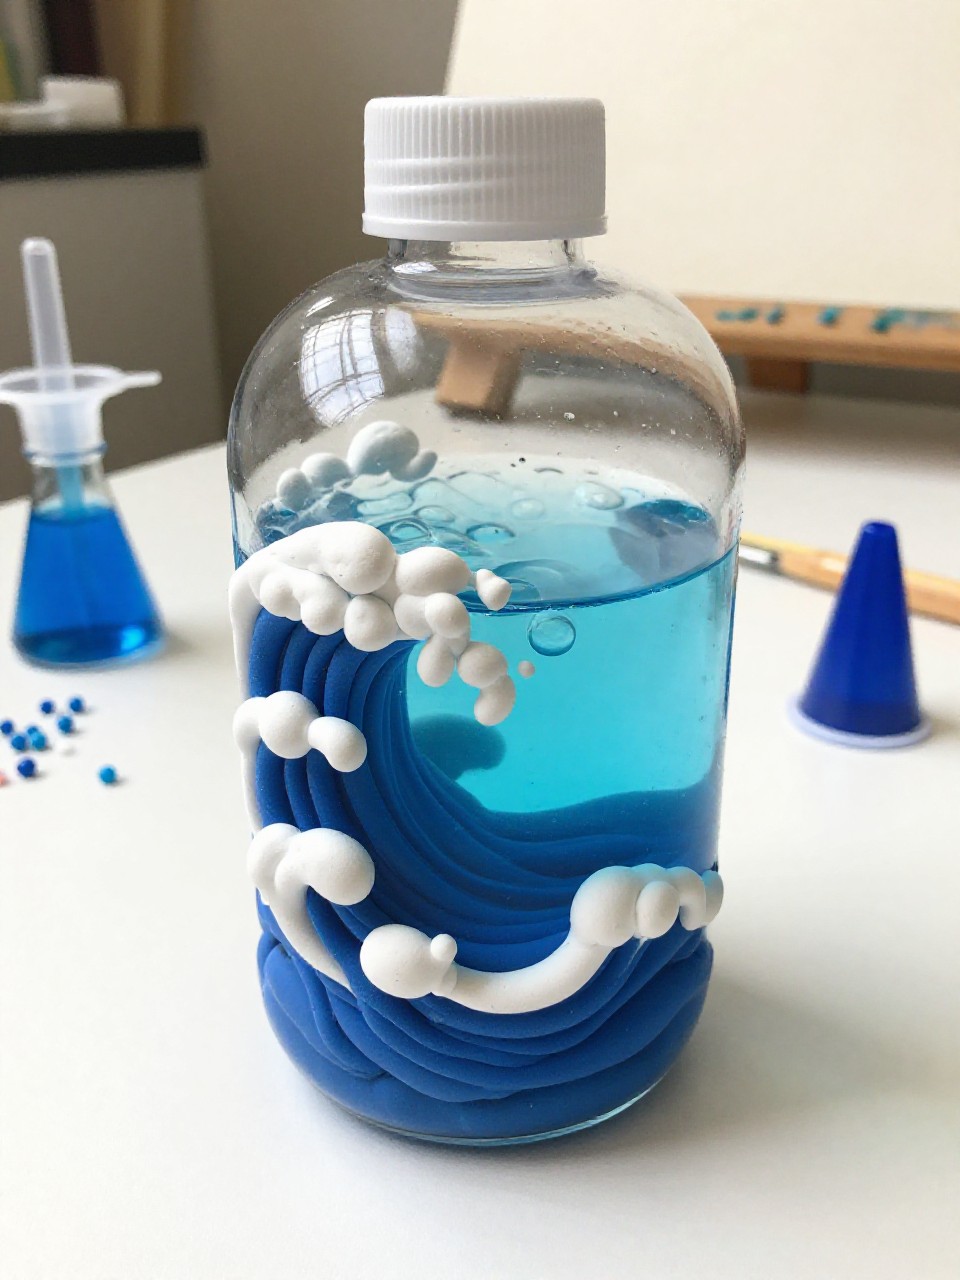
This bottle looks like rolling blue waves with floating shells and beads, perfect for a calm summer mood. Kids enjoy tipping it back and forth to see the “ocean” move, and it’s a simple, soothing project.
Materials Needed:
- Clear plastic bottle with tight cap
- Water and baby oil (or clear mineral oil)
- Blue food coloring
- Small shells or beads (plastic)
- Hot glue or tape to seal cap
How to make it:
- Fill the bottle halfway with water; add one drop of blue food coloring.
- Add shells and beads; fill the rest with oil, leaving a small air gap.
- Seal the cap tightly with hot glue or tape.
- Tip and swirl to watch the waves roll.
3. Popsicle Stick Beach Hut
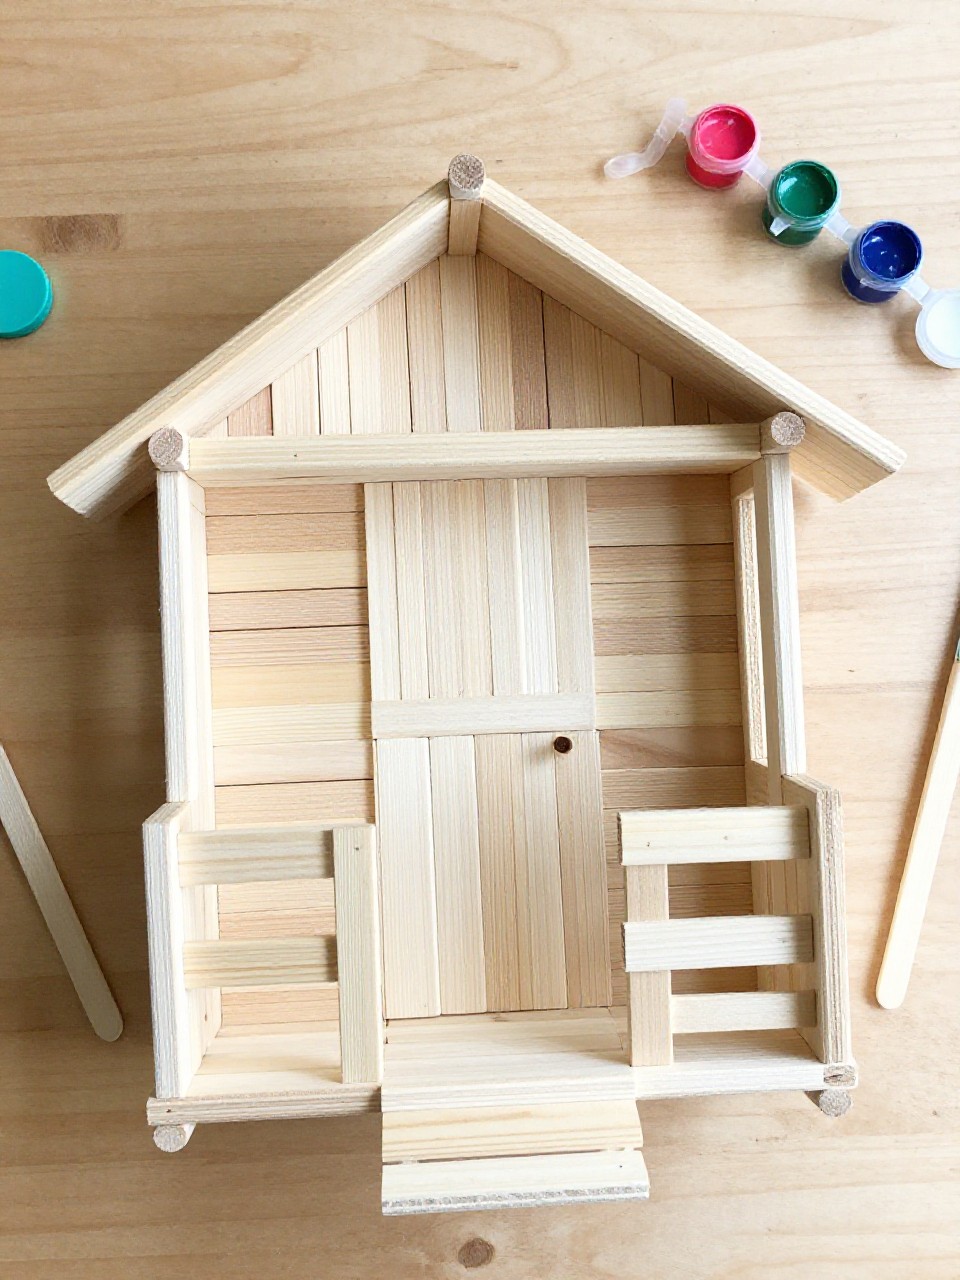
A mini beach hut with striped walls and a tiny paper surfboard brings summer vibes to any shelf. Kids love arranging sticks like real boards and choosing bright beach colors; it’s beginner-friendly and fast.
Materials Needed:
- Popsicle sticks
- Craft paint and brush
- Cardstock (door, surfboard)
- Glue
- Markers (optional)
How to make it:
- Paint sticks in beachy stripes; let dry.
- Glue sticks side by side to form a square wall and two triangles for a roof.
- Cut and glue a paper door and surfboard; add details with markers.
- Prop it up to display your mini beach scene.
4. Watermelon Paper Fan
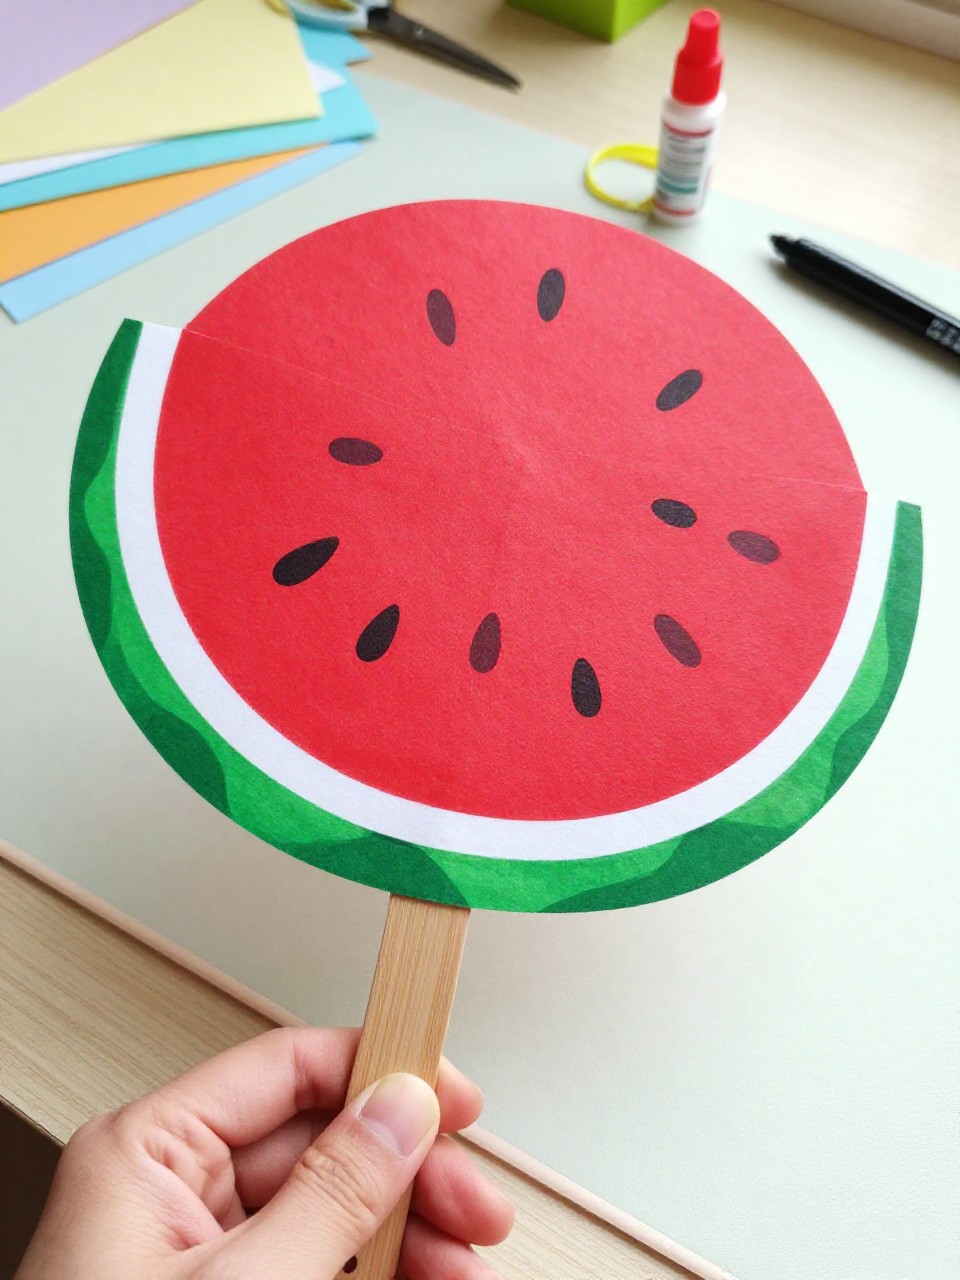
This hand fan looks like a juicy watermelon slice with painted seeds and a green rind. Kids enjoy using their own fan on hot days, and the folding steps feel satisfying and quick.
Materials Needed:
- Red and green construction paper
- Black marker or paper dots (seeds)
- Craft sticks or popsicle sticks
- Glue or tape
- Stapler (optional)
How to make it:
- Cut a circle of red paper; glue a green strip around the edge for the rind.
- Add black seeds with a marker or glued dots.
- Accordion-fold the circle into a fan shape.
- Glue sticks to the base as a handle; secure with tape or a staple.
5. Seashell Creature Magnets
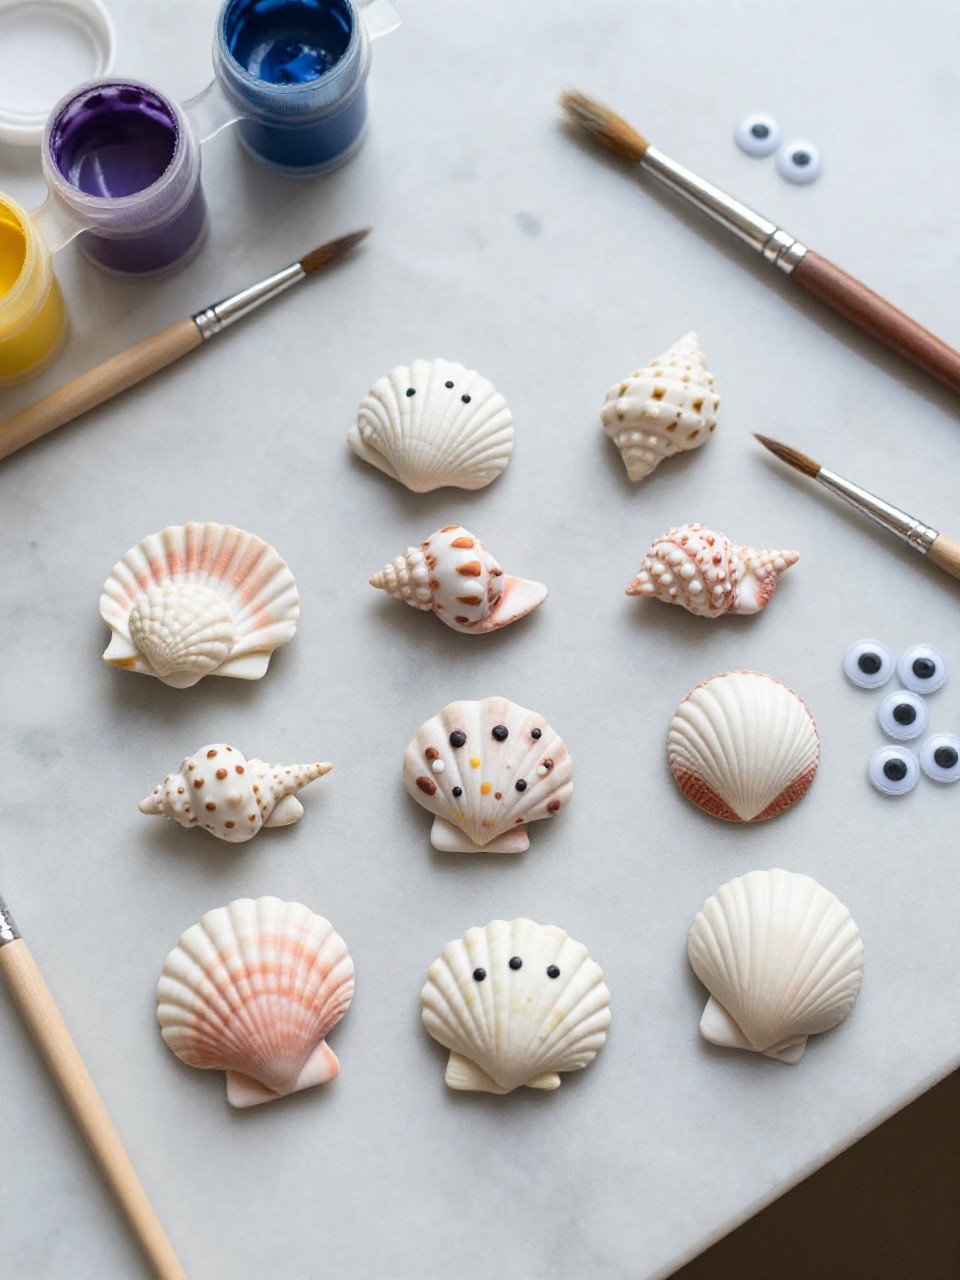
Little shell “critters” with googly eyes and painted patterns turn into cute fridge magnets. Kids love choosing shell shapes and giving each creature a silly face or tiny fins.
Materials Needed:
- Clean seashells
- Acrylic paint and brush
- Googly eyes
- Strong glue
- Small magnet discs
How to make it:
- Paint shells in bright colors or patterns; let dry.
- Glue on googly eyes and tiny painted details like fins or spots.
- Attach a magnet to the back with strong glue.
- Let cure and decorate the fridge or a magnetic board.
6. Flip-Flop Footprint Art
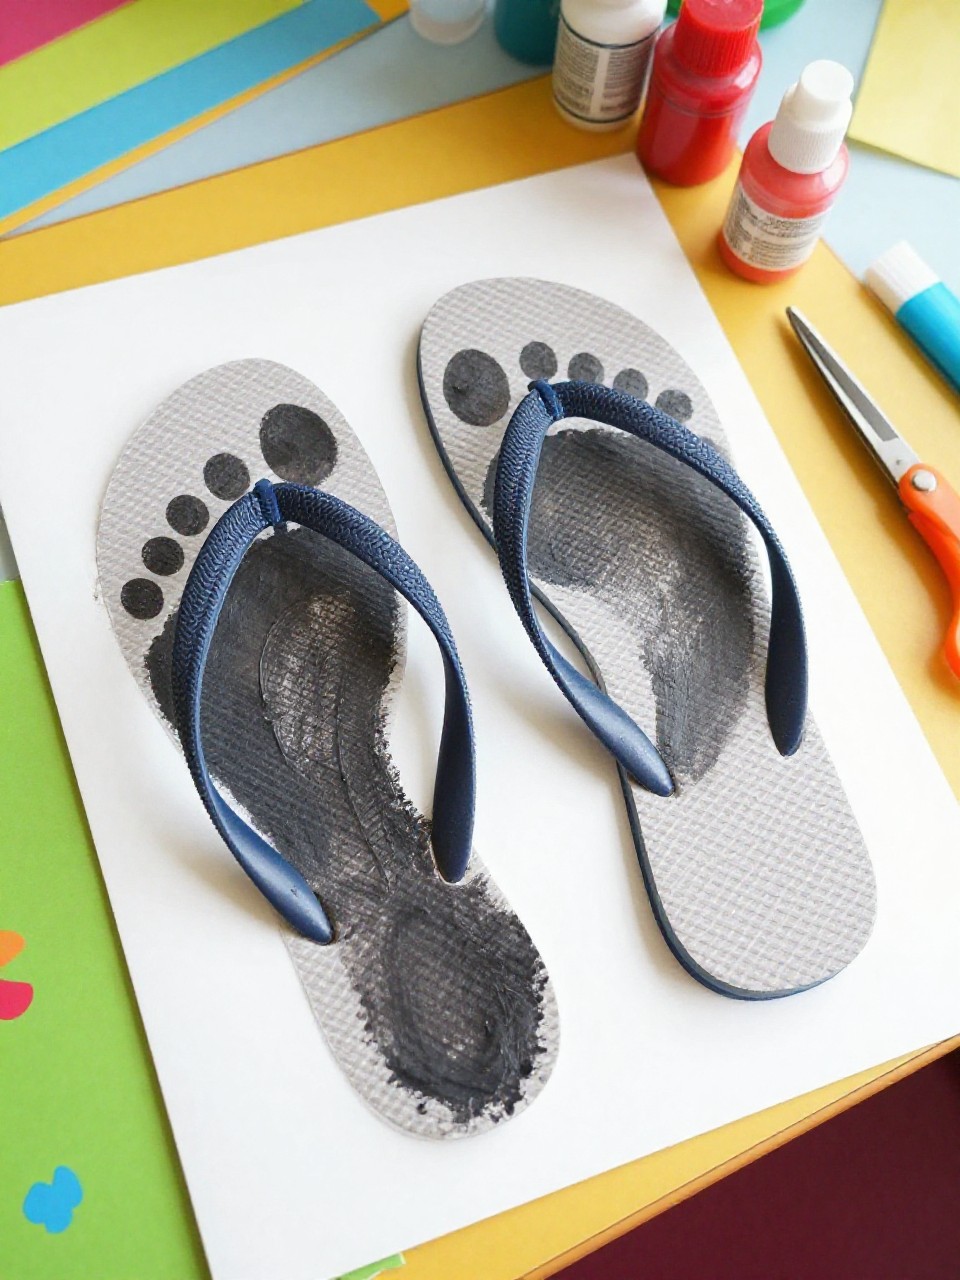
This artwork shows painted footprints wearing paper flip-flops, like sandy toes at the beach. Kids giggle at the tickly paint and enjoy choosing strap colors and patterns.
Materials Needed:
- White cardstock or canvas paper
- Washable paint (for footprints)
- Colored paper (flip-flop straps)
- Glue
- Markers (optional)
How to make it:
- Paint the bottom of feet with washable paint and press onto paper; let dry.
- Cut thin paper strips for flip-flop straps and glue onto the footprints.
- Add waves, suns, or names with markers.
- Dry flat and display.
7. Pool Noodle Boats
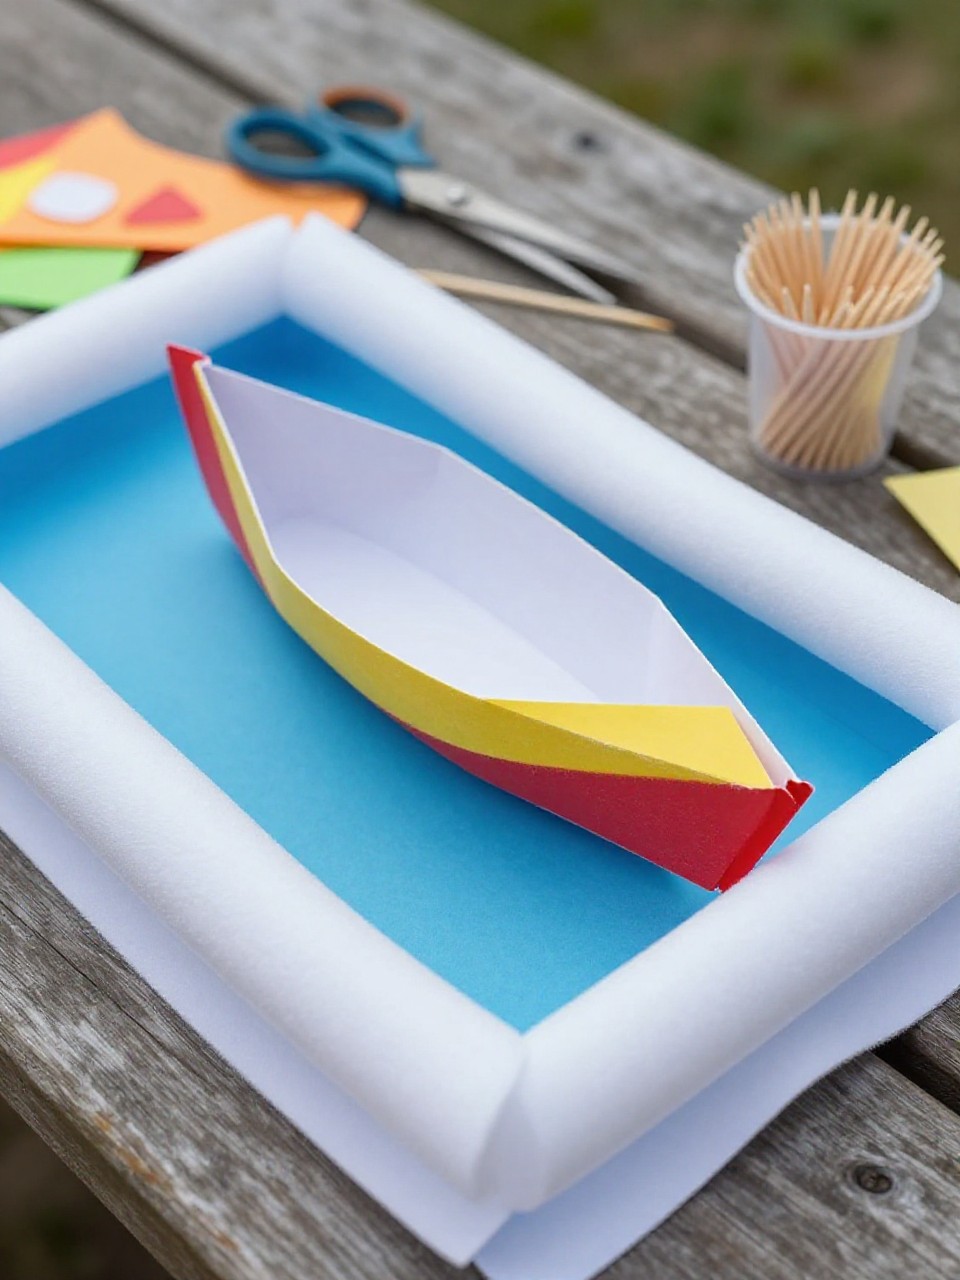
These tiny boats float in the tub or kiddie pool with a bright paper sail and a toothpick mast. Kids love racing them across water and testing different sail shapes.
Materials Needed:
- Pool noodle slice (1–2 inches thick)
- Toothpick or wooden skewer (blunt tip)
- Foam sheet or cardstock (sail)
- Waterproof marker (optional)
- Tape (optional)
How to make it:
- Cut a round slice of pool noodle for the boat base.
- Cut a triangle sail; poke two holes and slide it onto the toothpick.
- Stick the mast into the noodle; add tape if needed.
- Decorate the sail and set it in water to sail.
8. Nature Weaving Frame
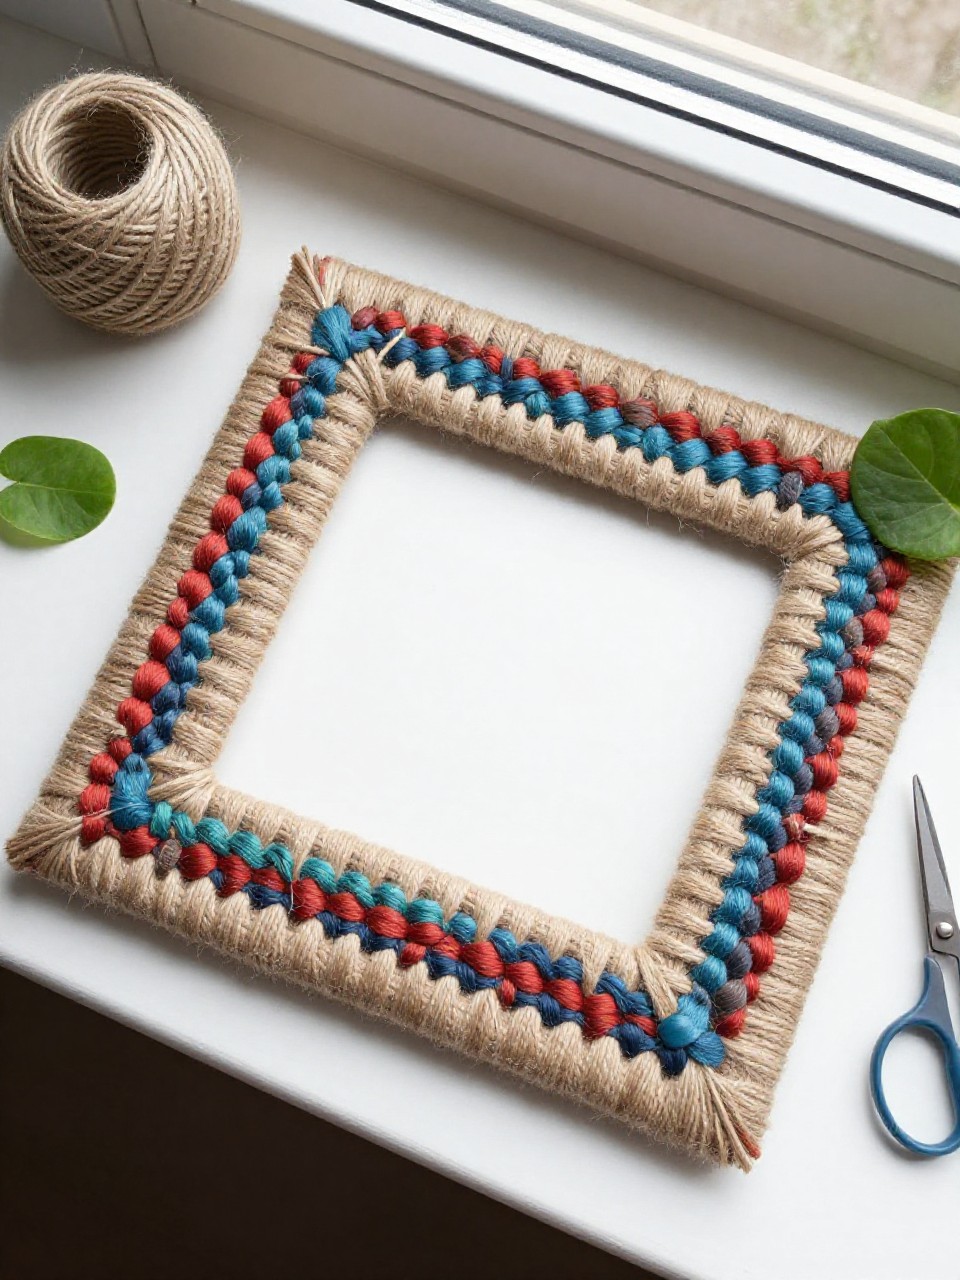
A simple cardboard loom holds grasses, flowers, and leaves to make a summer nature tapestry. Kids enjoy collecting materials outside and seeing patterns appear as they weave.
Materials Needed:
- Cardboard rectangle
- Yarn or twine
- Fresh or dried leaves, grasses, small flowers
- Tape or scissors
- Hole punch (optional)
How to make it:
- Cut notches along two short edges of the cardboard and string yarn back and forth to make a loom.
- Collect nature items and slide them over-under through the yarn.
- Pack layers gently to build color and texture.
- Tie off the back and hang to dry and display.
9. Rainbow Bubble Print Art
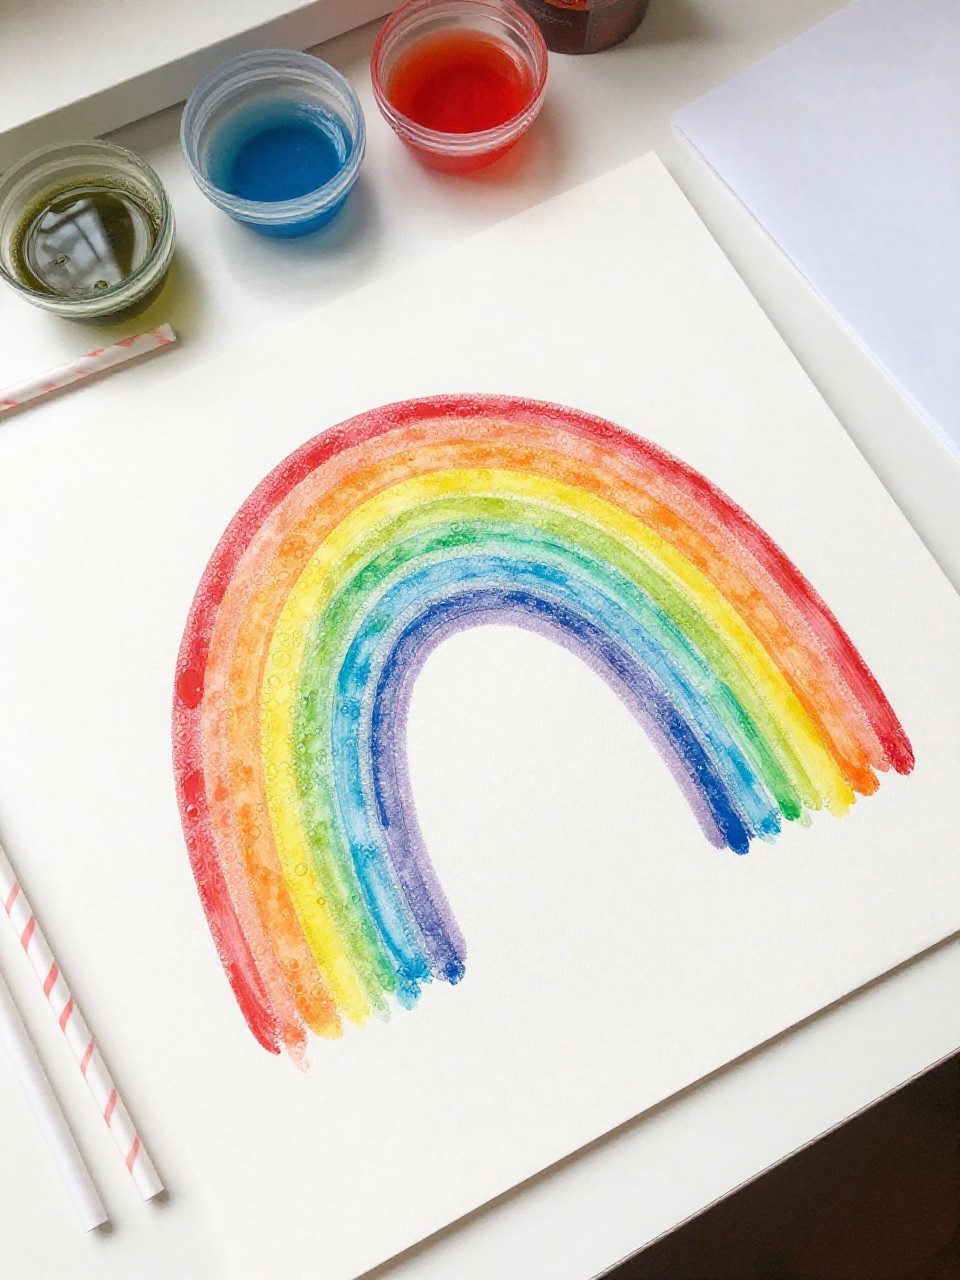
The paper shows soft, colorful bubble circles like summer soap bubbles frozen in time. Kids love blowing bubbles into painty water and watching magic patterns appear.
Materials Needed:
- Shallow trays or bowls
- Liquid dish soap
- Water
- Food coloring or liquid watercolor
- Straws and thick paper
How to make it:
- Mix water, a squirt of dish soap, and a few drops of color in bowls.
- Blow bubbles gently into each bowl with a straw to mound bubbles.
- Press paper onto the bubbles to lift prints; repeat with colors.
- Let dry flat and sign the art.
10. Sunprint Leaf Silhouettes

Blue-and-white prints show crisp leaf shapes made by sunlight, a classic summer science-art mix. Kids enjoy arranging leaves and watching the image appear like magic.
Materials Needed:
- Sunprint or cyanotype paper (pre-treated)
- Leaves or flowers
- Clear plastic sheet (optional)
- Water tray
- Clipboard (optional)
How to make it:
- Place leaves on the sunprint paper outdoors; cover with clear plastic to hold flat.
- Expose to sunlight for a few minutes until paper lightens.
- Rinse in water to develop the print.
- Dry flat on a clipboard and display.
11. Paper Cup Ice Cream Cones
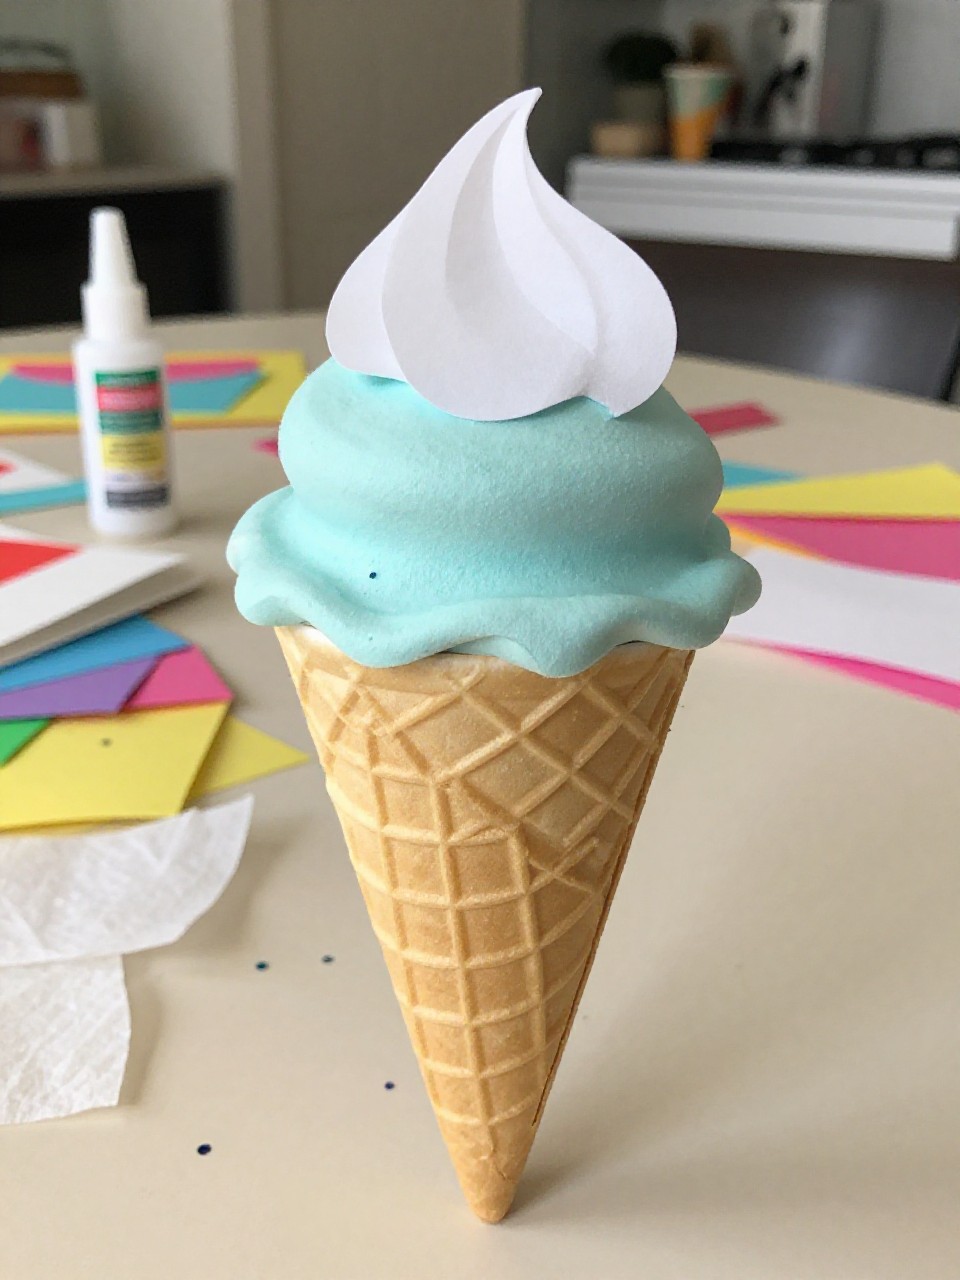
These “cones” look like scoops of ice cream stacked in pastel colors with sprinkles on top. Kids love choosing flavors with paint and adding a cherry, all with no melting mess.
Materials Needed:
- Paper cups (tan or painted tan)
- Tissue paper or pom-poms (pastel colors)
- Glue
- Sequins or paper bits (sprinkles)
- Red pom-pom (cherry)
How to make it:
- Paint the cup tan if needed and let dry; turn it upside down as the cone.
- Crumple tissue into balls or use pom-poms for scoops; glue on top.
- Add sequins or paper bits as sprinkles and a red pom-pom cherry.
- Let dry and set up a pretend ice cream stand.
12. Tropical Fish Suncatchers

Bright fish made from clear contact paper and tissue look like stained glass in a sunny window. Kids enjoy sticking colorful bits to fill the fish shape and seeing it glow.
Materials Needed:
- Clear contact paper
- Black construction paper (fish outline)
- Tissue paper squares
- Scissors
- String or tape
How to make it:
- Cut a fish outline from black paper, keeping the center open.
- Stick the outline onto contact paper, sticky side up.
- Fill the center with tissue squares; seal with another layer of contact paper.
- Trim edges and hang in a sunny spot.
13. Beachy Salt Dough Ornaments
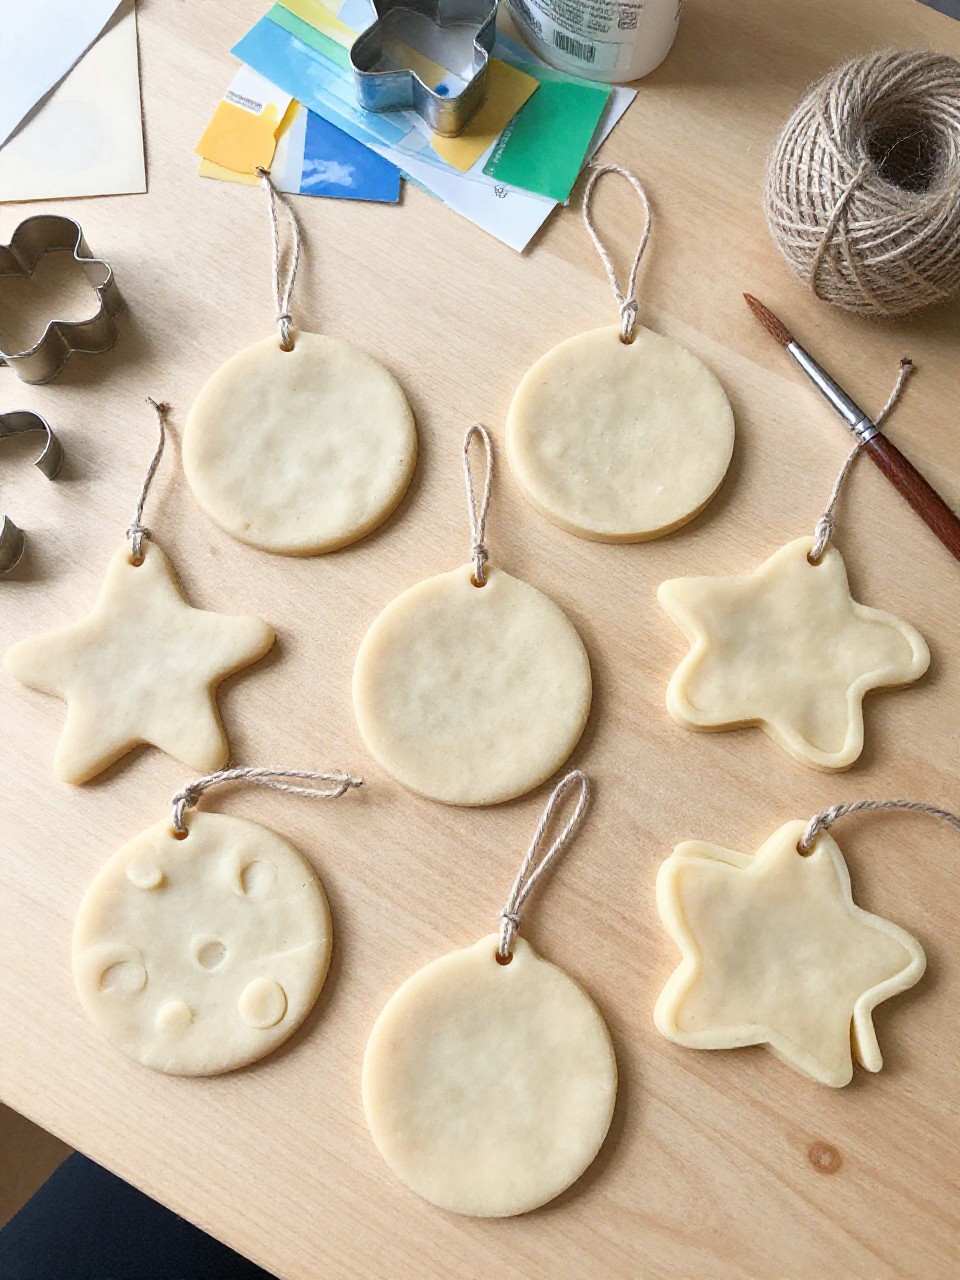
Starfish, shells, and flip-flops made from salt dough dry into paintable keepsakes. Kids enjoy rolling, cutting shapes, and painting them with sandy textures and ocean colors.
Materials Needed:
- Salt dough (1 cup flour, 1/2 cup salt, 1/2 cup water)
- Cookie cutters (star, shell, foot)
- Paint and brush
- Skewer for holes
- Twine
How to make it:
- Mix salt dough and roll to 1/4 inch thick.
- Cut shapes; poke a hole for hanging.
- Bake low and slow or air dry until hard.
- Paint, let dry, and tie with twine.
14. Lemonade Stand Banner
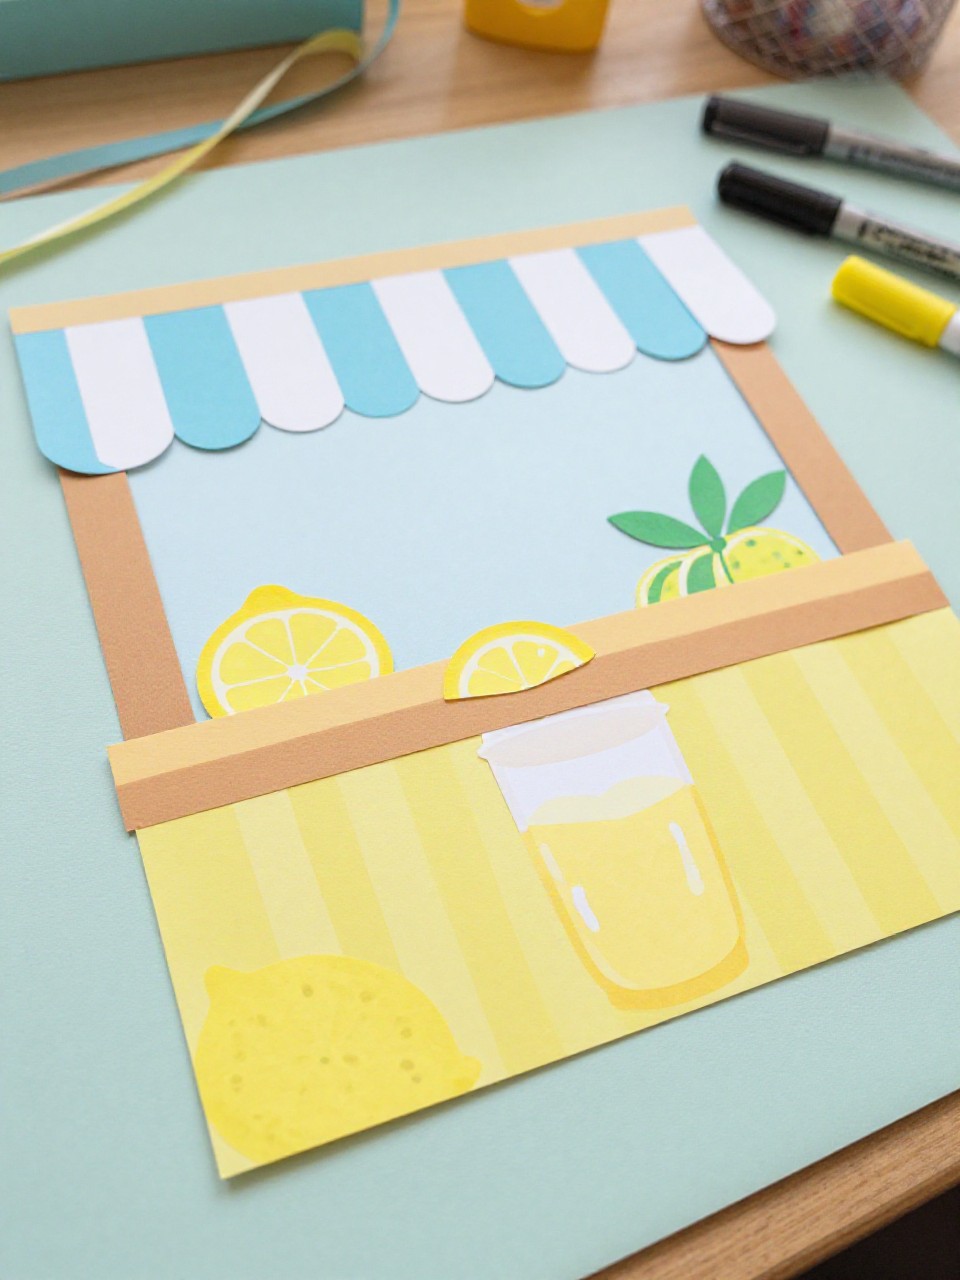
A sunny banner with lemon slices spells “LEMONADE,” perfect for backyard pretend play. Kids love making their own shop sign and practicing letters while crafting.
Materials Needed:
- Yellow and white cardstock
- String or ribbon
- Hole punch
- Markers
- Glue
How to make it:
- Cut circles of yellow and white; layer to look like lemon slices.
- Write one letter on each slice to spell “LEMONADE.”
- Punch holes and thread slices onto string.
- Hang on a table or wall for a stand.
15. Sand Art Bottles
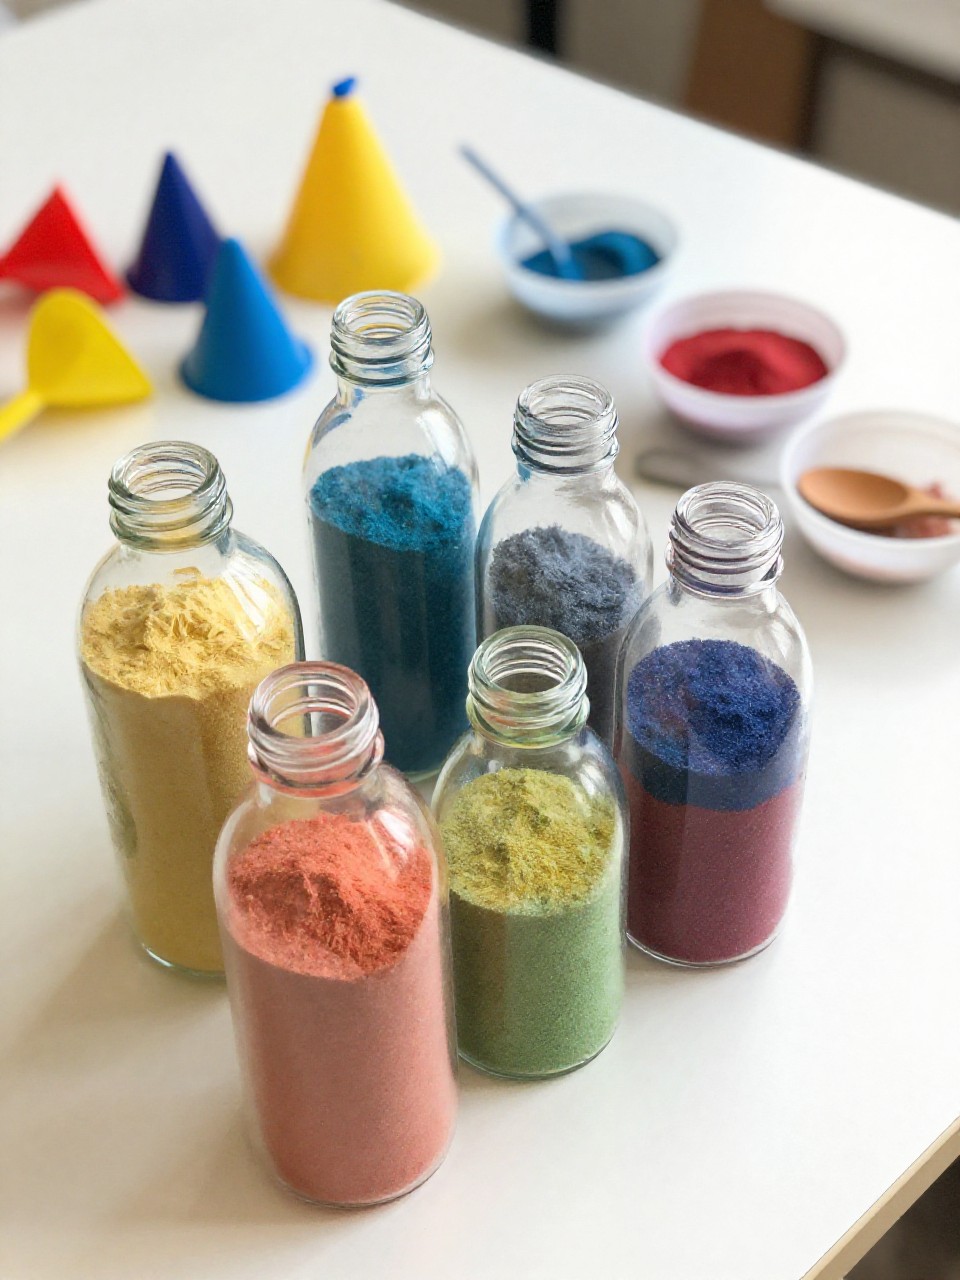
Layered sands in bright colors create a striped beach-in-a-bottle look. Kids enjoy pouring and tilting to make patterns and watching the colors stack up.
Materials Needed:
- Clear plastic bottles or jars
- Colored sand (store-bought or DIY with salt and chalk)
- Small funnels or paper cones
- Spoon
- Tape or glue to seal
How to make it:
- Place a funnel in the bottle opening.
- Spoon in colored sand, tilting the bottle between layers for waves.
- Repeat until full; tap gently to settle.
- Seal the cap with tape or glue.
16. Pineapple Handprint Cards
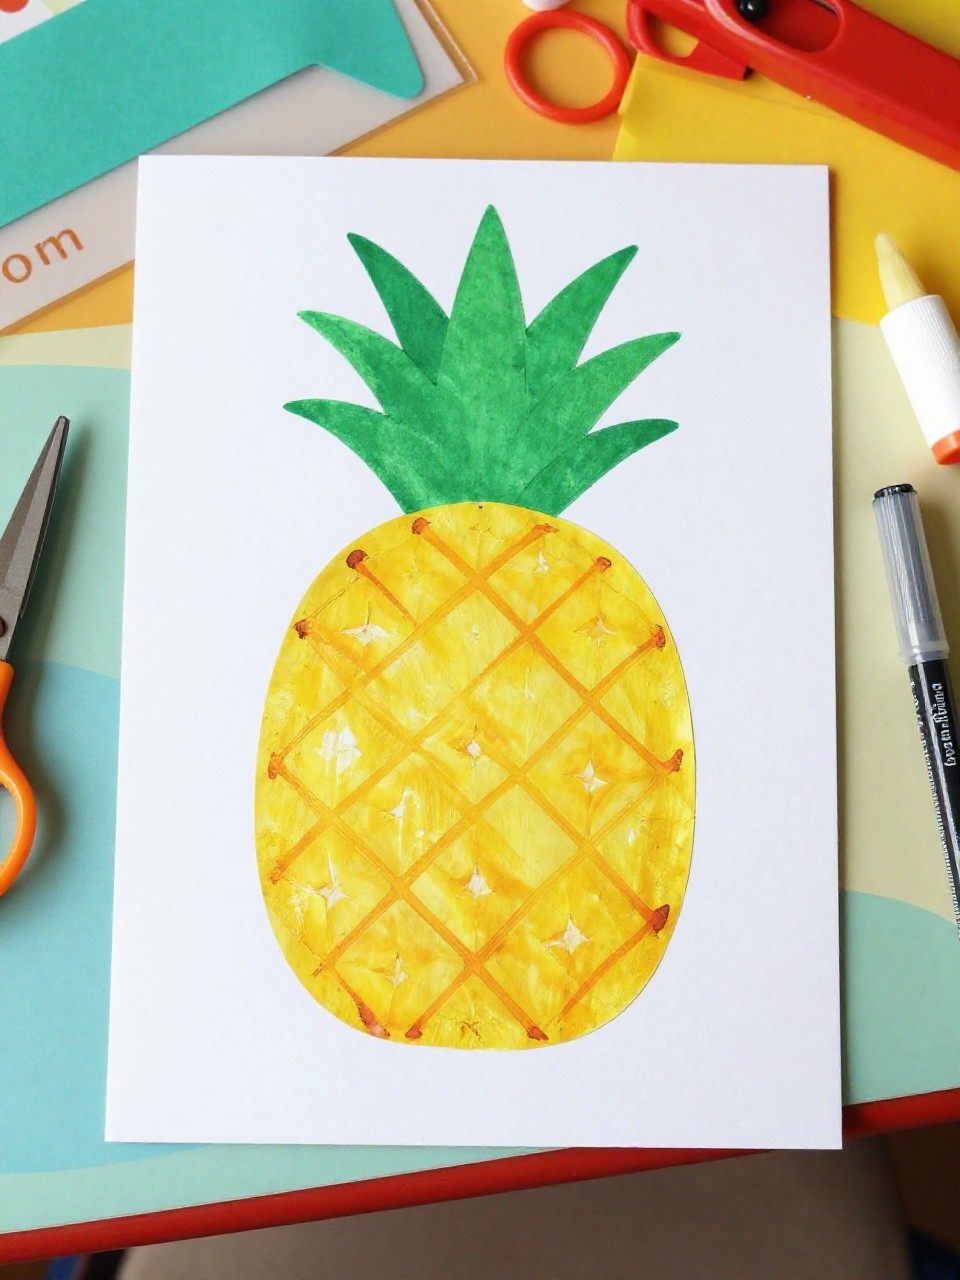
These cards look like happy pineapples with green crowns and textured yellow “scales” made from handprints. Kids love gifting a sunny card to family or friends.
Materials Needed:
- Yellow and green construction paper
- White cardstock (card base)
- Glue
- Black marker
- Scissors
How to make it:
- Paint or stamp yellow handprints on paper; cut into an oval pineapple shape.
- Cut green leaves and glue as the crown.
- Glue the pineapple onto a folded card and add a smile or message.
- Let dry and deliver your tropical note.
17. Firefly Glow Jars
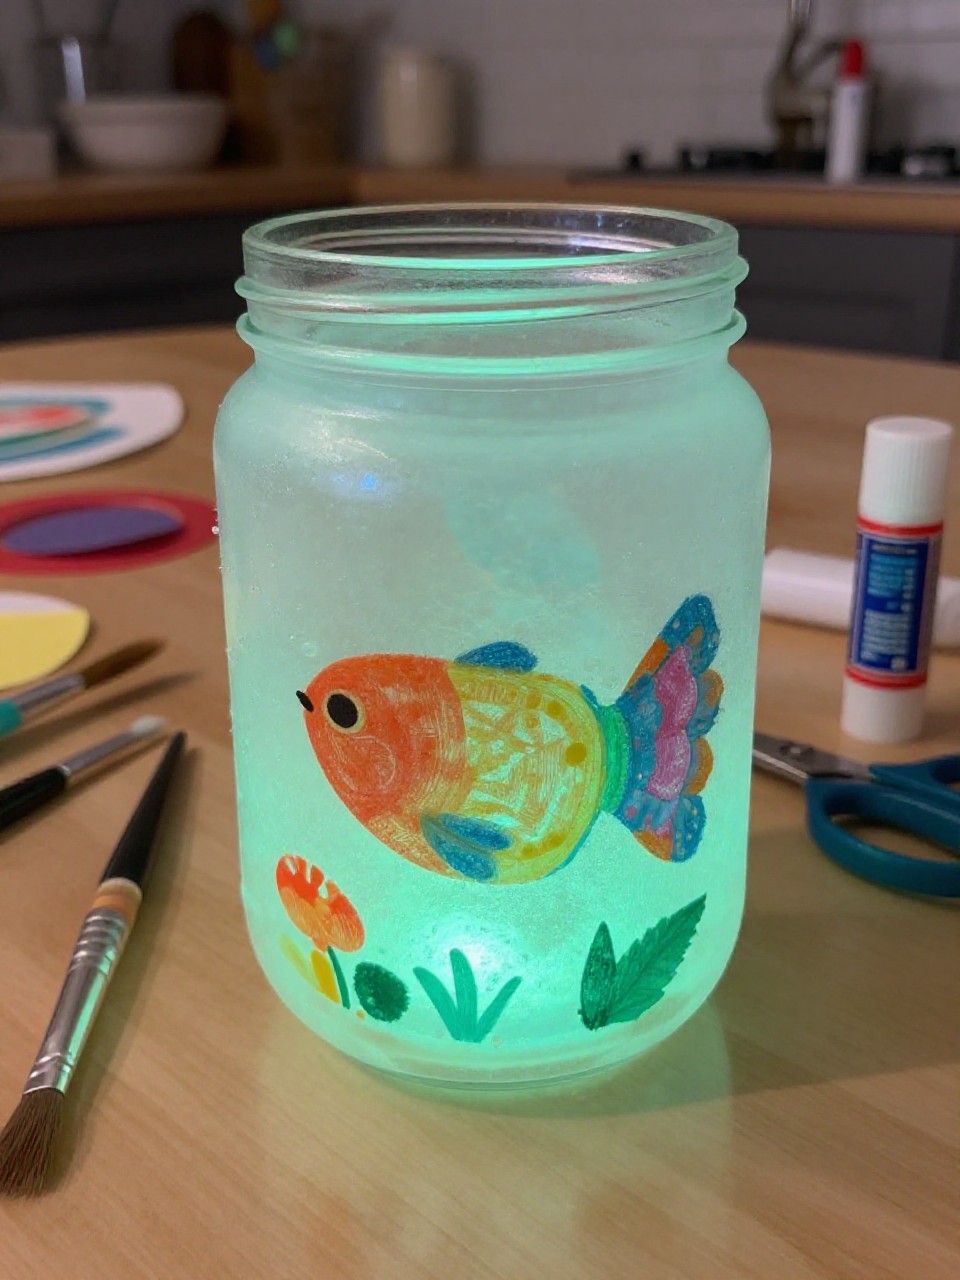
A jar with painted dots and a tiny paper firefly glows softly with a battery tea light, like summer nights. Kids enjoy turning off the lights to see their jar twinkle and adding wings and antennae.
Materials Needed:
- Clean clear jar (plastic recommended)
- Battery tea light
- Acrylic paint (yellow/green)
- Black paper (wings, body)
- Glue or tape
How to make it:
- Paint small glow dots inside the jar; let dry.
- Cut a simple firefly body and wings from black paper.
- Tape the tea light to the lid and add the paper firefly inside.
- Close the jar, switch on, and enjoy the glow.