
In This Article Show
Keeping kids busy can be tough, especially on rainy afternoons or during long school breaks. When you need something simple and mess-light, paper box crafts are a great answer. This list gives you fun, quick projects made from paper boxes you already have—tissue boxes, cereal boxes, and small gift boxes.
You’ll find cute toys, handy organizers, and playful decorations you can make today. Let’s jump into these easy, colorful paper box ideas.
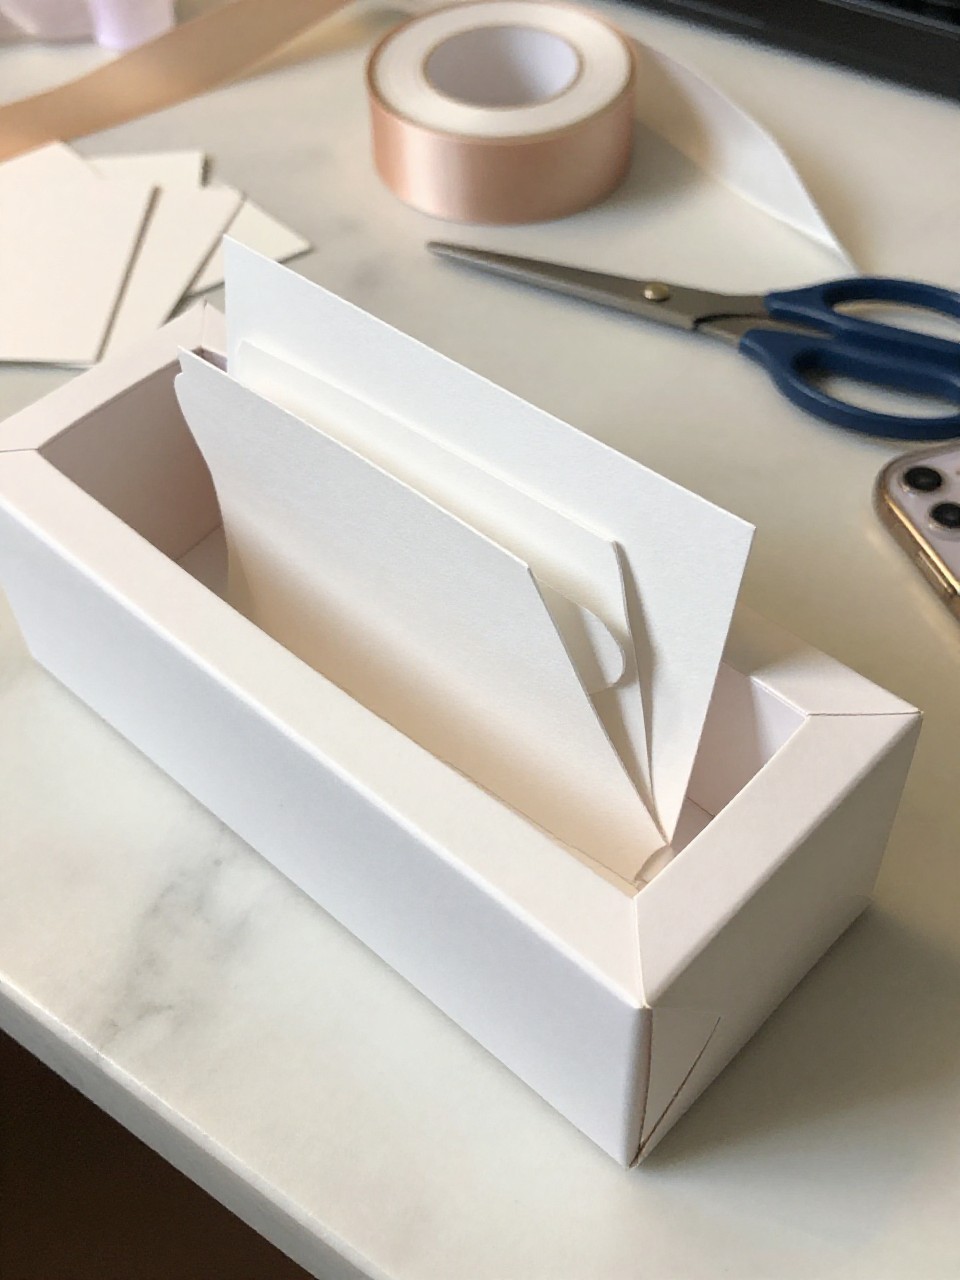
1. Mini Drawer Organizer Box
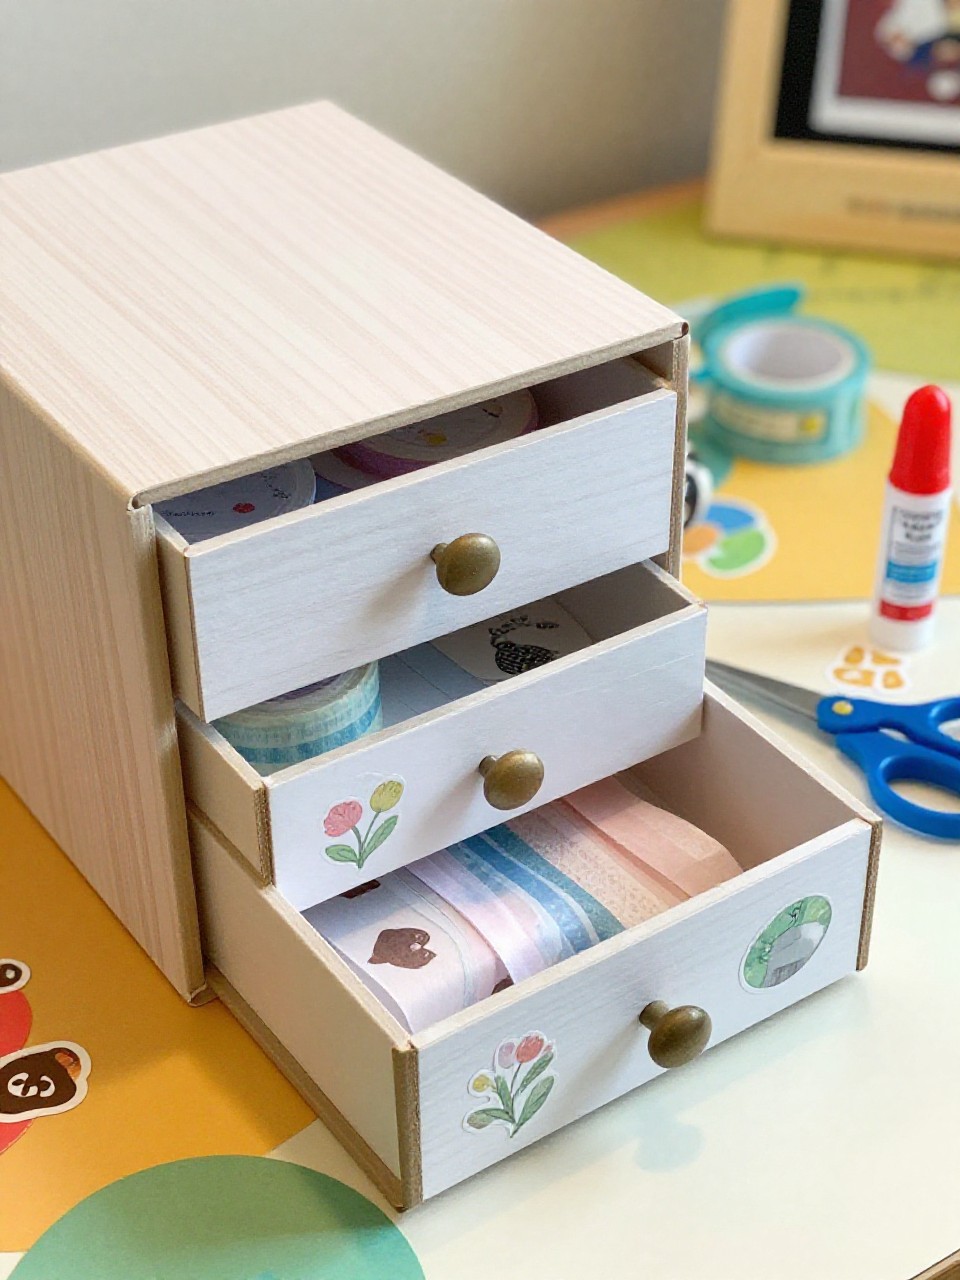
This craft turns a small paper gift box into a tiny drawer with a pull tab, perfect for pencils, erasers, or stickers. Kids like it because they can decorate the outside and stash secret treasures inside; it’s simple and feels useful right away.
Materials Needed:
- Small paper gift box with lid
- Colored paper or washi tape
- Glue stick
- Hole punch or sharp pencil (with adult help)
- Ribbon or string for pull tab
How to make it:
- Wrap the outside of the box and lid with colored paper or washi tape.
- Punch a small hole in the front of the lid and tie in a ribbon loop for a drawer pull.
- Add stickers, doodles, or labels to the front and sides.
- Slide the lid on like a drawer and fill it with small items.
2. Cereal Box Magazine Holder
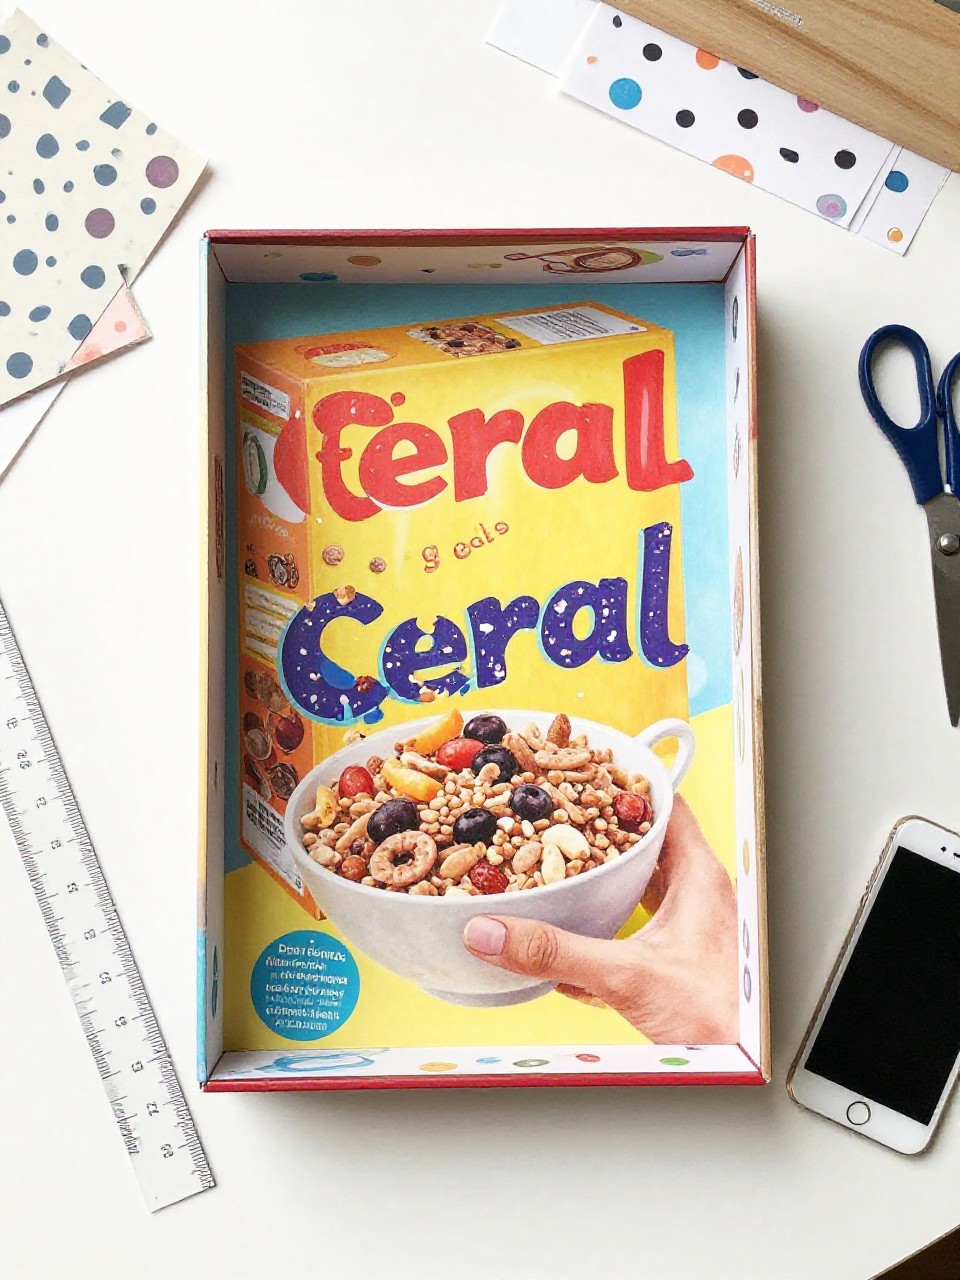
This project turns a cereal box into a slanted magazine or folder holder with bright patterns. Kids enjoy customizing it with bold paper and labels, and it helps keep homework or art safe on a shelf.
Materials Needed:
- Empty cereal box
- Ruler and pencil
- Scissors
- Wrapping paper or scrapbook paper
- Glue stick or double-sided tape
How to make it:
- Mark a diagonal cut from the front center to the back top and cut to make a slanted holder.
- Trace and wrap the outside with patterned paper, gluing edges flat.
- Add a label on the spine and decorate with stickers or markers.
- Let glue set and stand it upright with magazines or folders inside.
3. Tissue Box Monster Muncher

A tissue box becomes a silly monster with a big mouth where tissues once came out. Kids love feeding it paper “snacks” or small toys, and they can add goofy eyes, teeth, and spots.
Materials Needed:
- Empty tissue box
- Acrylic paint or construction paper covers
- Googly eyes or paper eyes
- White cardstock for teeth
- Glue and markers
How to make it:
- Remove leftover plastic from the opening and paint or paper-wrap the box.
- Cut and glue white triangle teeth around the opening to make a mouth.
- Add eyes on top and draw spots, stripes, or a tongue.
- Let dry and “feed” the monster with scrap paper treats.
4. Postcard Storage Shoebox
Turn a shoebox into a neat storage bin for postcards, photos, or recipe cards, dressed in a clean, bright style. It’s satisfying because kids can sort memories and decorate dividers.
Materials Needed:
- Clean paper shoebox with lid
- Craft paper or contact paper
- Index cards for dividers
- Glue stick or double-sided tape
- Stickers and labels
How to make it:
- Cover the box and lid with craft or contact paper, smoothing bubbles.
- Make dividers with index cards and label the tabs.
- Decorate the box with stickers, washi tape, or drawn borders.
- Fill with postcards or photos and stack on a shelf.
5. Paper Box City Buildings
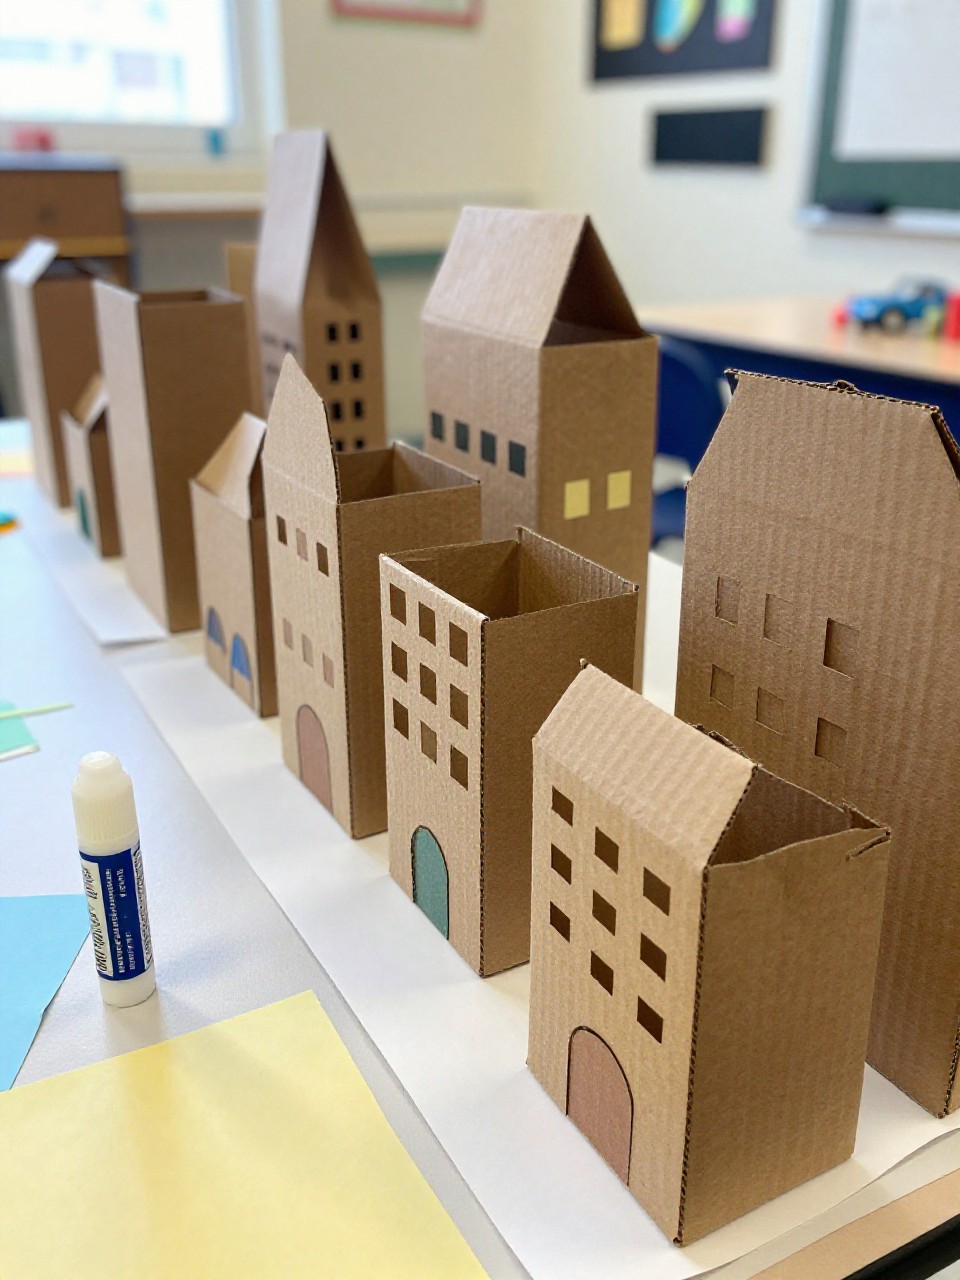
Small snack boxes become colorful city buildings with windows, doors, and rooftop signs. Kids enjoy arranging a tiny town and moving toy cars around the streets.
Materials Needed:
- Small paper food boxes (granola bar, tea, or snack boxes)
- Colored paper
- Markers
- Glue stick
- Bottle caps for rooftop signs (optional)
How to make it:
- Wrap each box with colored paper to reset the surface.
- Cut and glue windows, doors, and awnings; draw brick lines or numbers.
- Add signs or bottle-cap “satellite dishes” on top.
- Line them up to make a street and play.
6. Tiny Paper Box Gift House
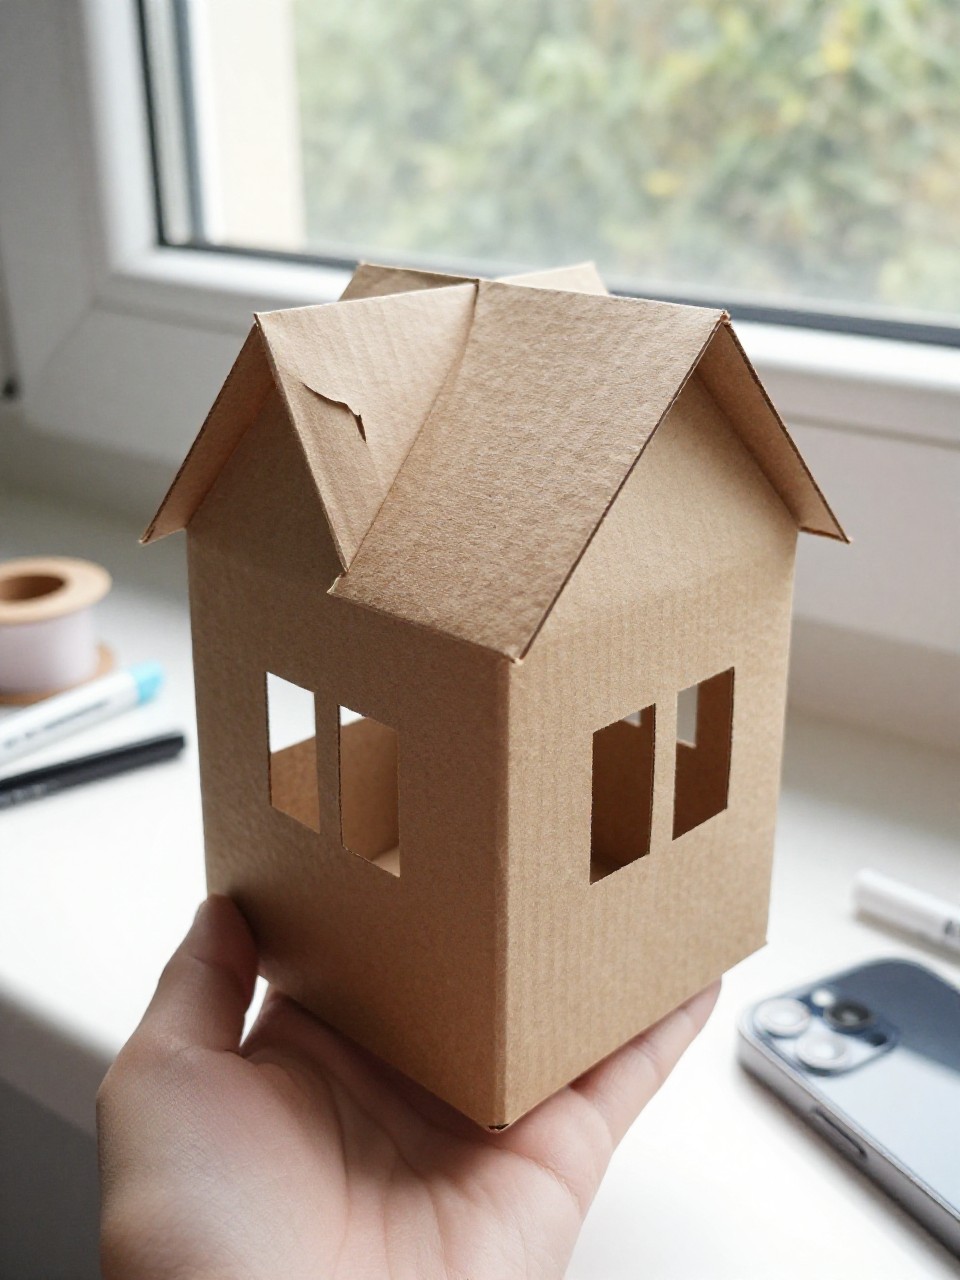
A small cube box turns into a cute gift house with a paper roof and hand-drawn windows. It’s fun to give as a present with a treat inside and looks charming on a windowsill.
Materials Needed:
- Small square paper box
- Colored cardstock for roof
- Markers and stickers
- Glue stick
- Ribbon (optional)
How to make it:
- Close the box and cut a rectangle of cardstock slightly larger than the top for a roof.
- Fold the roof in half and glue it on top like a little house roof.
- Draw windows, bricks, flowers, and a door; add a ribbon around the box if you like.
- Place a small gift inside and display.
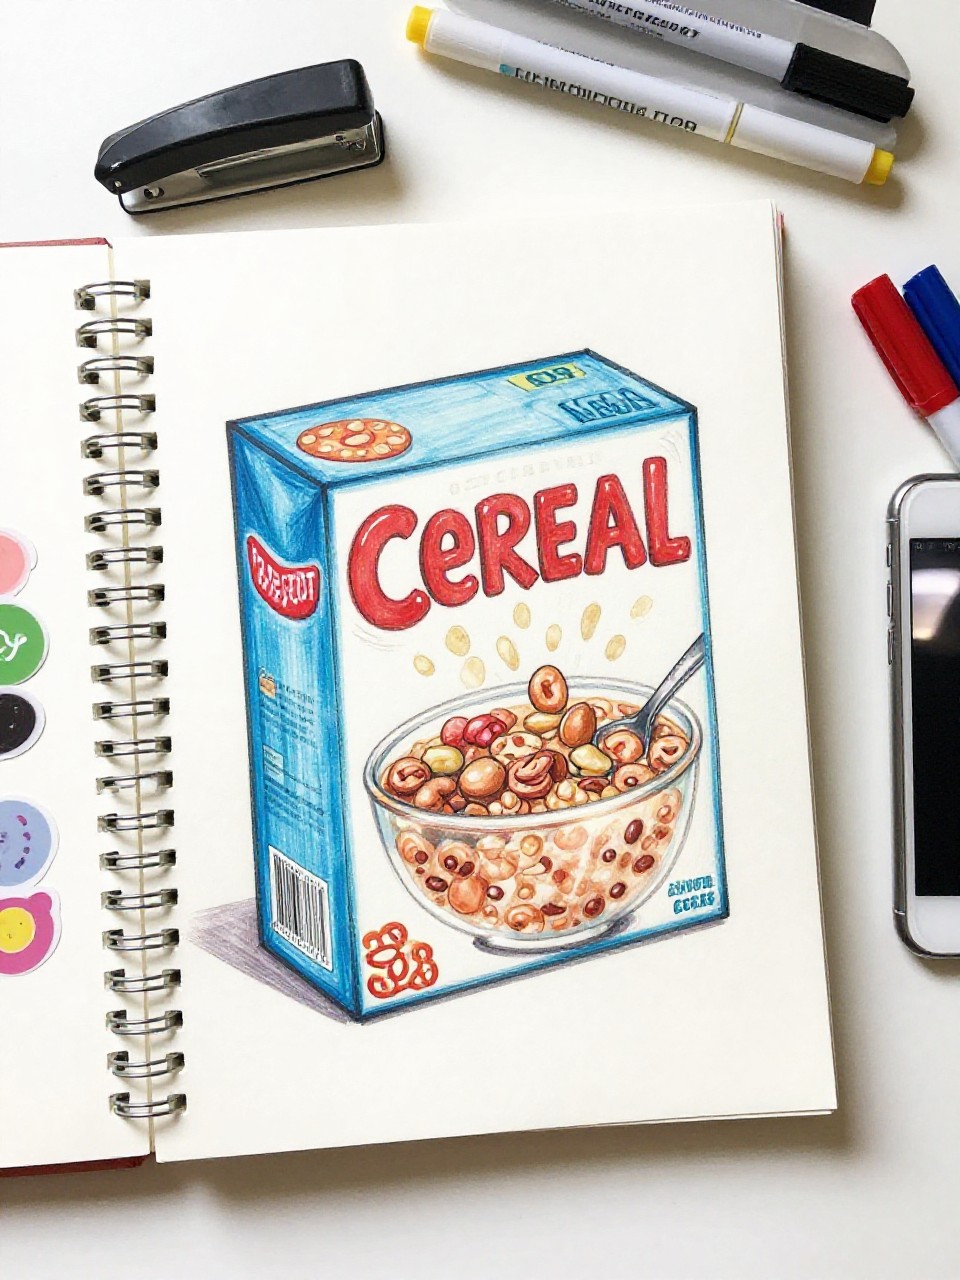
7. Cereal Box Puzzle Pieces
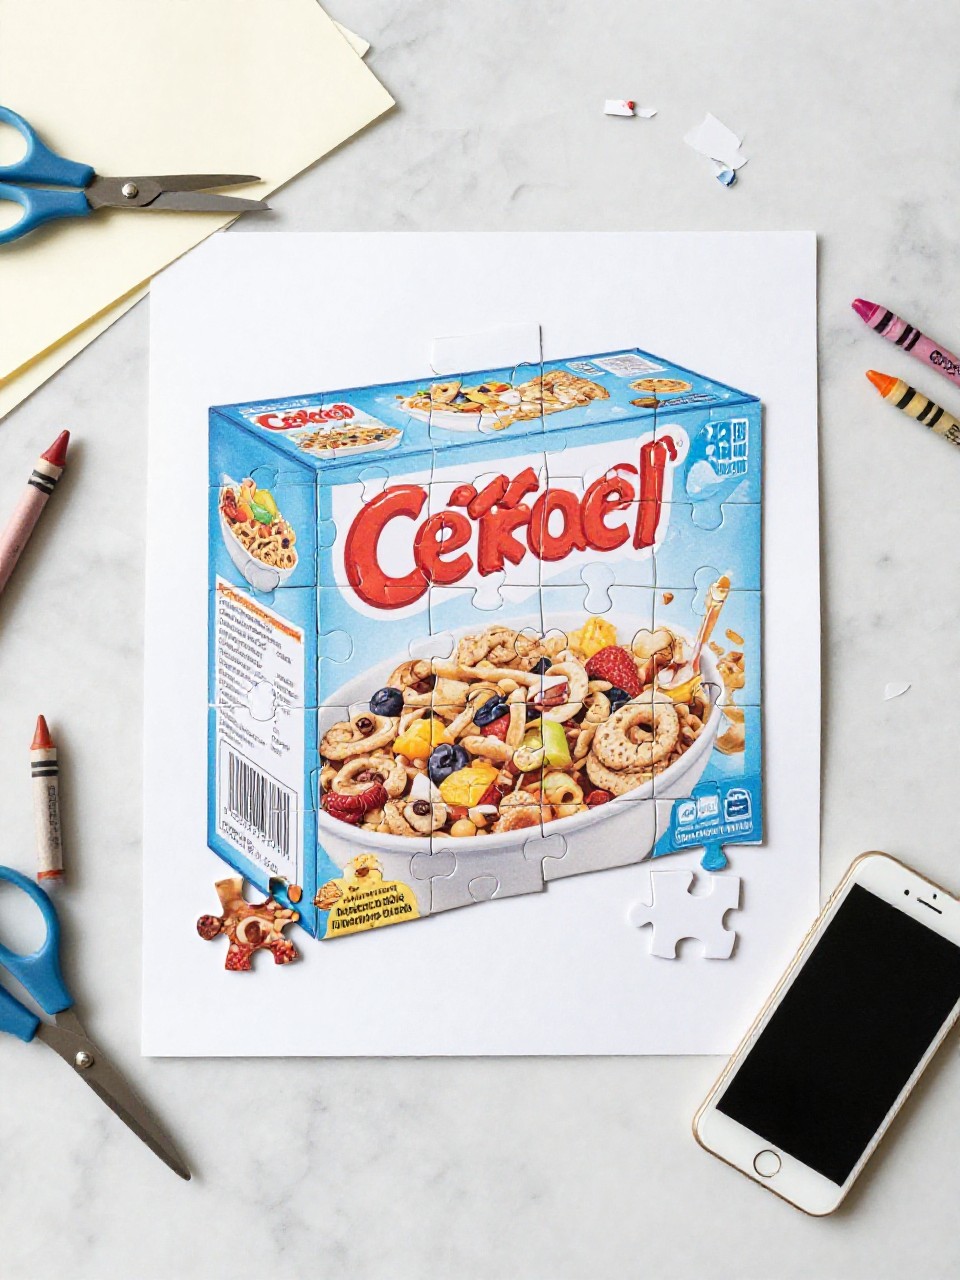
Make a custom jigsaw puzzle by drawing or collaging a picture on a cereal box panel and cutting it into chunky pieces. Kids love building their own puzzles and can choose the difficulty with more or fewer cuts.
Materials Needed:
- Front panel of a cereal box
- White paper for base drawing (optional)
- Markers, crayons, or collage scraps
- Glue stick
- Scissors
How to make it:
- Cut off a flat panel from a cereal box and glue white paper on it if you want a clean base.
- Draw or collage a bold image across the whole panel.
- Cut the panel into large puzzle shapes or simple squares.
- Mix the pieces and solve your homemade puzzle.
8. Tissue Box Aquarium
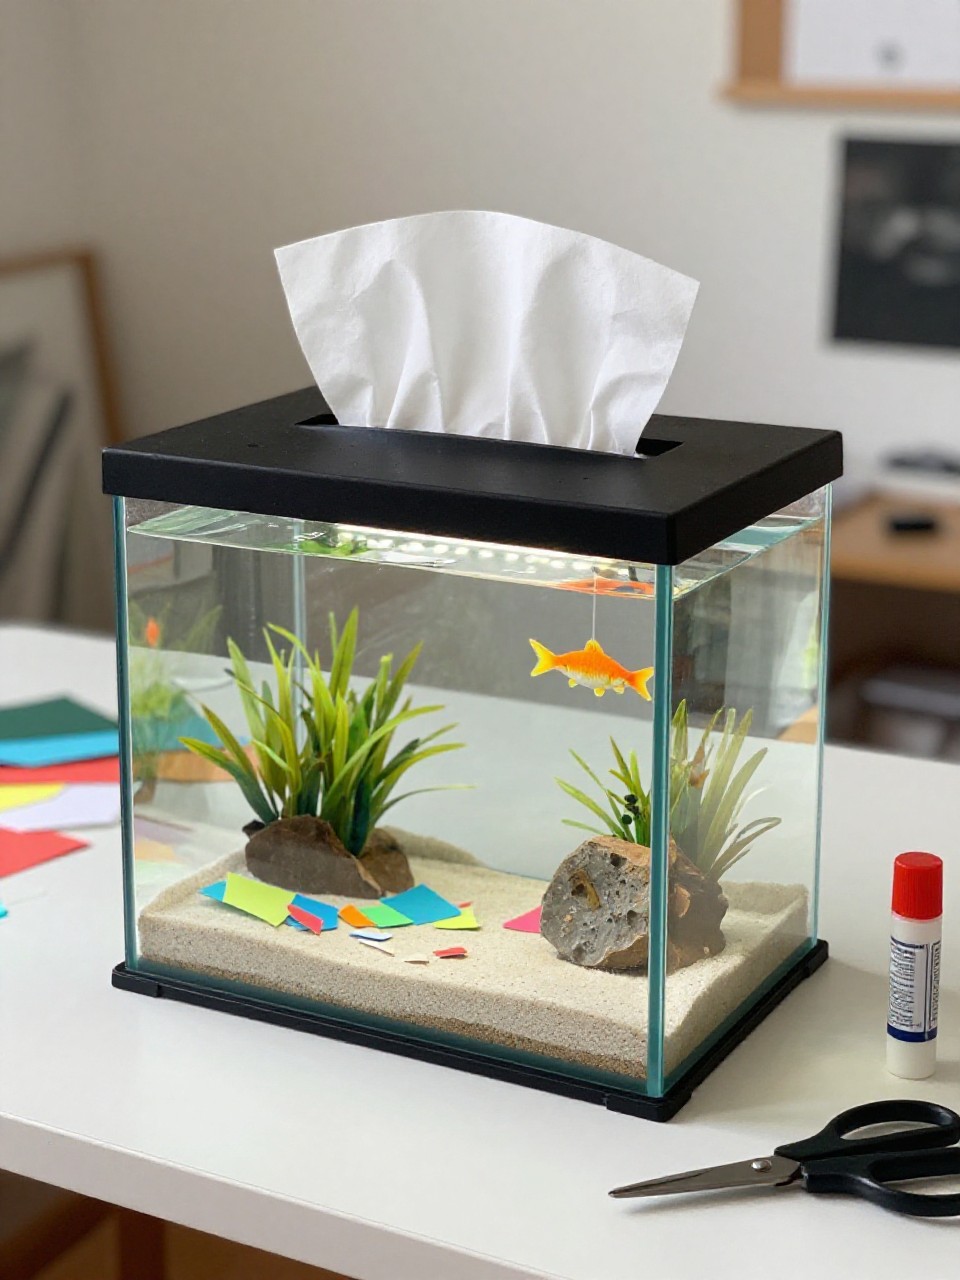
Turn a tissue box into a tiny aquarium with blue paper “water,” paper fish, and dangling seaweed. Kids enjoy peeking through the opening and moving fish on strings.
Materials Needed:
- Empty tissue box
- Blue paper
- Colored paper for fish and plants
- Thread or clear string
- Glue, tape, and markers
How to make it:
- Remove the plastic liner and cover the inside back with blue paper.
- Cut fish and seaweed from colored paper; draw eyes and scales.
- Tape fish to strings and attach them inside the top of the box; glue seaweed to the bottom.
- Decorate the outside and display your mini ocean.
9. Paper Box Camera Pretend Play
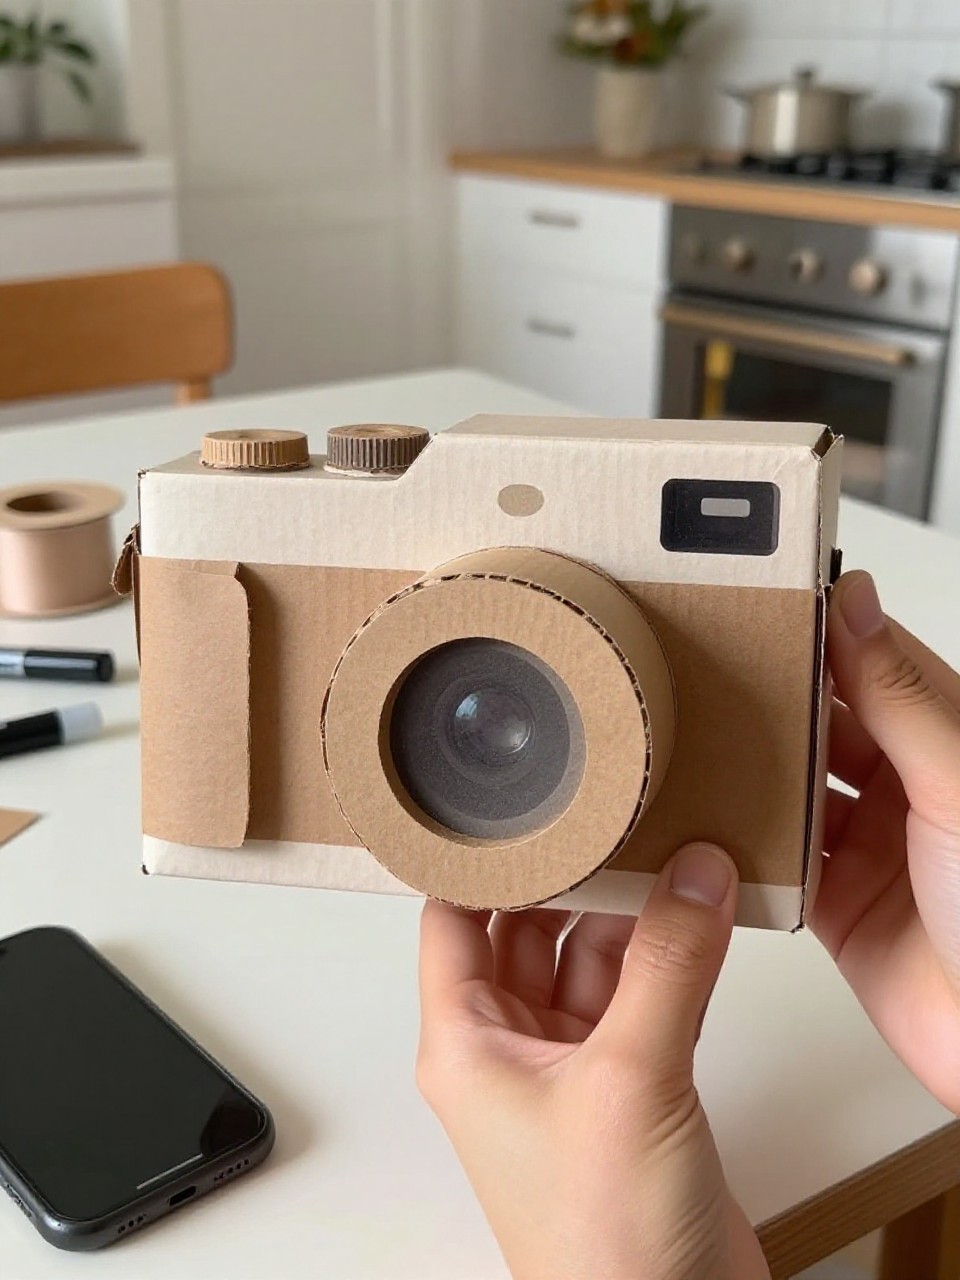
A small box becomes a pretend camera with a paper lens, button, and strap. Kids love play-acting as photographers and “clicking” pictures around the house.
Materials Needed:
- Small rectangular paper box
- Black and gray paper
- Bottle cap for lens rim (optional)
- Yarn or ribbon for strap
- Glue and markers
How to make it:
- Wrap the box with black paper for a camera body.
- Cut and glue a gray circle lens on the front; add a bottle cap as a rim if you like.
- Tape or glue yarn straps to the sides and draw buttons and a screen.
- Wear and play photographer.
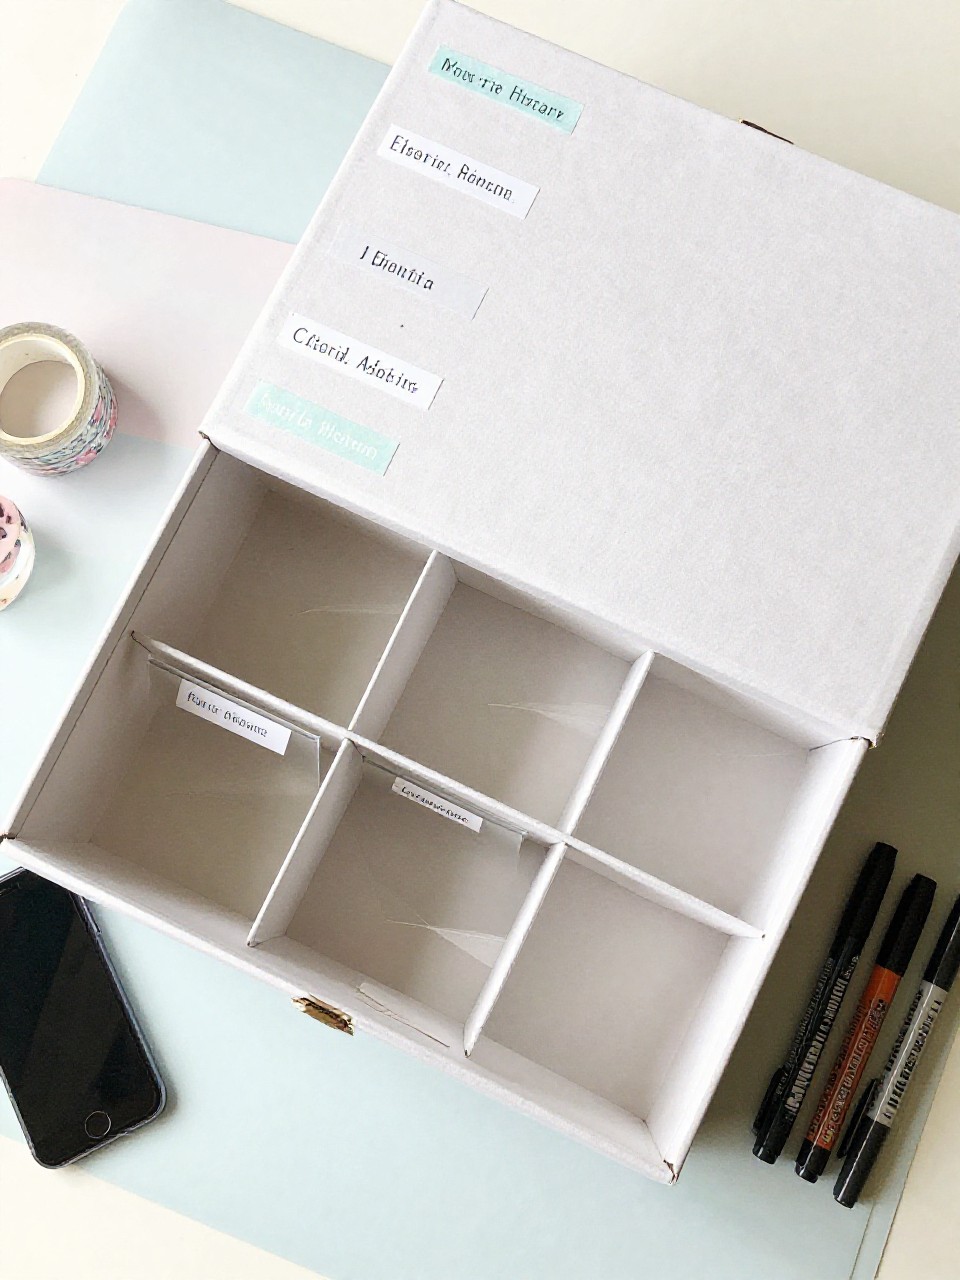
10. Desk Cubby From a Tea Box
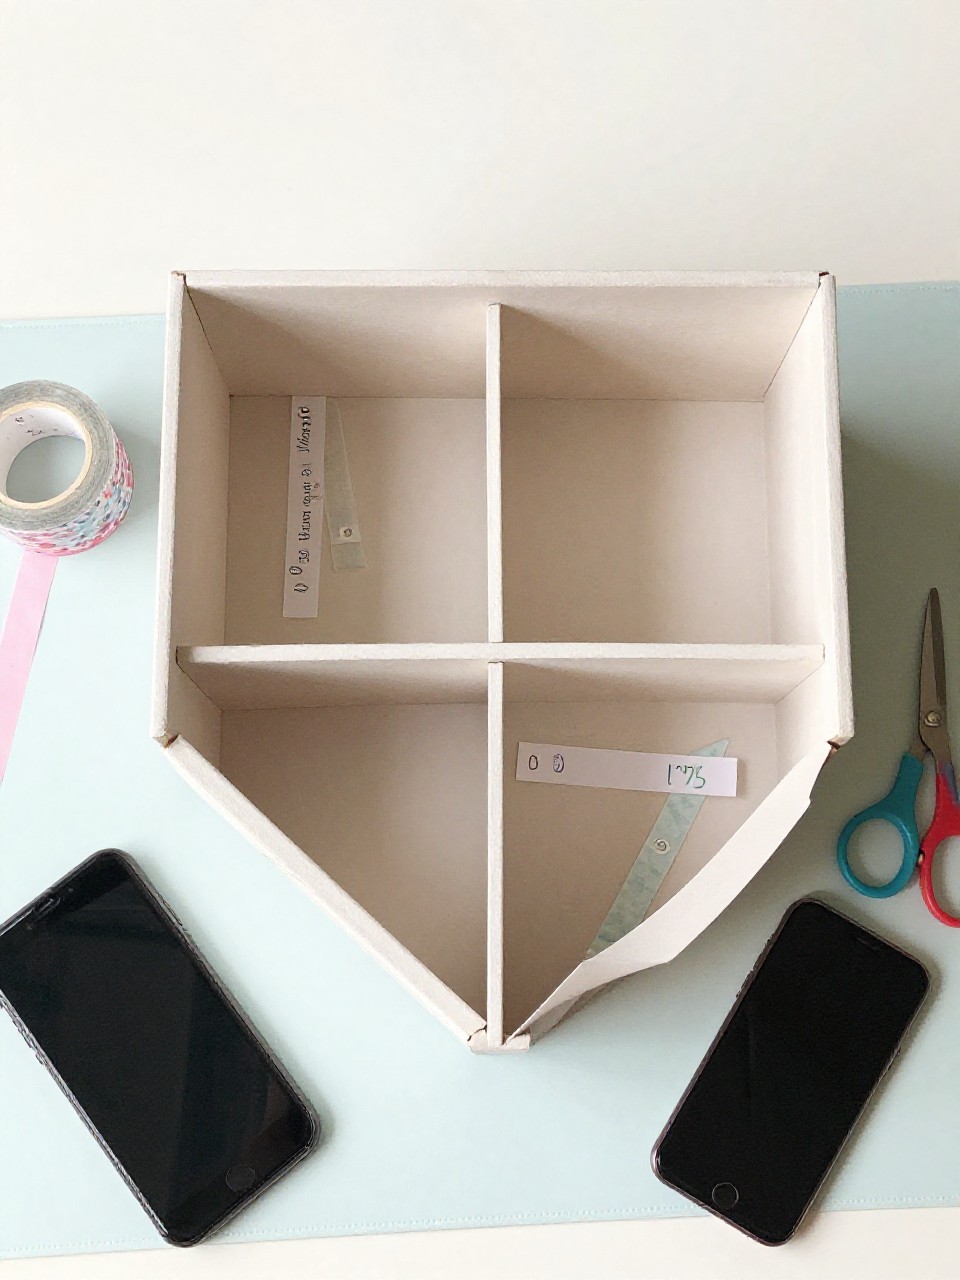
A tea box makes a small desk cubby with two sections for notes and pens. It’s satisfying because it reduces clutter and looks bright and neat.
Materials Needed:
- Empty tea box with flip top
- Cardstock for divider
- Decorative paper
- Glue stick or tape
- Labels or washi tape
How to make it:
- Cut off the top flap and wrap the box in decorative paper.
- Measure and slide a cardstock divider inside to split the space.
- Add labels and decorate edges with washi tape.
- Fill with sticky notes, pens, and clips.
11. Paper Box Robot Buddy
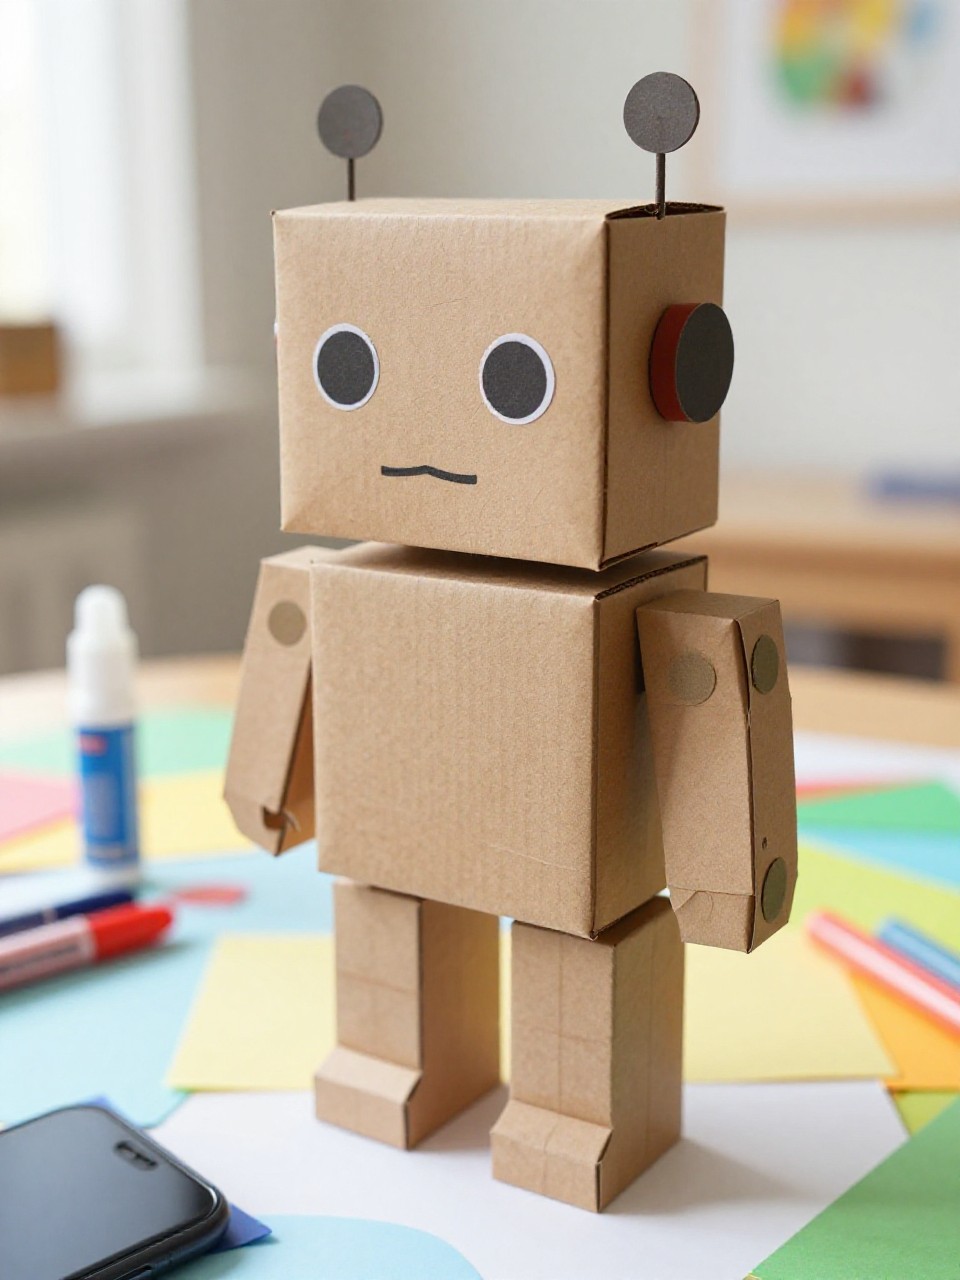
Stack two small boxes to make a friendly robot with paper arms and a smiley face. Kids enjoy choosing colors, buttons, and giving the robot a name.
Materials Needed:
- Two small paper boxes (body and head)
- Silver or gray paper
- Colored paper for arms and buttons
- Glue and tape
- Markers and googly eyes (optional)
How to make it:
- Wrap both boxes in silver or gray paper.
- Glue the head box on top of the body; tape paper strip arms to the sides.
- Add buttons, a panel, and a face with markers or googly eyes.
- Let dry and display your robot on a shelf.
12. Cereal Box Book Cover Sketchpad
Turn a cereal box panel into a sturdy cover for a simple stapled sketchpad. Kids like making their own art notebook and personalizing the cover.
Materials Needed:
- Cereal box panel (front or back)
- Printer paper sheets
- Stapler and tape
- Decorative paper or markers
- Stickers
How to make it:
- Cut the cereal box panel slightly larger than your paper stack and fold it like a book cover.
- Place paper inside and staple along the fold; tape over staples for safety.
- Decorate the outside with drawings, stickers, or titles.
- Start sketching in your custom pad.
13. Paper Box Animal Planters (Fake Plants)
Small boxes become cute animal “planters” with paper ears and a top opening filled with tissue paper “plants.” Kids enjoy picking animals and colors without needing real soil.
Materials Needed:
- Small paper boxes
- Colored paper for ears and faces
- Green tissue paper for leaves
- Glue stick
- Markers
How to make it:
- Wrap boxes in a base color; cut a top opening if closed.
- Add paper ears, noses, and cheeks; draw eyes and whiskers.
- Crumple green tissue and tuck into the opening as pretend plants.
- Line them up on a windowsill.
14. Gift Tag Dispenser Box
A small paper box becomes a handy dispenser for pre-cut gift tags with a slot at the front. It’s satisfying to pull out a tag when wrapping gifts, and kids can design seasonal themes.
Materials Needed:
- Small rectangular paper box
- Cardstock tags or cut tag shapes
- Craft knife (adult use) or scissors
- Decorative paper and labels
- Glue stick
How to make it:
- Wrap the box in decorative paper and label it “Gift Tags.”
- Cut a small front slot for tags to slide out; smooth edges with tape.
- Fill the box with a stack of tags and decorate with stickers or drawings.
- Place on a wrapping shelf and pull out tags as needed.
15. Paper Box Marble Maze
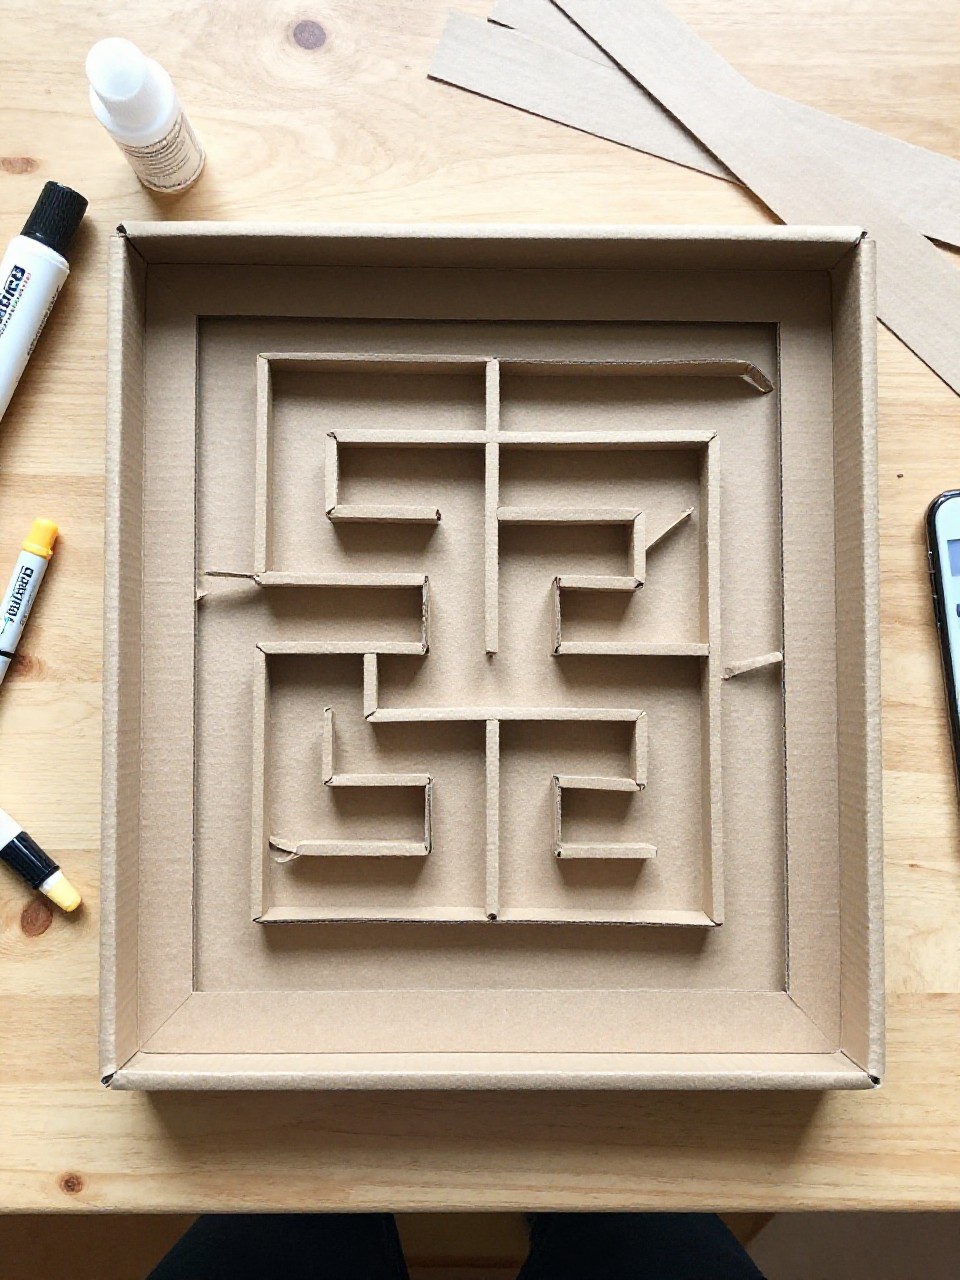
Create a simple marble maze inside a shallow box lid using paper strip walls. Kids love testing different paths and racing marbles through twists and turns.
Materials Needed:
- Shallow paper box lid or tray
- Cardstock strips
- Glue or double-sided foam tape
- Marker for start/finish
- Marble
How to make it:
- Draw a start and finish inside the lid.
- Cut cardstock strips and glue them as walls to form pathways.
- Add arrows, color zones, or numbers for points.
- Tilt the box and roll the marble through the maze.