


In This Article Show
Spring is the season of fresh starts, but you don’t need a full makeover to make your home feel new. A few small, clever projects can shift the mood and spark joy every time you walk by. The best part?

These ideas look fancy but are actually simple to do with basic tools and affordable supplies.
Pick one this weekend and watch your space wake up—bright, calm, and a little bit magical.
1. Pressed Flower Window Hangers
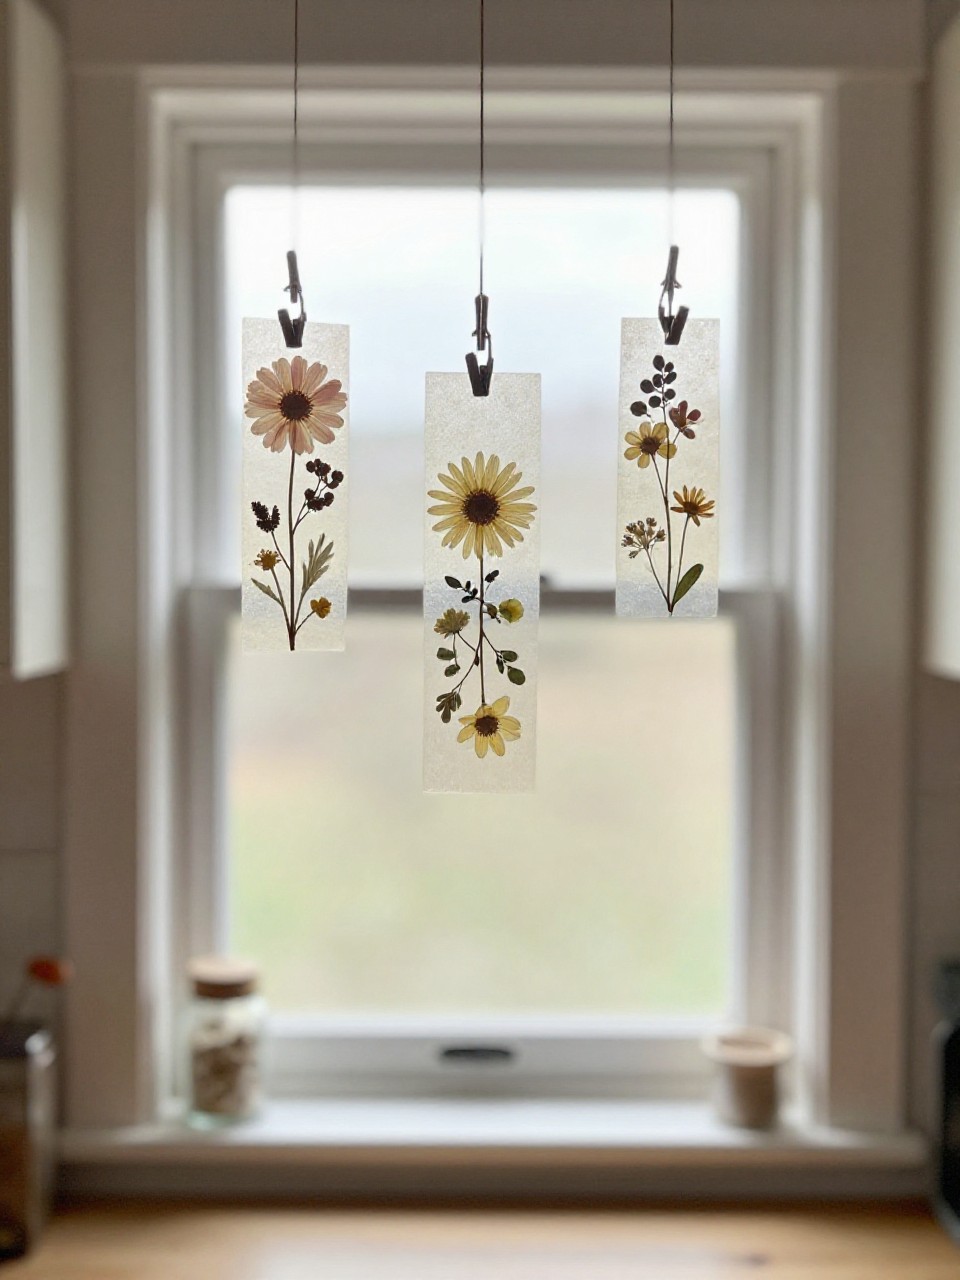
Delicate blooms look like they’re floating in air, catching sunlight and soft shadows. These hangers add a gentle, botanical mood to any window and feel like a secret garden moment inside.
Materials Needed:
- Clear laminating sheets or self-adhesive book covers
- Pressed flowers/leaves
- Thin ribbon or twine
How to make it:
- Arrange pressed flowers between two laminating sheets and seal.
- Trim into circles, arches, or organic shapes.
- Punch a small hole near the top and add ribbon or twine.
- Hang on small clear hooks in a sunny window.
2. Limewash-Look Terracotta Pots
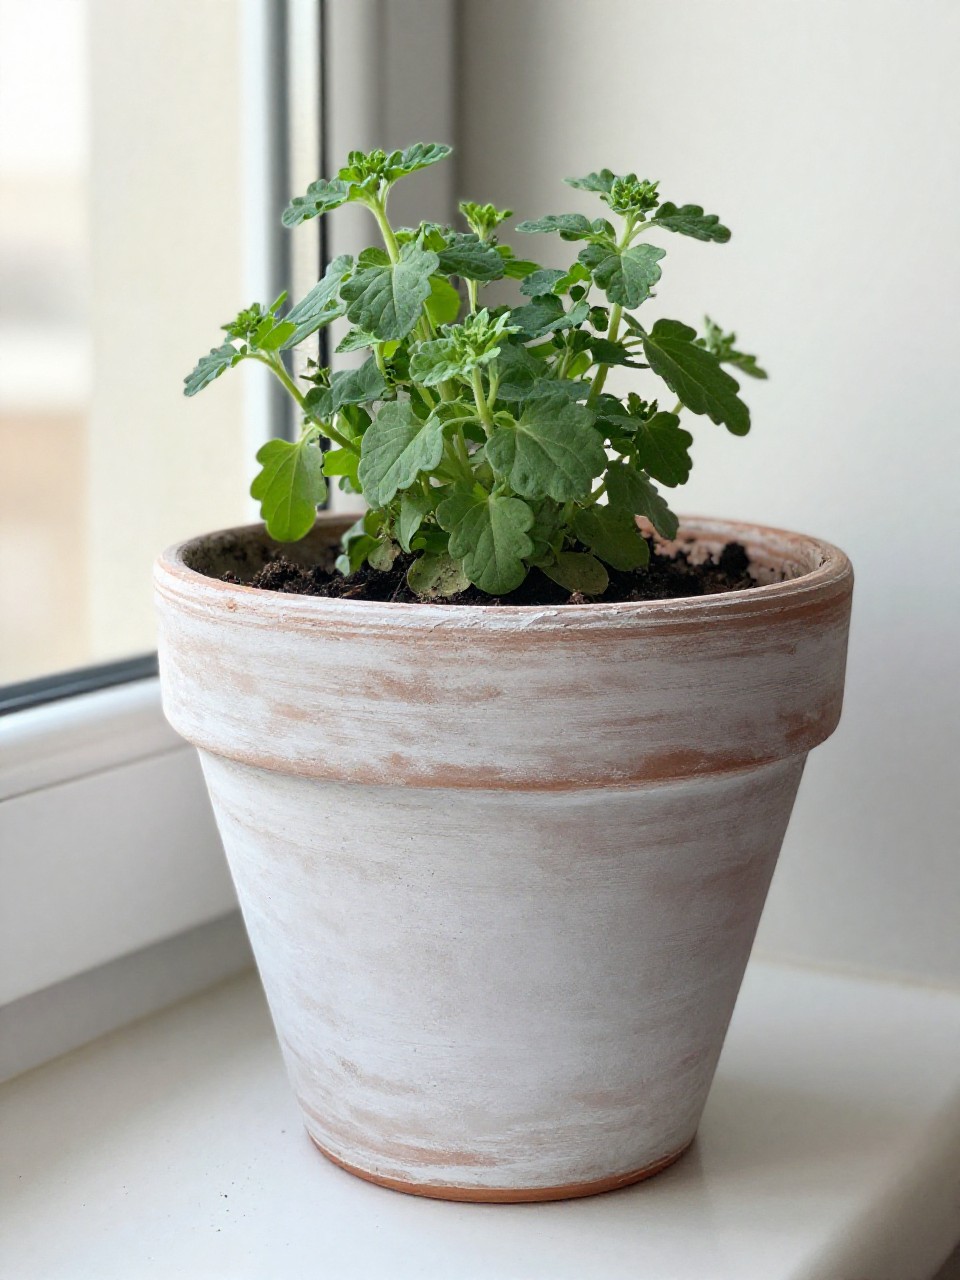
Get the dreamy, chalky limewash vibe without the mess. These pots look like they came from a boutique garden shop and make even grocery-store herbs feel special.
Materials Needed:
- Terracotta pots
- White acrylic paint
- Water + soft brush
How to make it:
- Mix acrylic paint with water (about 1:1) for a milky wash.
- Brush on in loose, crisscross strokes, letting some terracotta peek through.
- Dab with a damp cloth to soften and blend.
- Let dry and lightly sand edges for a worn, sun-faded look.
3. Cloud-Soft DIY Candle with Crushed Shells
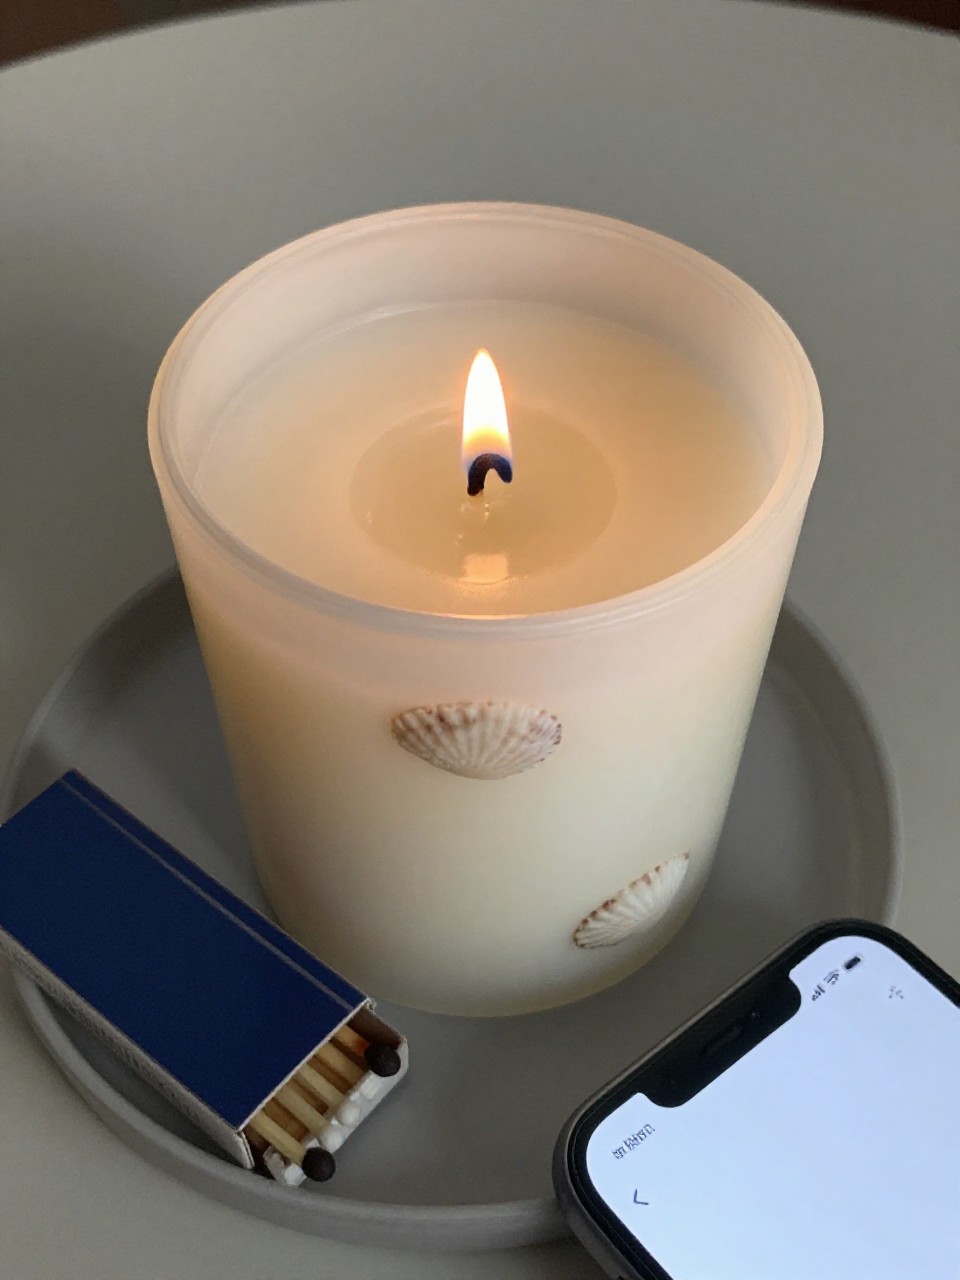
An airy, coastal candle with shells set like tiny fossils. The soft texture and glow feel like a beach morning at home.
Materials Needed:
- Soy wax flakes
- Cotton wick + wick sticker
- Clean glass or ceramic vessel + small crushed shells
How to make it:
- Set wick in the center of your vessel.
- Melt soy wax per package directions and cool slightly.
- Pour a thin layer, sprinkle shells near edges, then fill to top.
- Let set fully, trim wick, and enjoy the dappled light.
4. Fabric-Covered Switch Plates
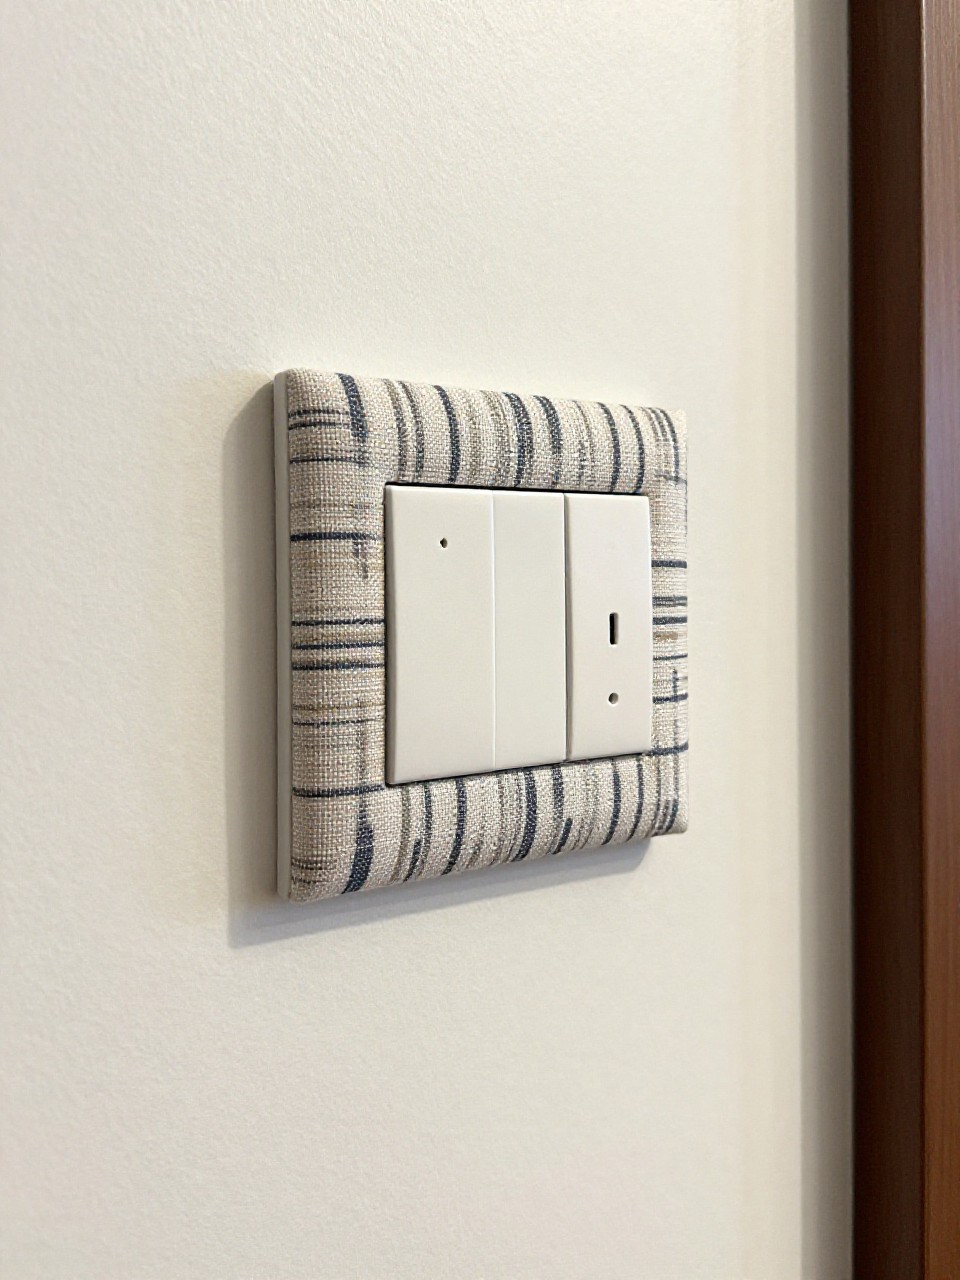
Turn an overlooked spot into a tiny design moment. These plates look designer but take minutes and scraps.
Materials Needed:
- Light cotton fabric
- Mod Podge or white glue
- Existing switch plate + craft knife
How to make it:
- Cut fabric slightly larger than the plate.
- Brush glue on plate, smooth fabric over, and wrap edges to the back.
- Slice out switch openings and screw holes with a craft knife.
- Seal the top with a thin glue layer; let dry and reinstall.
5. Painted Checkerboard Doormat
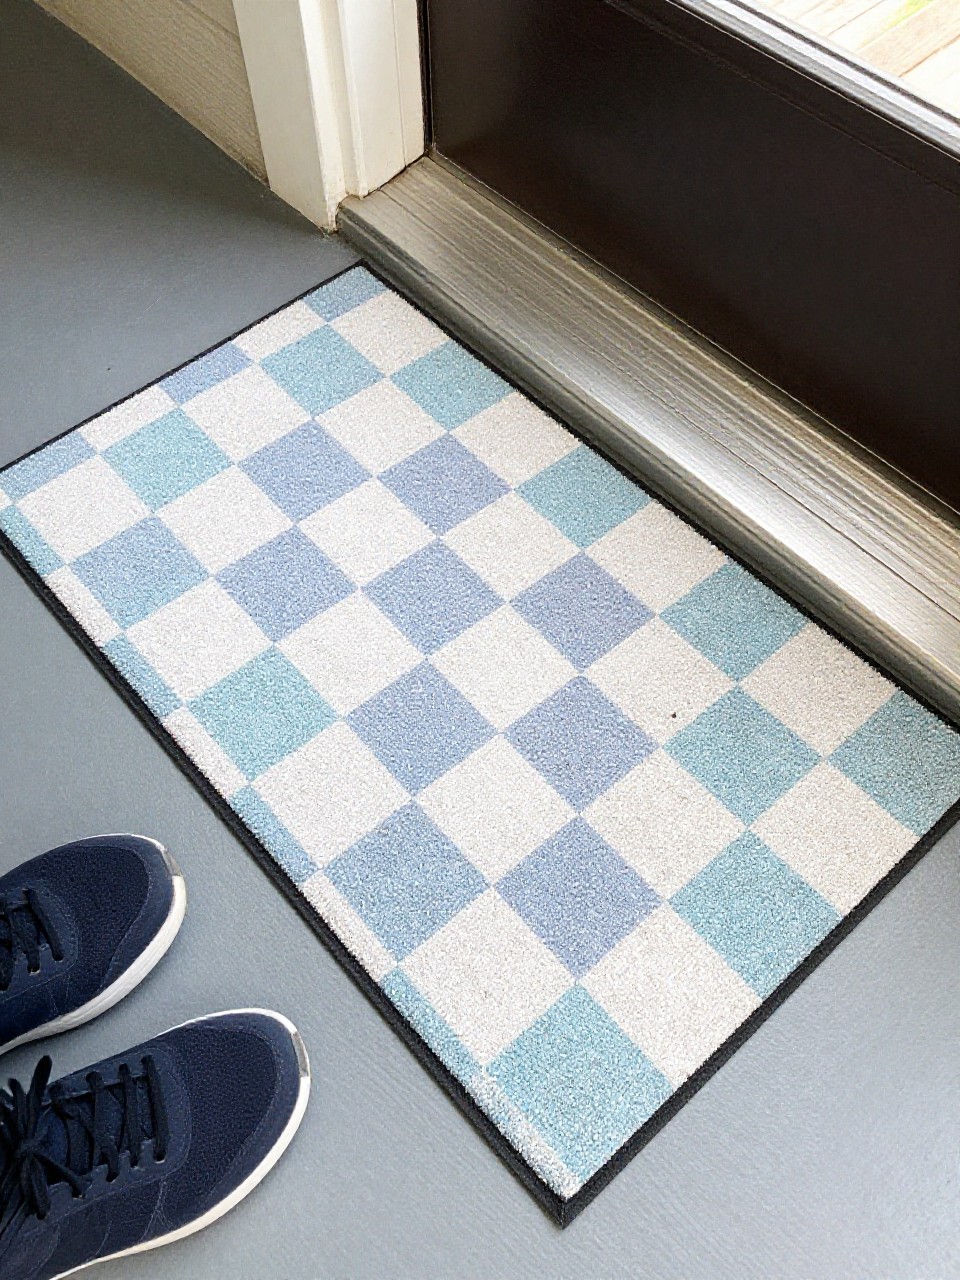
Fresh and graphic at the front door—this simple pattern instantly upgrades curb appeal. Pick two spring tones for a soft welcome.
Materials Needed:
- Coir doormat
- Painter’s tape
- Outdoor acrylic paint + stencil brush
How to make it:
- Tape off a simple grid of squares.
- Dab paint into every other square with an up-and-down motion.
- Let dry, then shift tape to fill remaining checks.
- Seal lightly if desired and let cure before use.
6. Botanical Monoprints on Fabric
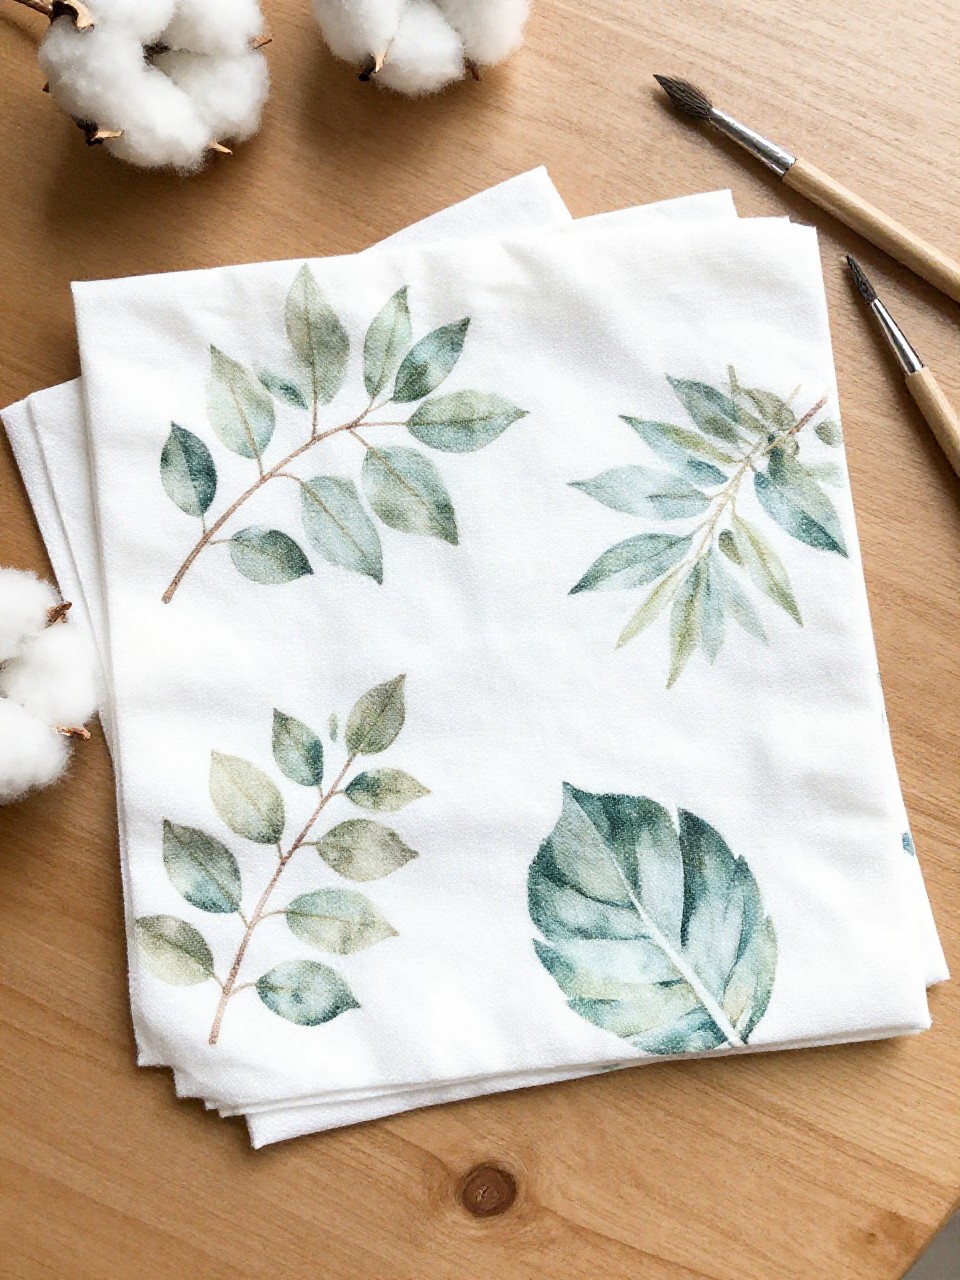
Make dreamy leaf prints on napkins or tea towels. The soft, imperfect texture feels artisanal and spring-fresh.
Materials Needed:
- Plain cotton napkins/towels
- Fabric paint
- Leaves or ferns + brayer or spoon
How to make it:
- Paint the veiny side of a leaf with a thin coat of fabric paint.
- Press leaf paint-side down onto fabric and burnish with a spoon.
- Peel off to reveal the print; repeat with overlapping layers.
- Heat-set paint per instructions and wash gently.
7. Air-Dry Clay Pebble Incense Holder
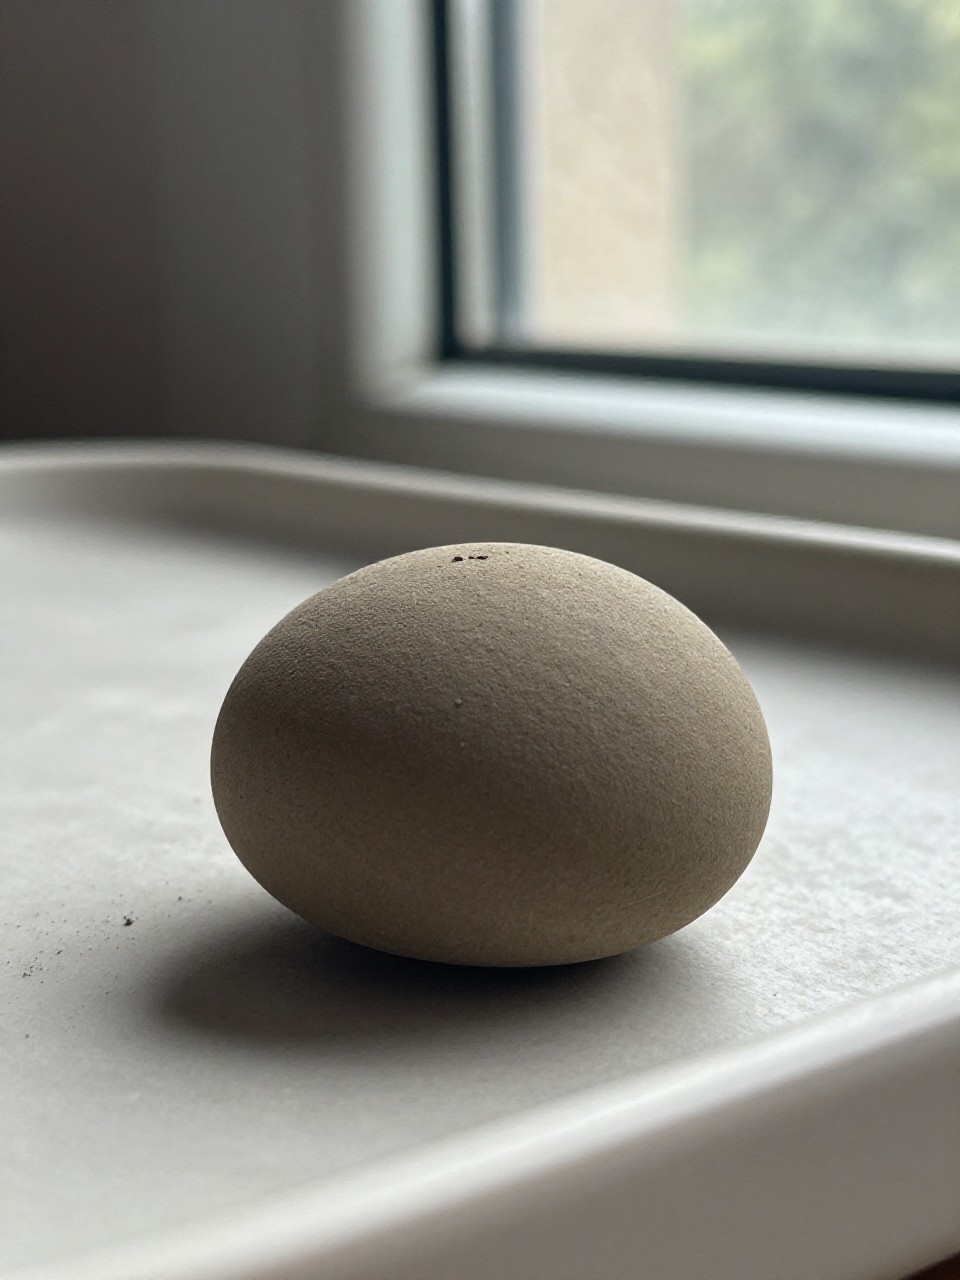
Minimal and calming, this pebble-shaped holder looks like found river stone. It’s small, sculptural, and satisfying to make.
Materials Needed:
- Air-dry clay
- Drinking straw or skewer
- Fine sandpaper
How to make it:
- Roll clay into an oval pebble and smooth with damp fingers.
- Use a skewer to make a small, angled hole for incense.
- Let dry completely per package time.
- Lightly sand for a stone-like finish.
8. Gradient-Dyed Pillowcases
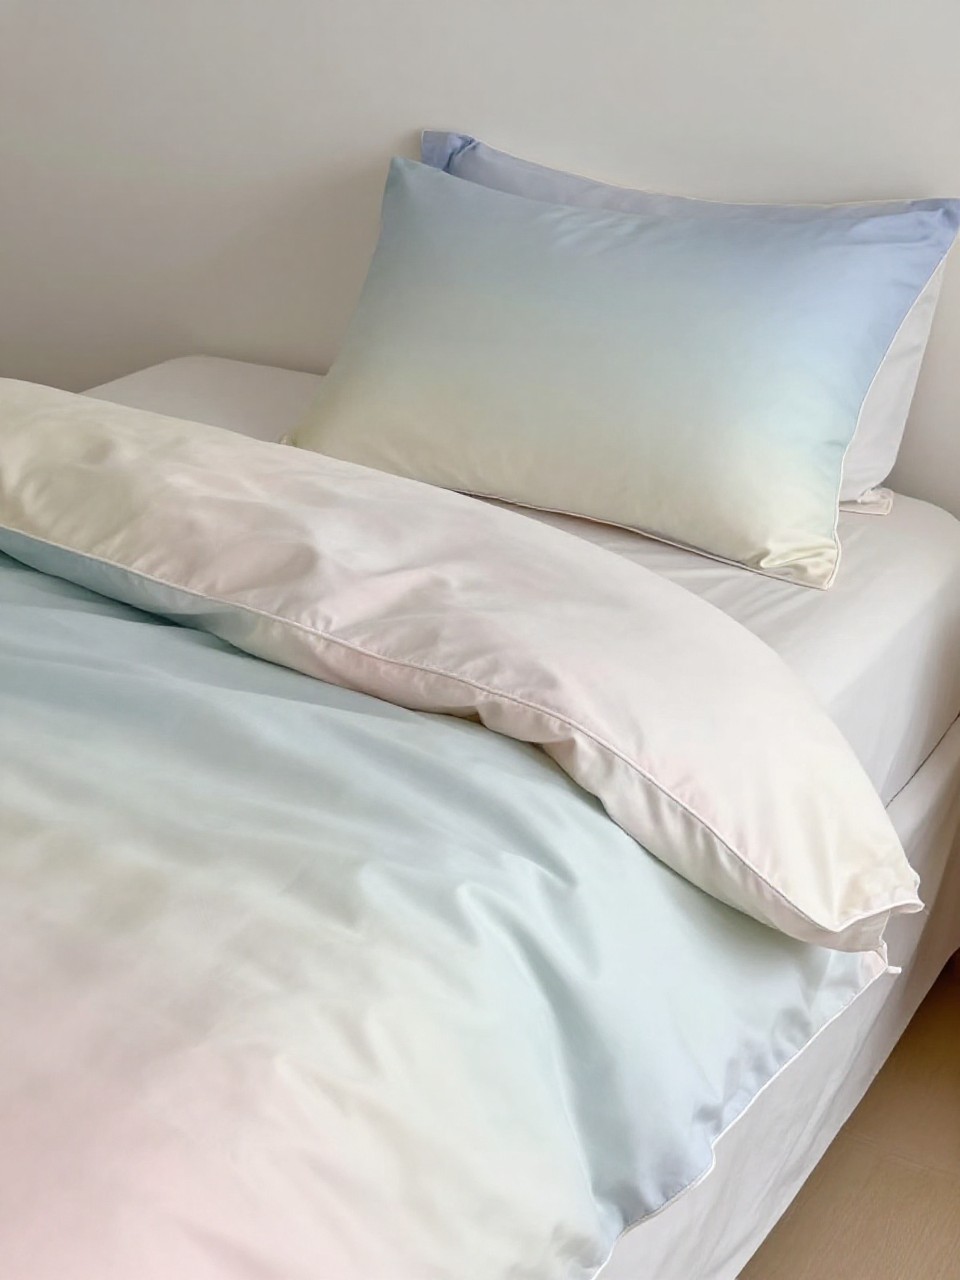
Create a soft ombré that looks like morning sky. It adds a calm, airy upgrade to your bed in under an hour.
Materials Needed:
- White cotton pillowcases
- Fabric dye
- Large bucket or basin
How to make it:
- Mix dye in warm water per instructions.
- Dip pillowcase bottom first, holding longer for a deeper shade.
- Lift gradually to create a fade; re-dip edges for depth.
- Rinse, wash, and dry to set the color.
9. Framed Moss Garden Art
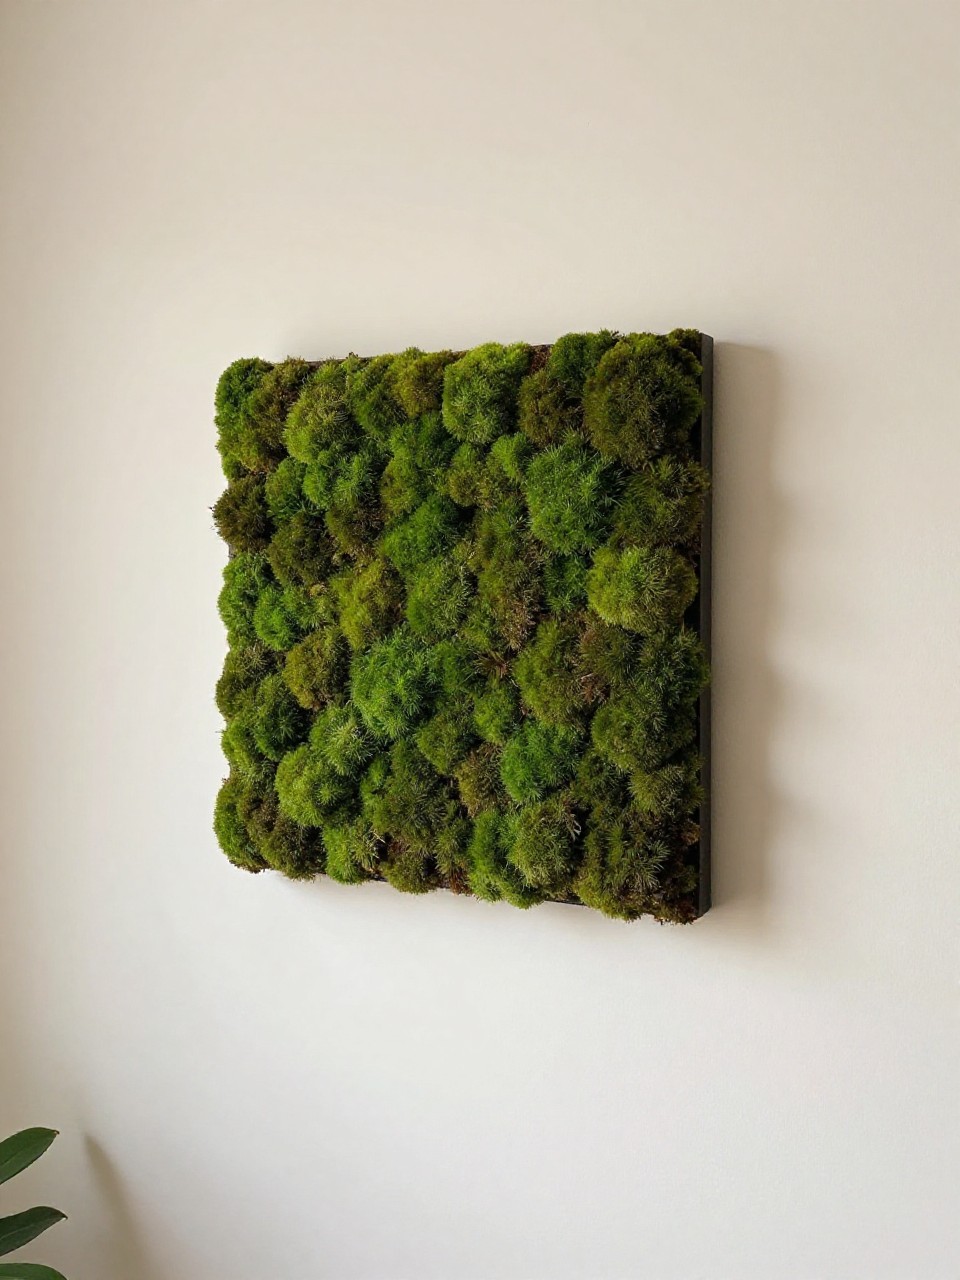
A lush, low-maintenance slice of green on your wall. It feels like a forest square and instantly freshens a room.
Materials Needed:
- Shadow box frame
- Preserved craft moss (various textures)
- Hot glue gun
How to make it:
- Remove frame glass and prep backing board.
- Arrange moss in mounds and patches for dimension.
- Hot glue pieces, mixing textures and shades.
- Close frame without glass for a natural, 3D look.
10. Citrus Stamped Tea Towels
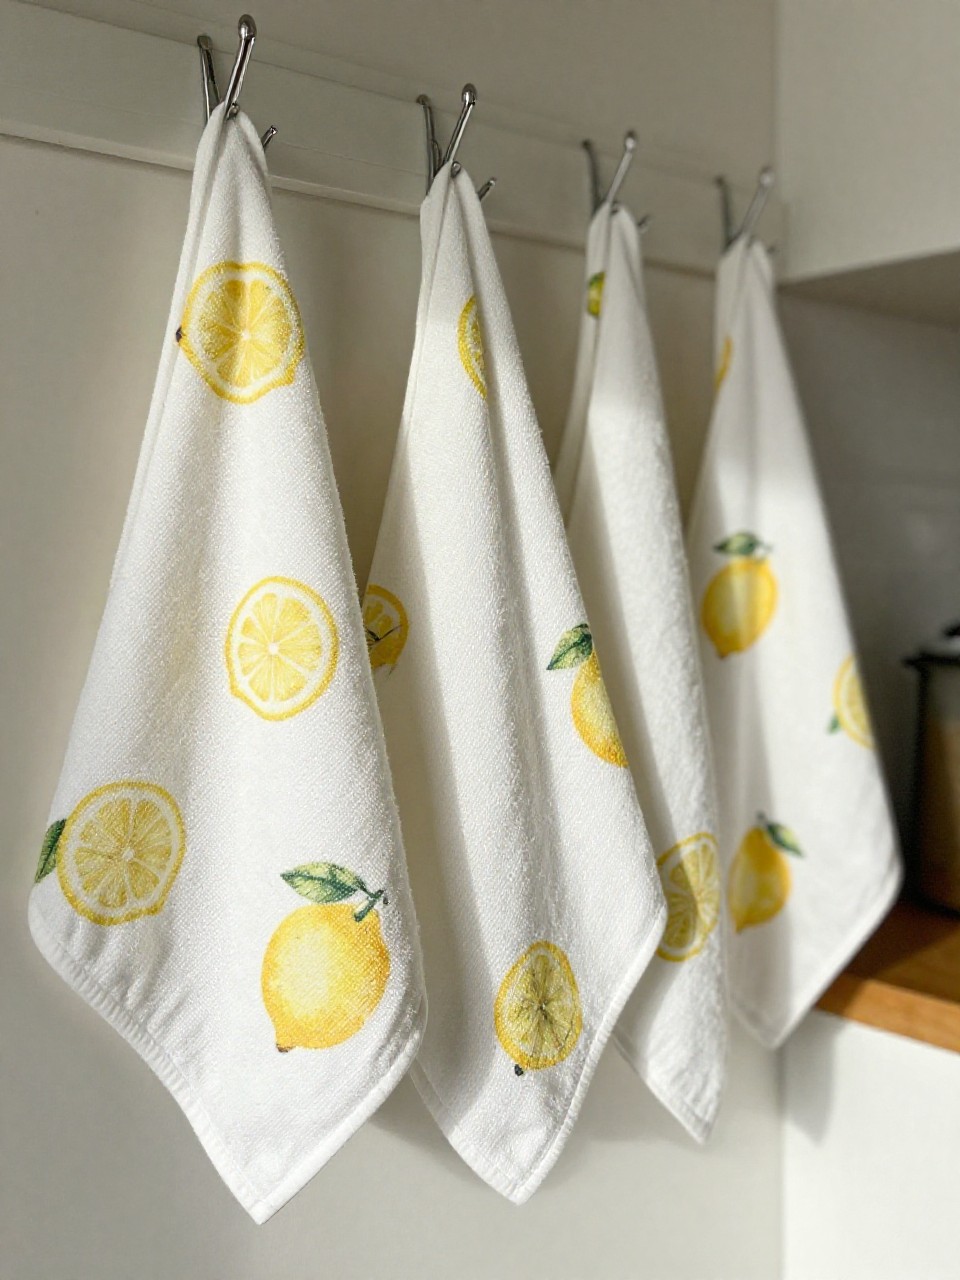
Hand-stamped lemons or oranges bring a cheerful market feel to your kitchen. The prints are bright, playful, and perfectly imperfect.
Materials Needed:
- Plain tea towels
- Fabric paint
- Halved citrus + small brush
How to make it:
- Pat cut citrus dry and brush a thin layer of paint on the cut side.
- Press firmly onto towel; lift straight up.
- Add leaf details with a brush if desired.
- Heat-set and wash gently.
11. Ribbon-Wrapped Hoop Wreath
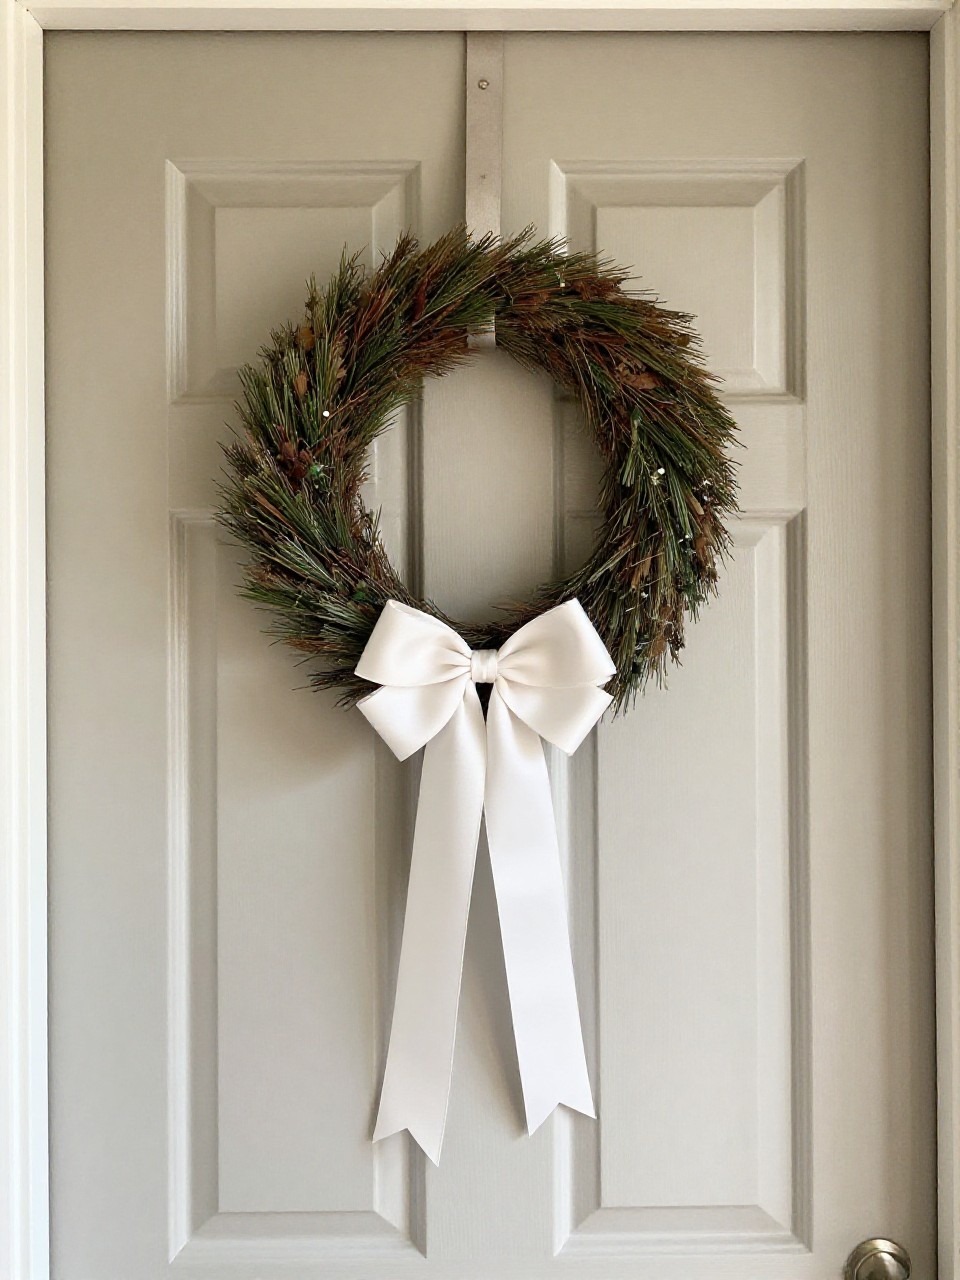
Soft, fluttery ribbons make a delicate spring wreath. It’s airy, modern, and easy to customize with color.
Materials Needed:
- Metal or wooden hoop
- Assorted ribbons
- Floral wire or hot glue
How to make it:
- Wrap part of the hoop with a base ribbon to anchor.
- Tie or glue ribbons in layers along the bottom third.
- Trim ends at different lengths for movement.
- Add a loop at the top and hang.
12. Speckled Enamel-Look Planters
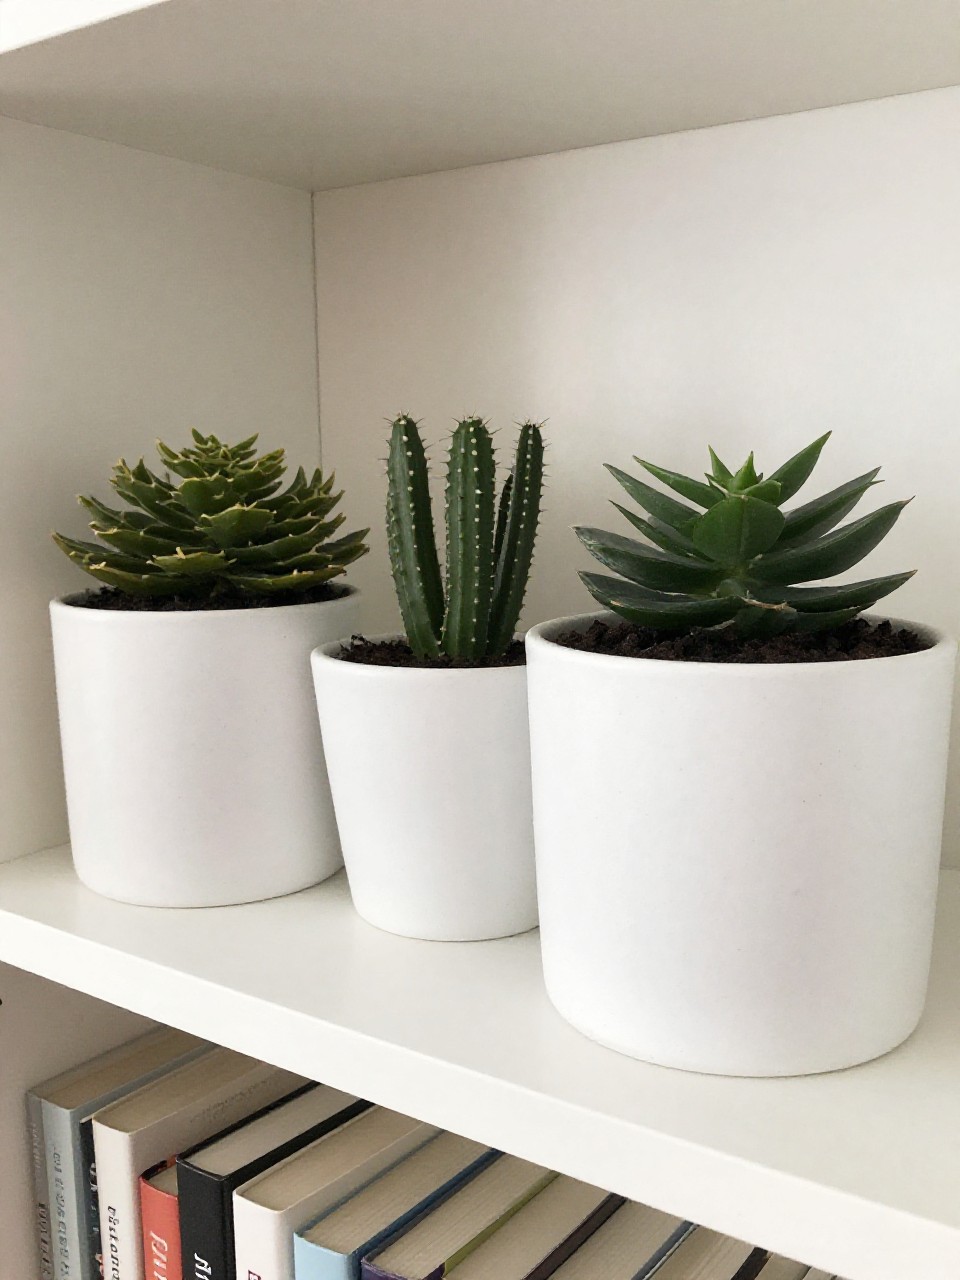
Create the trendy speckled enamel effect with a toothbrush. These planters look crisp and modern on shelves.
Materials Needed:
- White ceramic planters
- Acrylic paint (black or color)
- Old toothbrush + sealant spray
How to make it:
- Protect area and load toothbrush with watered-down paint.
- Flick bristles toward planters for tiny speckles.
- 3. Rotate and layer for even coverage.
- Let dry and seal lightly to protect.
13. Sun-Catcher Bead Garland
Sparkly glass beads turn window light into dancing dots. It’s simple, joyful, and adds movement to any room.
Materials Needed:
- Clear or iridescent beads
- Fishing line or clear thread
- Needle + small suction hook
How to make it:
- Thread beads in a pleasing pattern, knotting between sections.
- Create 2–3 strands of varying lengths.
- Tie strands to a top loop and secure knots.
- Hang in a sunny window with a suction hook.
14. Painted Arch Wall Art on Canvas
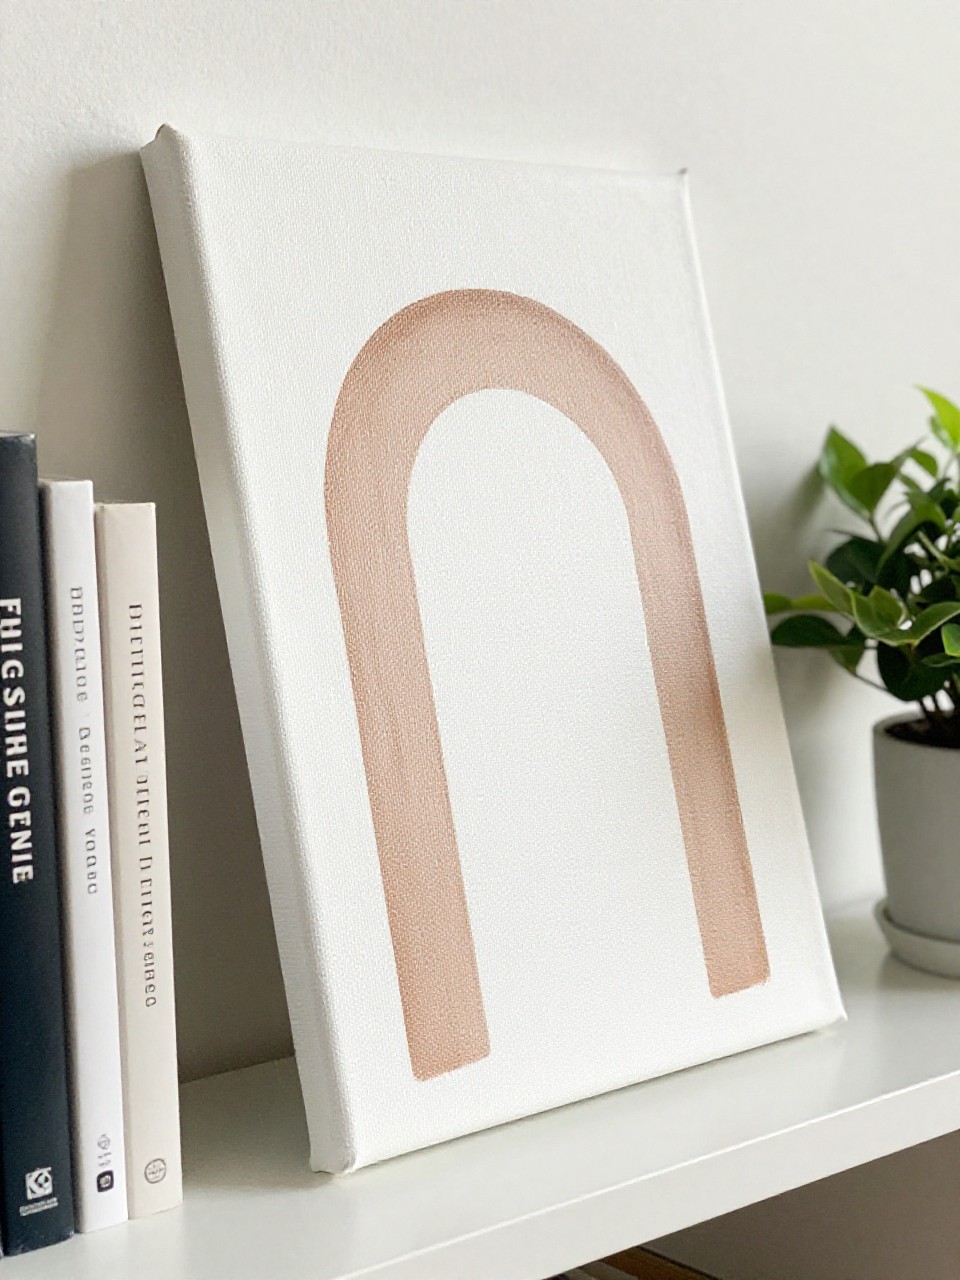
A soft arch shape feels warm and architectural. This simple design looks gallery-worthy with just two colors.
Materials Needed:
- Blank canvas
- Acrylic paint (two coordinating shades)
- Painter’s tape + round object for curve
How to make it:
- Tape a wide rectangle, then trace a curve at the top using a bowl.
- Paint inside the arch with color one; let it dry.
- Paint the background with color two for contrast.
- Remove tape for a crisp, modern piece.
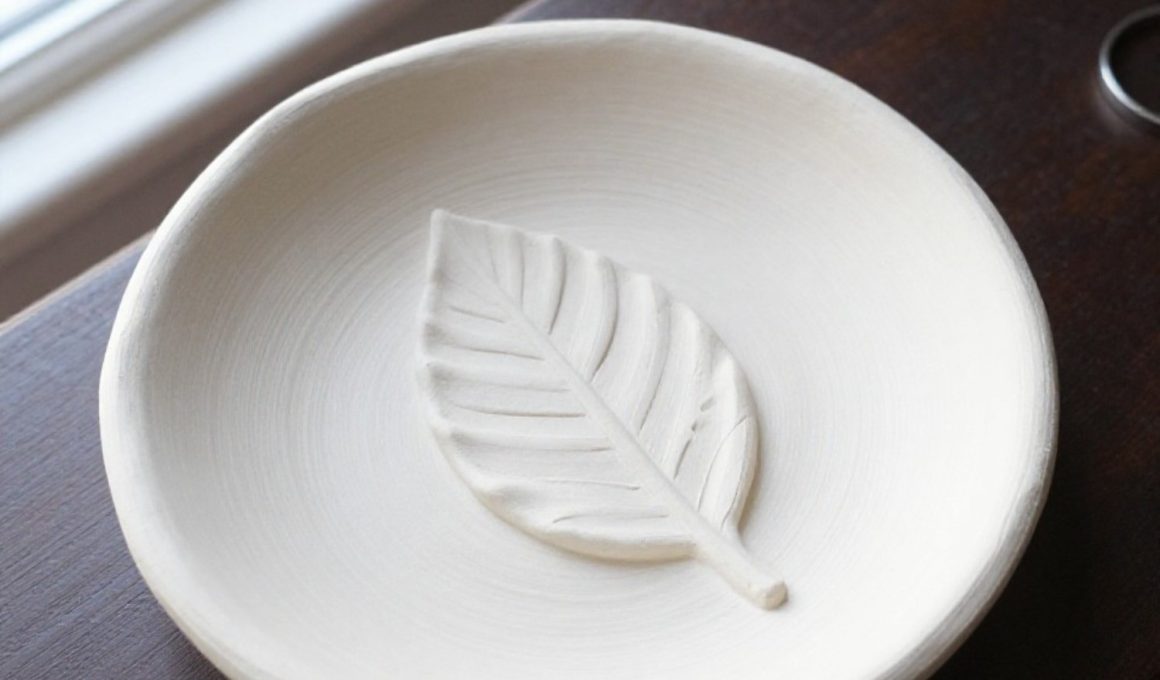
15. Clay Ring Dish with Botanical Imprint
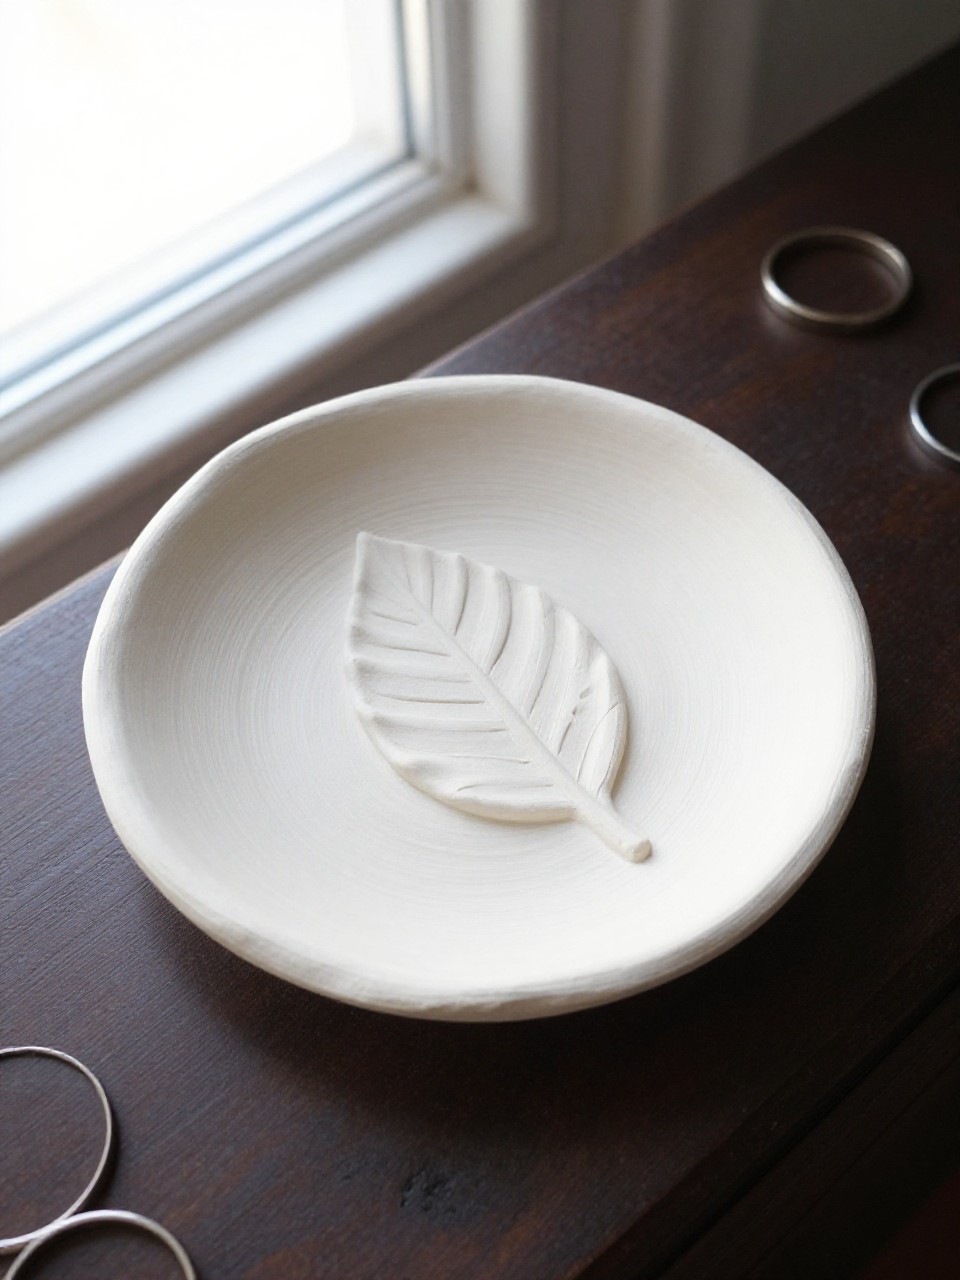
A tiny catchall with leaf veins pressed into the surface. It looks like ceramic art and keeps jewelry tidy.
Materials Needed:
- Air-dry clay
- Small leaf or herb sprig
- Bowl for shaping
How to make it:
- Roll clay flat and press leaf to imprint veins.
- Cut a circle and place it inside a bowl to curve edges.
- Remove leaf, smooth with damp fingers, and dry.
- Optional: paint edges or seal clear.
16. Stenciled Floor Cloth from Drop Cloth
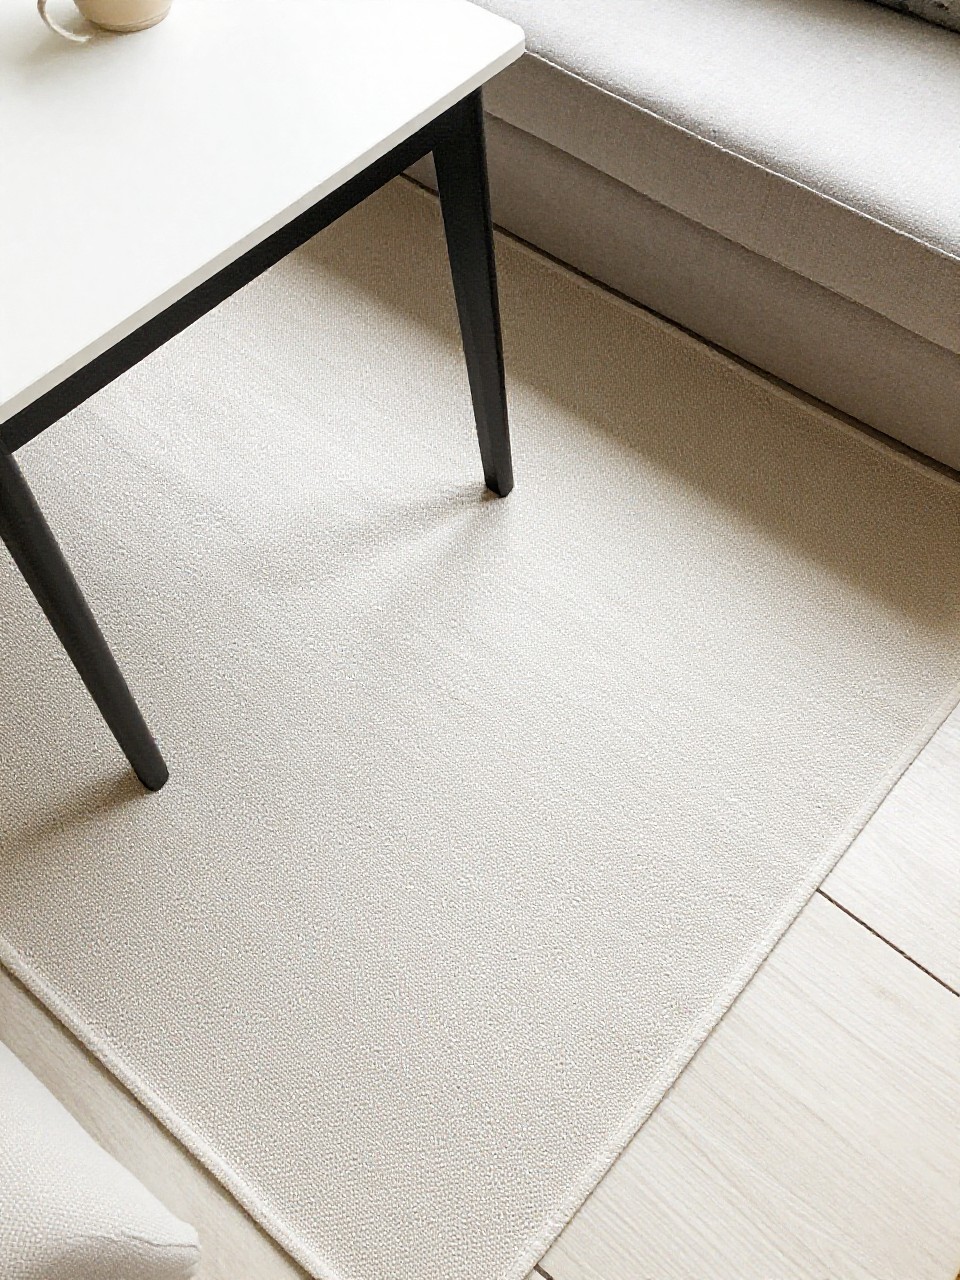
Create a washable, custom rug for kitchens or entryways. It’s durable, lies flat, and looks like patterned tile.
Materials Needed:
- Canvas drop cloth
- Stencil + painter’s tape
- Floor paint or durable acrylic + sealer
How to make it:
- Cut drop cloth to size and hem or glue edges.
- Tape stencil in place and dab paint with a foam brush.
- Lift and repeat, aligning the pattern.
- Seal both sides; let cure flat before use.
17. Dried Citrus and Herb Wall Swag

A light, fragrant bundle that feels like a European kitchen window. The slices glow soft amber, and the herbs dry beautifully.
Materials Needed:
- Dried citrus slices
- Fresh herbs (rosemary, eucalyptus)
- Twine + scissors
How to make it:
- Bundle herbs with twine, leaving a long tail.
- Tie citrus slices along the tail at staggered heights.
- Wrap the top neatly and create a hanging loop.
- Hang on a hook and fluff for shape.


