


In This Article Show
Summer is a great time to pull out your Cricut because so many seasonal projects are fun, useful, and easy to personalize. You can make decor for your porch, labels for summer outings, party supplies, travel pieces, and cute gifts without needing a huge craft setup.
These Cricut ideas are creative but still practical enough to use all season. Some work with vinyl, some use cardstock, and others use iron-on or stencil vinyl, so you can choose a project based on your supplies, skill level, and what you want to make first.
1. Summer Picnic Basket Tag
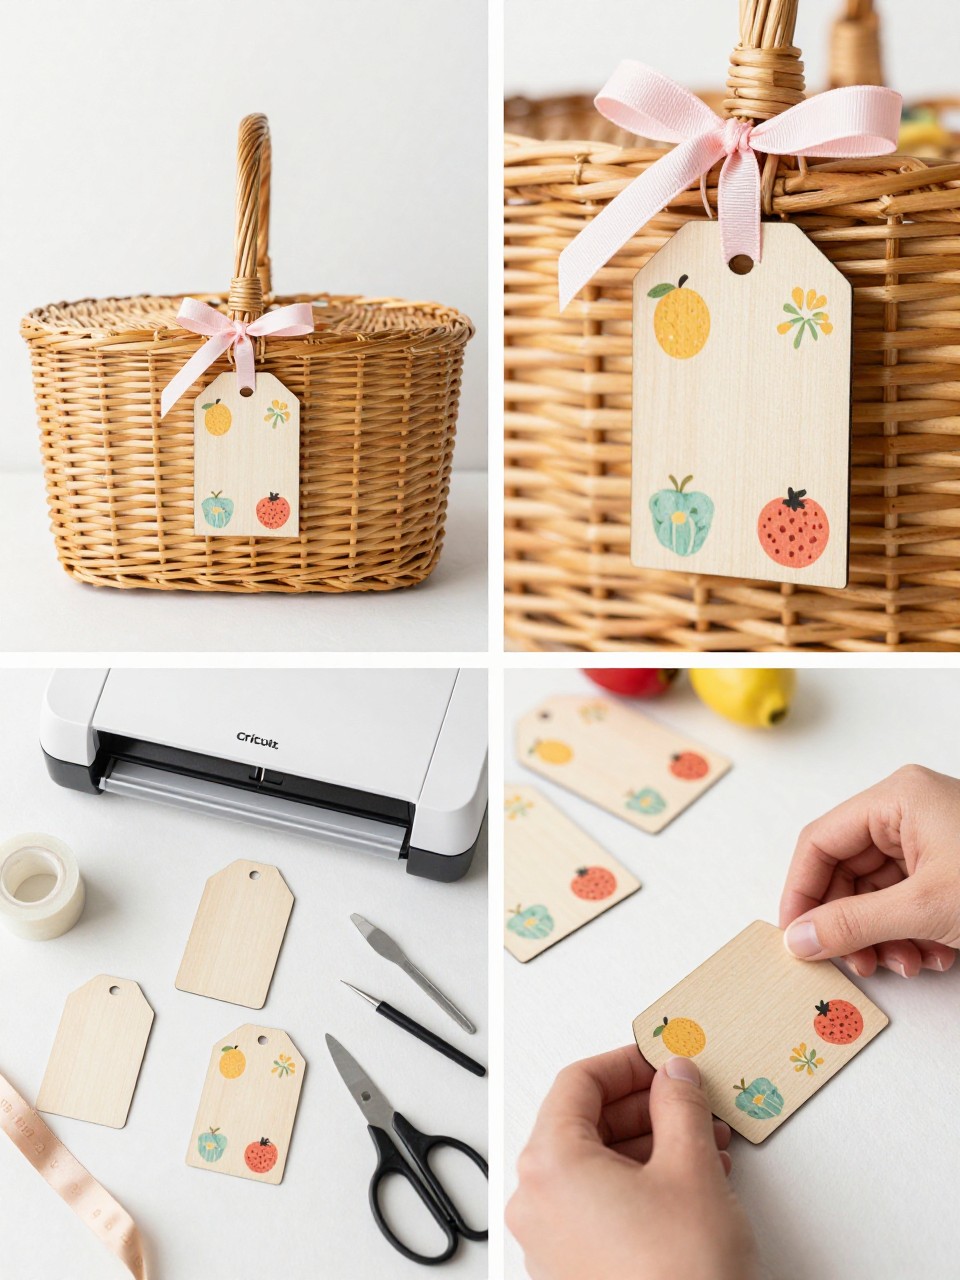
A picnic basket tag is a cute way to make your summer picnic setup feel more personal. Instead of adding vinyl directly to a woven basket, you can decorate a smooth wooden tag and tie it to the handle.
This project works well for picnics, park dates, family outings, and summer party displays. Add fruit icons, flowers, initials, or a simple color theme to match your basket and napkins.
Materials Needed:
- Blank wooden tag
- Permanent adhesive vinyl
- Transfer tape
- Cricut machine
- Weeding tool
- Scraper tool
- Ribbon or twine
- Scissors
Steps To Make:
- Create a small name, initial, or summer icon design in Design Space.
- Cut the design from permanent vinyl.
- Weed away the extra vinyl carefully.
- Use transfer tape to apply the vinyl to the wooden tag.
- Tie the finished tag to the basket handle with ribbon or twine.
2. Custom Summer Straw Hat
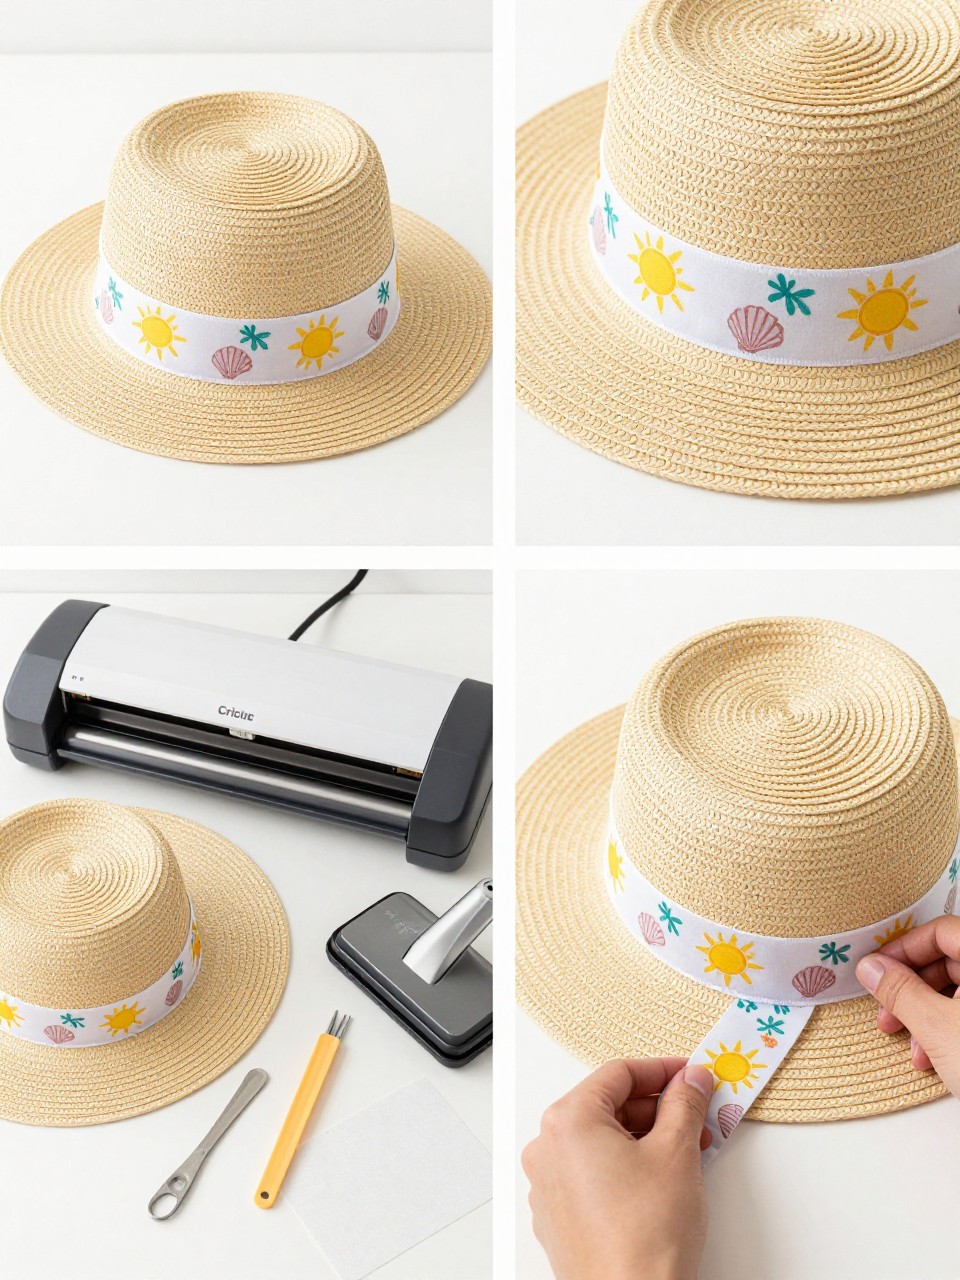
A custom straw hat is a stylish summer Cricut project that feels fun without being too hard. The easiest method is to decorate a ribbon band first, then wrap the ribbon around the hat.
This gives you a cleaner surface for the vinyl and helps the design last longer. Use small icons like shells, suns, flowers, lemons, or waves for a cute seasonal look.
Materials Needed:
- Plain straw hat
- Ribbon for the hat band
- Heat-transfer vinyl
- Cricut machine
- Weeding tool
- Mini heat press or iron
- Teflon sheet or parchment paper
- Hot glue or fabric glue
Steps To Make:
- Measure the ribbon around the hat crown.
- Create a small repeating icon design in Design Space.
- Mirror and cut the design from heat-transfer vinyl.
- Weed the vinyl and press it onto the ribbon.
- Wrap the decorated ribbon around the hat and glue it neatly in place.
3. Vinyl Lemonade Pitcher Decal
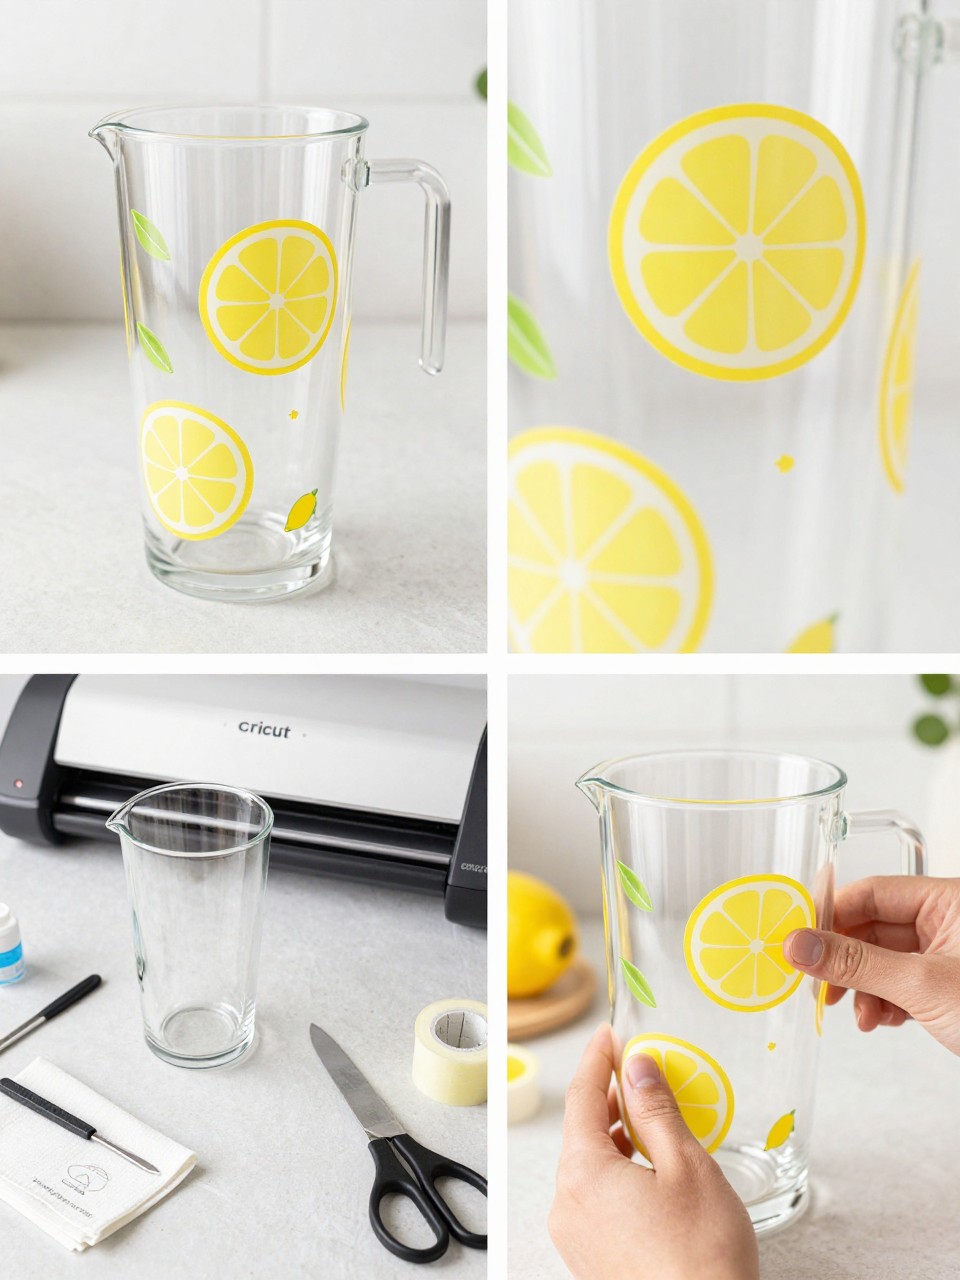
A lemonade pitcher decal is perfect for summer parties, brunches, and patio meals. A plain pitcher can look much more special with lemon slices, leaves, flowers, or tiny sun shapes.
Use permanent vinyl and keep the design away from areas that get heavy washing. This is best for the outside of the pitcher only, not surfaces that touch food or drinks.
Materials Needed:
- Clear glass or plastic pitcher
- Permanent adhesive vinyl
- Transfer tape
- Cricut machine
- Weeding tool
- Scraper tool
- Rubbing alcohol and cloth
Steps To Make:
- Clean the outside of the pitcher with rubbing alcohol.
- Cut lemon, leaf, or summer icon designs from permanent vinyl.
- Weed the vinyl carefully.
- Use transfer tape to lift the design.
- Apply it to the outside of the pitcher and smooth it down firmly.
4. Summer Porch Pillow Covers
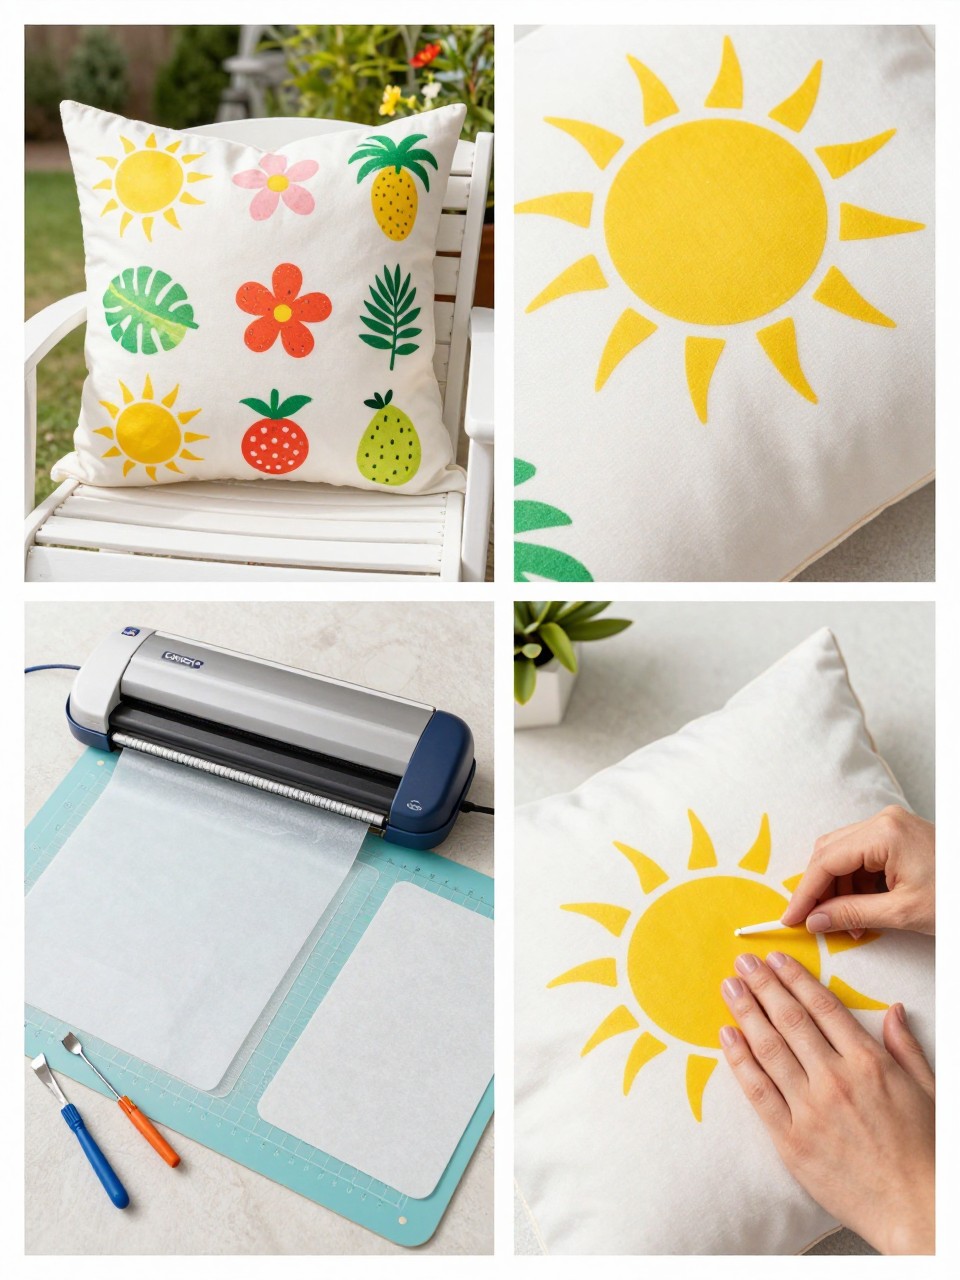
Custom porch pillow covers are a creative way to refresh outdoor seating for summer. You can use simple icons, borders, or abstract shapes to make plain pillow covers feel seasonal.
This project works best with removable fabric covers that can handle heat. Keep the design simple so the pillows still look clean and easy to style.
Materials Needed:
- Blank pillow covers
- Heat-transfer vinyl
- Cricut machine
- Cutting mat
- Weeding tool
- Heat press or iron
- Teflon sheet or parchment paper
Steps To Make:
- Choose a simple summer design for each pillow cover.
- Size the design to fit the pillow front.
- Mirror the design before cutting heat-transfer vinyl.
- Cut and weed the vinyl.
- Press the design onto the pillow cover using the correct heat settings.
5. Cardstock Popsicle Party Garland
A popsicle party garland is bright, playful, and perfect for summer birthdays, pool parties, and backyard cookouts. The Cricut makes it easy to cut matching shapes that look clean and party-ready.
Layered cardstock makes each popsicle look more finished. You can string the shapes across a dessert table, patio wall, mantel, or party backdrop.
Materials Needed:
- Colored cardstock
- Cricut machine
- LightGrip mat
- Glue or tape runner
- Twine or ribbon
- Small wooden sticks, optional
- Scraper tool
- Scissors
Steps To Make:
- Choose or create popsicle shapes in Design Space.
- Cut the shapes from different cardstock colors.
- Layer the cardstock pieces with glue.
- Attach each popsicle to twine or ribbon.
- Hang the garland across a party area.
6. Custom Beach Bag Name Patch
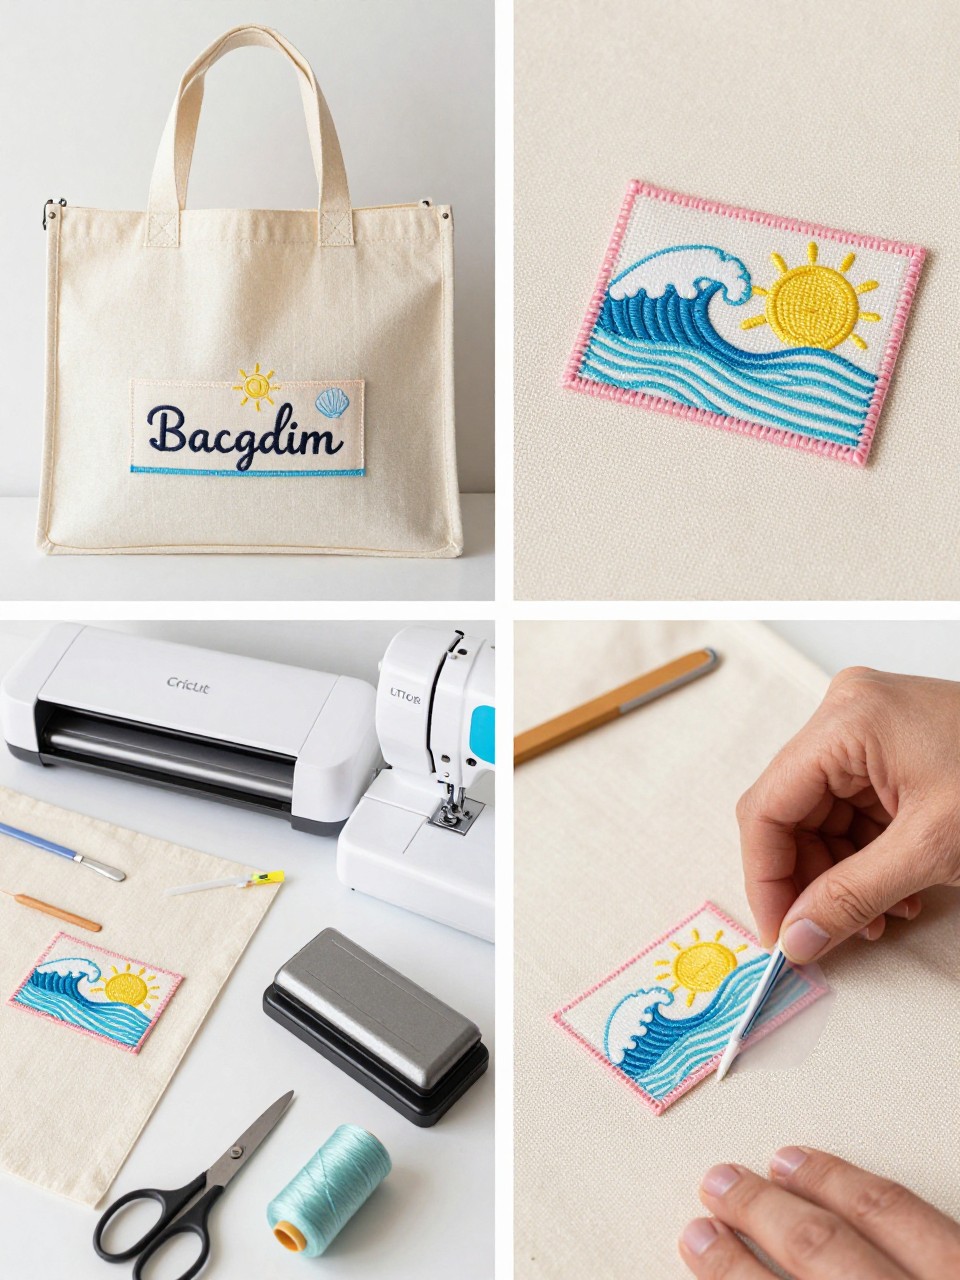
A beach bag name patch is a creative alternative to placing vinyl directly onto a large bag. You can make a small fabric patch with a name or icon design, then sew or glue it onto the bag.
This is useful for family beach bags, camp bags, pool bags, or travel totes. It also makes the design feel more handmade and durable.
Materials Needed:
- Canvas beach bag
- Small piece of canvas fabric for patch
- Heat-transfer vinyl
- Cricut machine
- Weeding tool
- Mini heat press or iron
- Sewing machine or fabric glue
- Scissors
Steps To Make:
- Cut a small canvas patch to your preferred shape.
- Create a name or summer icon design in Design Space.
- Mirror, cut, and weed the heat-transfer vinyl.
- Press the vinyl onto the patch.
- Sew or glue the patch onto the beach bag.
7. Summer Camp Memory Jar Labels
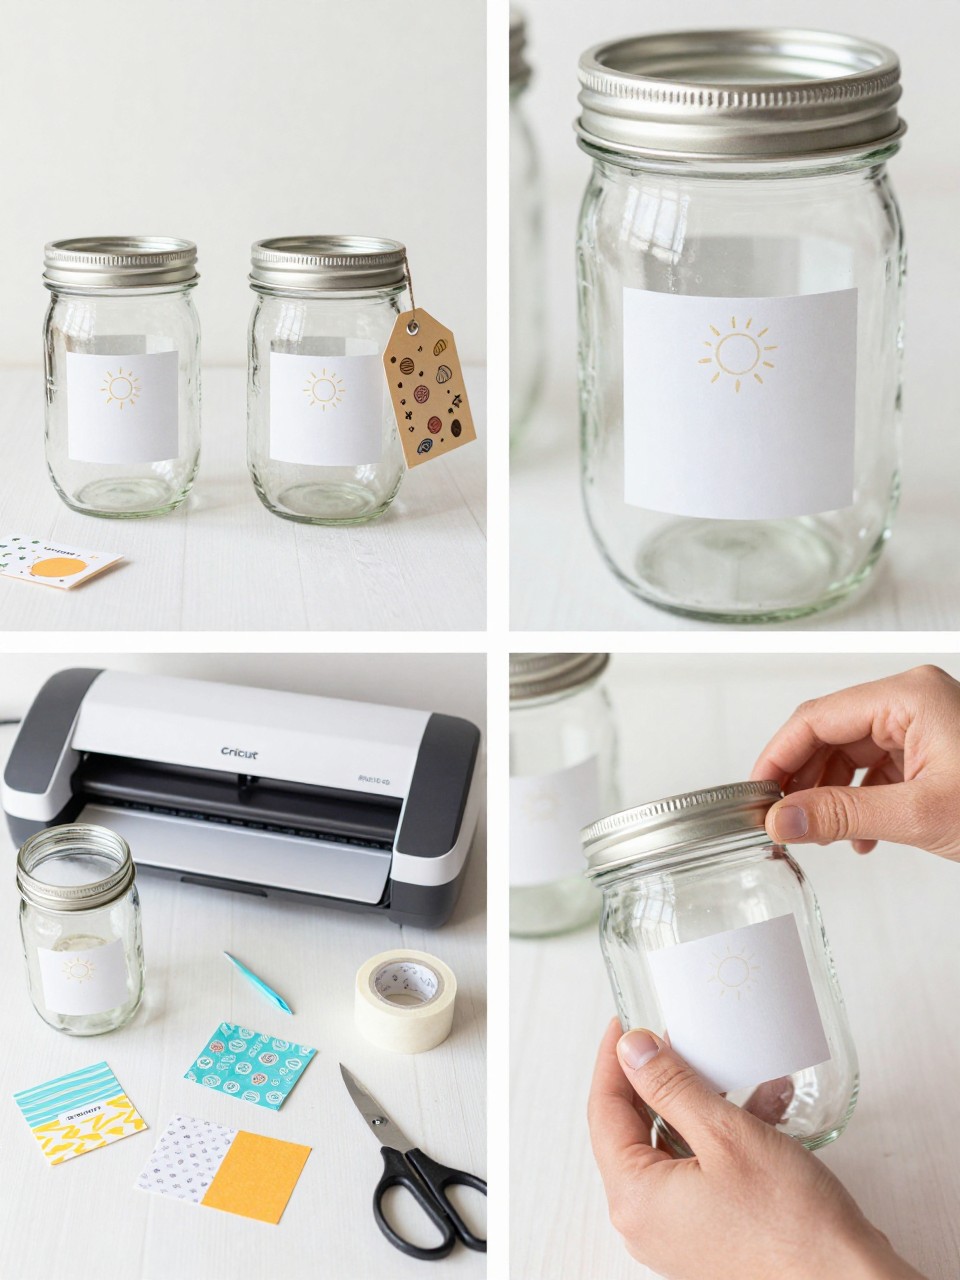
Summer memory jars are a sweet way to store keepsakes from trips, camp, beach days, or family outings. The Cricut helps you make neat labels and small cardstock tags for each jar.
This project is great for kids and adults because it turns small summer moments into something you can display. Use jars for shells, ticket stubs, notes, pressed flowers, or tiny photos.
Materials Needed:
- Mason jars
- Permanent vinyl
- Transfer tape
- Cardstock
- Cricut machine
- Weeding tool
- Scraper tool
- Ribbon or twine
- Scissors
Steps To Make:
- Create simple jar labels and small tag shapes in Design Space.
- Cut vinyl labels and cardstock tags.
- Weed the vinyl labels carefully.
- Apply the vinyl to clean glass jars with transfer tape.
- Tie cardstock tags to the jars with ribbon or twine.
8. Outdoor Movie Night Snack Boxes

Outdoor movie night snack boxes are fun for summer evenings, backyard parties, and family nights. You can make small boxes for popcorn, candy, cookies, or wrapped snacks.
This project is more creative than a basic banner but still easy with cardstock and a scoring tool. Add stars, moons, or tiny snack icons for a cute summer-night feel.
Materials Needed:
- Colored cardstock
- Cricut machine
- LightGrip mat
- Scoring stylus or scoring wheel
- Glue or tape runner
- Scraper tool
- Scissors
Steps To Make:
- Choose a snack box template in Design Space.
- Cut and score the box pieces from cardstock.
- Fold along the score lines.
- Glue the side tabs to form the box.
- Add layered cardstock stars, moons, or snack icons.
9. Personalized Garden Apron
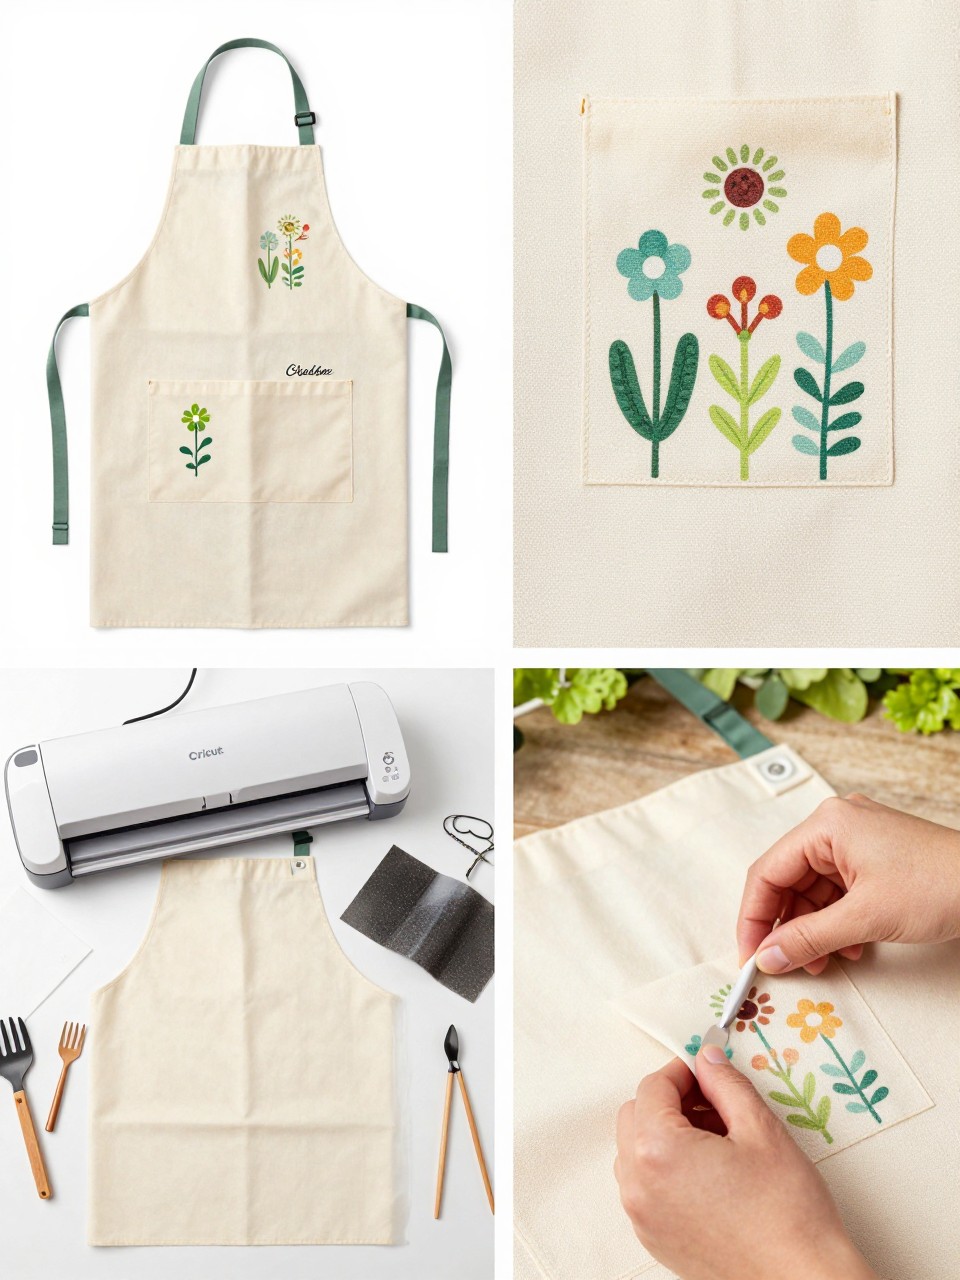
A personalized garden apron is a useful summer Cricut project for anyone who loves plants, herbs, or backyard projects. It keeps tools close while adding a cute custom detail.
Use heat-transfer vinyl on a canvas or cotton apron. Small plant icons, flowers, gloves, and simple names work well without making the apron feel too busy.
Materials Needed:
- Blank canvas or cotton apron
- Heat-transfer vinyl
- Cricut machine
- Cutting mat
- Weeding tool
- Heat press or iron
- Teflon sheet or parchment paper
Steps To Make:
- Create a garden-inspired design in Design Space.
- Size the design for the apron pocket or chest area.
- Mirror the design before cutting HTV.
- Cut and weed the vinyl.
- Press it onto the apron using the right heat setting.
10. Water Bottle Tracking Decals
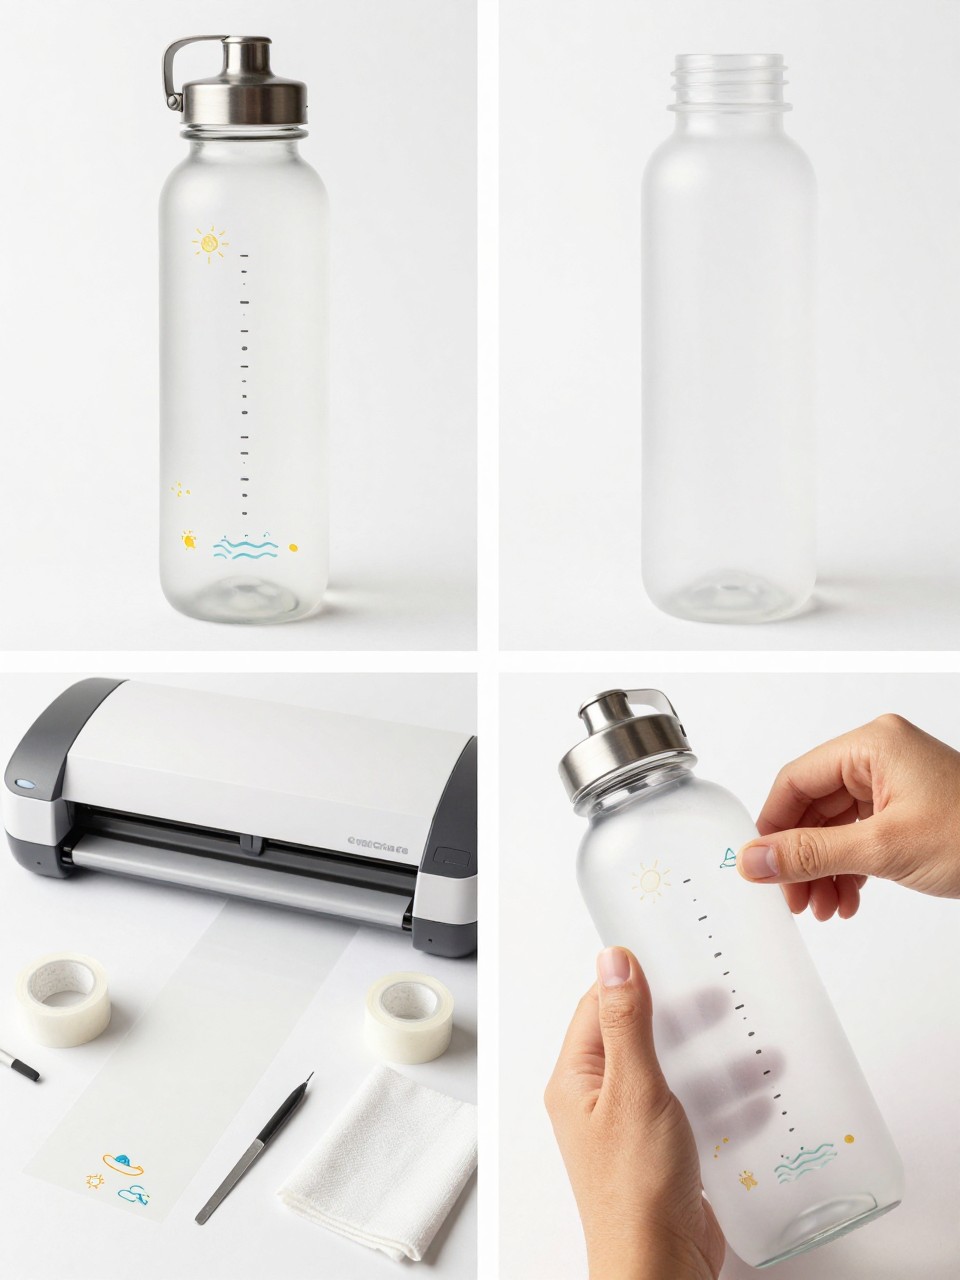
Water bottle tracking decals are useful during hot summer days because they make drinking water feel more fun and organized. You can add simple marker lines, small icons, or initials to a reusable bottle.
Keep the vinyl design small and easy to apply. Permanent vinyl works best on smooth bottles, but avoid placing it near areas that get heavy rubbing or soaking.
Materials Needed:
- Smooth reusable water bottle
- Permanent adhesive vinyl
- Transfer tape
- Cricut machine
- Weeding tool
- Scraper tool
- Rubbing alcohol and cloth
Steps To Make:
- Clean the bottle surface with rubbing alcohol.
- Create simple marker lines, icons, or initials in Design Space.
- Cut the design from permanent vinyl.
- Weed the vinyl and use transfer tape to lift it.
- Apply it to the bottle and smooth firmly before peeling the tape.
11. Summer Travel Packing Cubes Labels
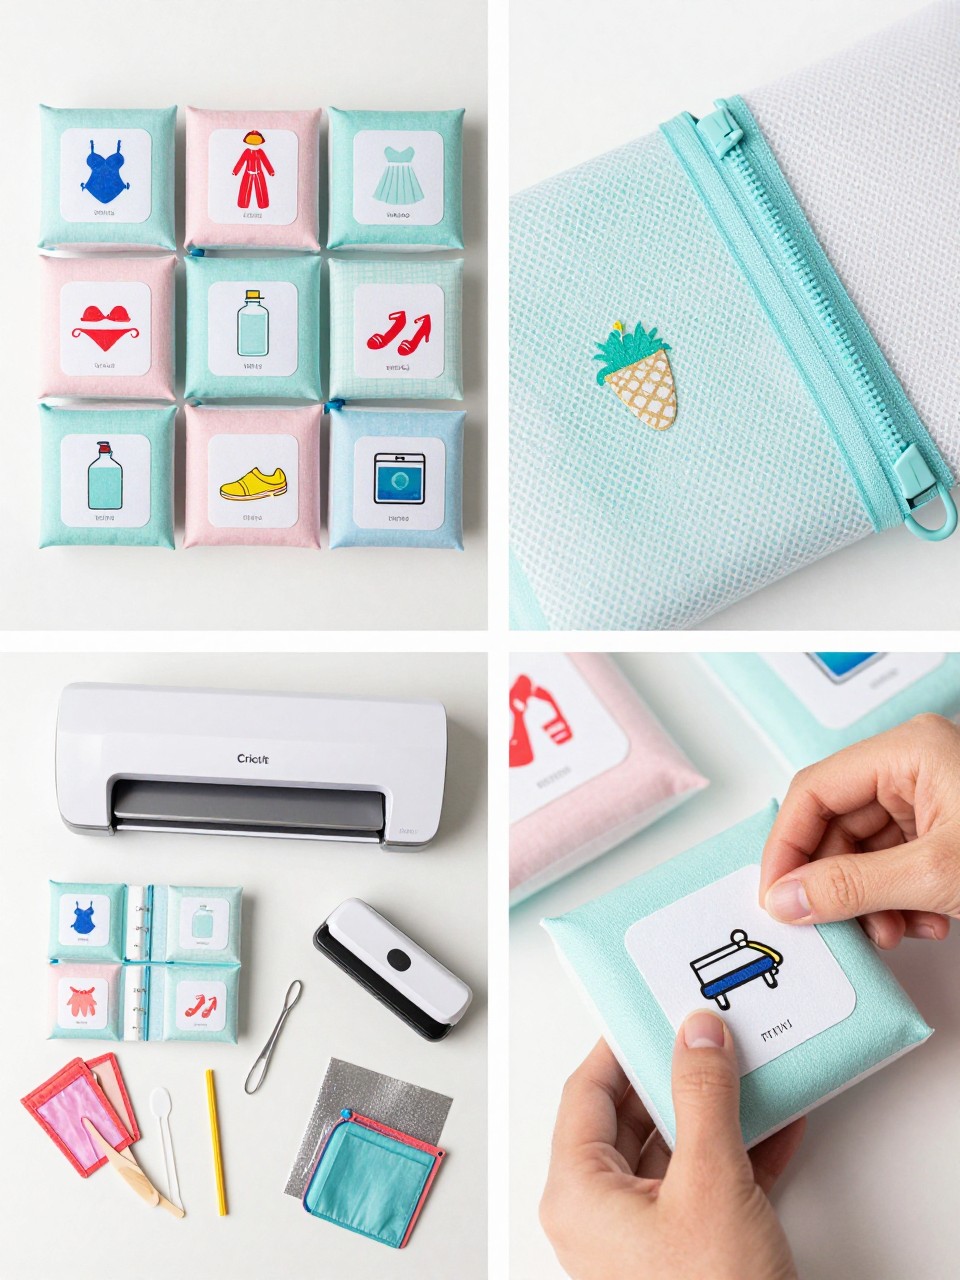
Packing cube labels are perfect for summer trips because they make your suitcase easier to organize. You can label cubes for swimwear, outfits, shoes, toiletries, or kids’ clothing.
Use heat-transfer vinyl if the packing cubes are fabric and can handle heat. Keep the labels small and simple so they look clean and easy to read.
Materials Needed:
- Fabric packing cubes
- Heat-transfer vinyl
- Cricut machine
- Cutting mat
- Weeding tool
- Mini heat press or iron
- Teflon sheet or parchment paper
Steps To Make:
- Check that your packing cubes can handle heat.
- Create small label words or icons in Design Space.
- Mirror the design before cutting HTV.
- Cut and weed the vinyl.
- Press the labels onto each packing cube carefully.
12. Summer Fruit Coaster Set
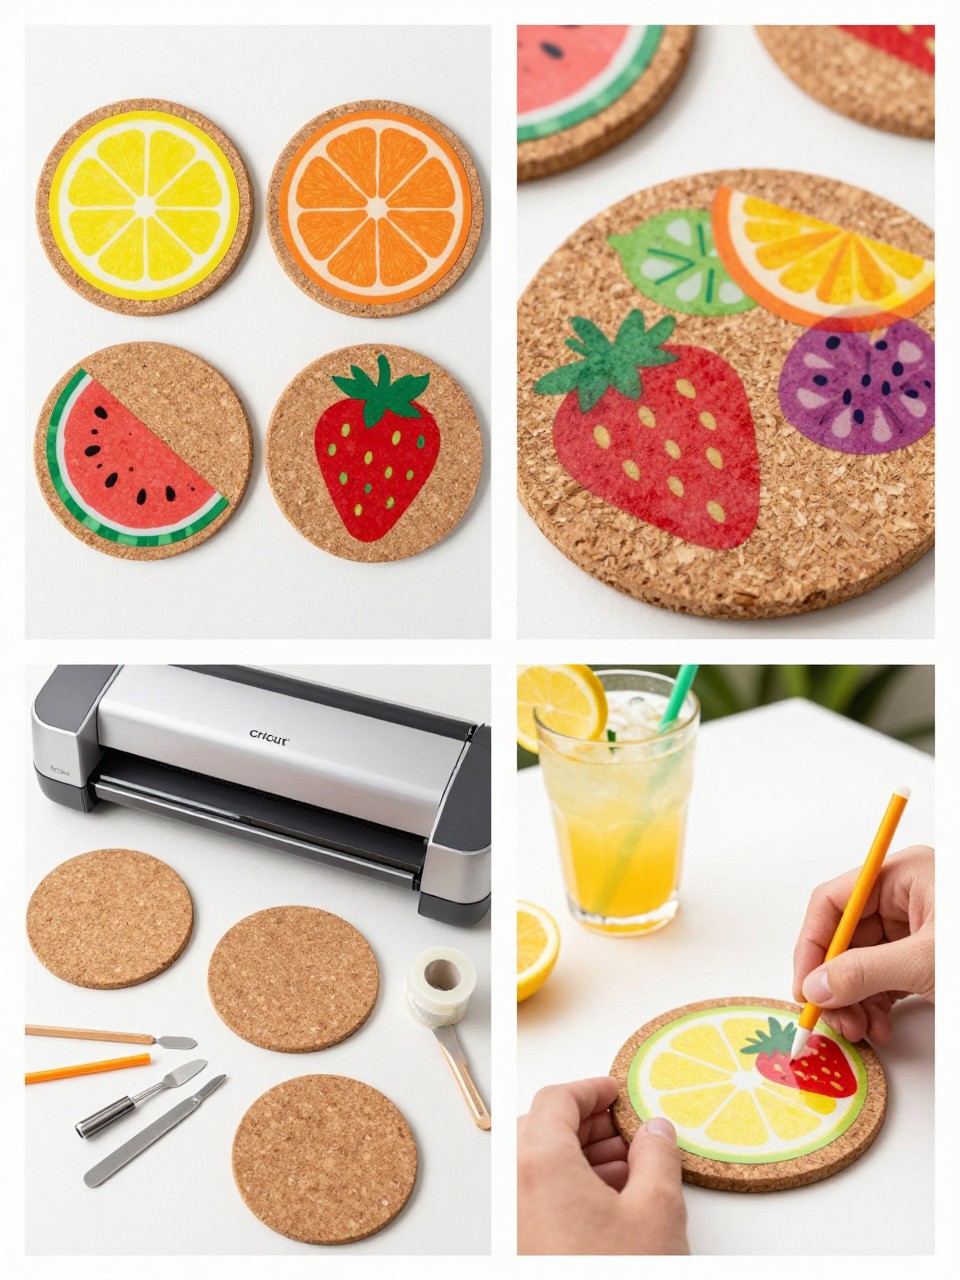
A summer fruit coaster set is cute, useful, and perfect for patio drinks or iced coffee. Cork coasters look great with vinyl fruit decals and are easy to display on a table.
This project is a fun way to practice layering simple vinyl shapes. Lemons, oranges, watermelon slices, and strawberries all work well as coaster designs.
Materials Needed:
- Blank cork coasters
- Permanent vinyl
- Transfer tape
- Cricut machine
- Weeding tool
- Scraper tool
- Clear sealer, optional
Steps To Make:
- Create fruit shapes sized to fit your coasters.
- Cut each color layer from permanent vinyl.
- Weed the vinyl carefully.
- Apply the layers to each coaster with transfer tape.
- Seal the coasters if you want extra protection.
13. DIY Summer Planner Tabs
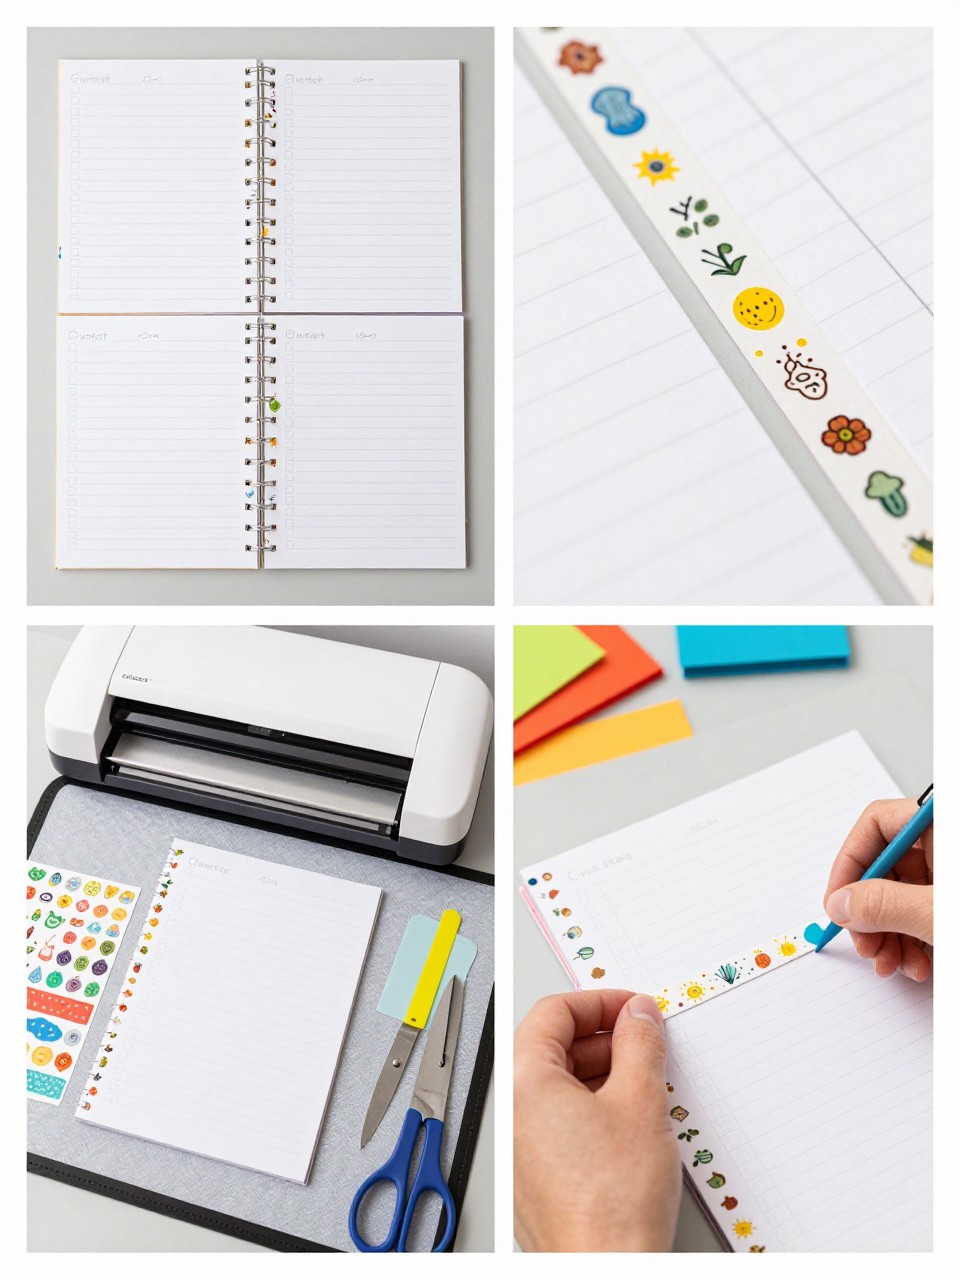
Summer planner tabs are a creative Cricut project for organizing trips, parties, recipes, garden plans, or kids’ activities. They make your planner feel seasonal and easier to use.
You can cut tabs from cardstock, sticker paper, or laminated sheets. Add tiny icons to help separate sections like travel, meals, crafts, and events.
Materials Needed:
- Cardstock or printable sticker paper
- Cricut machine
- LightGrip mat
- Small vinyl or sticker icons
- Laminating sheet, optional
- Scraper tool
- Scissors
Steps To Make:
- Create tab shapes in Design Space.
- Cut the tabs from cardstock or sticker paper.
- Add small icons or labels if desired.
- Laminate the tabs for more durability.
- Attach them to planner pages or summer binders.
14. Layered Cardstock Summer Shadow Box
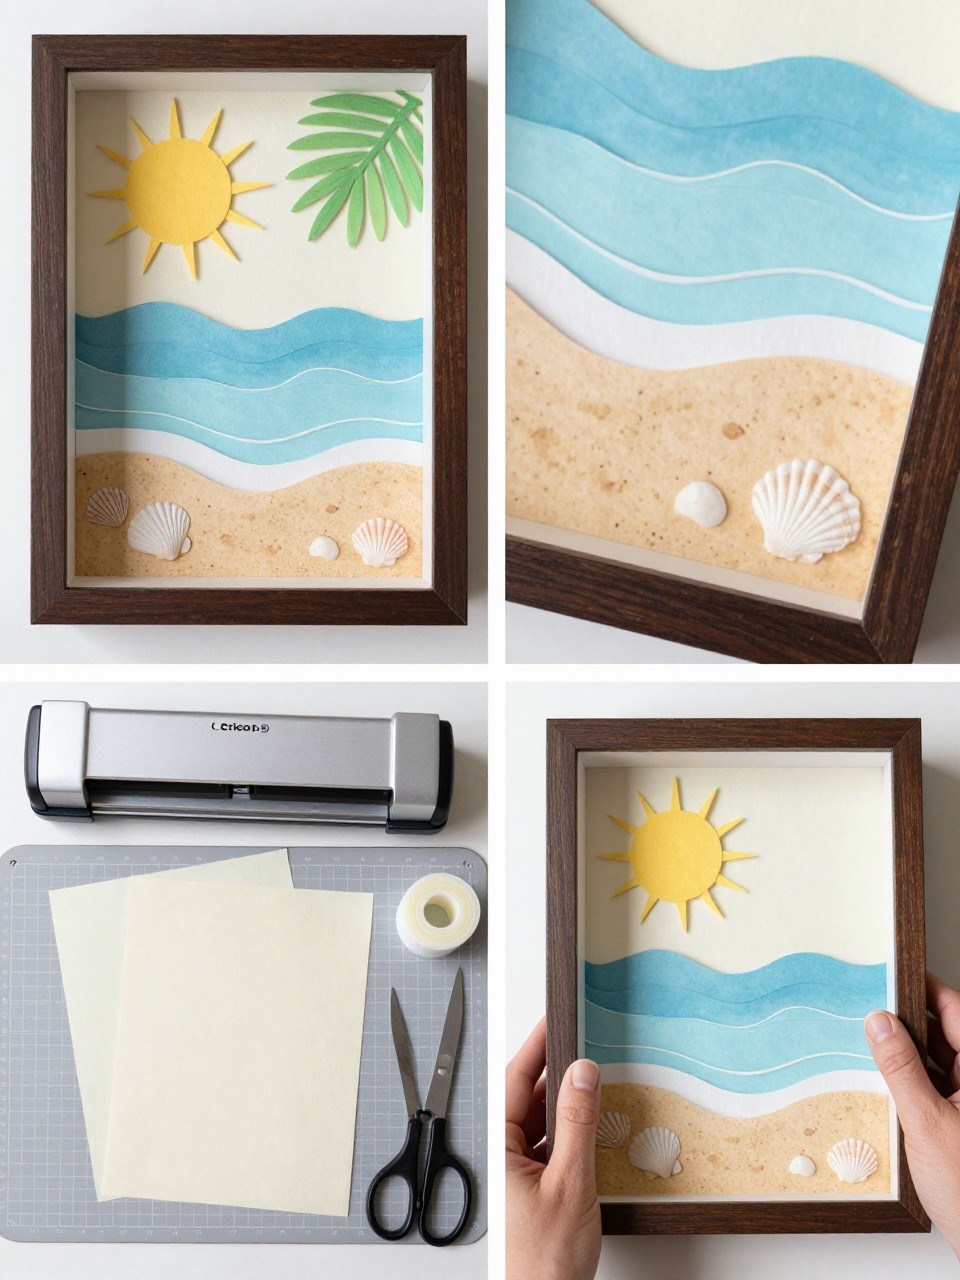
A layered cardstock summer shadow box is a creative project that looks like real decor when finished. It is perfect for shelves, entry tables, kids’ rooms, or seasonal gallery walls.
This project is a little more detailed than basic vinyl, but the Cricut does most of the cutting. Use foam tape between layers to create depth and make the scene stand out.
Materials Needed:
- Colored cardstock
- Cricut machine
- LightGrip mat
- Shadow box frame
- Foam tape
- Glue or tape runner
- Scraper tool
- Scissors
Steps To Make:
- Choose or design a layered summer scene in Design Space.
- Cut each layer from cardstock.
- Arrange the layers in the correct order.
- Add foam tape between layers for depth.
- Place the finished design inside the shadow box frame.