


In This Article Show
Spring comes with longer light, fresh air, and that itch to refresh every corner. But store-bought decor can feel cookie-cutter or pricey. These projects are for real people with real schedules—each one looks designer-level but is simple enough for a lazy Sunday afternoon.
Grab a cup of tea, pull out your craft bin, and let’s make your home feel like a bright, happy spring retreat without stress or mess.
1. Lime-Wash Look Vase (with Paint)
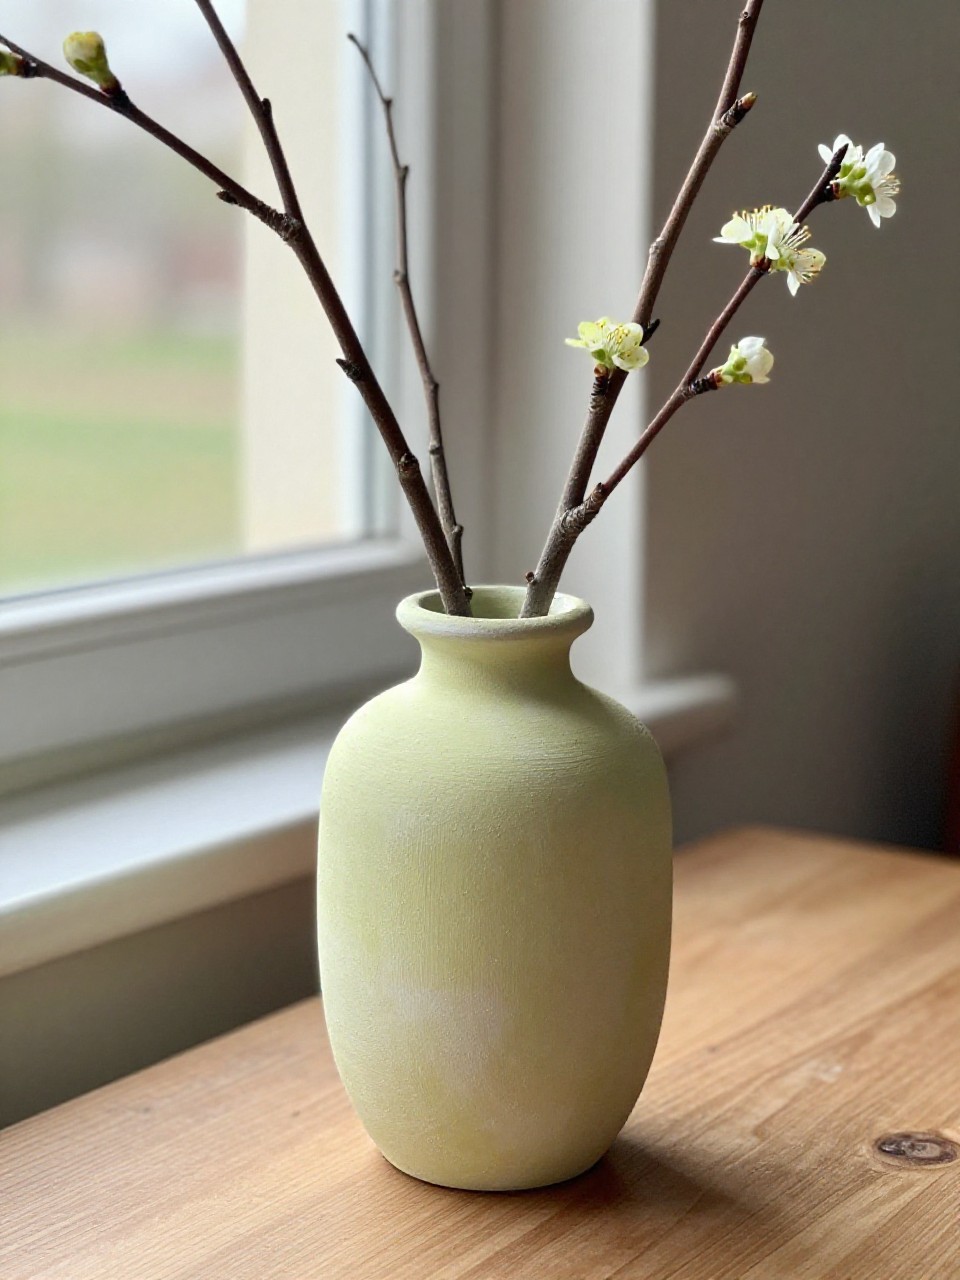
Give any thrifted vase a soft, chalky lime-wash finish that looks boutique. The texture hides mistakes, and the cloudy layers feel calm and airy—perfect for spring branches.
Materials Needed:
- Old glass or ceramic vase
- Matte acrylic paint (white + beige)
- Baking soda
- Sponge
How to make it:
- Mix 1 tablespoon baking soda into 1/4 cup white paint to make a chalky base.
- Sponge the mixture over the vase in dabs; let dry 20 minutes.
- Thin beige paint with water; tap on in irregular cloudy patches.
- Lightly blend edges with a damp sponge for a lime-wash look.
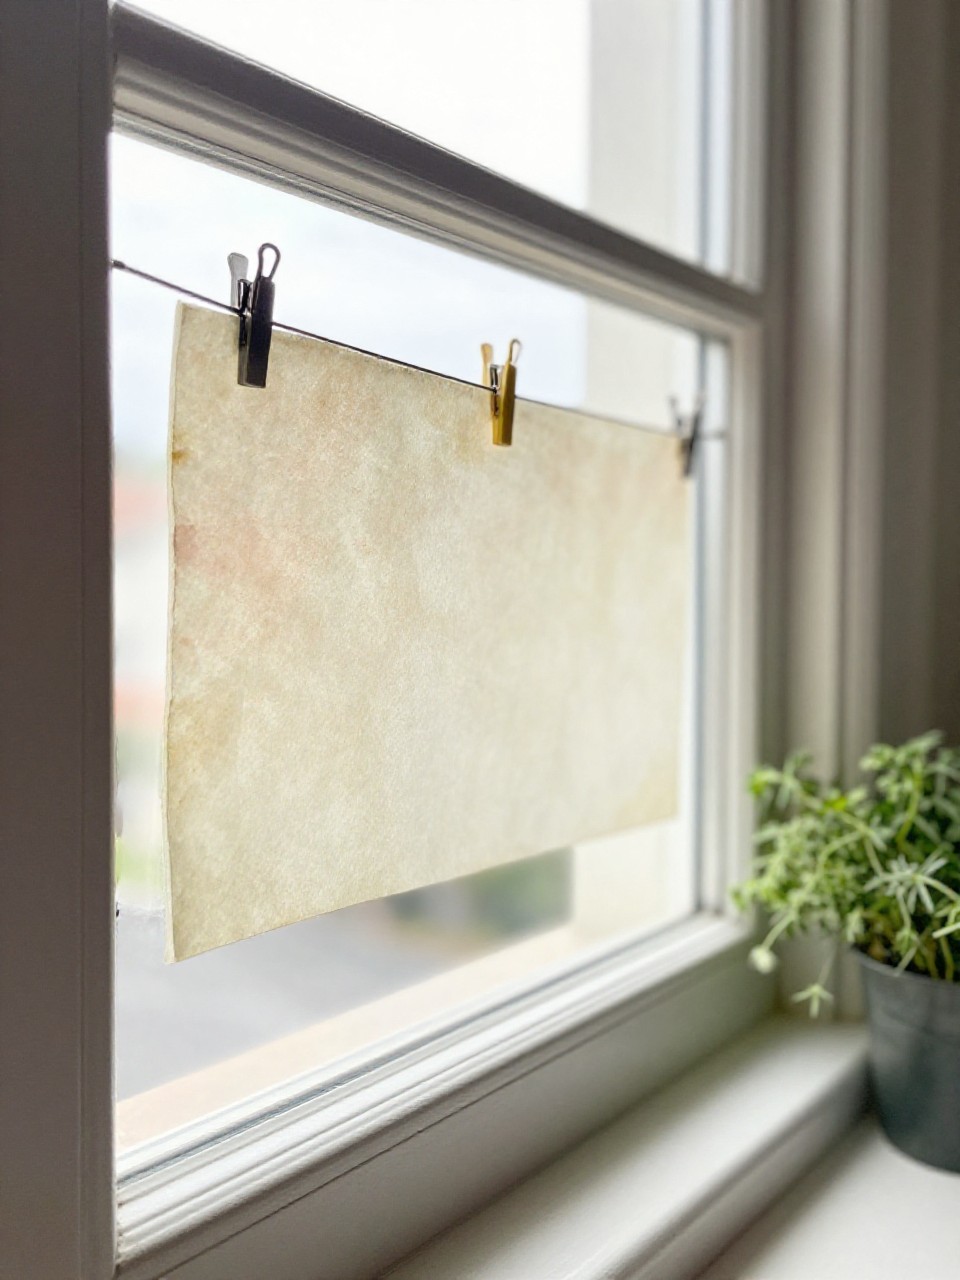
2. Pressed Citrus Sun Catchers
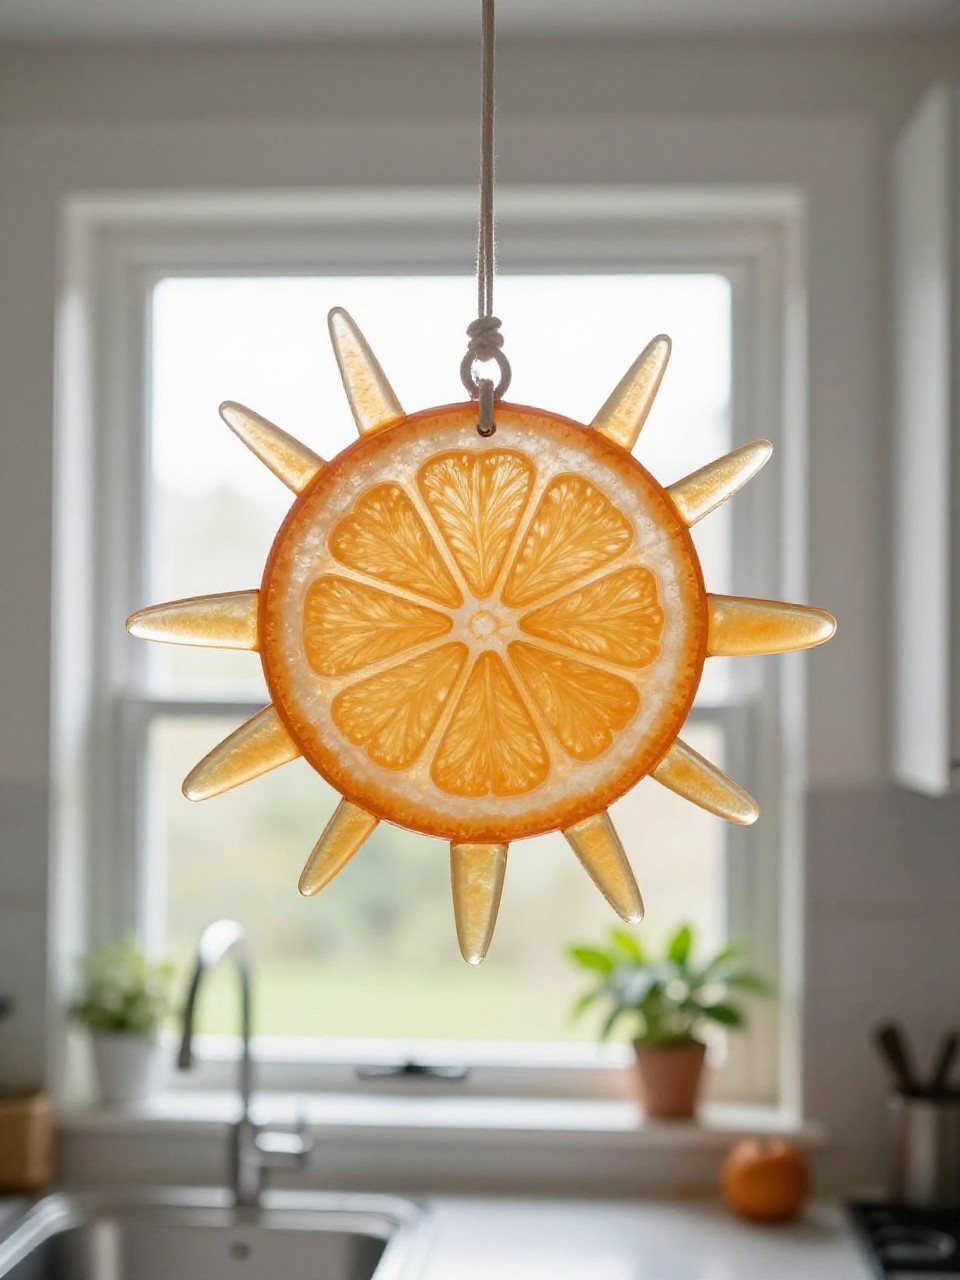
Slices of dried lemon and orange glow like tiny stained glass in the window. They smell fresh and bring a bright pop of color to kitchens and breakfast nooks.
Materials Needed:
- Thin orange and lemon slices
- Parchment paper
- Clear packing tape or self-adhesive laminating sheets
- Twine
How to make it:
- Dry citrus slices in a low oven (200°F/95°C) for 2–3 hours, flipping once.
- Sandwich slices between two layers of clear tape or laminating sheets.
- Press well to remove bubbles; cut out around the slices.
- Punch a hole and hang with twine in a sunny window.
3. Mossy Bird’s Nest Centerpiece
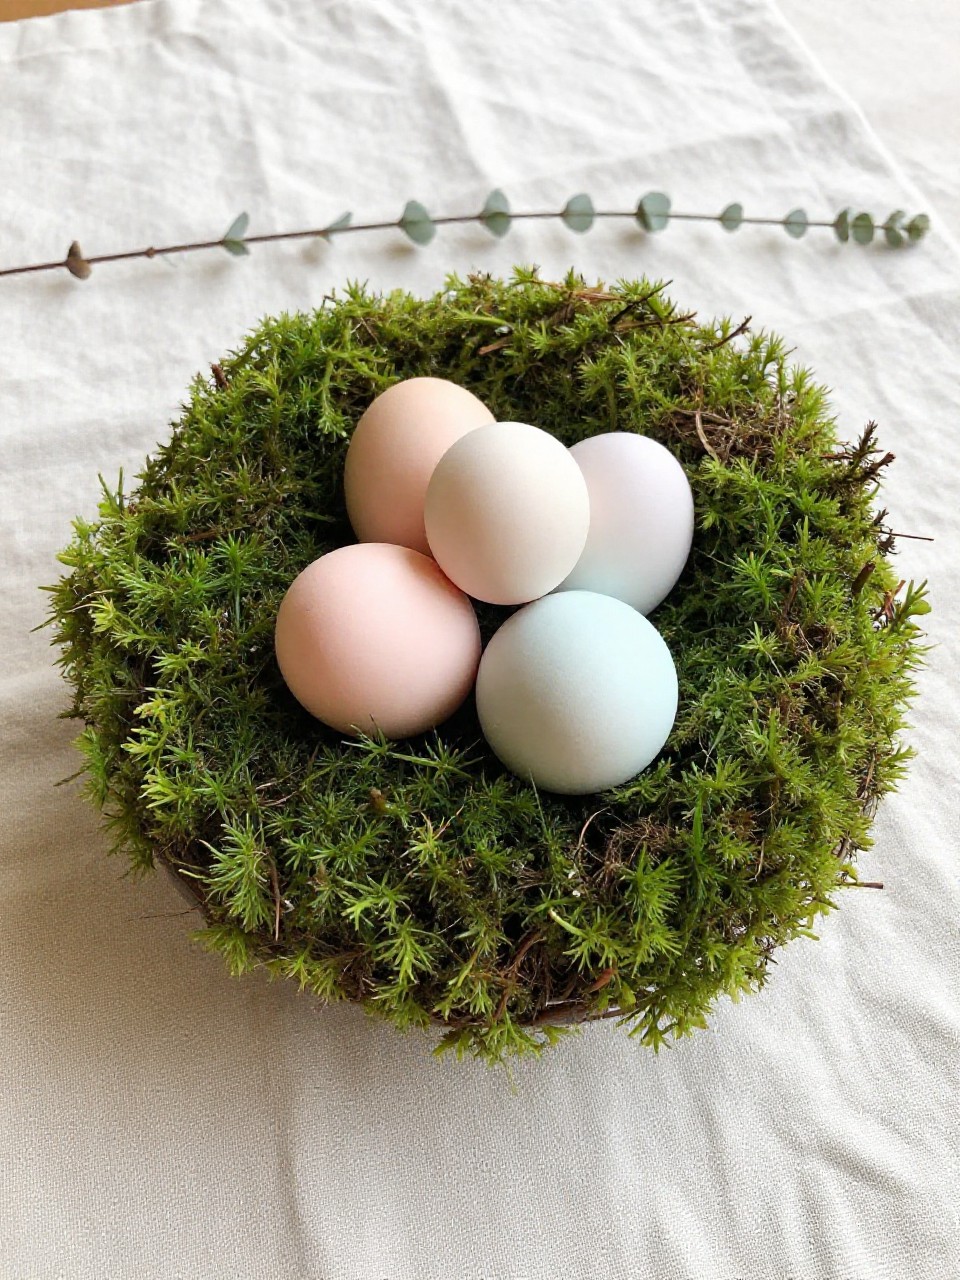
A tiny, nature-inspired nest centerpiece looks lush and earthy without being fussy. It brings instant spring forest vibes to your dining table.
Materials Needed:
- Grapevine wreath (small) or vine garland
- Sheet moss or preserved moss
- Faux eggs or painted wooden beads
- Hot glue
How to make it:
- Coil a short length of vine into a loose nest shape or use a mini wreath base.
- Hot glue moss in layers, tucking pieces to look organic.
- Add a few eggs in the center; secure with tiny glue dots.
- Style on a plate with extra moss or petals sprinkled around.
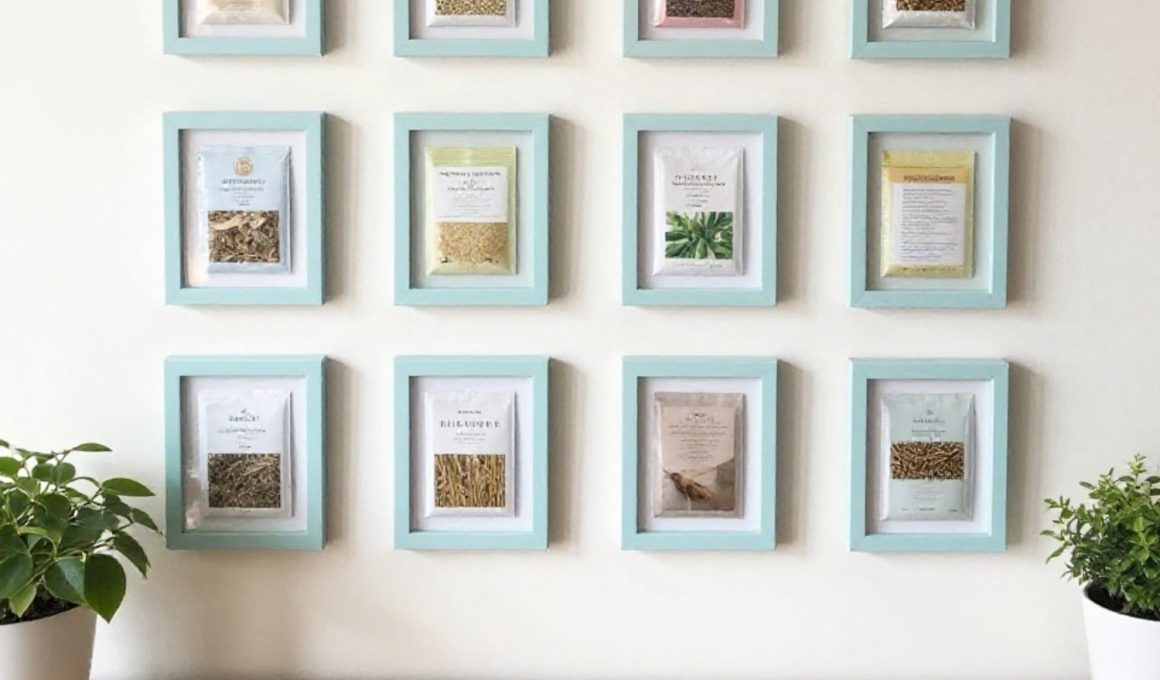
4. Painted Seed Packet Gallery
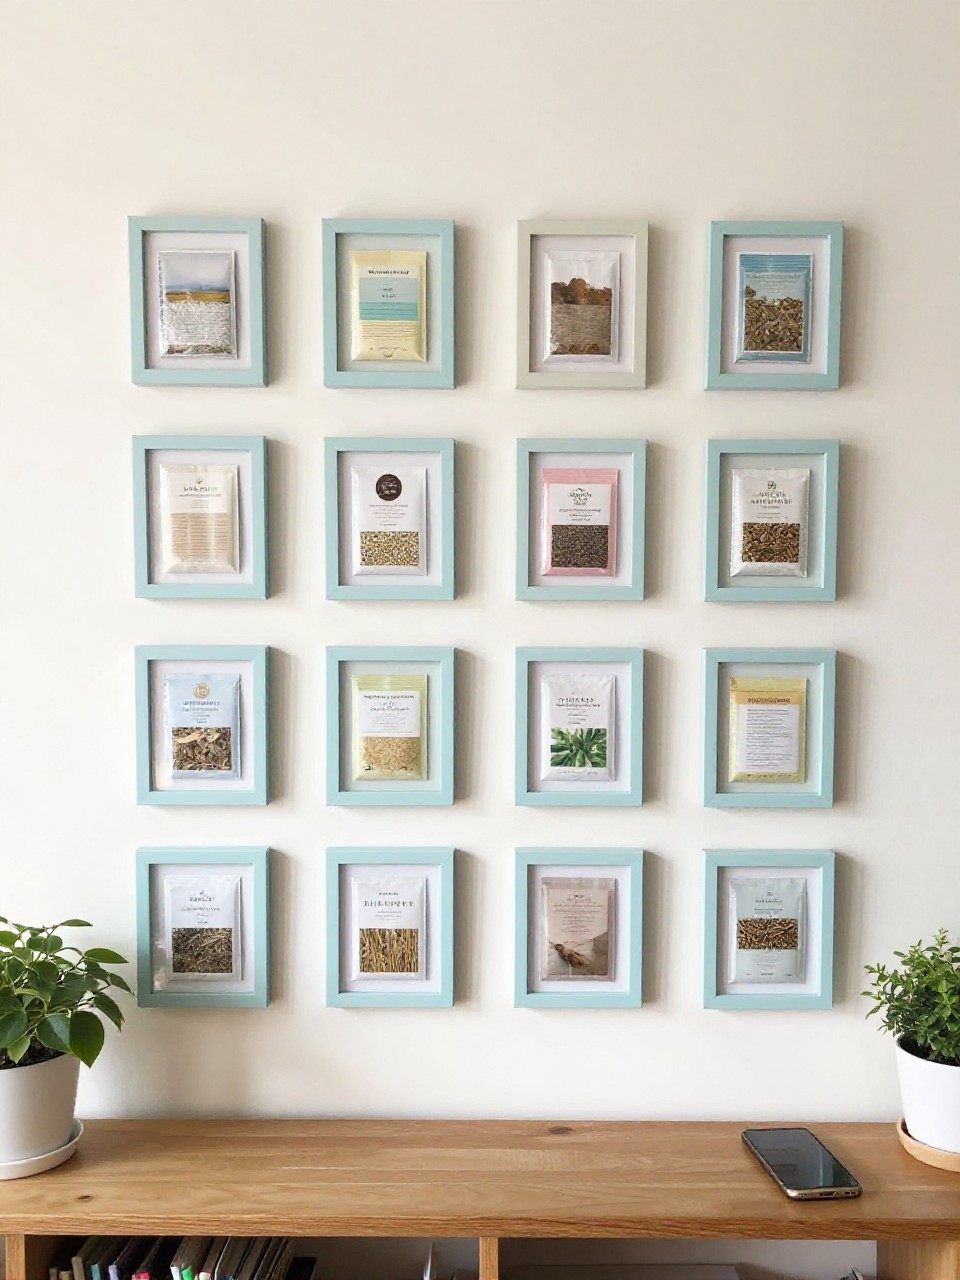
Turn pretty seed packets into instant art that feels fresh, vintage, and garden-ready. The mix of colors looks curated without needing real painting skills.
Materials Needed:
- Floral seed packets
- Small frames or clipboards
- Acrylic paint (pastels)
- Painter’s tape
How to make it:
- Tape off a simple border on each seed packet.
- Brush a pastel background, leaving the flower image and title visible.
- Peel tape and let dry.
- Frame or clip and hang in a grid.
5. Watercolor Window Clings (with Glue)
Soft, dreamy colors on your windows without any mess. These clings peel off cleanly and look like frosted watercolor panes.
Materials Needed:
- Clear school glue
- Food coloring or liquid watercolors
- Plastic sheet protectors
- Paintbrush
How to make it:
- Squeeze a puddle of clear glue onto a sheet protector.
- Drop in a little color and swirl gently with a brush for a marbled look.
- Let dry fully overnight until it lifts cleanly.
- Peel and stick onto clean windows; reposition as you like.
6. Spring Meadow Candle Sleeves
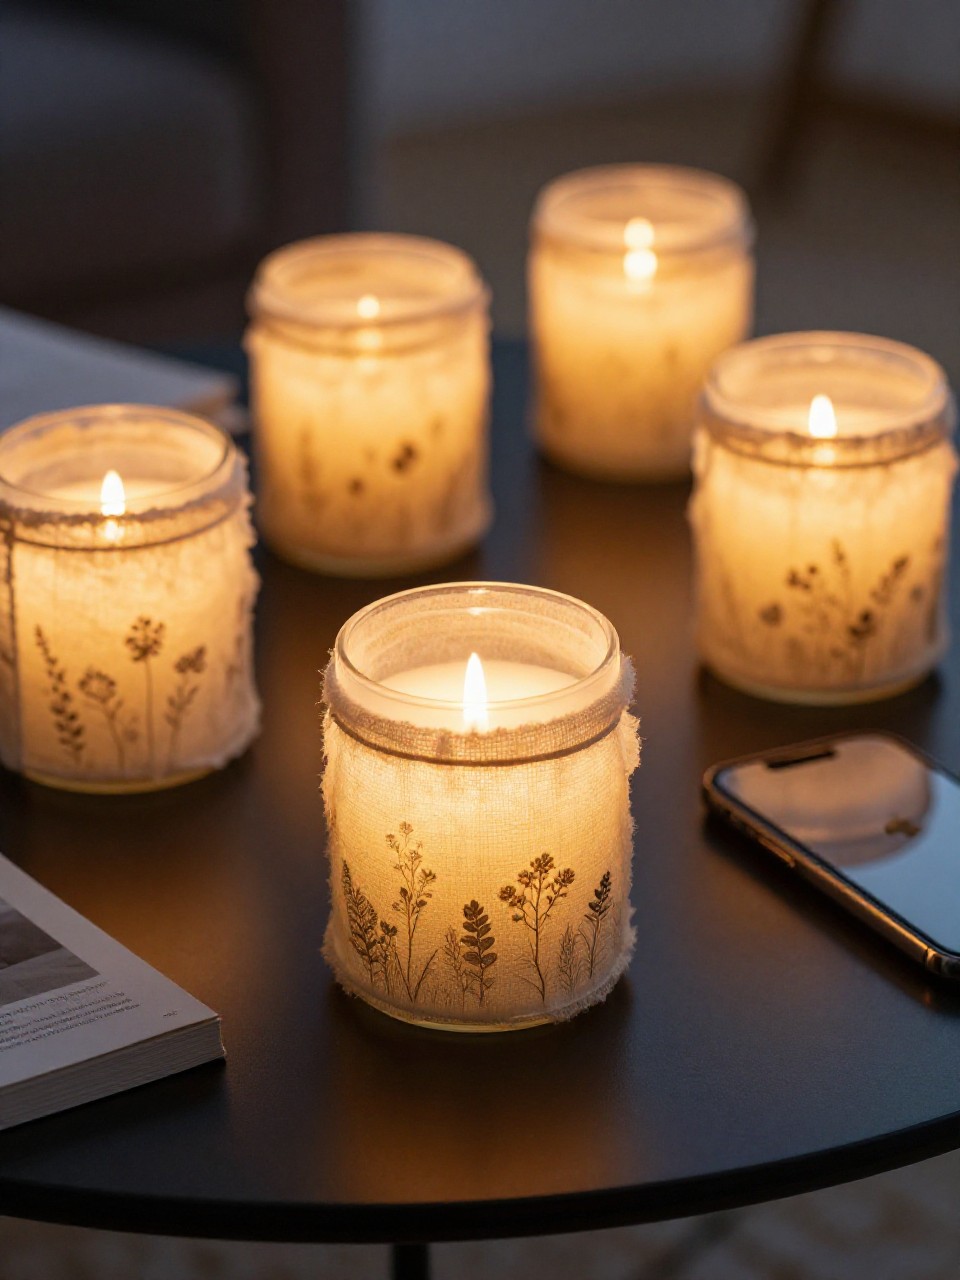
Create removable paper sleeves for plain candles, printed with soft meadow silhouettes. They glow like little lanterns and feel cozy for cool spring nights.
Materials Needed:
- Vellum or tracing paper
- Craft knife or scissors
- Tape or glue stick
- Printed meadow silhouette or hand-drawn doodles
How to make it:
- Print or draw meadow silhouettes onto vellum.
- Cut to fit around your candle jar with a slight overlap.
- Tape or glue the edge to form a sleeve (don’t glue to the jar).
- Slide over the candle so light shines through the print.
7. Clay-Painted Faux Terracotta Pots
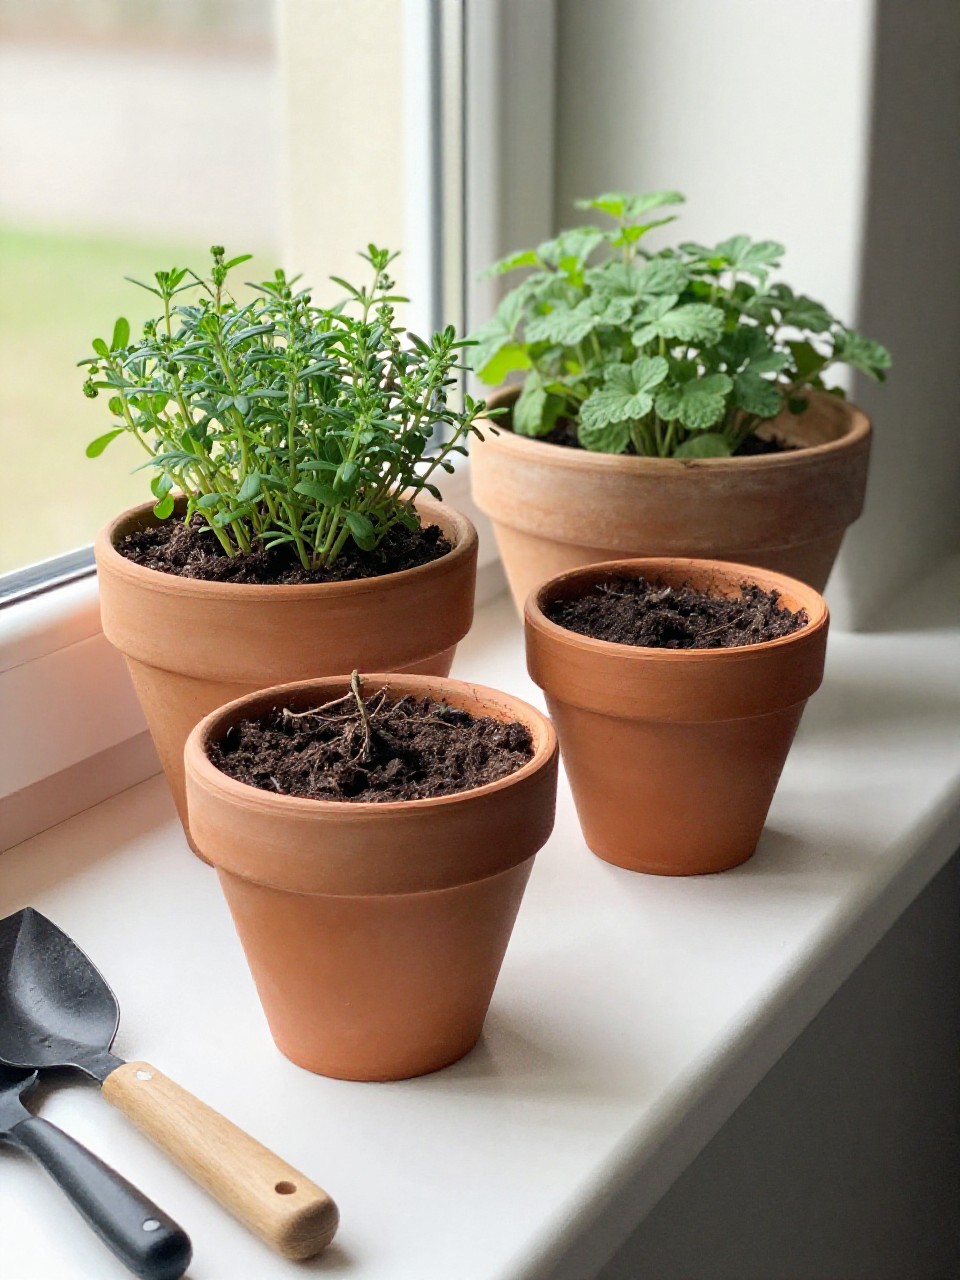
Turn plastic pots into earthy “terracotta” with texture and warm color. They look artisan-made and pair beautifully with herbs and succulents.
Materials Needed:
- Plastic nursery pots
- Acrylic paint (terra-cotta + a bit of white)
- Baking soda
- Foam brush
How to make it:
- Mix paint with a spoon of baking soda for texture.
- Brush on in quick, rough strokes for a pottery feel.
- Dab a little white into the wet paint for sun-kissed highlights.
- Let dry and pot up small spring plants.
8. Botanical Cyanotype-Style Prints (with Sun and Paper)
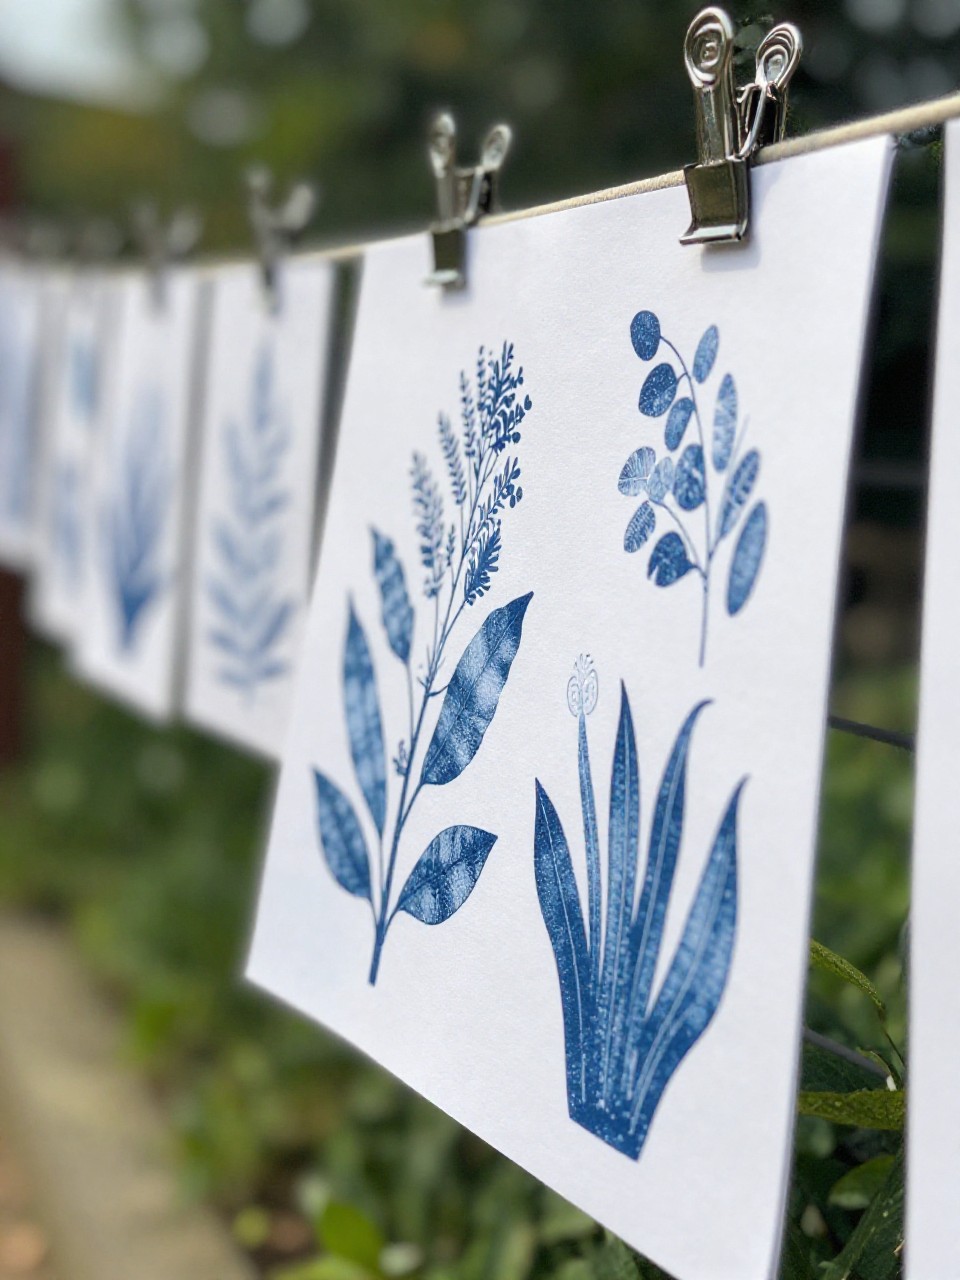
Get the look of cyanotypes without chemicals using dark blue paper and sunlight. The crisp leaf shapes feel modern and fresh.
Materials Needed:
- Dark blue construction paper
- Flat leaves/ferns/flowers
- Clear plastic sheet or glass from a frame
- Sunny spot
How to make it:
- Arrange leaves on the blue paper.
- Lay clear plastic or glass on top to hold them flat.
- Place in bright sun for a few hours until the uncovered paper fades.
- Remove leaves to reveal lighter silhouettes; frame when dry.
9. Ribbon-Wrapped Tulip Wreath
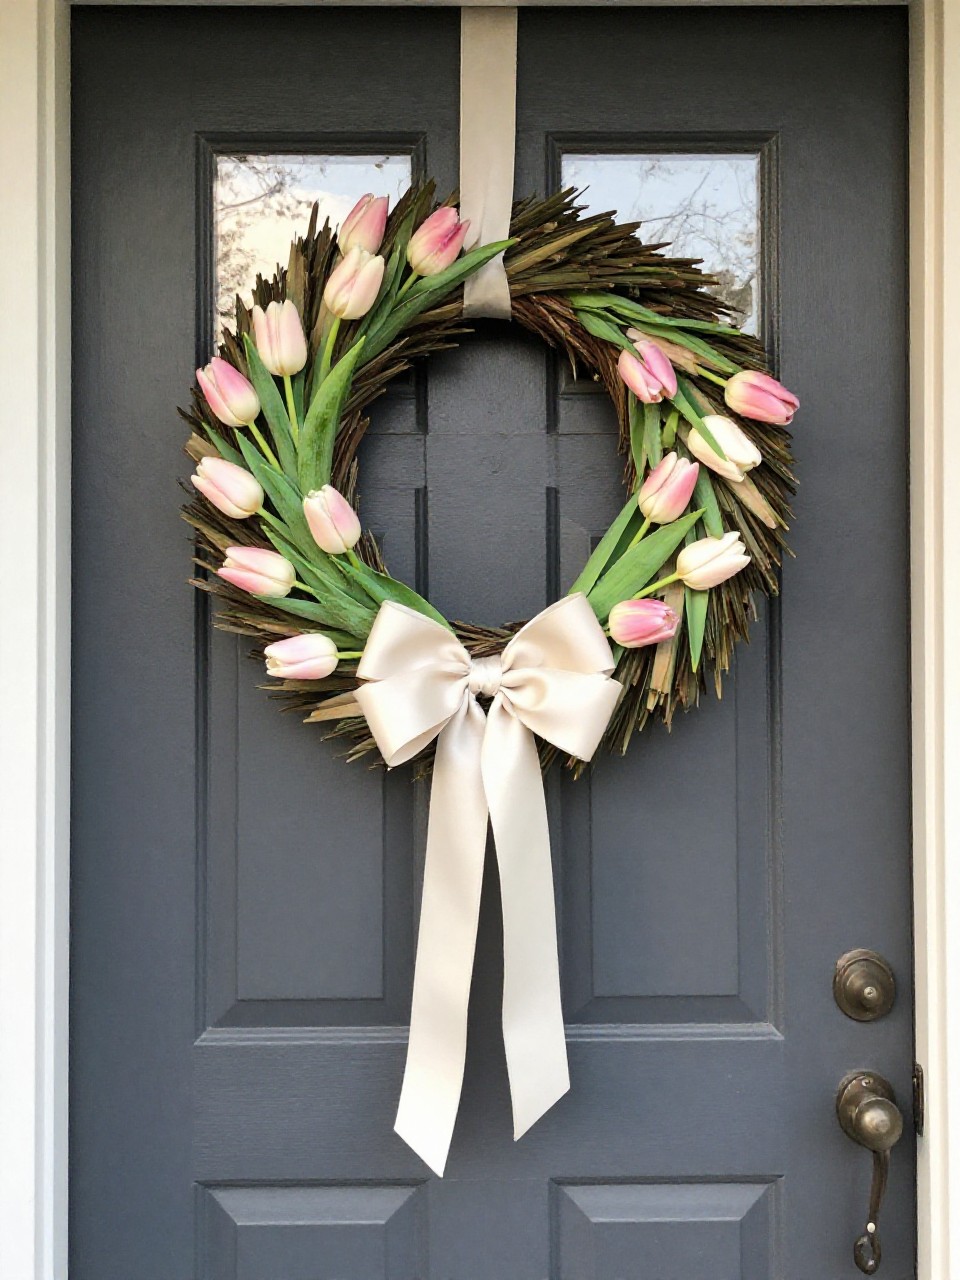
A sweet, soft wreath that looks boutique but takes minutes. The crisscross ribbons and tucked tulips feel cheerful and polished.
Materials Needed:
- Foam wreath form
- Wide satin or grosgrain ribbon
- Faux tulips
- Floral pins or hot glue
How to make it:
- Wrap the wreath form fully with ribbon, securing the ends.
- Crisscross a second ribbon color loosely around.
- Trim tulip stems to short lengths.
- Tuck and pin blooms along one side for an asymmetrical sweep.
10. Speckled Robin’s Egg Orbs
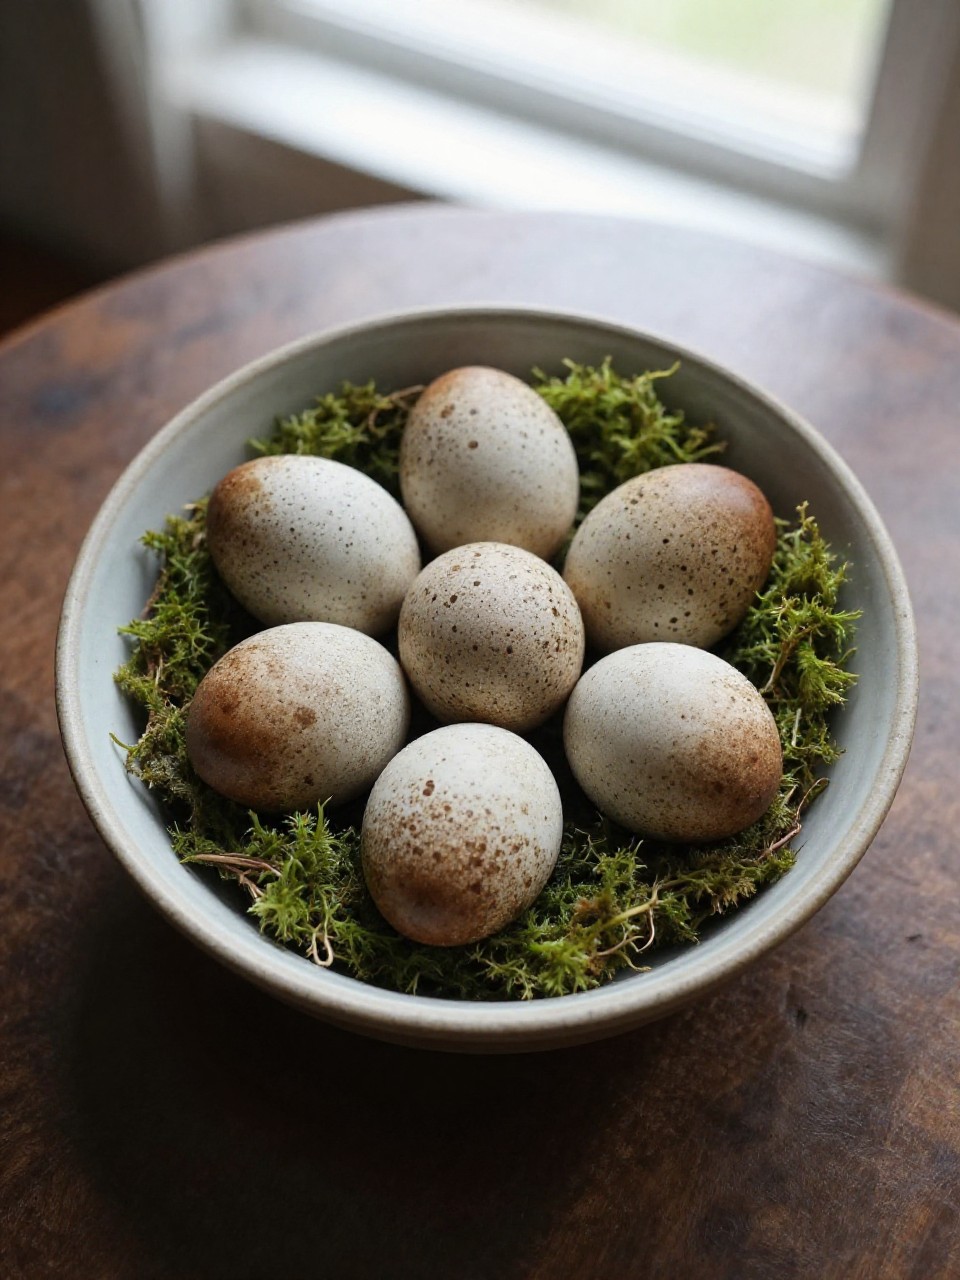
Create pretty speckled eggs from wooden or plastic eggs that look hand-thrown. Cluster them in bowls for a simple spring statement.
Materials Needed:
- Wooden or plastic eggs
- Acrylic paint (pale blue/green)
- Old toothbrush
- Brown and white paint for speckles
How to make it:
- Paint eggs a soft robin’s-egg blue; let dry.
- Thin brown paint slightly with water.
- Dip the toothbrush and flick the bristles to speckle; repeat with white.
- Dry and display in a bowl with moss or straw.
11. Fabric-Wrapped Books in Pastel Linens
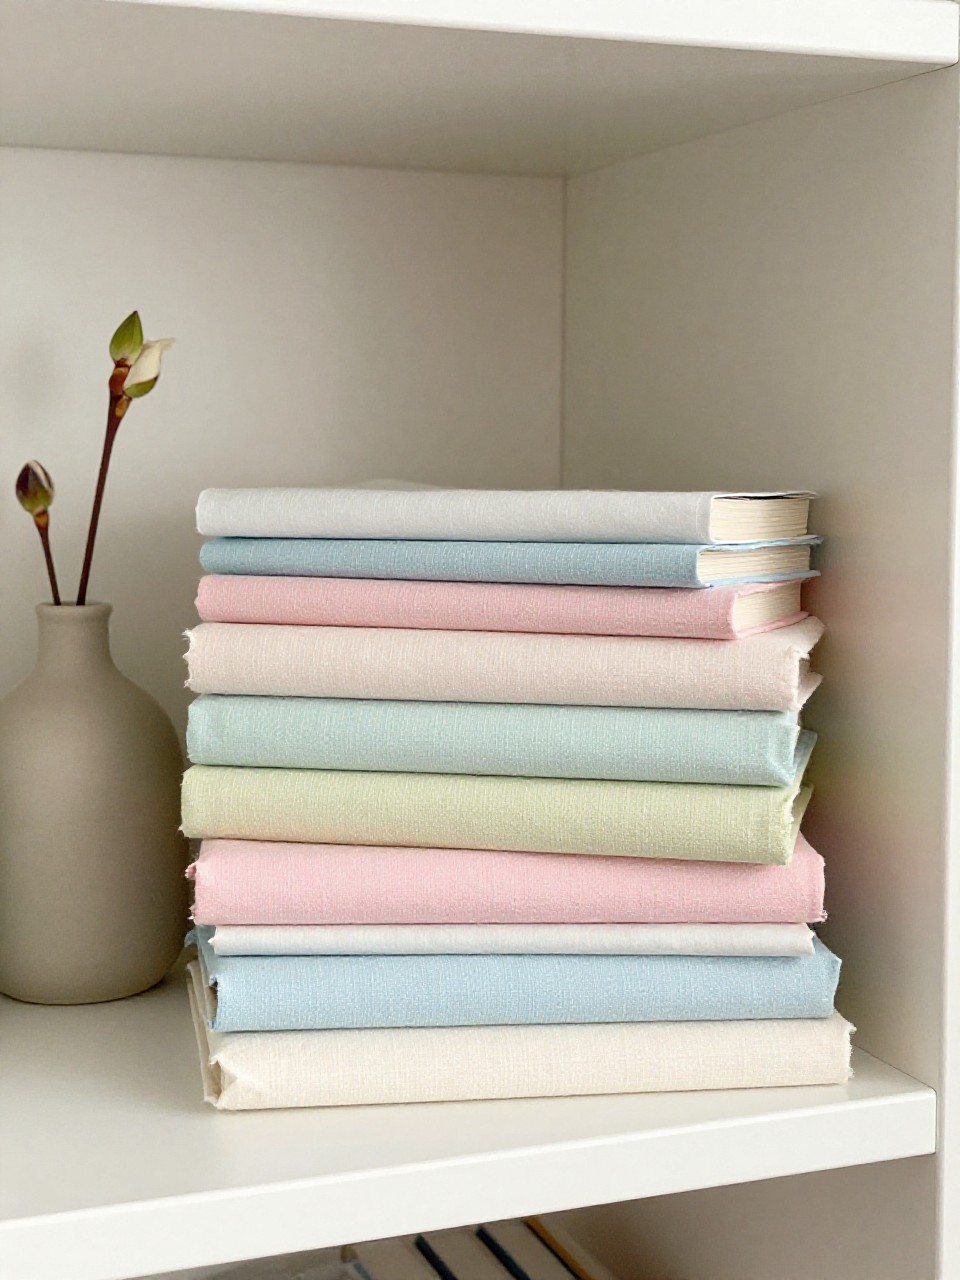
Give shelves a clean, spring palette with simple fabric-wrapped books. The textures read cozy and elevated, like boutique styling.
Materials Needed:
- Old hardback books
- Thin fabric (linen or cotton)
- Double-sided tape or glue stick
- Scissors
How to make it:
- Cut fabric with 1–2 inches extra around the book.
- Tape or glue the spine first, then wrap the covers tightly.
- Fold corners like a present and secure the inside covers.
- Stack with spines facing in for a soft, textural look.
12. Wildflower-Flecked Plaster Frames
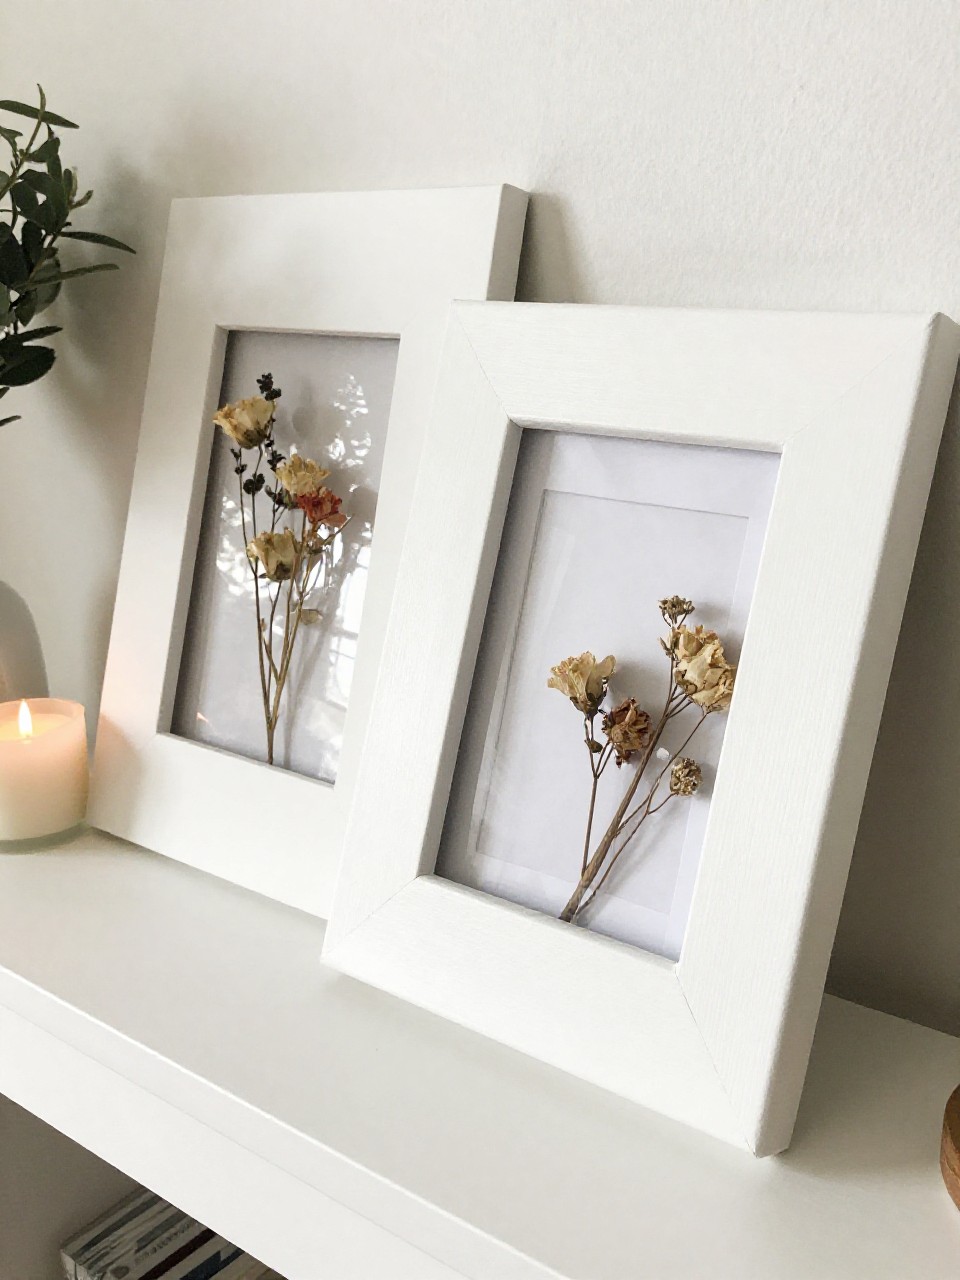
Simple plaster turns basic frames into airy, stone-like decor sprinkled with dried blooms. They look like treasures from a coastal gallery.
Materials Needed:
- Cheap photo frames (flat surface)
- Spackling paste or lightweight joint compound
- Dried wildflowers
- Putty knife
How to make it:
- Spread a thin, uneven layer of spackle over the frame.
- While damp, press in small dried petals and stems.
- Drag the putty knife lightly to embed and texture.
- Let dry and sand edges lightly for a soft chalk finish.
13. Ombre Dip-Dyed Tea Towels
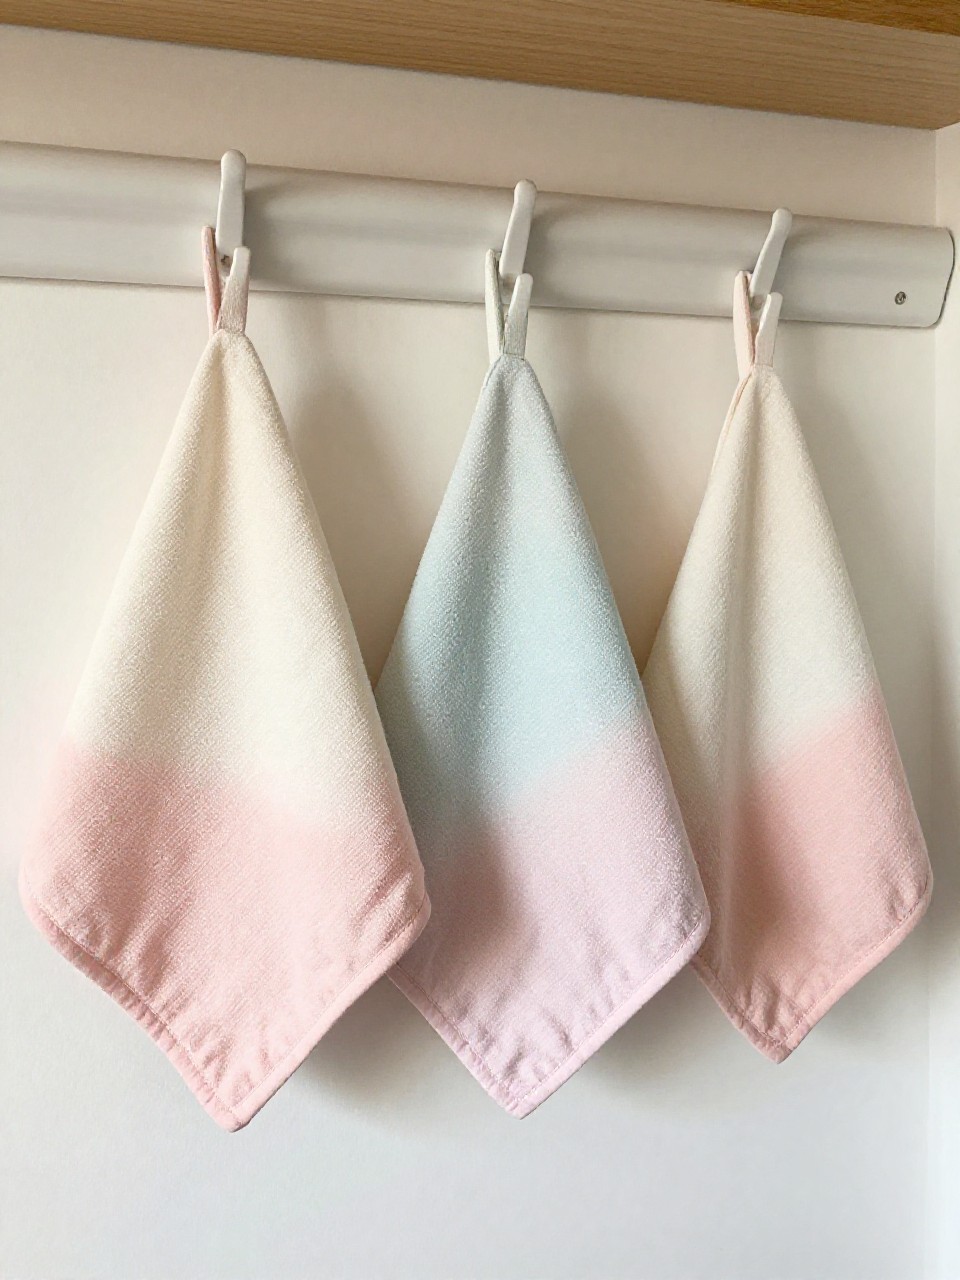
Freshen the kitchen with soft ombre towels that look boutique but take minutes. The gentle fade feels beachy and clean.
Materials Needed:
- White cotton tea towels
- Fabric dye (one color)
- Bucket
- Salt (if dye calls for it)
How to make it:
- Mix dye in a bucket following instructions.
- Dip the bottom third of the towel deepest; hold for 5–10 minutes.
- Raise slowly to create a fade, dipping the middle briefly.
- Rinse, wash, and hang dry for a soft ombre.
14. Pebble Garden Markers with Paint Pens
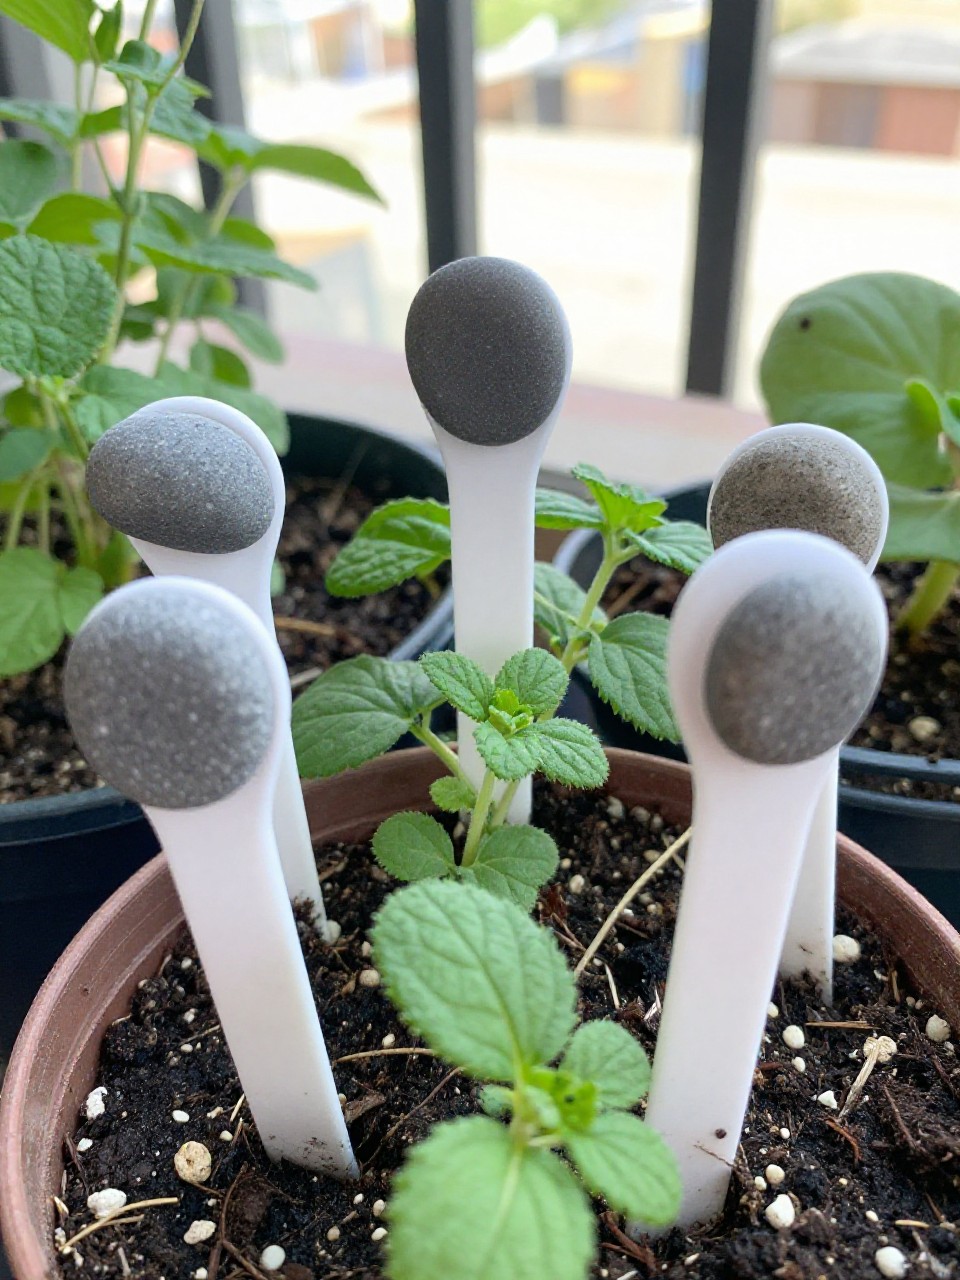
Cute, useful, and surprisingly chic—painted pebble markers label herbs and flowers. The smooth stones and neat lettering feel spa-like.
Materials Needed:
- Smooth river rocks
- Paint pens (white or metallic)
- Clear spray sealer (optional)
- Scrap paper for practice
How to make it:
- Practice simple block or cursive lettering on paper.
- Write plant names on clean, dry rocks.
- Add a tiny leaf doodle or border.
- Seal with clear spray if they’ll live outdoors.
15. Floral Decoupage Light Switch Plates
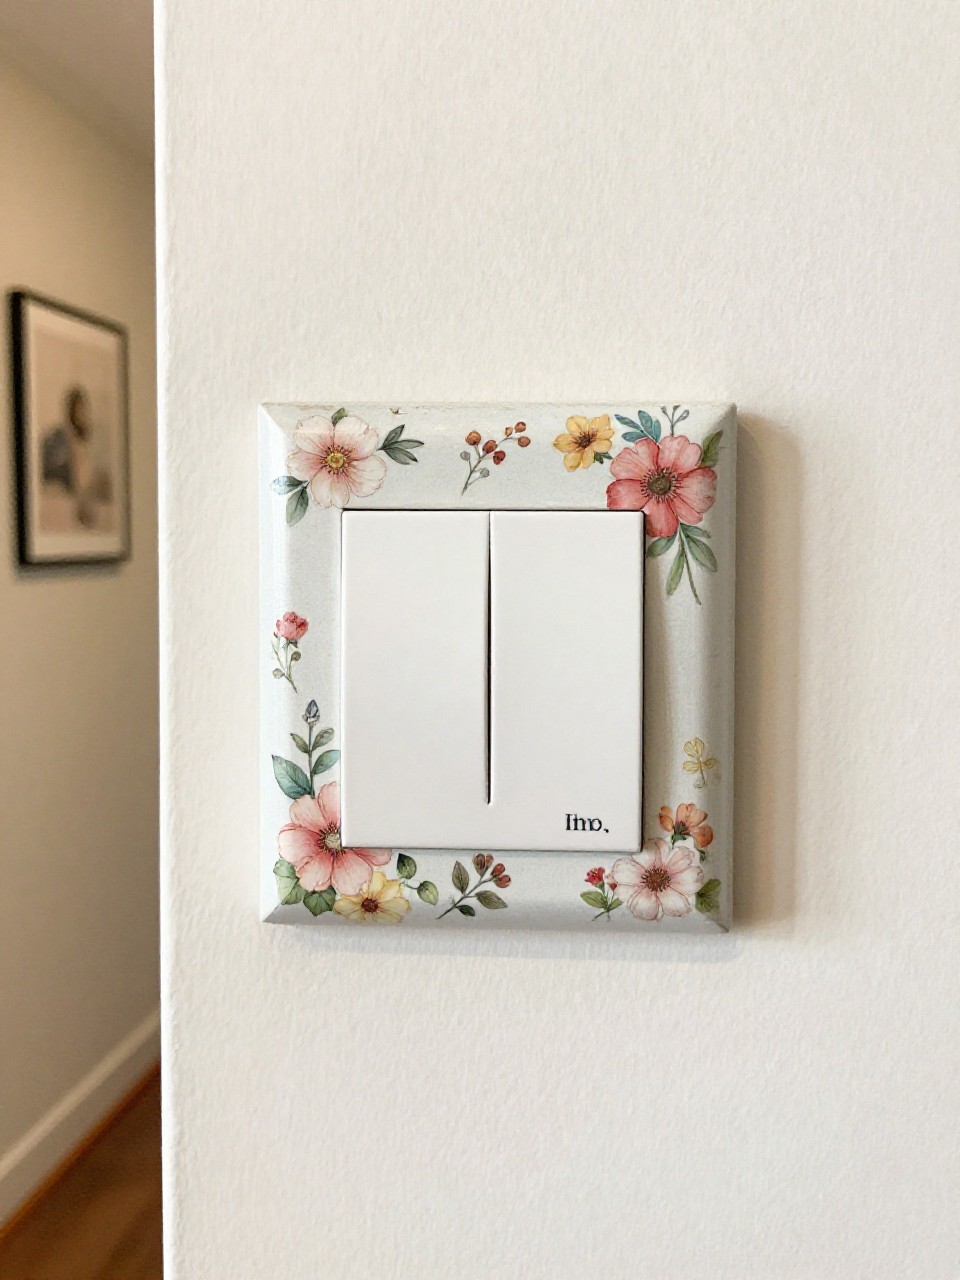
Turn plain switch plates into tiny art pieces in under 10 minutes. They add a charming surprise to halls and bedrooms.
Materials Needed:
- Plain plastic switch plates
- Floral napkins or tissue paper
- Mod Podge or diluted white glue
- Small brush
How to make it:
- Separate napkin layers from the top printed layer.
- Brush glue on the plate; press a napkin gently over it.
- Smooth from the center out, trimming edges with a craft knife.
- Seal with a thin top coat; poke clean holes for screws.
16. Branch Bud Vase Garland
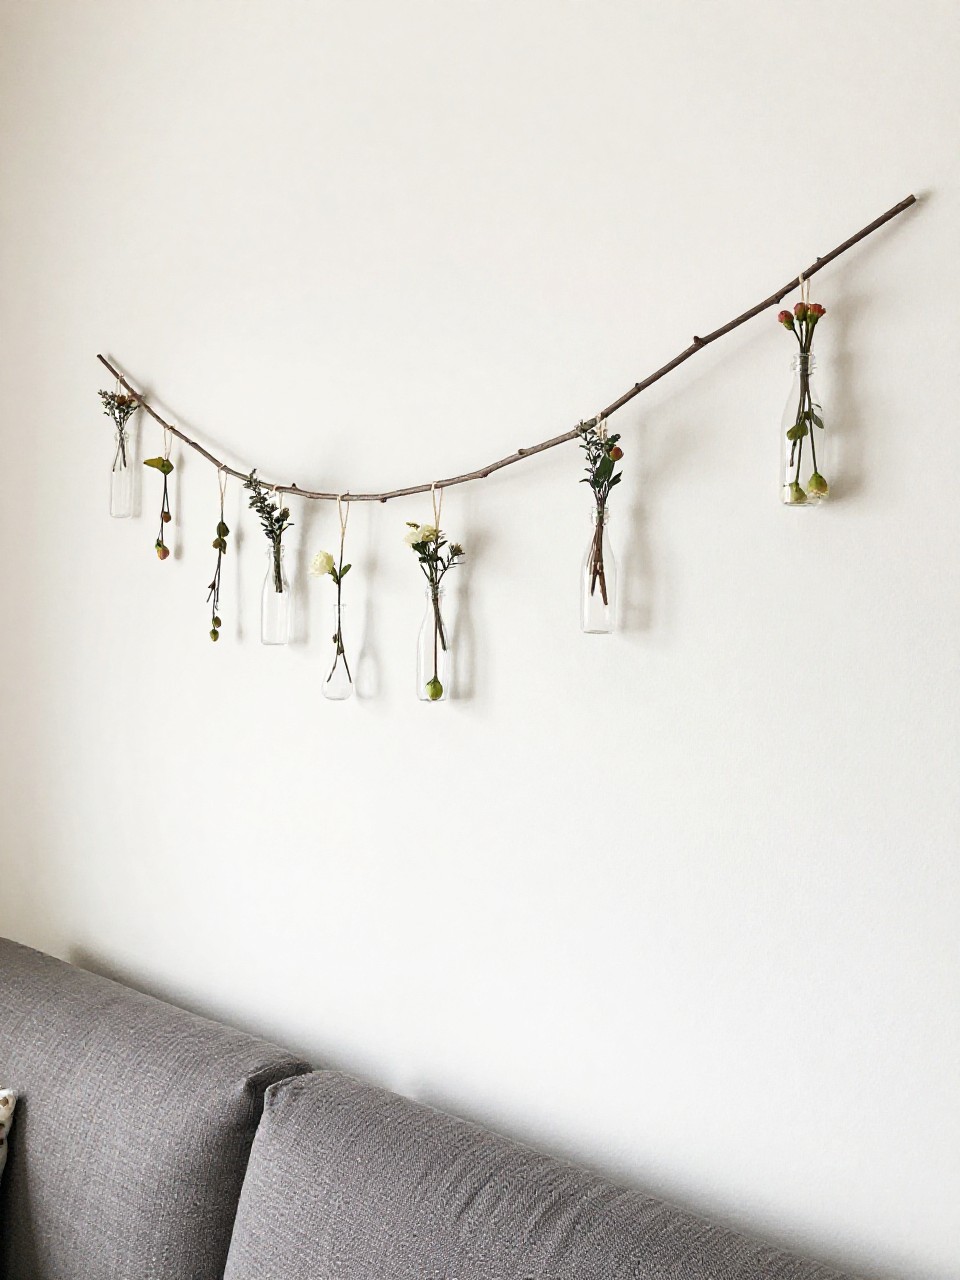
A natural branch becomes a simple garland, holding tiny bud vases like floating blossoms. It feels airy and sculptural without much work.
Materials Needed:
- Straight branch or driftwood
- Small glass bud vases or test tubes
- Twine or thin wire
- Command hooks
How to make it:
- Tie twine to each vase neck, leaving hanging loops.
- Space and tie loops along the branch securely.
- Hang the branch on wall hooks.
- Add a few small blooms or greenery cuttings to the vases.
17. Paper Petal Shadow Lanterns
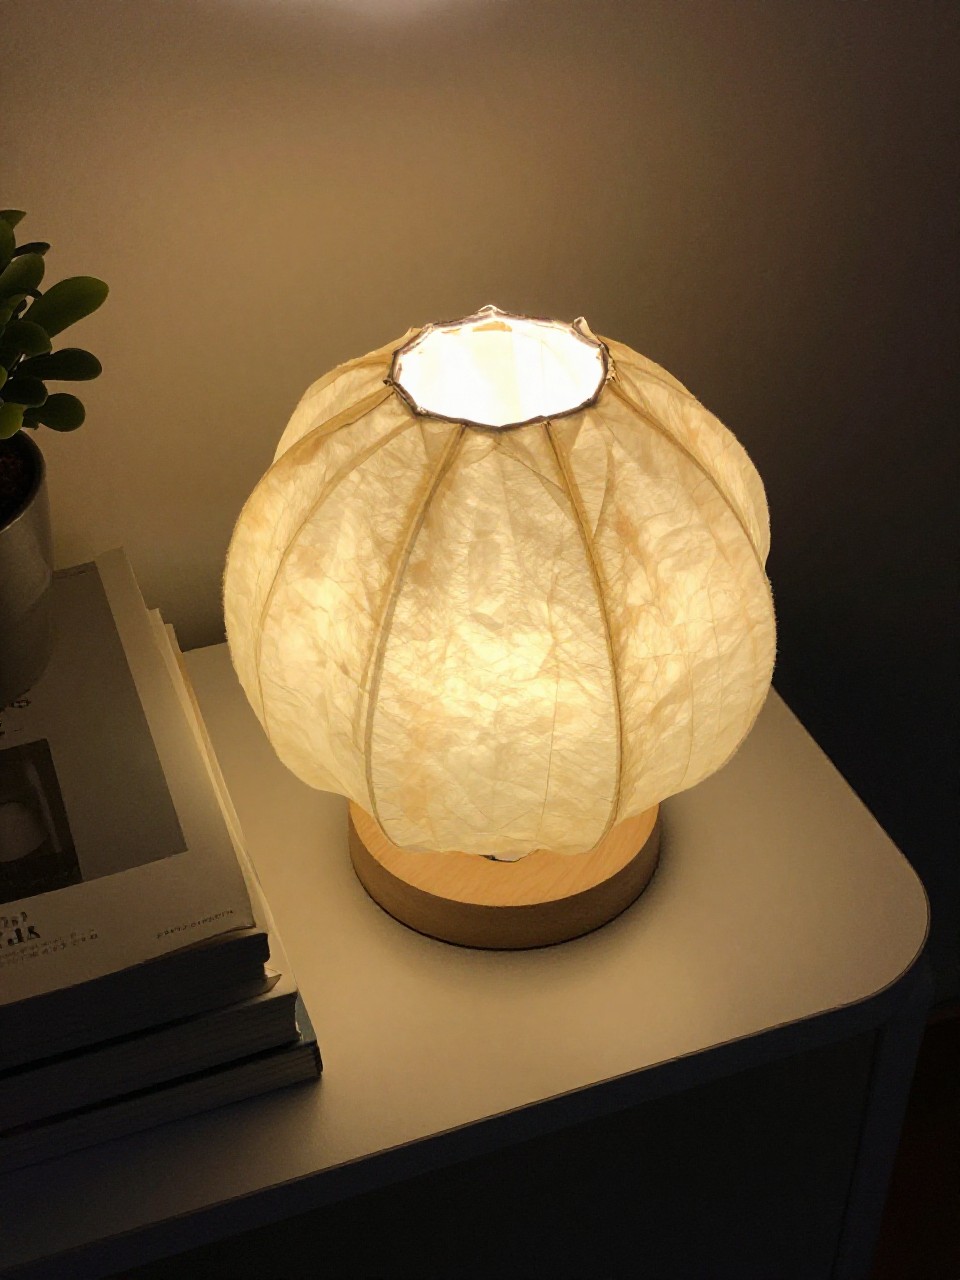
Layered paper petals turn a simple jar into a soft, glowing lantern with floral shadows. The look is dreamy and perfect for evenings.
Materials Needed:
- Clean glass jar
- Vellum or colored paper
- Double-sided tape
- LED tealight
How to make it:
- Cut petal shapes from vellum or soft-colored paper.
- Overlap petals around the jar, securing with tape as you go.
- Stagger lengths to create a layered flower look.
- Place an LED tealight inside and enjoy the shadows.