


In This Article Show
Keeping kids busy can be tough, especially on rainy days or during long afternoons at home or school. If you’re looking for simple, cheerful projects that use basic supplies, this list is for you. Below are 17 cute paper bird crafts that are easy to set up and fun to decorate.
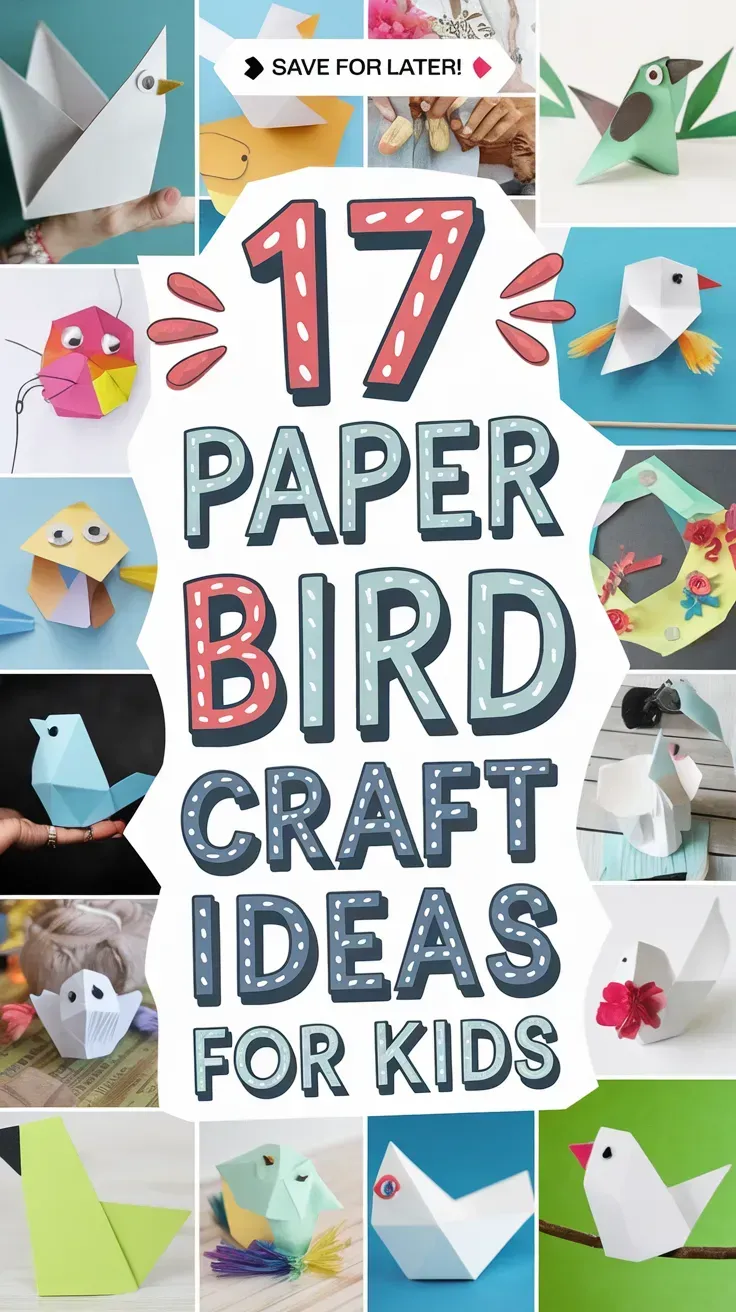
They help kids practice cutting, gluing, and color choices while making sweet little birds to play with or display. Let’s jump into the ideas.
1. Paper Plate Bluebird
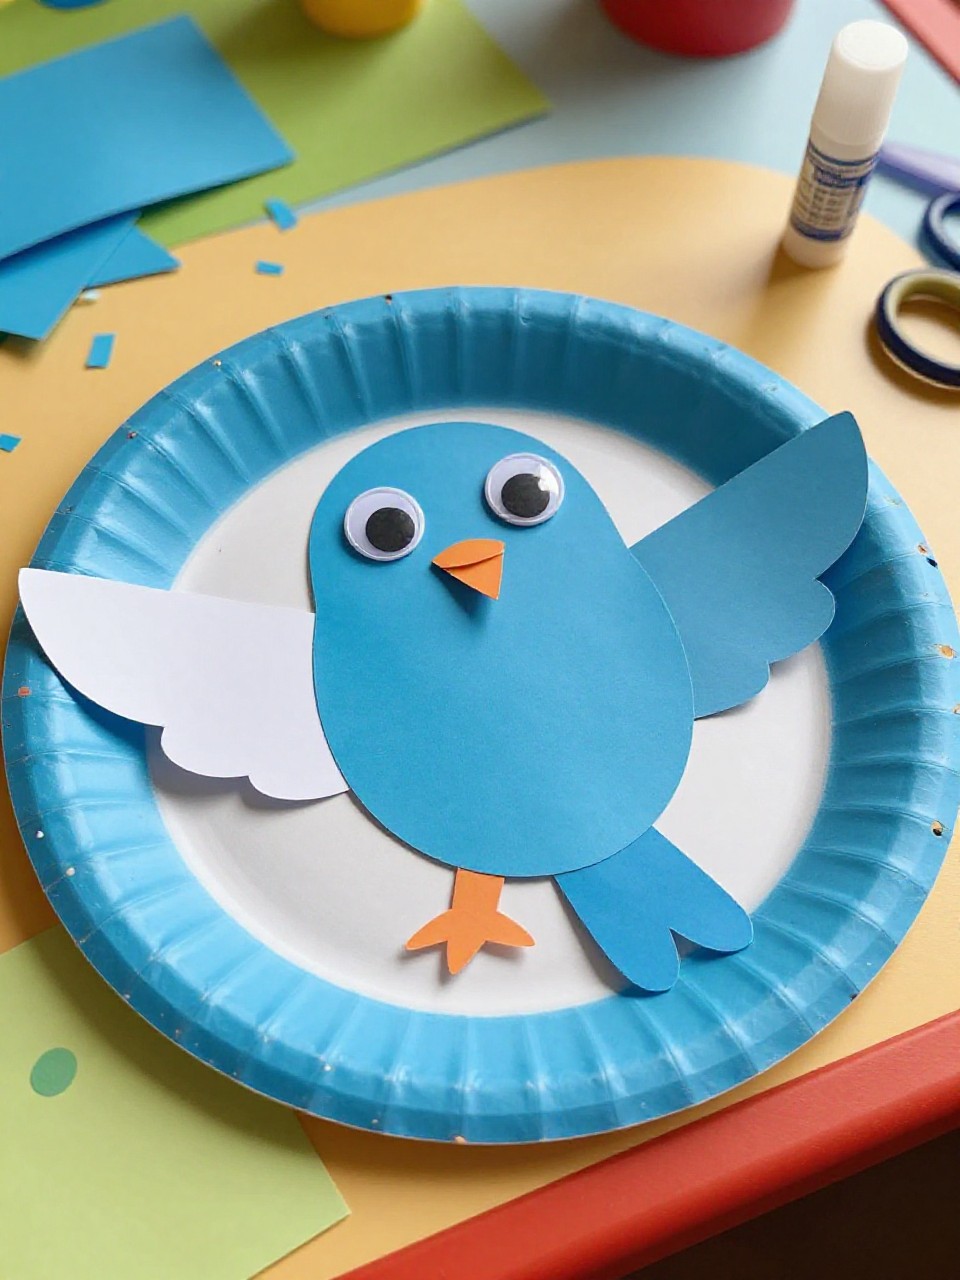
This craft makes a round, cheerful bluebird with a fluffy paper plate body, paper wings, and a tiny beak. Kids love how fast it comes together and how the bright blue pops; it’s beginner friendly and great for quick success.
Materials Needed:
- Paper plate (small or regular)
- Blue paint or blue construction paper
- Orange paper (for beak and feet)
- Googly eyes or drawn eyes
- Glue stick, scissors
How to make it:
- Paint the plate blue or cover it with blue paper; let dry if painted.
- Cut two wing shapes and a tail from blue paper; glue to the sides and back.
- Add an orange triangle beak and feet; stick on googly eyes.
- Let set, then hang on a wall or pin to a bulletin board.
2. Handprint Paper Peacock
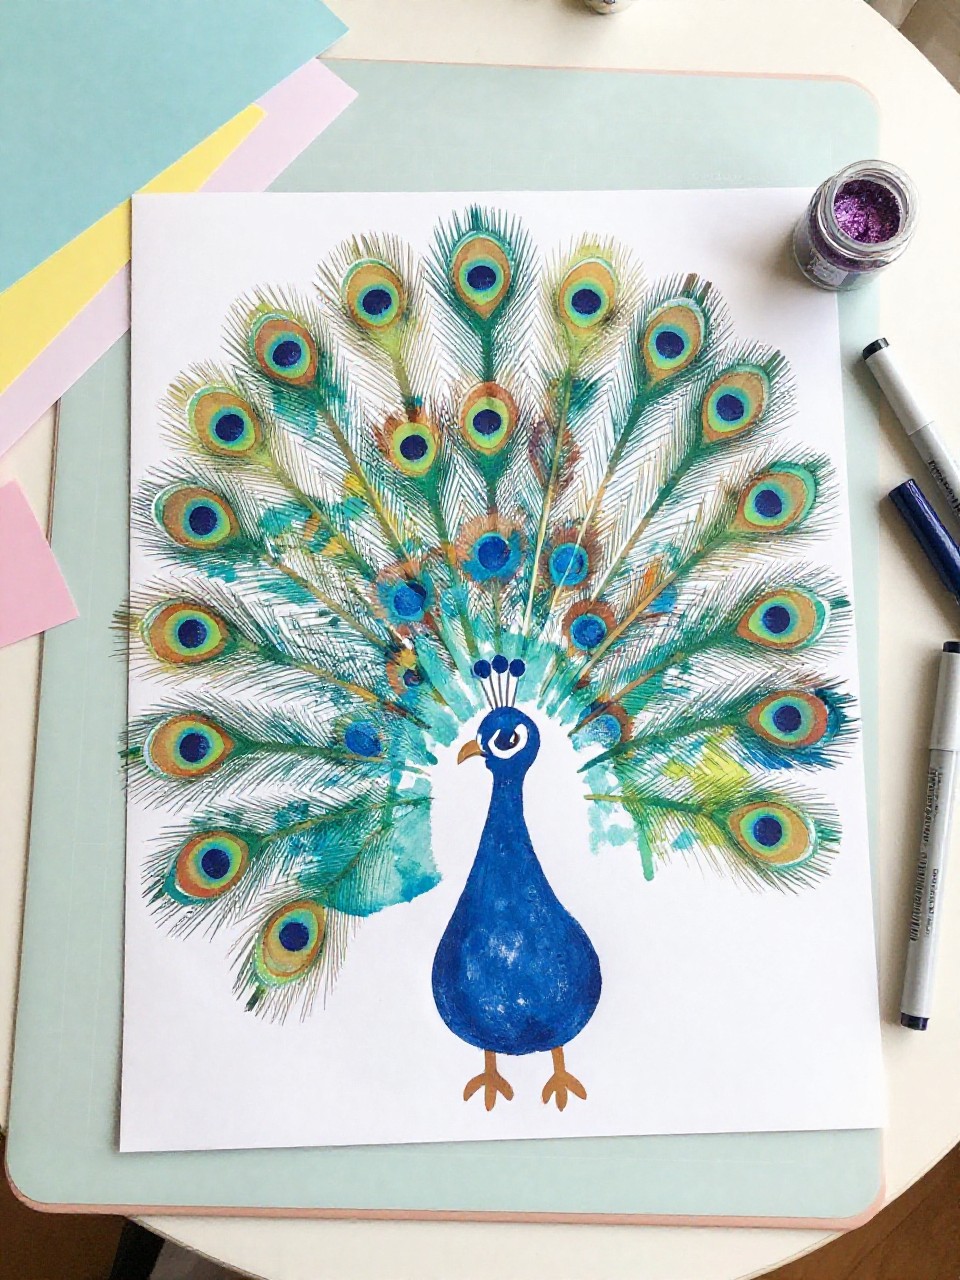
This project creates a proud peacock with a simple oval body and handprint “feather” fans. Kids enjoy tracing their hands and layering bright colors to make a showy tail that feels personal and fun.
Materials Needed:
- Colored paper (blues, greens, yellows)
- Pencil for tracing
- Googly eyes or marker
- Glue stick, scissors
- Optional: sequins or stickers
How to make it:
- Trace and cut out several handprints in different colors.
- Glue the handprints in a fan shape to form the peacock tail.
- Cut an oval body, head, beak, and crown; glue in front of the tail and add eyes.
- Decorate feathers with sequins or stickers and display upright.
3. Accordion-Fold Hummingbird
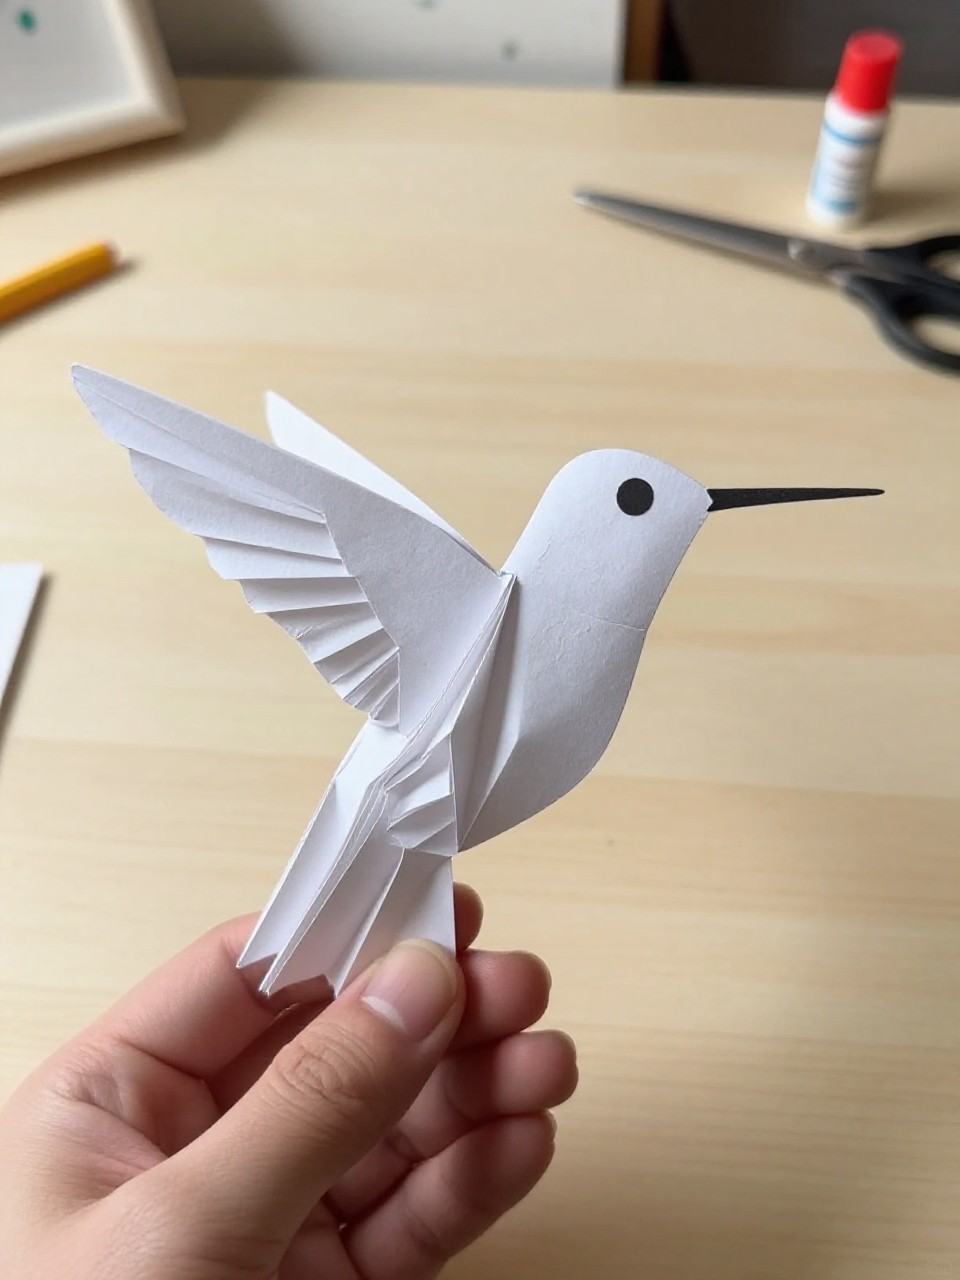
This hummingbird features an accordion-fold paper body and wings that look ready to flutter. Kids love the satisfying folding and the tiny beak, plus it’s quick and playful to make.
Materials Needed:
- Bright colored paper
- Black paper (for beak)
- Glue stick
- Marker for eye
- String (optional for hanging)
How to make it:
- Cut a rectangle for the body and fold it back and forth like a fan.
- Cut two wing shapes and glue to the sides of the folded body.
- Add a small cone or triangle beak and draw an eye.
- Glue on string to hang or stand it up to admire.
4. Rainbow Paper Parrot
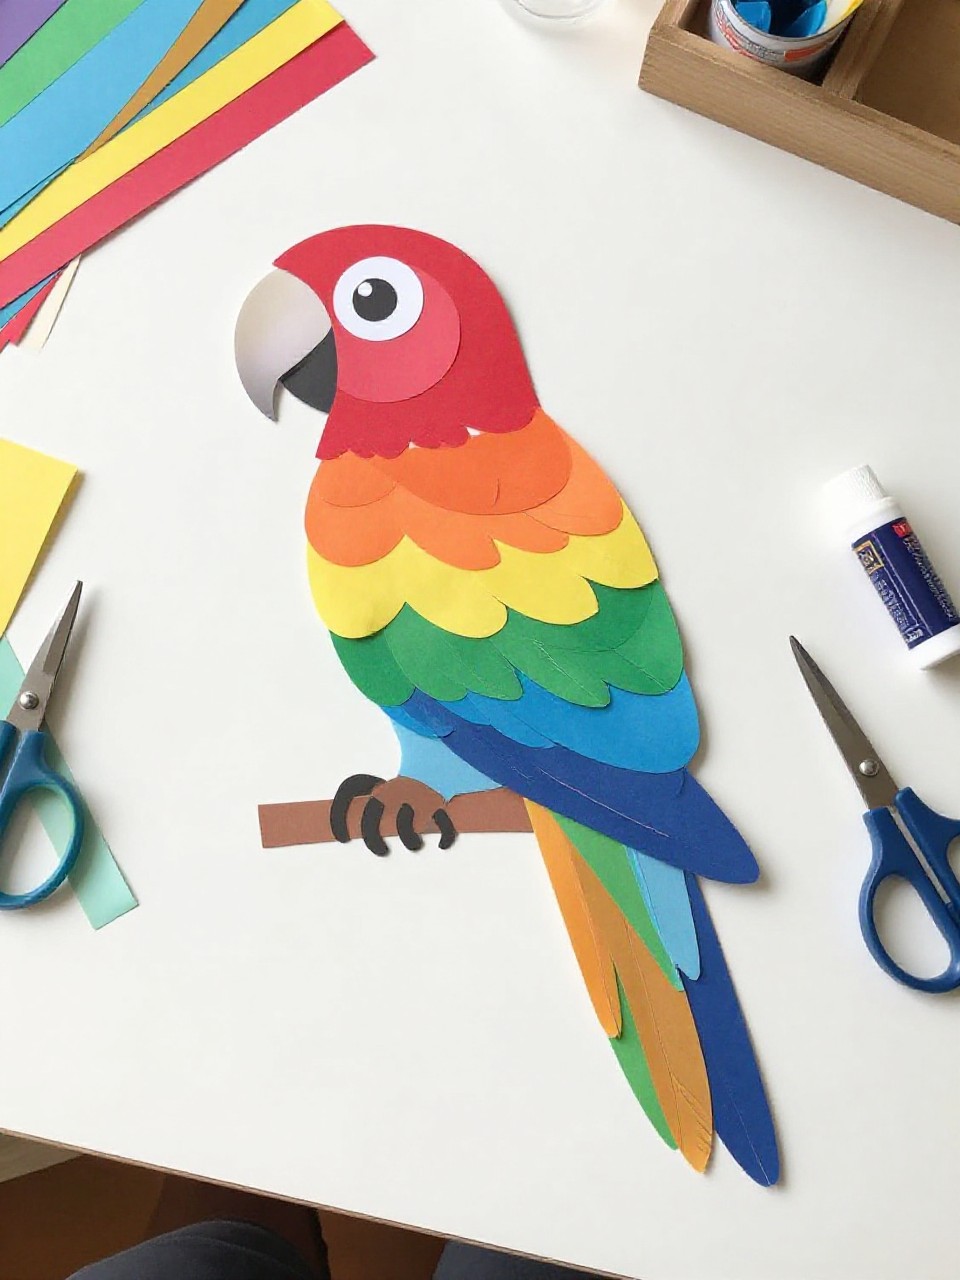
This craft makes a bright parrot with layered rainbow feathers and a curved beak. Kids enjoy arranging colors in order and seeing the bird come alive with bold stripes.
Materials Needed:
- Red, orange, yellow, green, blue, purple paper
- Black and white paper (for eyes and beak)
- Glue stick, scissors
- Pencil for tracing
- Optional: feather stickers
How to make it:
- Cut a parrot body shape from red paper.
- Layer long feather strips in rainbow order along the wing and tail; glue.
- Add a curved beak, eye, and a little cheek.
- Press flat, then stick on feather stickers if desired.
5. Cupcake Liner Owls
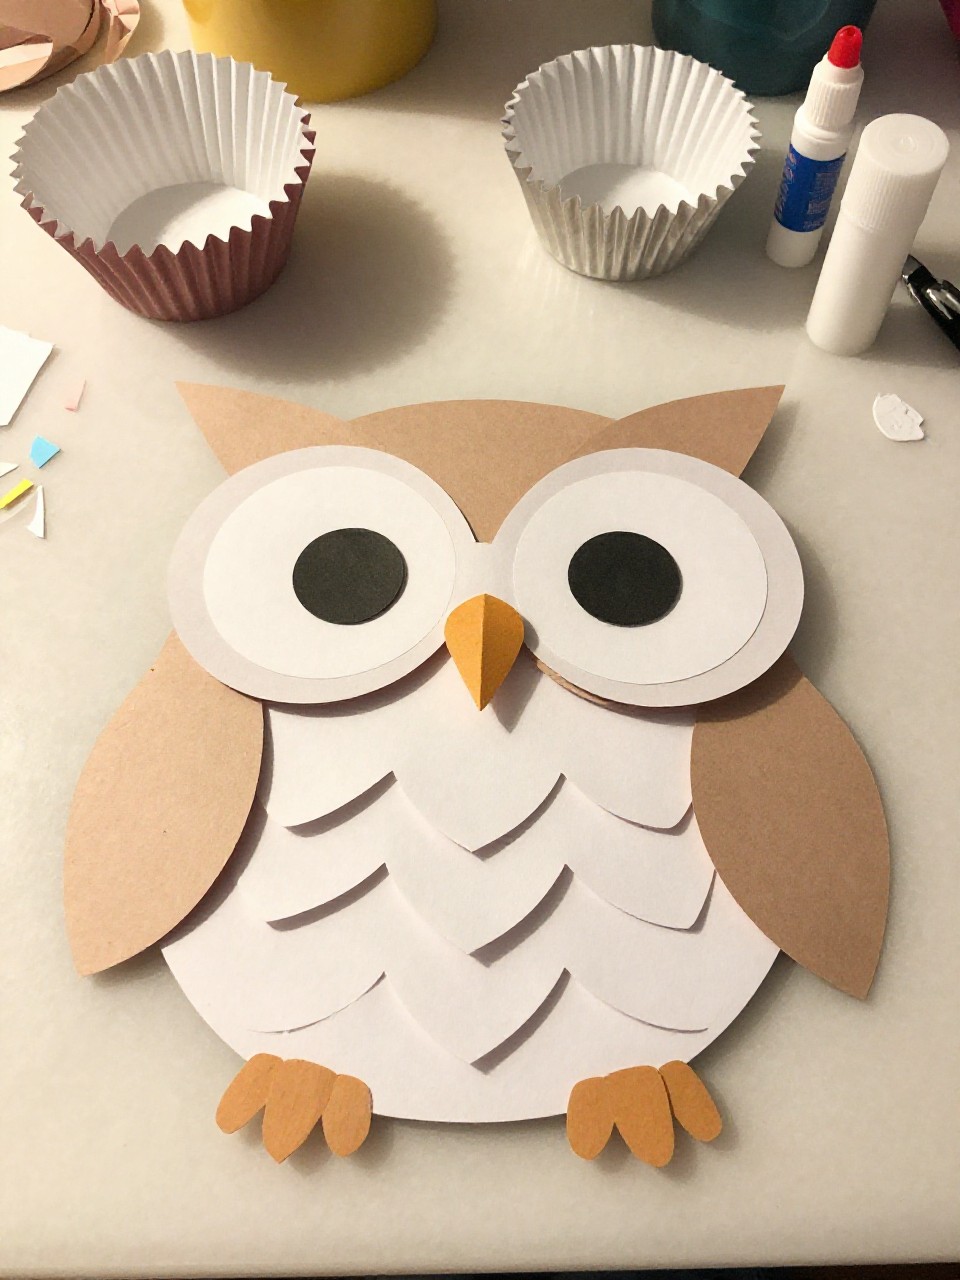
These owls use flattened cupcake liners as soft, scalloped feathers on a simple paper body. Kids like picking fun liner patterns and seeing the owl’s big eyes pop.
Materials Needed:
- Cupcake liners (patterned or solid)
- Brown or gray construction paper
- Googly eyes or paper eyes
- Orange paper (for beak and feet)
- Glue stick, scissors
How to make it:
- Cut an oval owl body from brown or gray paper.
- Flatten cupcake liners and layer them as the chest and wings; glue.
- Add big eyes and a small triangle beak and feet.
- Let dry, then tape to a window or fridge.
6. Paper Strip Bird Nest Collage

This scene shows two tiny paper birds sitting in a woven-look nest with a simple branch. Kids enjoy snipping strips and arranging a cozy nest, which feels creative but easy.
Materials Needed:
- Brown paper for nest strips
- Colored paper for small birds
- Background paper
- Glue stick, scissors
- Marker for branch details
How to make it:
- Cut the background and draw a simple branch.
- Snip brown strips and glue them crisscross to form a nest.
- Cut small oval birds with triangle beaks and dot eyes; tuck into the nest.
- Add leaves and let it dry flat before hanging.
7. Finger-Puppet Paper Chicks
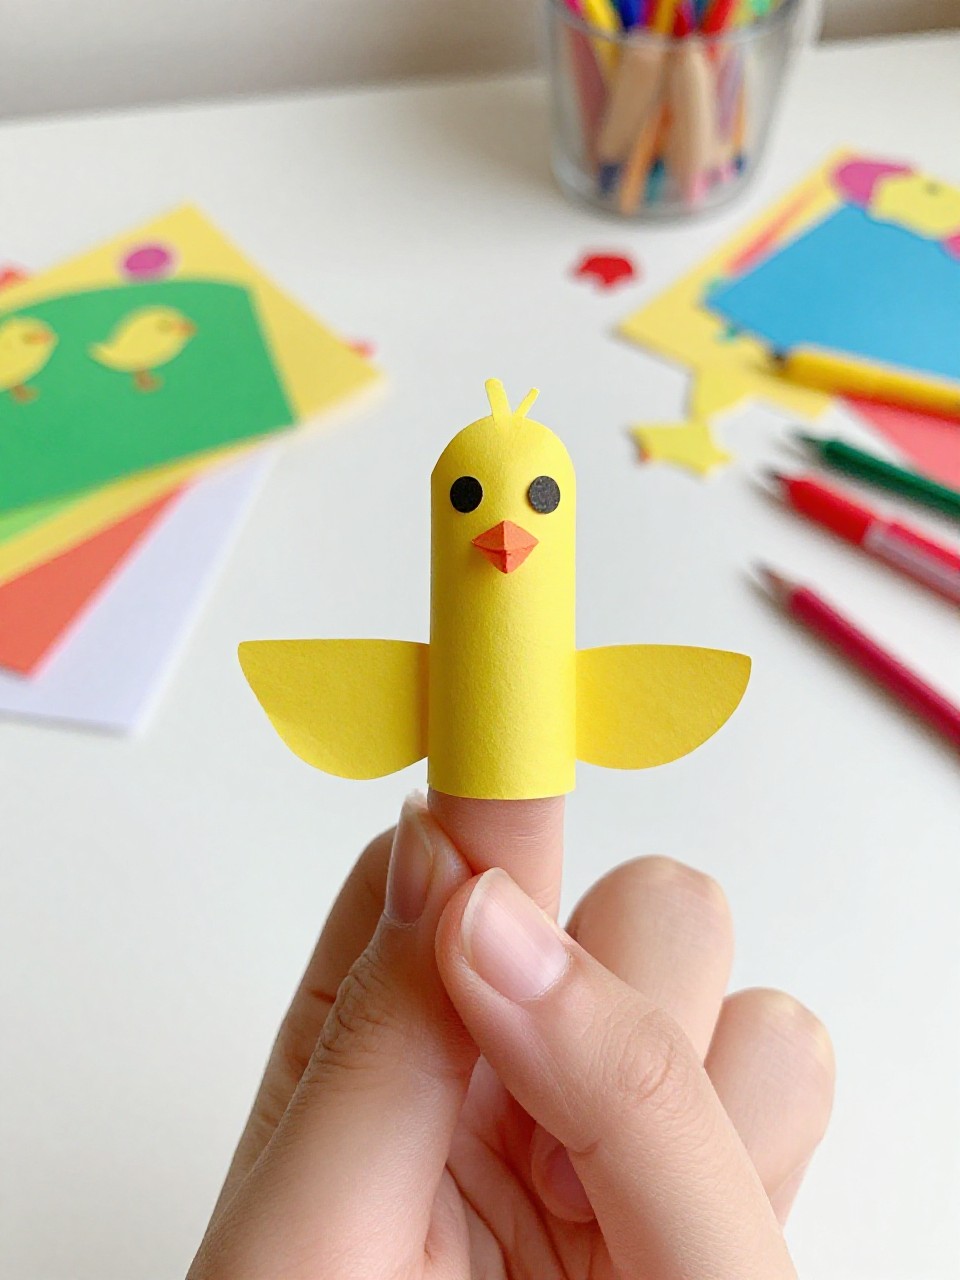
These are tiny chick finger puppets made from paper tubes with simple faces and wings. Kids love wearing them for pretend play and making the chicks peep.
Materials Needed:
- Yellow paper
- Orange paper (beaks and feet)
- Black marker or googly eyes
- Glue or tape
- Scissors
How to make it:
- Cut a strip of yellow paper and roll it into a small tube to fit a finger; tape.
- Add a paper circle head and small side wings.
- Glue on a triangle beak and draw or add eyes; attach tiny feet if you want.
- Let set and then wiggle on fingers for a chick parade.
8. Swinging Paper Robin on a Ring
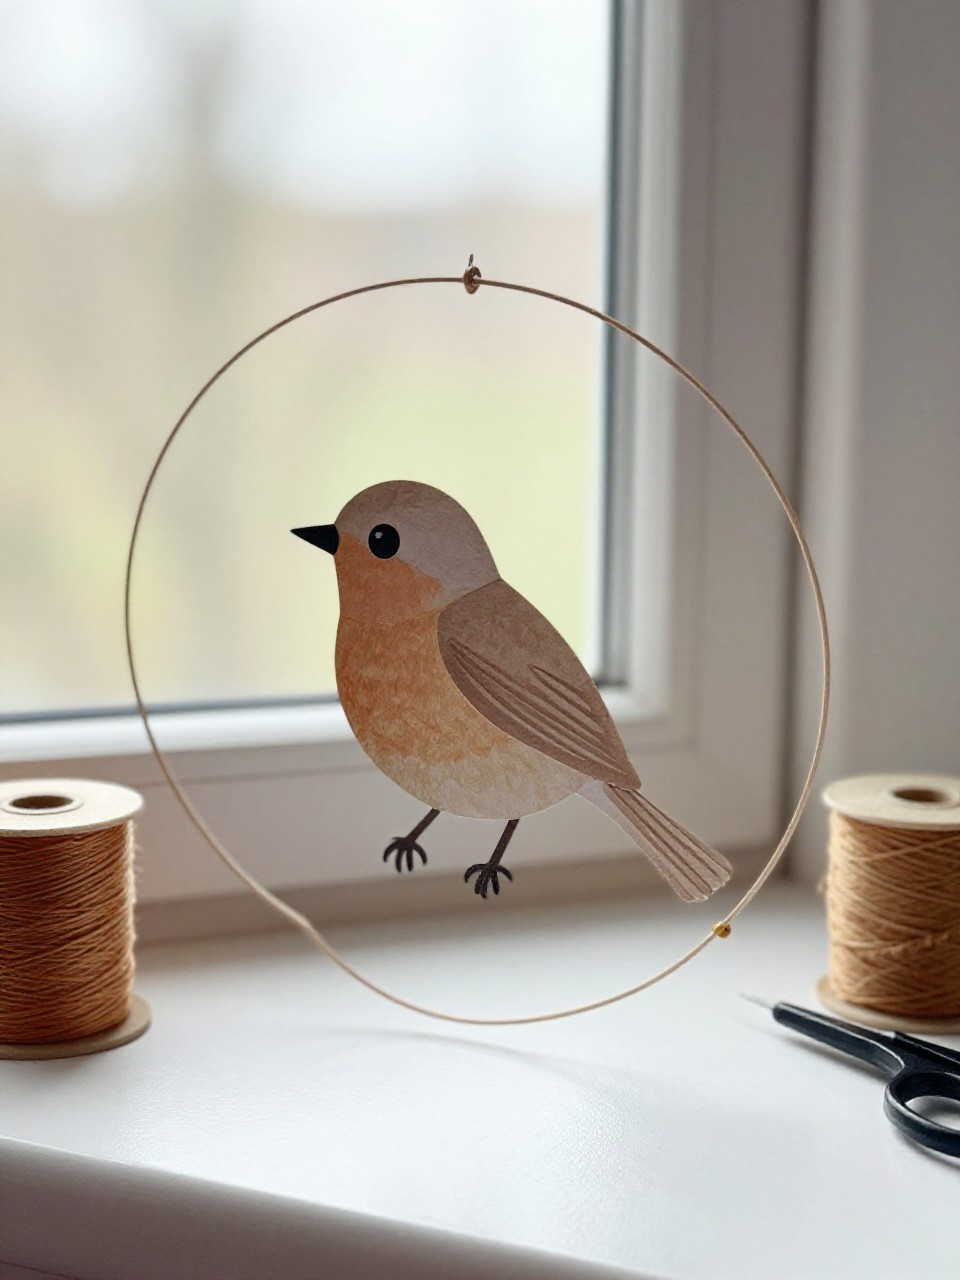
This craft makes a round robin perched inside a paper ring “swing.” Kids enjoy seeing the bird hang and gently move, making it fun to display near a window.
Materials Needed:
- Brown and red paper
- Cardstock strip for ring
- String or yarn
- Glue stick, scissors
- Hole punch (optional)
How to make it:
- Form a cardstock ring and secure with glue or tape.
- Cut a round brown body with a red belly; add wings, beak, and eye.
- Glue the robin to the bottom of the ring; punch a hole at the top and tie string.
- Hang and watch it sway slightly.
9. Simple Origami Dove
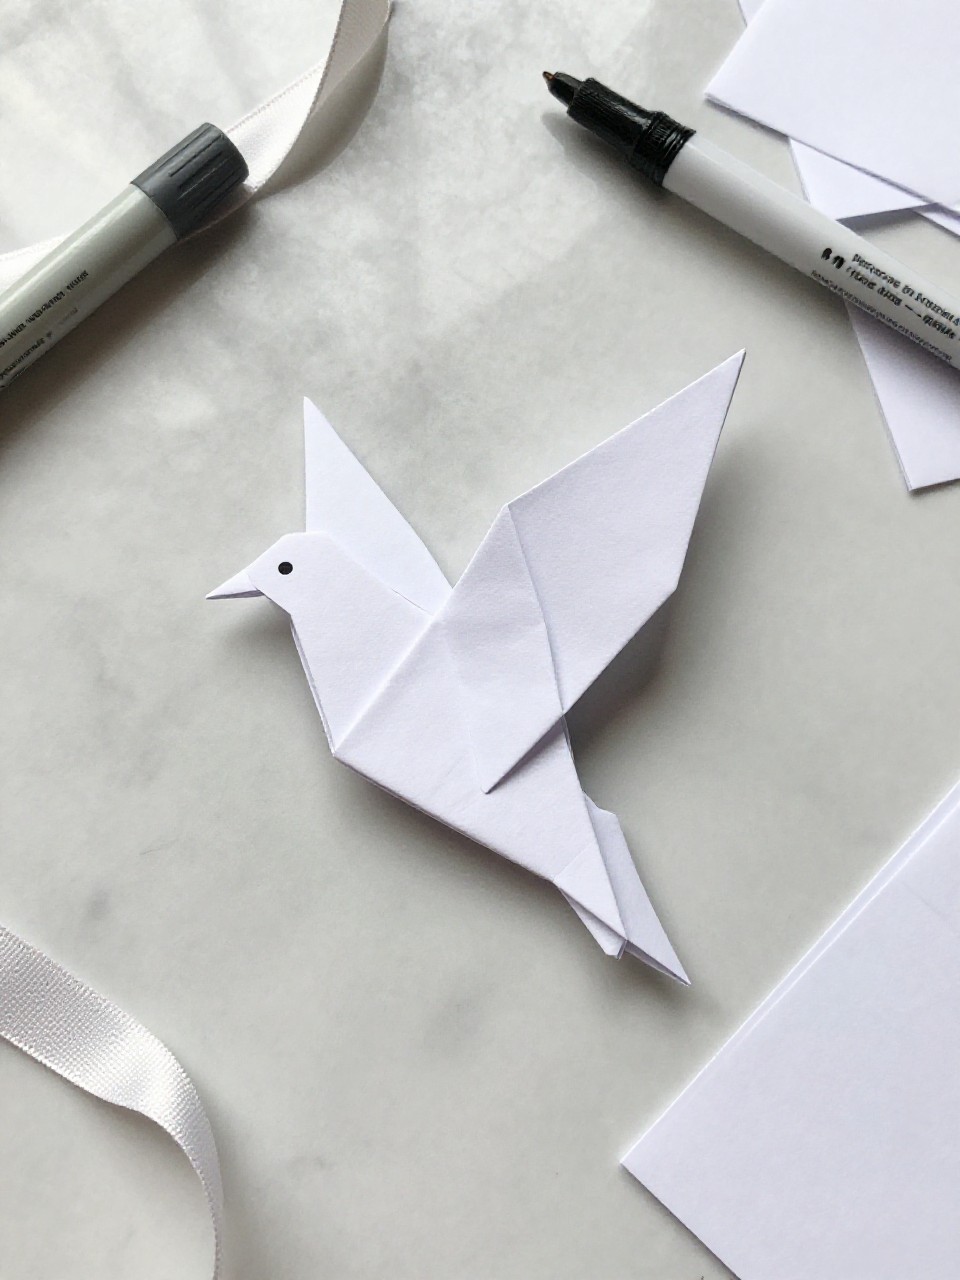
A clean, folded paper dove with a peaceful shape and pointed tail. Kids enjoy the magic of turning a flat square into a bird with just a few folds.
Materials Needed:
- Square paper (white or pastel)
- Black marker for eye
- Optional: ribbon for hanging
- Optional: glitter glue for trim
How to make it:
- Fold the square diagonally to make a triangle, then follow 3–4 easy folds to form head and wings.
- Crease well so the wings hold shape.
- Draw a small eye and add gentle glitter trim if desired.
- Tape on ribbon to hang from a branch or doorway.
10. Paper Bag Puffin Puppet
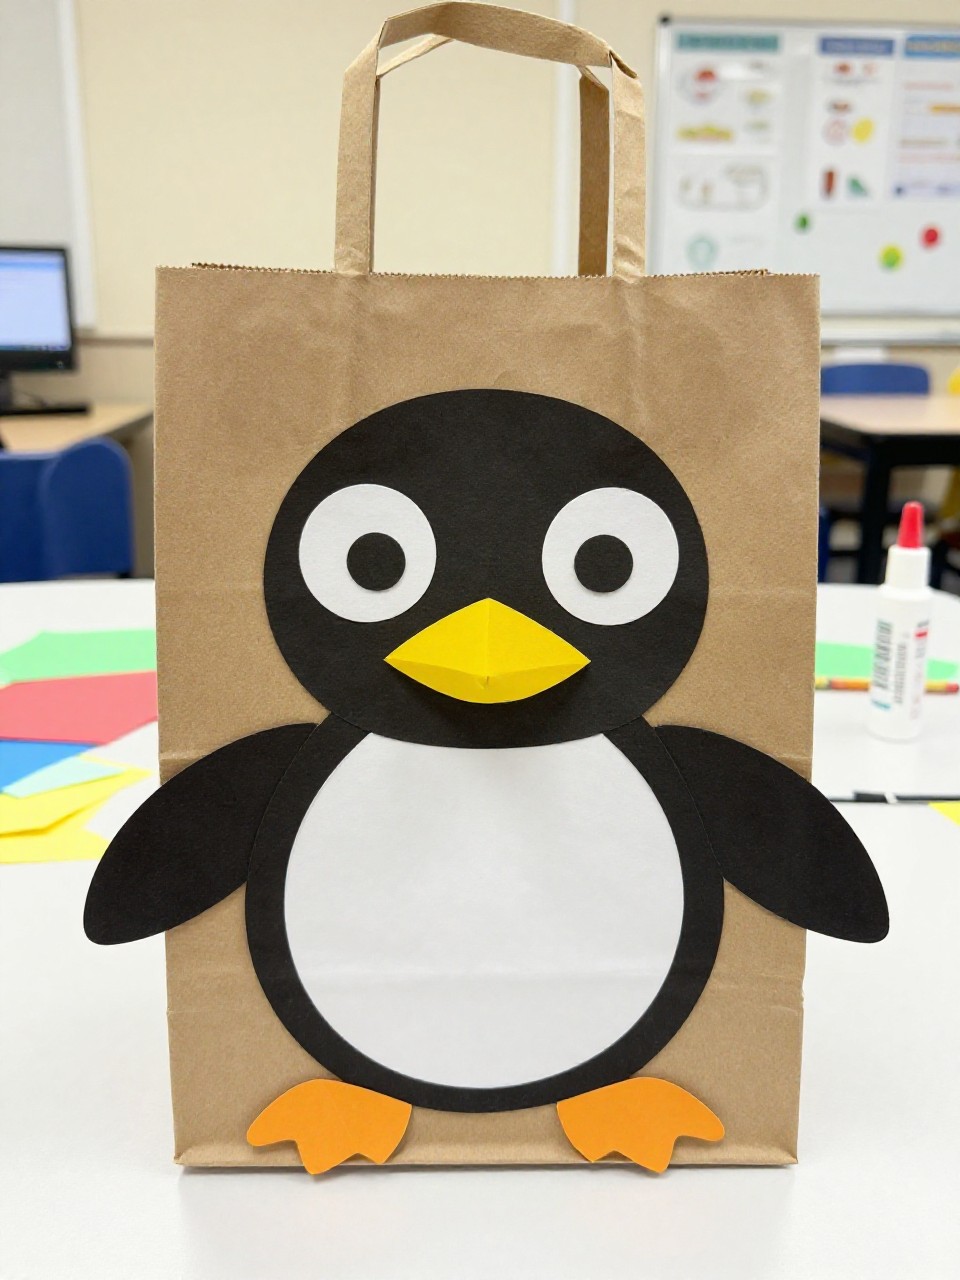
This is a friendly puffin puppet made from a small paper lunch bag with bold black, white, and orange shapes. Kids love using it for storytelling and the beak’s bright color is very satisfying.
Materials Needed:
- Small paper lunch bag
- Black, white, and orange paper
- Glue stick, scissors
- Markers for details
How to make it:
- Place the bag flap-side down for the puppet mouth.
- Cut and glue black “back,” white “belly,” and orange beak and feet.
- Add an eye circle and outline details with marker.
- Let dry and put on a puppet show.
11. Paper Cone Flamingo

A tall flamingo made from a pink paper cone with a long neck and simple legs. Kids enjoy the 3D shape and the silly bent knee look.
Materials Needed:
- Pink paper
- Black and white paper (for beak and eyes)
- Glue or tape
- Scissors
- Optional: pink feather
How to make it:
- Roll pink paper into a cone and secure.
- Cut a long neck and head, then glue to the top of the cone.
- Add a black-tipped beak, eyes, and thin paper legs.
- Glue on a feather and stand it up to display.
12. Twirling Paper Swallow Mobile

This craft creates a spiral mobile with a dark blue swallow that twirls in the air. Kids like watching it spin and seeing the forked tail cutout.
Materials Needed:
- Dark blue cardstock
- Pencil and scissors
- White marker or gel pen
- Thread or fishing line
- Hole punch
How to make it:
- Draw and cut a swallow with a forked tail from cardstock.
- Add simple feather lines with a white pen.
- Punch a hole and tie thread to hang.
- Hang near a vent or window so it gently twirls.
13. Layered Feather Paper Turkey

A friendly paper turkey with a fan of layered, colorful feather shapes behind a round body. Kids enjoy choosing color patterns and seeing the tail grow fuller with each layer.
Materials Needed:
- Brown paper for body
- Red, orange, yellow, and other colors for feathers
- Googly eyes or marker
- Glue stick, scissors
- Optional: craft gems
How to make it:
- Cut a round body and small head from brown paper.
- Cut feather ovals in many colors; glue in a fan.
- Attach body in front, then add eyes, beak, and wattle.
- Press flat under a book, then display on a mantle.
14. Paper Roll Owl with Big Eyes

This owl uses a recycled toilet paper roll wrapped in patterned paper with folded “ear” points. Kids love the giant eyes and the cozy look.
Materials Needed:
- Empty toilet paper roll
- Patterned or brown paper
- White and black paper for eyes
- Orange paper for beak
- Glue stick, scissors
How to make it:
- Wrap the roll with paper and glue in place.
- Press the top edges inward to make two ear points.
- Add large layered eyes and a small beak.
- Draw feather lines and set it on a shelf.
15. Heart-Shape Lovebirds Card
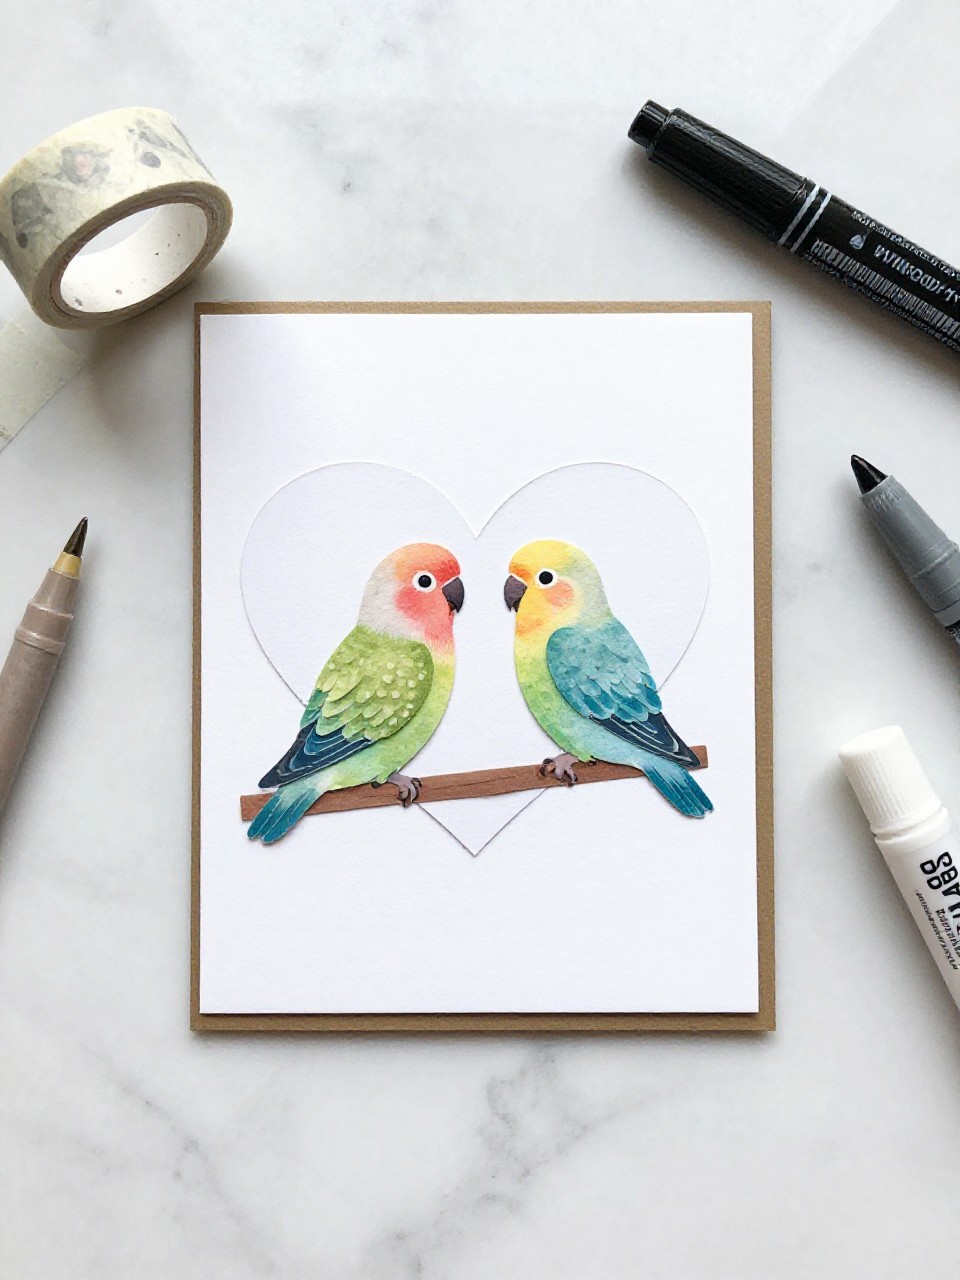
A sweet pair of lovebirds made from overlapping paper hearts on a folded card. Kids enjoy turning simple hearts into birds and gifting the card.
Materials Needed:
- Cardstock card base
- Colored paper hearts (various sizes)
- Marker for details
- Glue stick, scissors
- Optional: stickers or washi tape
How to make it:
- Fold cardstock to make a card.
- Glue two large hearts sideways for bodies; add small hearts for wings.
- Draw beaks, eyes, and tiny feet; add a branch line if desired.
- Decorate with stickers and write a message inside.
16. Paper Cup Hanging Chick

This chick hangs upside down from a string, made from a paper cup wrapped in yellow paper with dangling feet. Kids enjoy the silly pose and bright color.
Materials Needed:
- Small paper cup
- Yellow paper
- Orange paper for beak and feet
- String
- Glue, scissors, hole punch
How to make it:
- Wrap the cup with yellow paper and glue.
- Punch a hole in the base and tie a hanging string.
- Add a paper face, wings, and dangling feet inside the rim.
- Hang from a doorway or shelf.
17. Paper Fan-Tail Peacock Mask
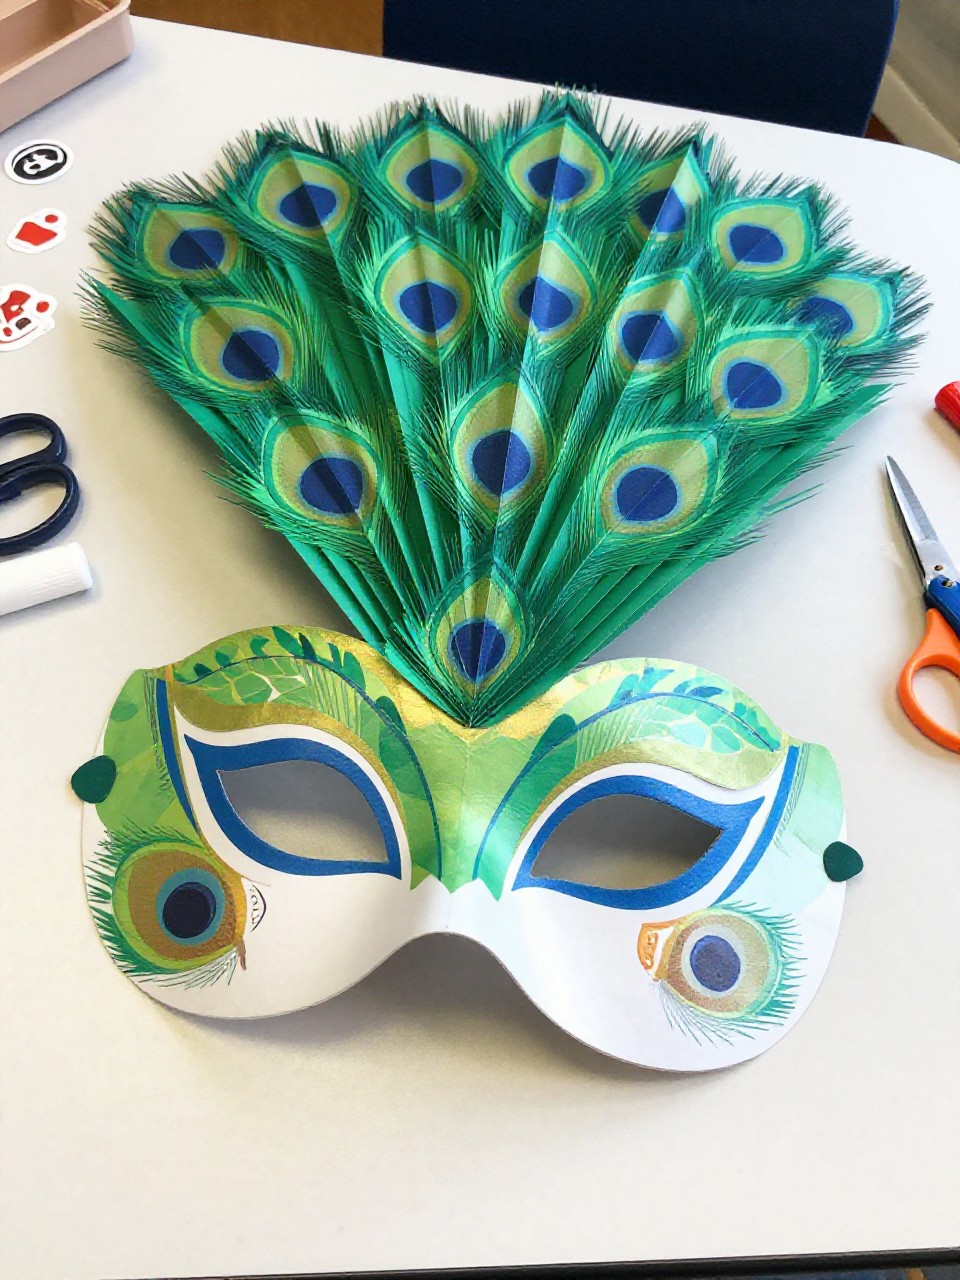
A wearable peacock mask with a paper plate face and a wide fan-tail of folded paper behind it. Kids love pretending to strut and the dramatic fan makes great photos.
Materials Needed:
- Paper plate
- Blue and green paper
- Elastic string or craft stick
- Glue stick, scissors
- Markers and stickers
How to make it:
- Cut eye holes in the paper plate and color it peacock blue.
- Fold several rectangles into fans and glue them as a tail behind the plate.
- Add beak, eyebrows, and eye details; decorate with dots and stickers.
- Attach elastic to wear or a craft stick to hold.