


In This Article Show
Keeping kids busy can be tough, especially on rainy days or when screens have taken over. If you’re looking for simple, magical projects, these fairy garden crafts are fun, low-mess, and easy to set up with common supplies.
Each idea helps you build tiny scenes where fairies might “live,” perfect for home or classroom.
Let’s jump into cute, beginner-friendly projects that bring a little wonder to your day.
1. Mason Jar Fairy Garden

A tiny enchanted garden lives inside a clear mason jar, with a bit of moss, pebbles, and a small door or mushroom. Kids love shaking the jar gently to “wake the fairies” and carrying their garden from room to room. It’s easy, contained, and great for display.
Materials Needed:
- Clean mason jar with lid
- Sheet moss or faux moss
- Small pebbles or aquarium gravel
- Mini bottle-cap mushrooms (caps + painted dowels)
- Tiny paper door sticker or painted cardboard door
How to make it:
- Add a layer of pebbles to the bottom of the jar for “drainage.”
- Press moss on top, then tuck in the tiny door and a mushroom.
- Add a sprinkle of glitter “fairy dust” if you like.
- Close the lid and place the jar near a window to admire your mini world.
2. Pebble Path Fairy Walkway
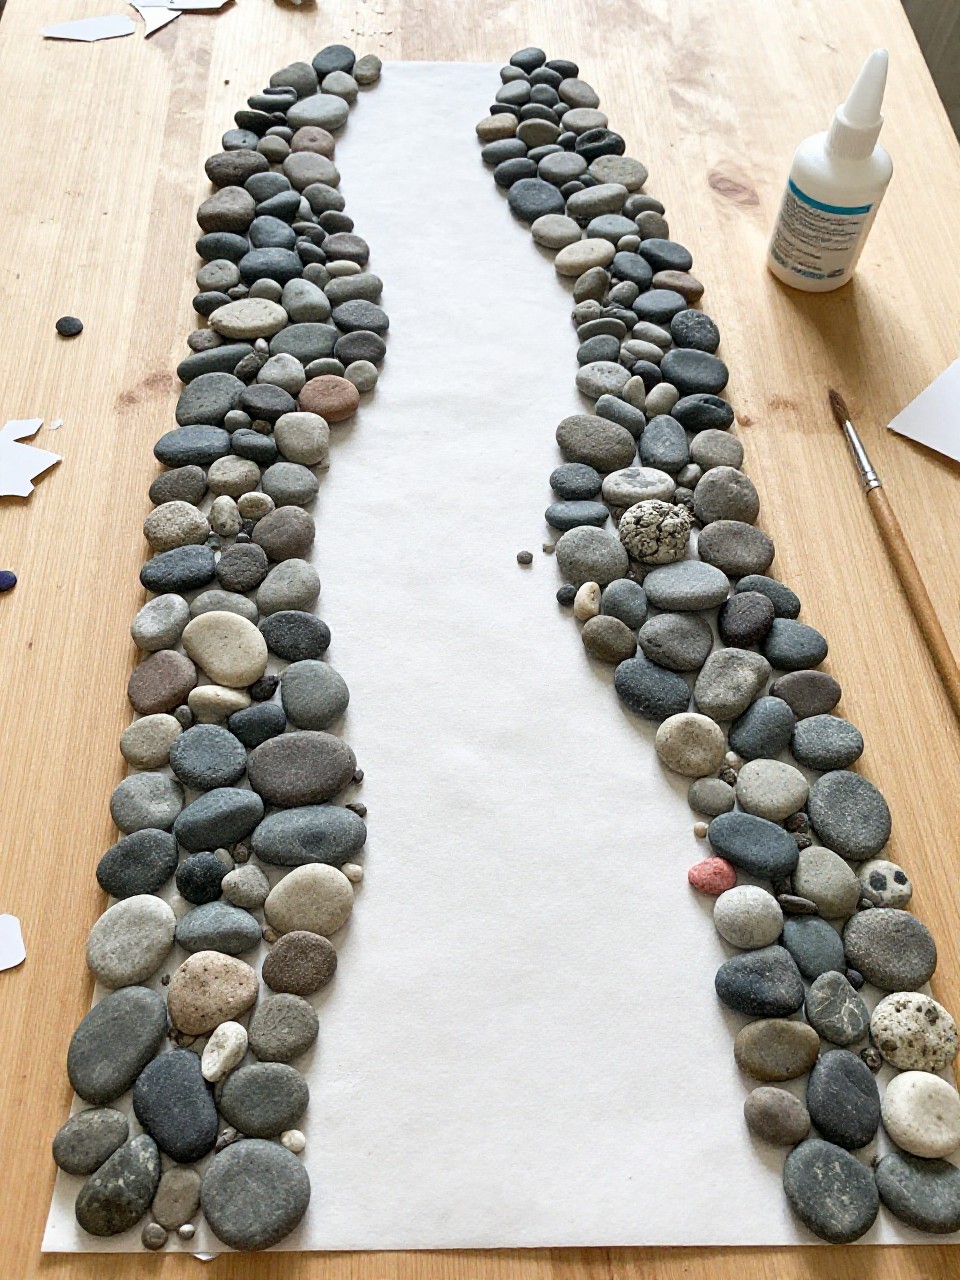
This craft makes a curved mini pathway for any fairy garden tray. Kids love arranging smooth pebbles like a puzzle and seeing a real “walkway” appear. It’s relaxing and perfect for little hands.
Materials Needed:
- Cardboard strip or craft sticks for base
- Smooth pebbles (mix of sizes)
- Strong craft glue
- Green felt or moss sheet
- Optional tiny sign made from paper
How to make it:
- Cut a curved base from cardboard or line up craft sticks side by side.
- Glue pebbles closely together to form a path.
- Tuck moss or felt around the edges to blend it into a garden.
- Let dry fully and place it in your fairy scene with a tiny paper sign.
3. Bottle Cap Mushroom Forest
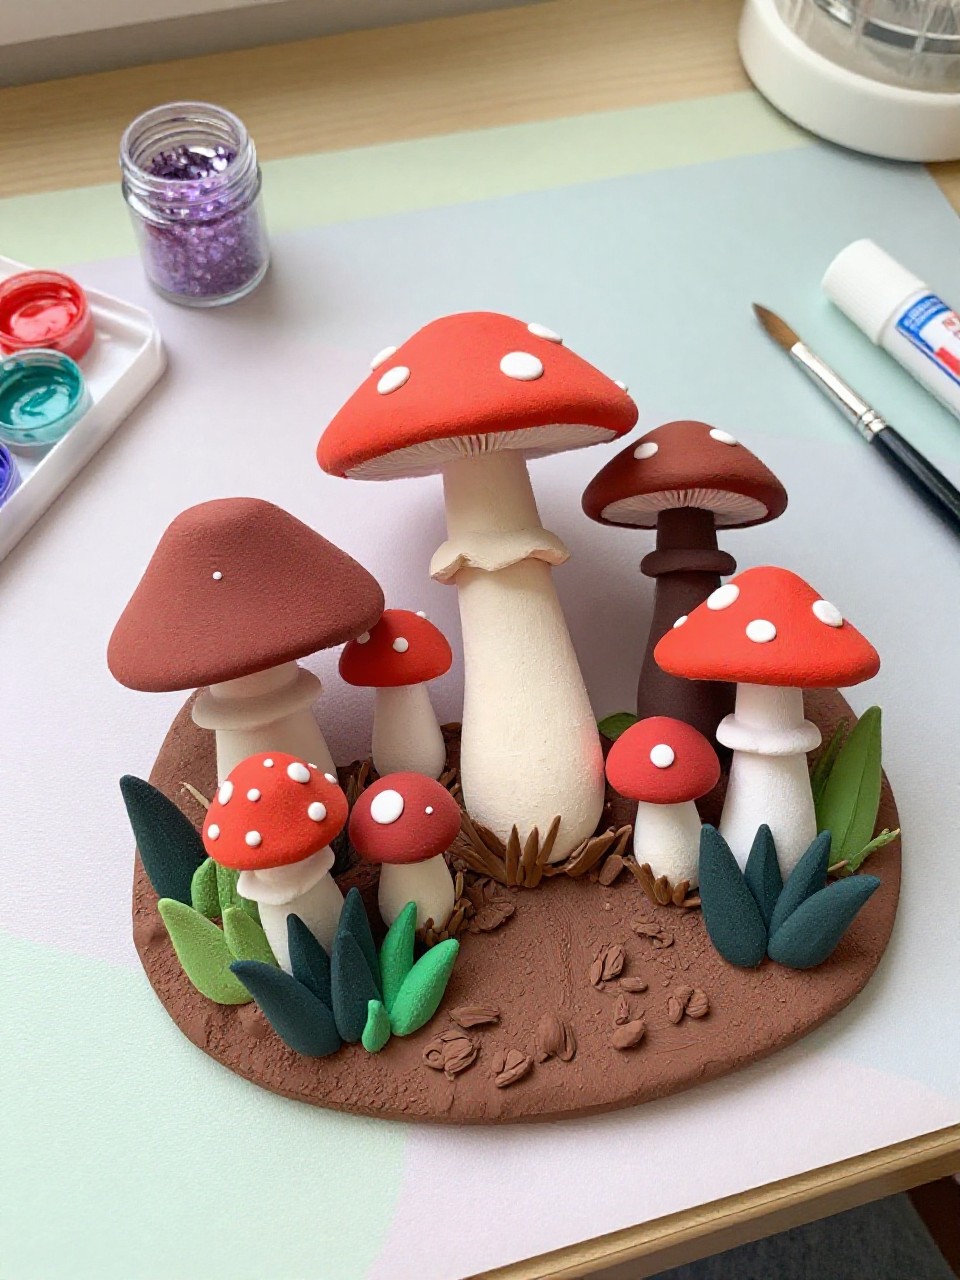
Painted bottle caps and short twigs become cute spotted mushrooms for a fairy meadow. Kids enjoy choosing colors and dotting on white spots to make each mushroom unique. This quick craft adds instant charm.
Materials Needed:
- Clean metal or plastic bottle caps
- Acrylic paint (red, pink, yellow) + white for dots
- Short twig pieces or wooden dowels
- Hot glue (adult help) or strong craft glue
- Moss or green felt base
How to make it:
- Paint bottle caps in bright colors and let dry.
- Add white dots with the tip of a brush or cotton swab.
- Glue each cap onto a twig or dowel “stem.”
- Press stems into moss or glue onto felt to form a small mushroom patch.
4. Popsicle Stick Fairy Door
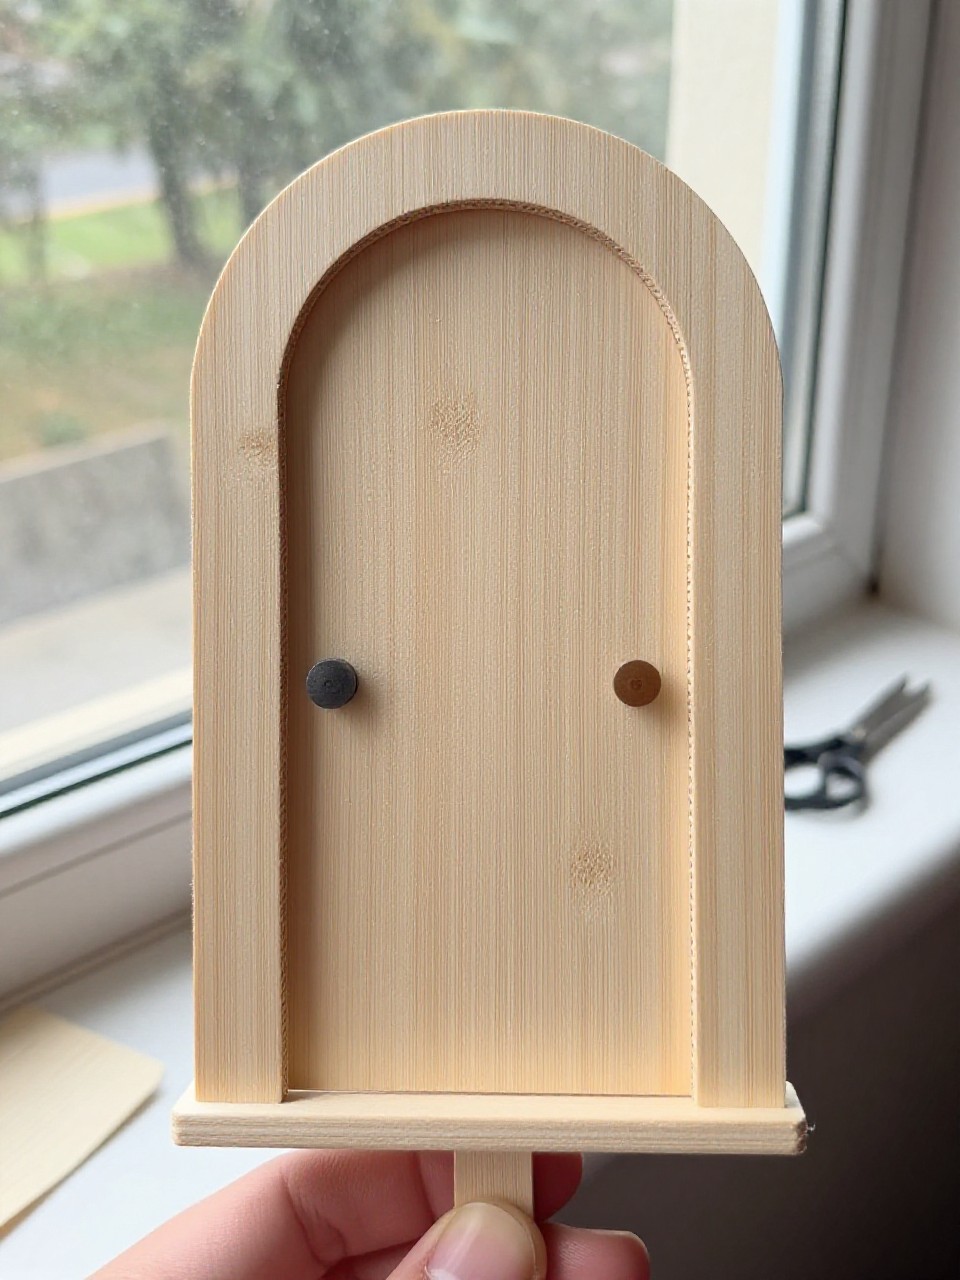
A tiny wooden door with a curved top leans against a plant pot or sits at a tree base. Kids love painting the door bright colors and adding a bead doorknob. It’s simple and looks magical in any corner.
Materials Needed:
- Popsicle sticks
- Craft glue
- Acrylic paint or markers
- Small bead or brad for knob
- Optional mini hinges drawn with marker
How to make it:
- Trim and glue sticks side by side; add a stick across the back for support.
- Cut a gentle arch at the top if desired.
- Paint the door, draw wood lines, and glue on a bead knob.
- Let dry and place by a plant, bookshelf, or garden pot.
5. Acorn Cap Fairy Teacups
Tiny acorn caps become little teacups on a leaf “tray” for pretend fairy tea parties. Kids enjoy finding acorns outside and turning nature finds into tiny tableware. It’s a sweet add-on to any fairy setting.
Materials Needed:
- Clean acorn caps
- Toothpick pieces for handles
- Craft glue
- Leaf (real or paper) for serving tray
- Optional metallic paint
How to make it:
- Wash and dry acorn caps; trim tiny toothpick handles.
- Glue a small handle onto each cap’s edge.
- Paint caps or leave natural; add a touch of shimmer if desired.
- Arrange cups on a leaf tray and set them in your fairy garden.
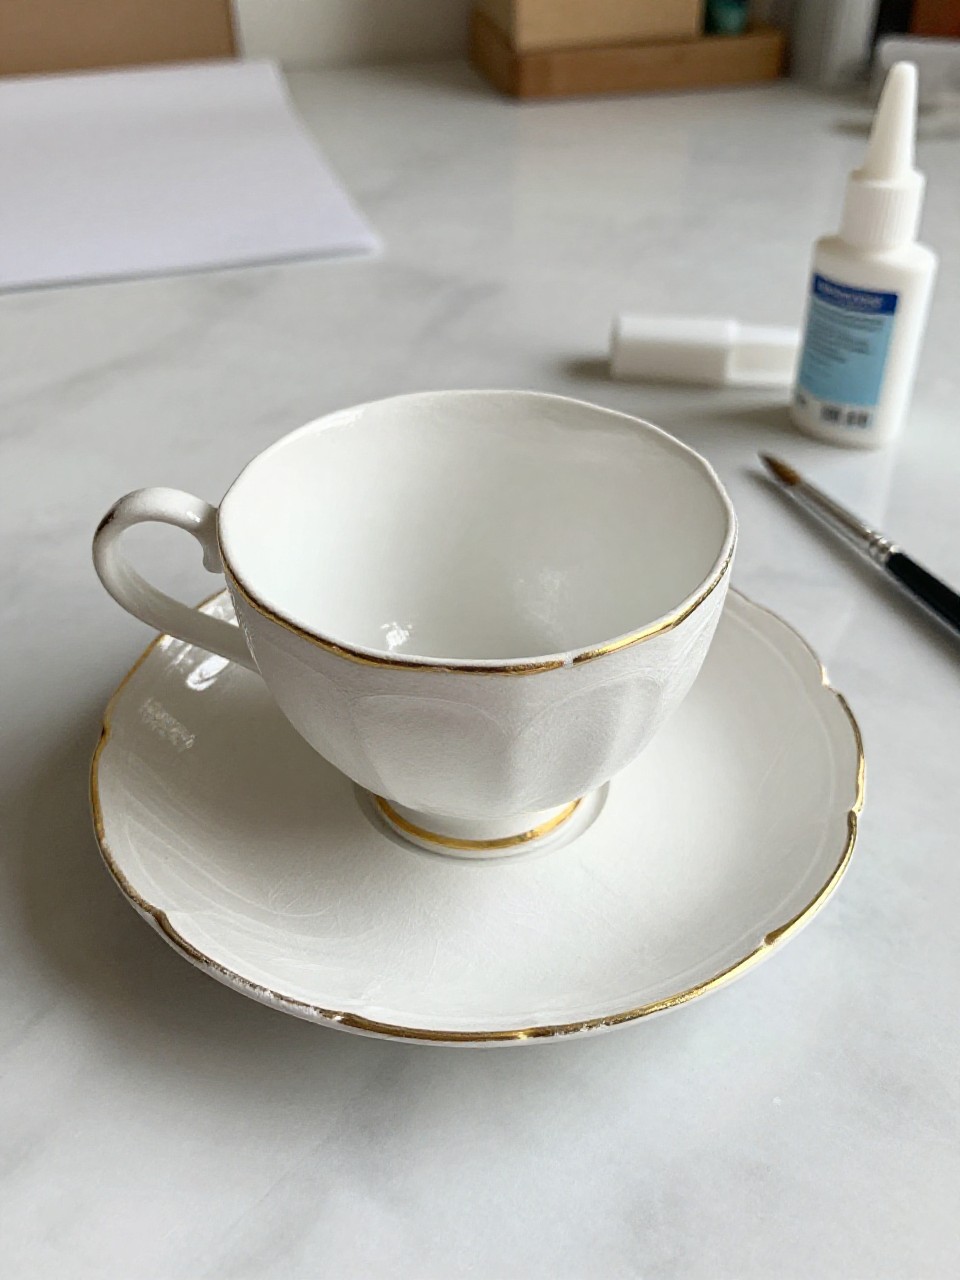
6. Teacup Fairy Planter
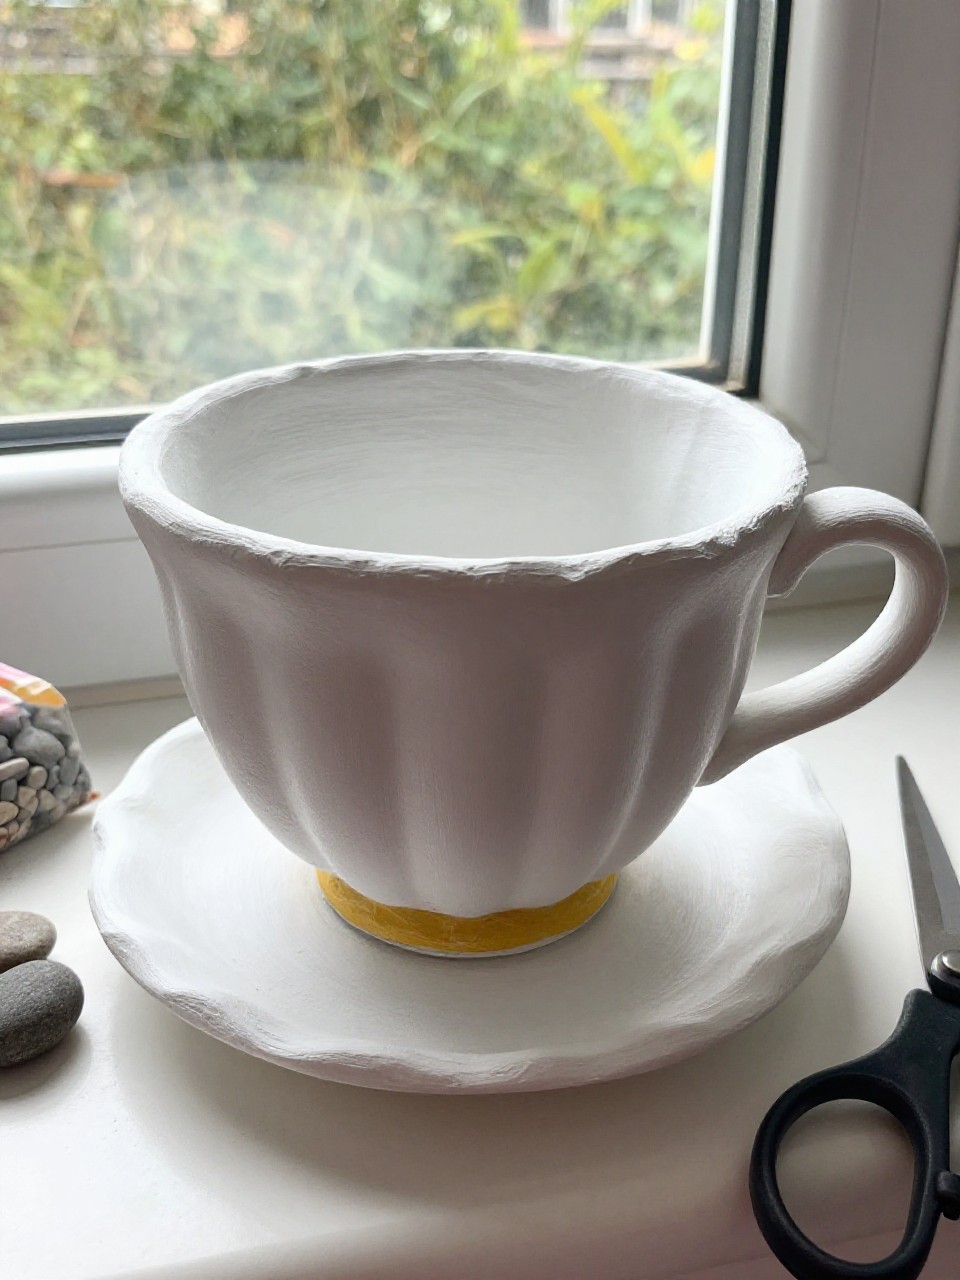
A thrifted teacup holds soil, a tiny plant, and small fairy accents like stones and a door. Kids like watching the plant grow while the fairy scene stays cozy and cute. It’s a great gift idea too.
Materials Needed:
- Old teacup and saucer
- Potting soil and small succulent or fake plant
- Pebbles
- Mini fairy door or button accent
- Optional moss
How to make it:
- Add a pebble layer to the cup for drainage, then scoop in soil.
- Plant the succulent and top with pebbles.
- Tuck in a mini door or button “stepping stones.”
- Set on the saucer and add moss around the base.
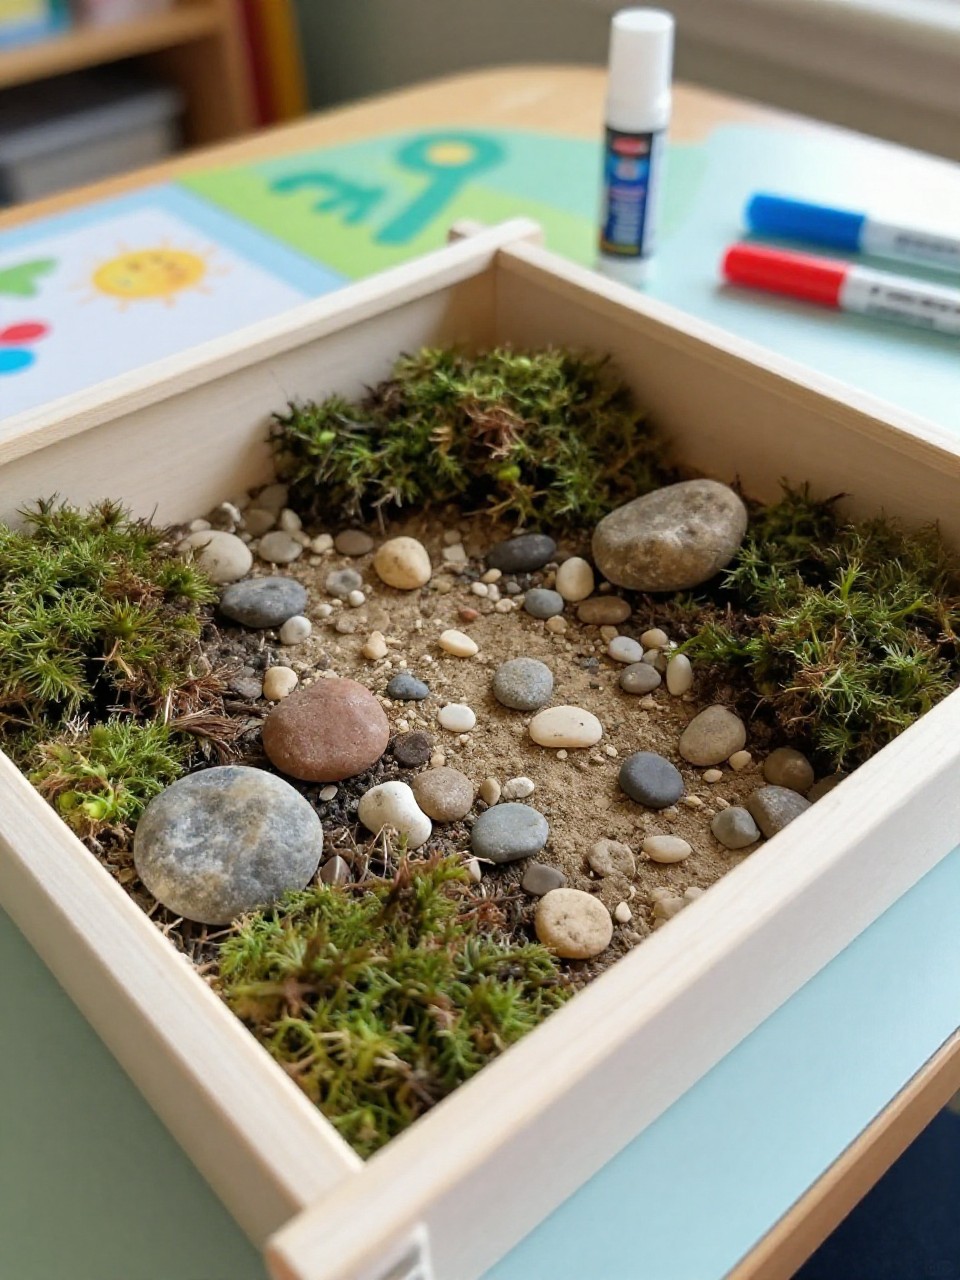
7. Clay Pebble Fairy Pond
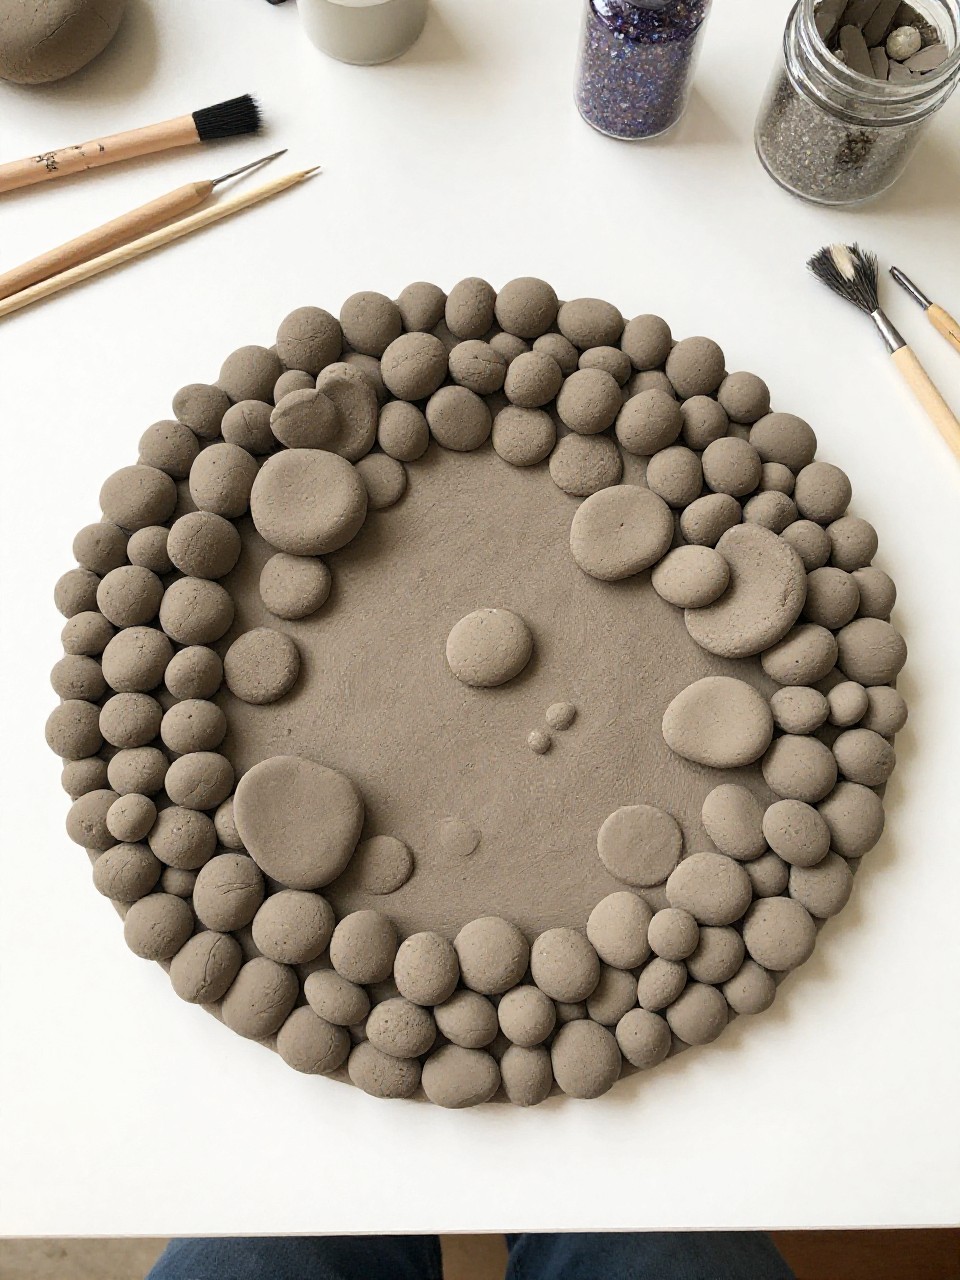
A small blue “water” pond sits in a ring of clay rocks with a leaf dock. Kids enjoy shaping rocks, pressing textures, and choosing glitter or beads to sparkle like water. It’s beginner-friendly and tactile.
Materials Needed:
- Air-dry clay (gray or brown)
- Blue glass beads or blue paint with gloss sealer
- Small leaf or felt for dock
- Craft stick for texture
- Optional glitter
How to make it:
- Roll clay into pebble shapes and form a circle “pond wall.”
- Fill the center with blue beads or paint the base blue and seal.
- Add texture lines to rocks and press in a leaf dock.
- Let everything dry, then place in your fairy garden.
8. Pinecone Fairy House
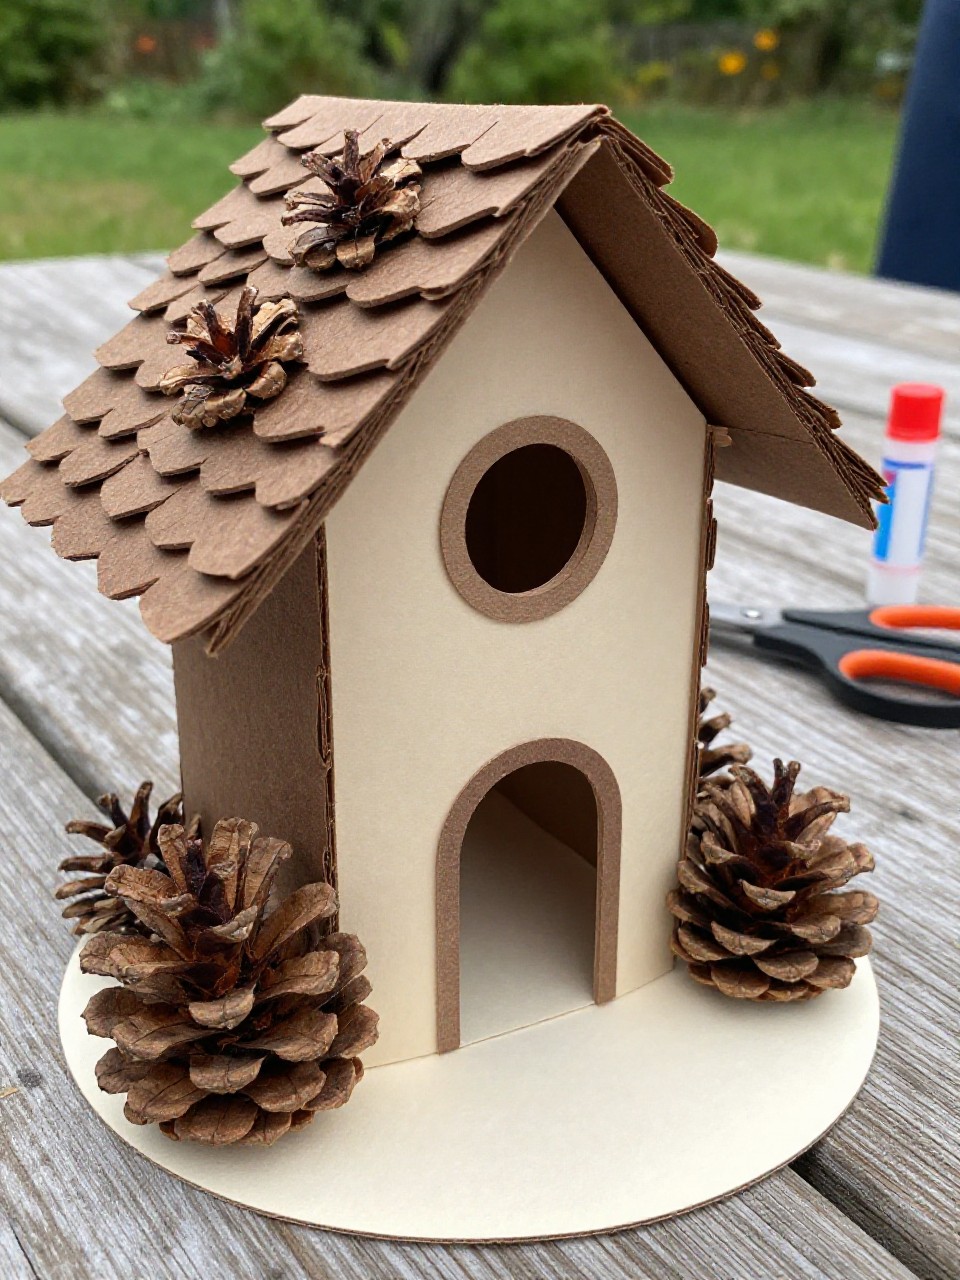
A pinecone becomes a rustic fairy cottage with a tiny door, window, and moss roof. Kids love transforming a simple pinecone into a home with personality. This craft fits indoor planters or outdoor nooks.
Materials Needed:
- Large pinecone
- Cardboard or foam sheet for door and window
- Moss
- Acrylic paint and small brush
- Craft glue
How to make it:
- Paint or cut a small door and window; glue them to the pinecone scales.
- Add a bead or dot for the doorknob.
- Glue moss around the top as a soft roof.
- Let dry and set the house among plants or stones.
9. Cork Spool Fairy Table and Stools

A wooden spool or cork becomes a little table with button tops and tiny cork stools. Kids have fun staging fairy picnics and arranging plates and cups. It’s fast and cute for play.
Materials Needed:
- Wine corks and small wooden spools
- Large buttons or cardstock circles
- Craft glue
- Acrylic paint or markers
- Optional mini beads for plates
How to make it:
- Paint corks/spools if desired and let dry.
- Glue a large button on a spool for the table top.
- Cut shorter cork pieces for stools; leave tops plain or add small buttons.
- Arrange the set in your fairy garden with bead “plates.”
10. Seashell Fairy Bath

A curved seashell becomes a tiny bath or birdbath with a beaded rim and shiny “water.” Kids enjoy picking the shell and adding sparkly details. It brings a beachy feel to fairy spaces.
Materials Needed:
- Large seashell
- Clear glue or resin-like craft glaze
- Small beads or pearls
- Fine glitter
- Optional tiny paper towel “towel”
How to make it:
- Clean the shell and dry it well.
- Line the rim with tiny beads using glue.
- Fill the inside with clear glue and sprinkle a hint of glitter.
- Let it cure fully, then place it on a flat stone in your garden.
11. Cardboard Fairy Bridge
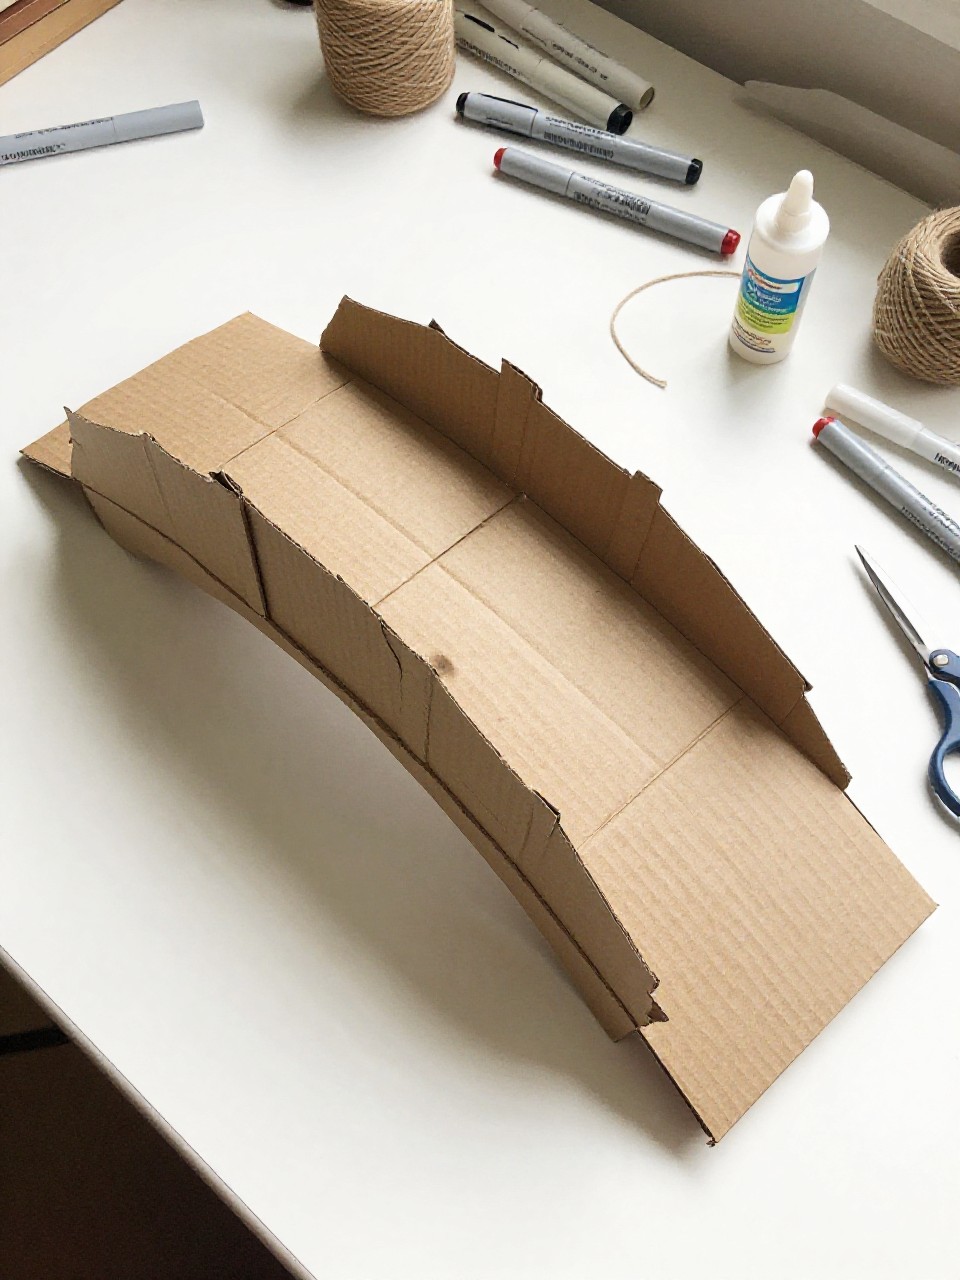
A small arched bridge lets fairies cross over a “stream” made from blue paper. Kids like bending cardboard into shape and decorating railings with twine. It’s a fun build that adds height to scenes.
Materials Needed:
- Cardboard strip
- Craft sticks or toothpicks for rails
- Twine or thin ribbon
- Acrylic paint or markers
- Craft glue
How to make it:
- Cut a curved bridge shape from cardboard and paint it.
- Glue craft sticks as planks across the top.
- Add toothpick rails and wrap twine like rope.
- Let dry and set over a strip of blue paper “water.”
12. Bead-and-Wire Fairy Lanterns
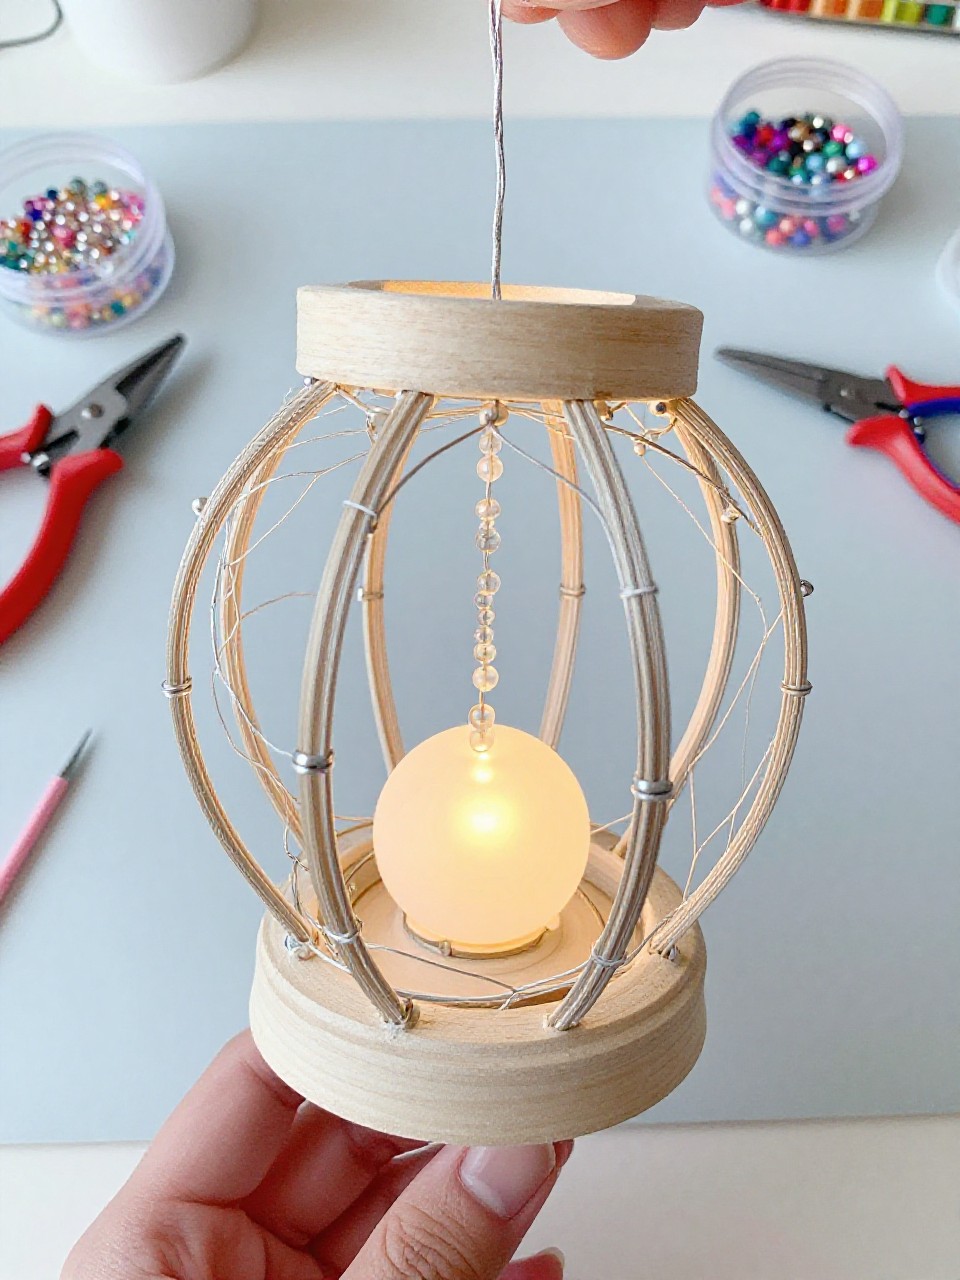
Tiny hanging lanterns are made from wire loops with bead “lights.” Kids enjoy threading colorful beads and bending simple shapes. They look magical on branches or door hooks.
Materials Needed:
- Thin craft wire
- Assorted small beads
- Round pencil for shaping
- Wire cutters
- Ribbon for hanging
How to make it:
- Wrap wire around a pencil to make a small looped frame.
- Thread beads onto wire and secure ends by twisting.
- Add a top loop and tie on a short ribbon.
- Hang lanterns from a twig in your fairy garden.
13. Felt Leaf Fairy Hammock

A stitched felt leaf becomes a tiny hammock between two sticks. Kids like gently placing a pebble “pillow” and imagining fairies napping. It’s simple sewing or can be glued for beginners.
Materials Needed:
- Green felt
- Embroidery floss or craft glue
- Two sturdy sticks
- Hole punch or scissors
- Pebble or pom-pom pillow
How to make it:
- Cut a large leaf shape from felt and punch a hole at each end.
- Stitch a simple border or glue to add strength.
- Tie each end to a stick and set the sticks into clay or soil.
- Add a small pebble pillow and place in your garden.
14. Pebble and Paint Fairy Welcome Sign
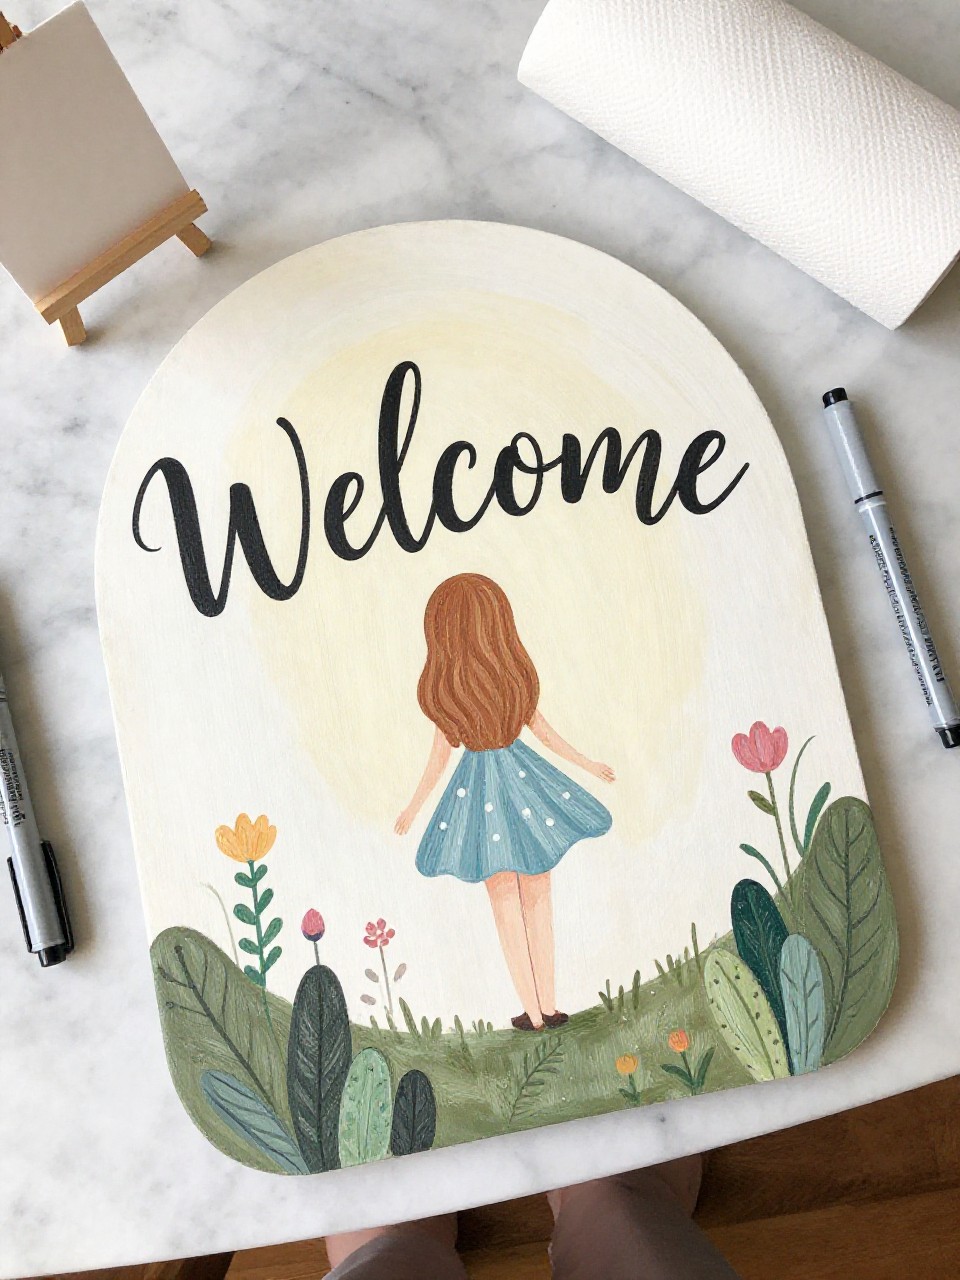
A flat pebble becomes a friendly “Welcome Fairies” sign with painted letters and vines. Kids enjoy writing tiny words and adding flowers and hearts. It’s quick and perfect for any fairy entry.
Materials Needed:
- Smooth flat pebble
- Acrylic paint pens or fine brushes
- Clear sealer (optional)
- Paper towel for practice lettering
- Optional mini easel
How to make it:
- Clean and dry the pebble.
- Write “Welcome Fairies” and add small vines, dots, and flowers.
- Let dry and seal if the garden is outdoors.
- Prop on a mini easel or lean against a fairy door.
15. Shoebox Fairy Garden Tray
A decorated shoebox lid becomes a portable fairy garden scene with paths, plants, and a mini door. Kids enjoy designing the layout like a diorama and moving pieces around. It’s a great starter project.
Materials Needed:
- Shoebox lid
- Moss sheet or green paper
- Pebbles, buttons, and small sticks
- Mini fairy door and mushroom accents
- Craft glue
How to make it:
- Line the shoebox lid with moss or green paper.
- Plan a path, pond, and seating area; glue pebbles and buttons in place.
- Add a fairy door to the “back wall” and tuck sticks as a fence.
- Let dry, then display on a shelf or carry to play areas.