


In This Article Show
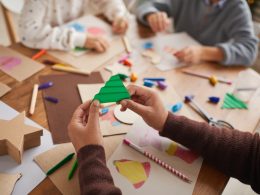
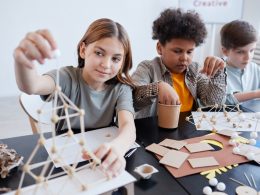
Keeping kids busy on hot summer days can be tough, especially when you want something simple, screen-free, and fun. Pirate-themed crafts are perfect because they invite pretend play, easy storytelling, and big imaginations.
In this list, you’ll find quick, low-mess projects that use common supplies and spark hours of adventure. Let’s dive into 12 fun pirate crafts that are easy to make, great for classrooms or rainy days, and full of swashbuckling charm!
1. Paper Plate Pirate Hat
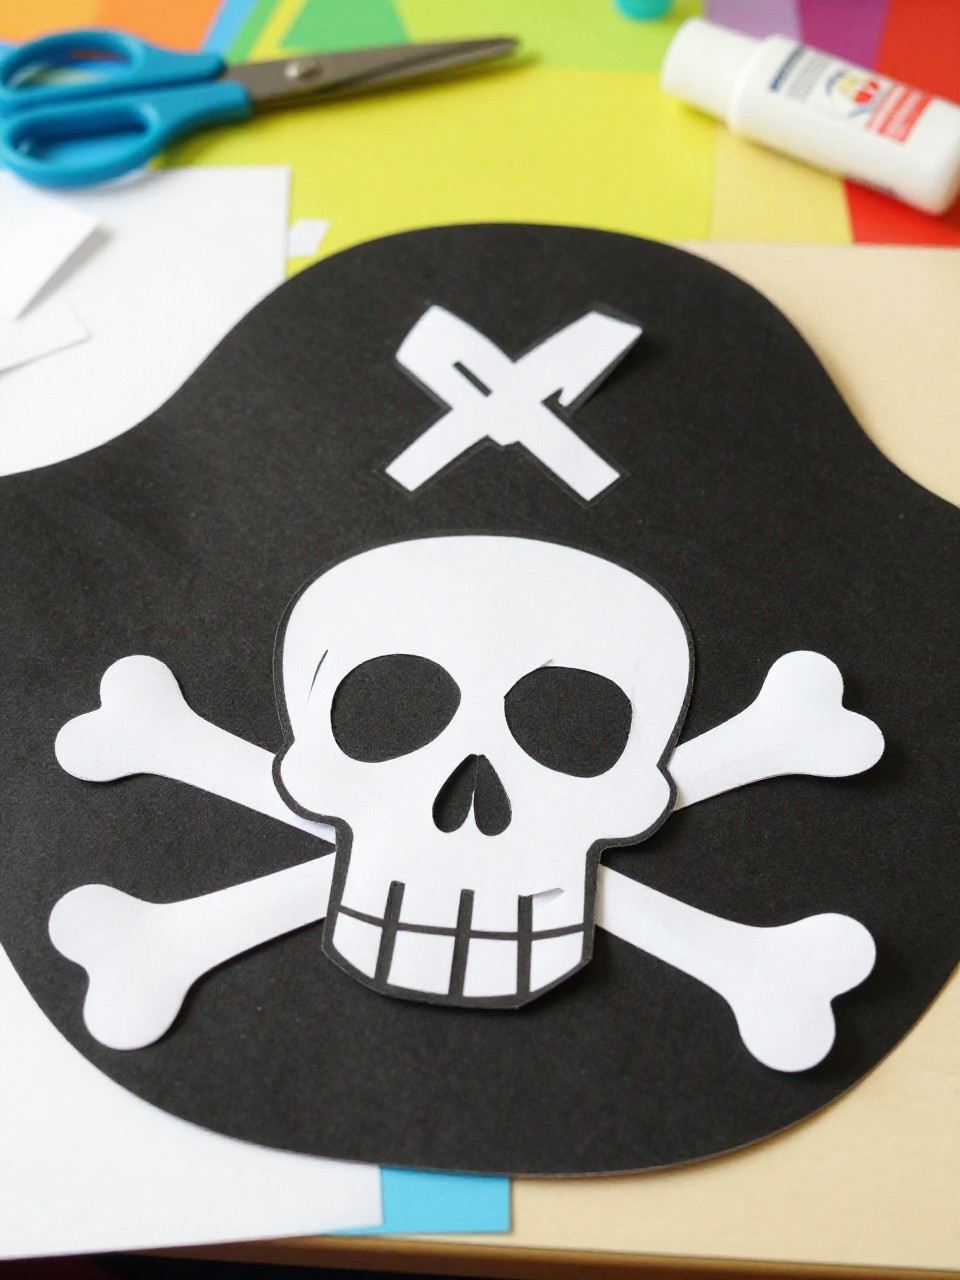
This hat looks like a classic black pirate hat with a bold skull-and-crossbones on the front. Kids love wearing it for pretend play and taking pirate photos; it’s quick to make and fits most heads with a simple paper band.
Materials Needed:
- Large paper plate (sturdy)
- Black paint or black markers
- White paper for skull-and-crossbones
- Glue stick
- Stapler or tape
How to make it:
- Cut the paper plate in half for the hat base; paint it black and let it dry.
- Cut a strip of paper to fit around the head and staple or tape it into a band.
- Glue a simple skull-and-crossbones cutout to the front.
- Attach the hat to the headband, adjust size, and let kids wear it for pirate play.
2. Cardboard Tube Spyglass
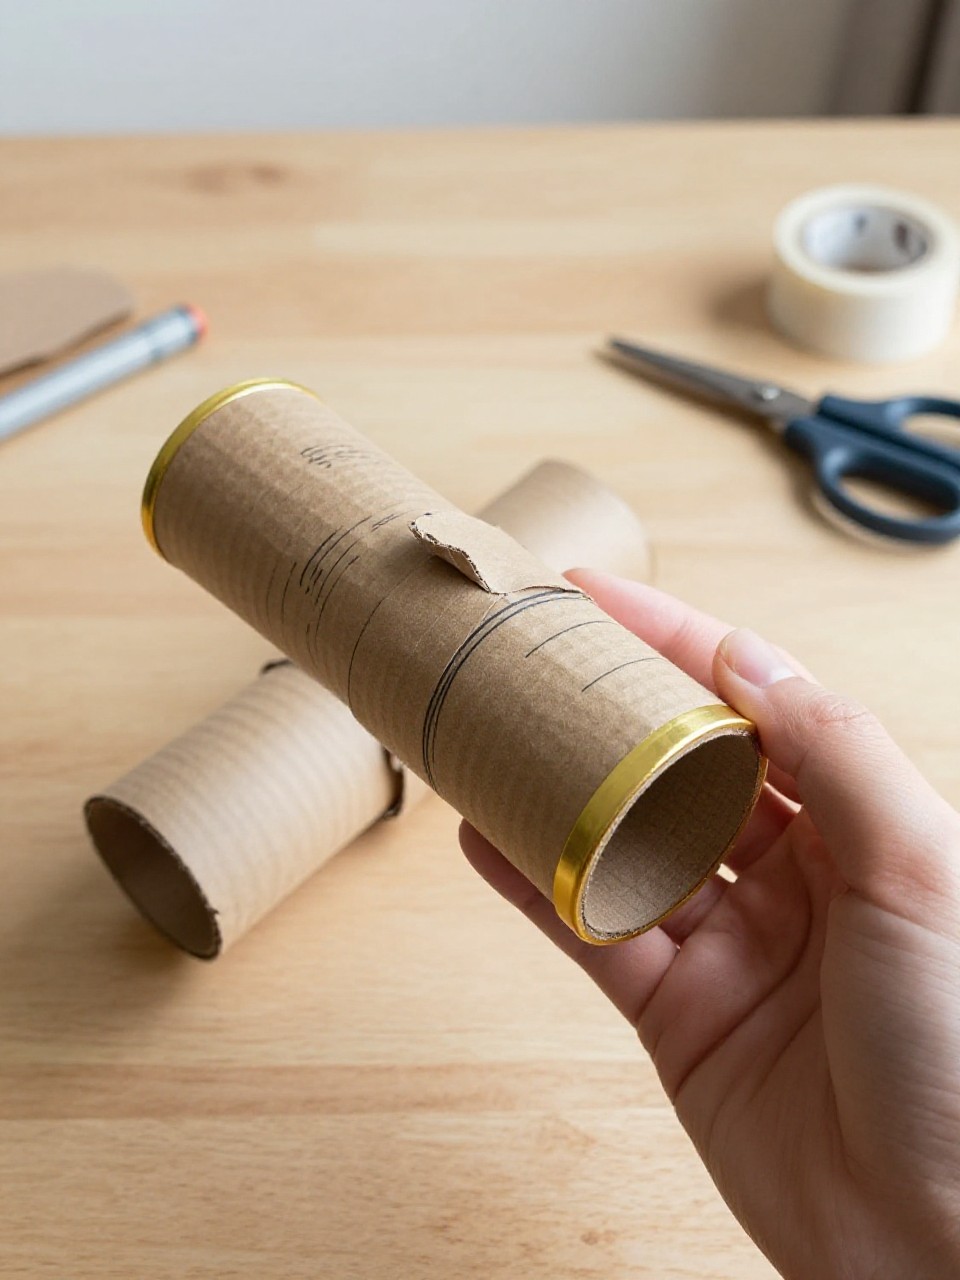
This craft looks like a mini pirate telescope wrapped in “weathered” paper with a gold rim. Kids enjoy pretending to search for ships and treasure; it’s easy, sturdy, and great for imaginative play.
Materials Needed:
- Cardboard tube (paper towel roll)
- Brown craft paper or a paper bag
- Gold tape or yellow paper strip
- Glue or tape
- Markers for details
How to make it:
- Wrap the tube in brown paper and secure with glue or tape.
- Add a gold or yellow band around one end for a metal rim look.
- Draw tiny “rivets,” swirls, or a skull emblem along the tube.
- Let dry and head outside to “scan” the horizon for treasure.
3. Foam Sheet Pirate Eye Patch
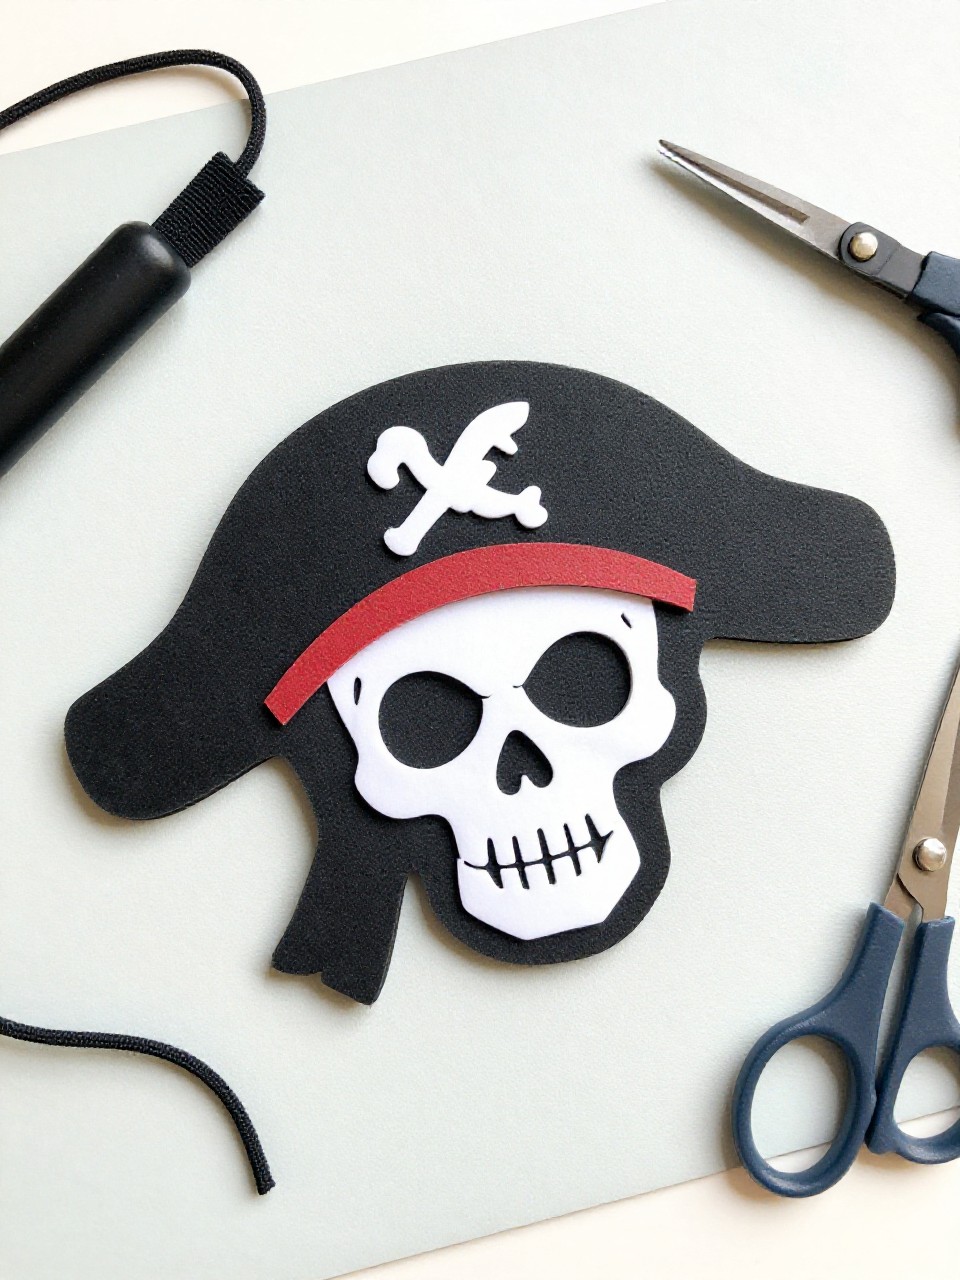
This finished patch is a small black foam oval with an elastic band and a cute white skull sticker. Kids love wearing it because it feels instantly pirate-y and comfy, and it’s simple enough for a quick group activity.
Materials Needed:
- Black craft foam sheet
- Elastic cord
- Hole punch (or carefully poke holes)
- White sticker paper or white foam for skull
- Glue
How to make it:
- Cut a small oval from black foam to fit over one eye.
- Punch two small holes on the sides and thread elastic to fit the head.
- Cut and stick or glue a tiny skull onto the patch.
- Tie knots, trim ends, and try it on for a pirate look.
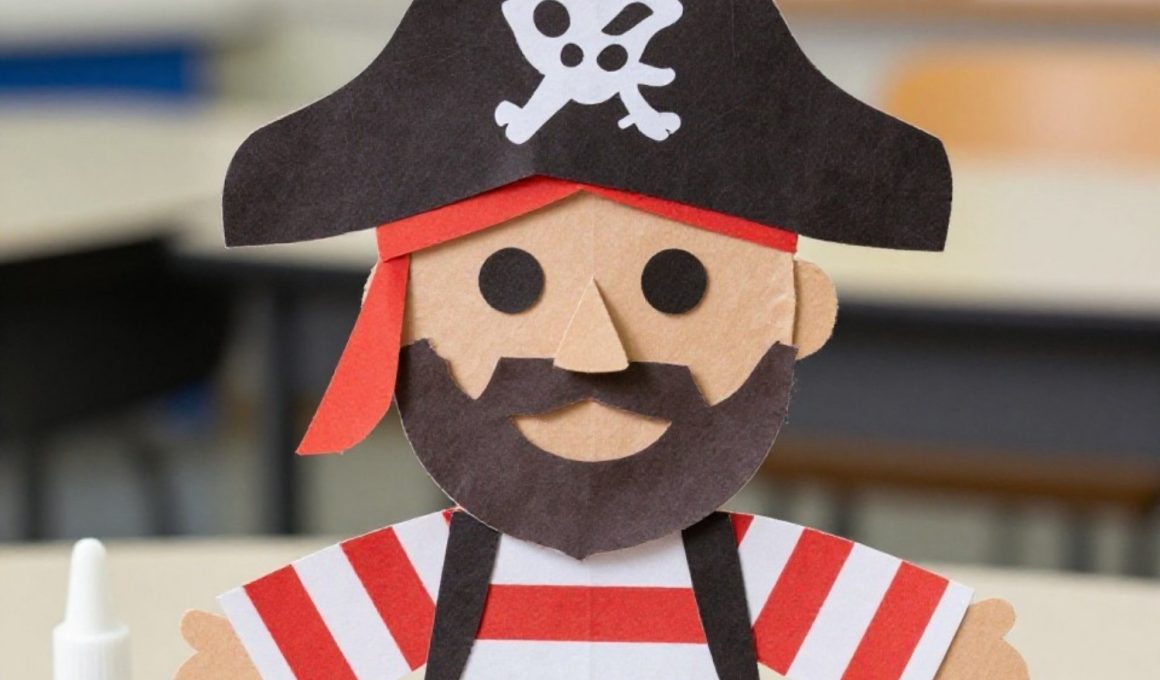
4. Paper Bag Pirate Puppet
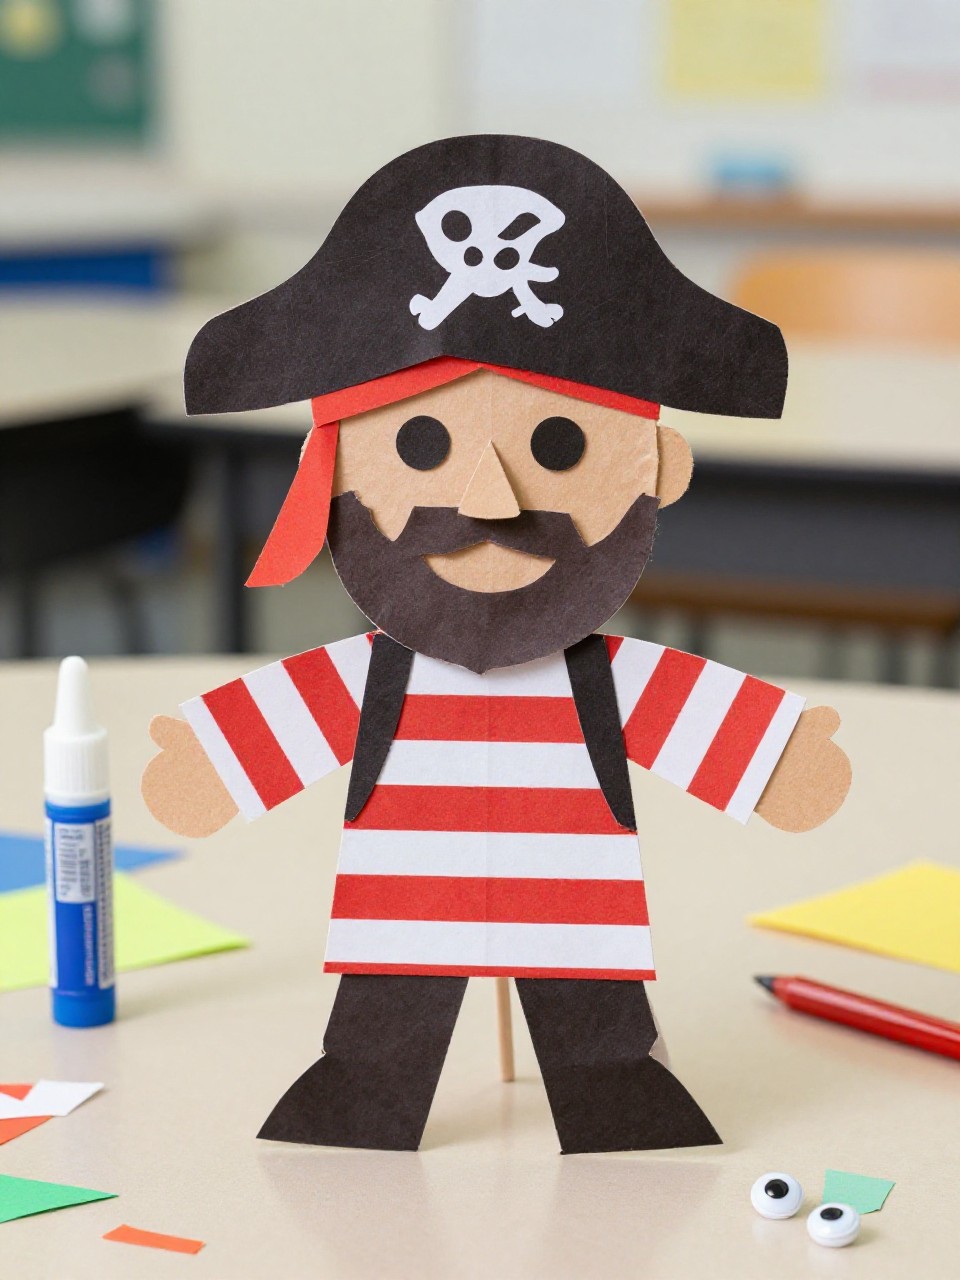
This puppet looks like a friendly pirate with a striped shirt, beard, and a little hat on a lunch bag. Kids enjoy moving the mouth flap and making up sea stories; it’s a great beginner project with big personality.
Materials Needed:
- Brown paper lunch bag
- Construction paper (red, black, white, blue)
- Markers and glue stick
- Googly eyes (optional)
- Cotton balls or yarn for beard (optional)
How to make it:
- Glue a shirt rectangle on the bag’s front and a face on the flap.
- Cut a small hat and glue it on top; add stripes, belt, and buttons.
- Stick on eyes, draw a smile, and add a cotton-yarn beard if you like.
- Let dry, then put your hand inside to animate your pirate.
5. Salt Dough Treasure Coins
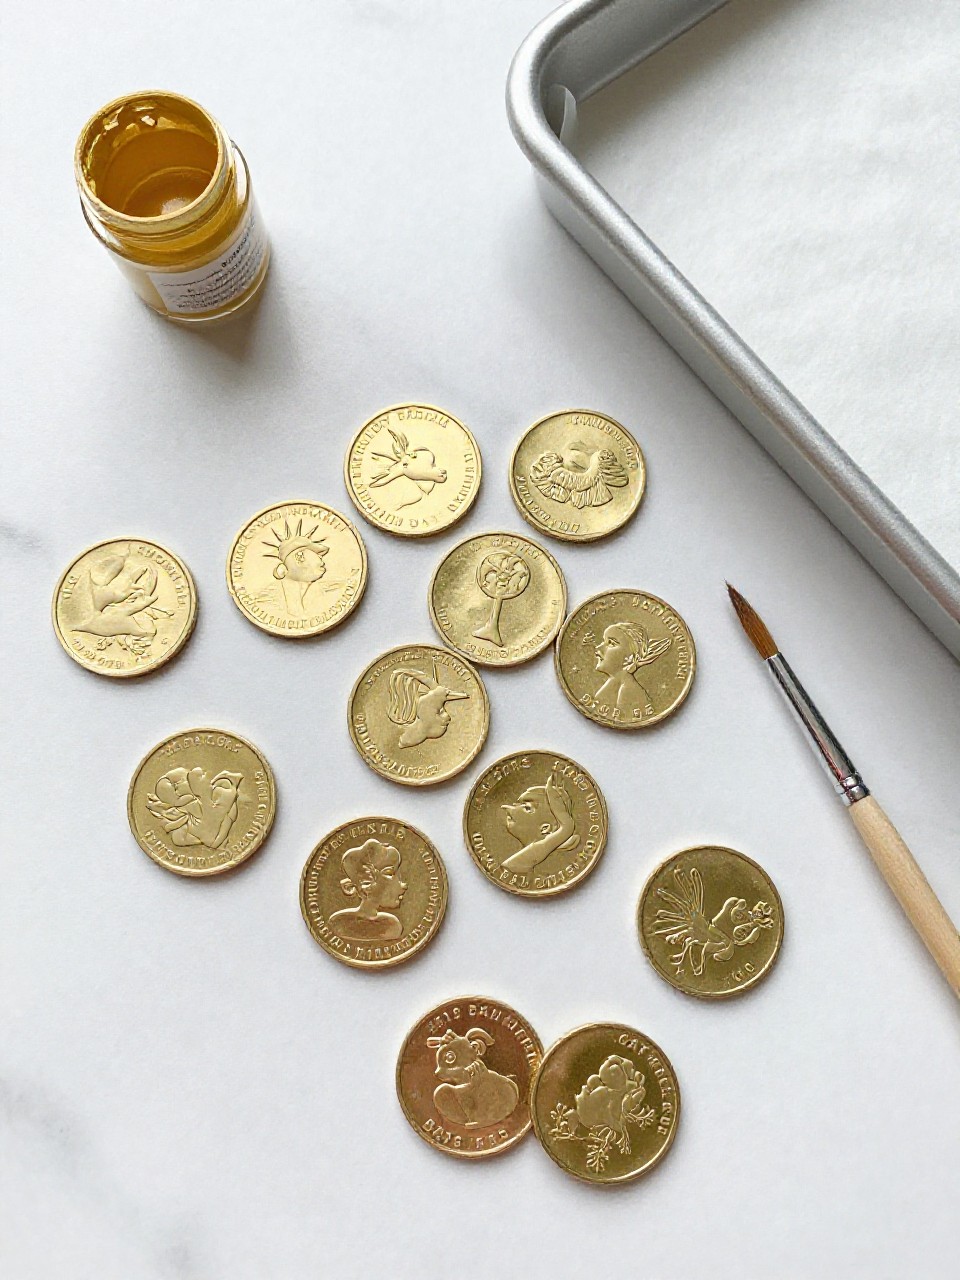
These look like chunky gold coins pressed with simple symbols and brushed with shiny paint. Kids love squishing the dough, stamping designs, and then hiding the “gold” for treasure hunts.
Materials Needed:
- Flour, salt, water (basic salt dough)
- Circle cookie cutter or cup
- Toothpick for designs
- Gold acrylic paint
- Baking sheet and parchment
How to make it:
- Mix salt dough (2 parts flour, 1 part salt, water as needed) and roll to 1/4 inch.
- Cut circles and press symbols or initials with a toothpick.
- Bake low and slow until hard, then cool.
- Paint gold, let dry, and store in a small pouch for play.
6. Map-in-a-Bottle Message Craft
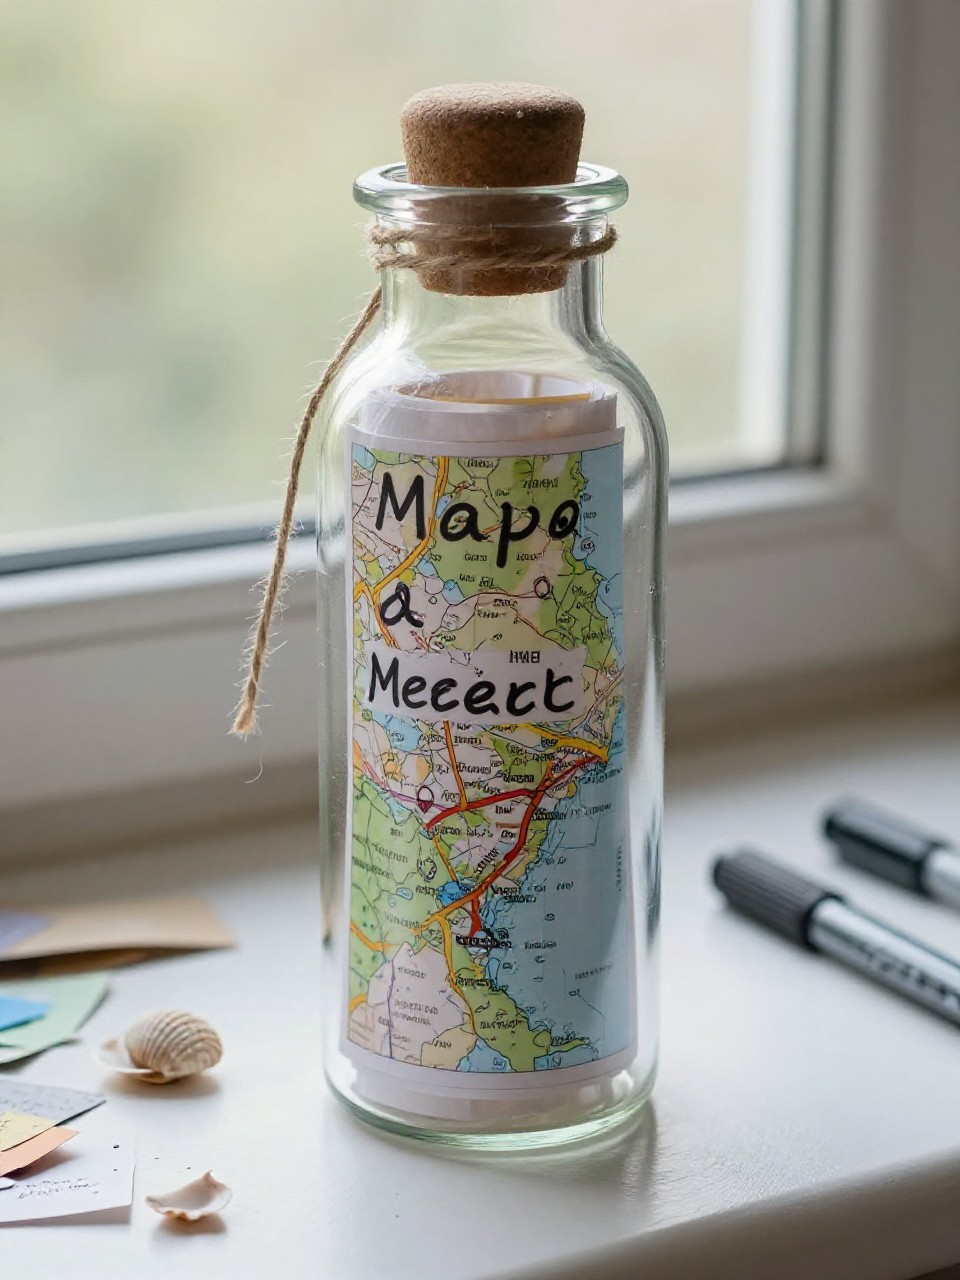
This looks like a tiny rolled treasure map tucked inside a clear plastic bottle with a twine tie and a little shell charm. Kids love writing secret messages and pretending to send them across the sea.
Materials Needed:
- Clear plastic bottle with cap (safe for kids)
- Tea-stained paper or tan paper
- Twine or yarn
- Small shell or bead (optional)
- Markers
How to make it:
- Crumple and flatten paper, then draw an island, X, and dotted path.
- Roll the map, tie with twine, and add a shell charm if using.
- Slip the roll into the bottle and cap it.
- Display on a windowsill or use during treasure hunts.
7. Popsicle Stick Pirate Ship

This craft becomes a small flat-bottom ship with a paper sail and a little Jolly Roger flag. Kids enjoy arranging sticks, naming their ship, and sailing it through pretend oceans on the floor or table.
Materials Needed:
- Popsicle sticks
- Cardboard base (oval or rectangle)
- White paper for sail
- Skewer or straw for mast
- Glue
How to make it:
- Glue sticks across the cardboard base to make a deck.
- Attach a straw or skewer mast at the center.
- Cut a triangle sail, poke holes, and slide it onto the mast; draw a skull flag.
- Let dry fully before gentle pretend sailing.
8. Handprint Parrot Sidekick
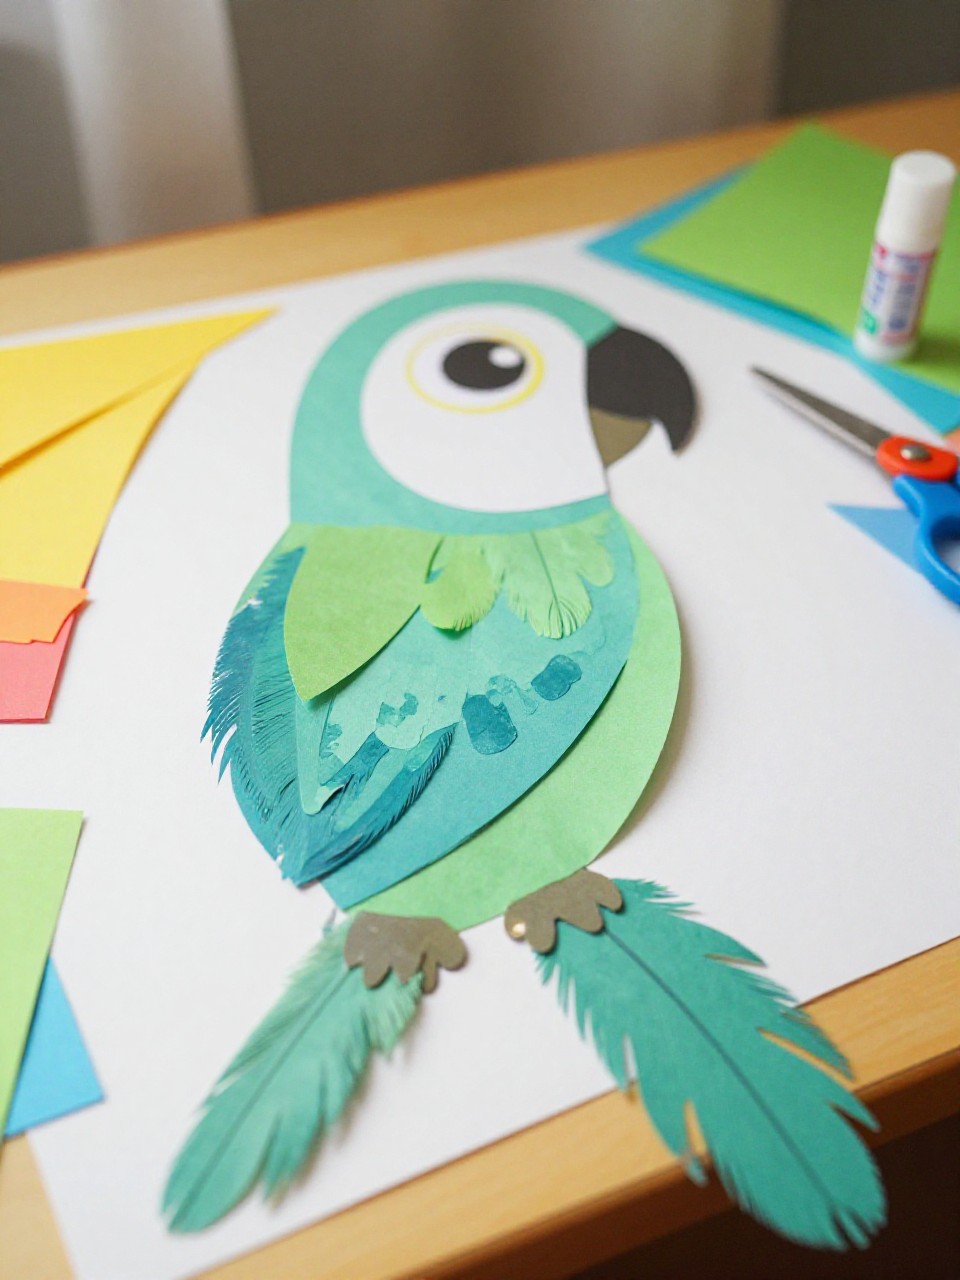
This looks like a bright parrot where the feathers are made from layered handprints in rainbow colors. Kids love tracing their hands, choosing colors, and sticking the parrot on their shoulder during play.
Materials Needed:
- Construction paper (red, yellow, green, blue)
- Googly eye or marker
- Glue stick
- Pencil and scissors
- Tape loop to wear
How to make it:
- Trace and cut several handprints in different colors.
- Glue them in a fan shape for feathers; add a round head and beak.
- Stick on an eye and draw feather lines.
- Add a tape loop on the back so it can perch on a shoulder.
9. Paper Plate Pirate Ship Porthole
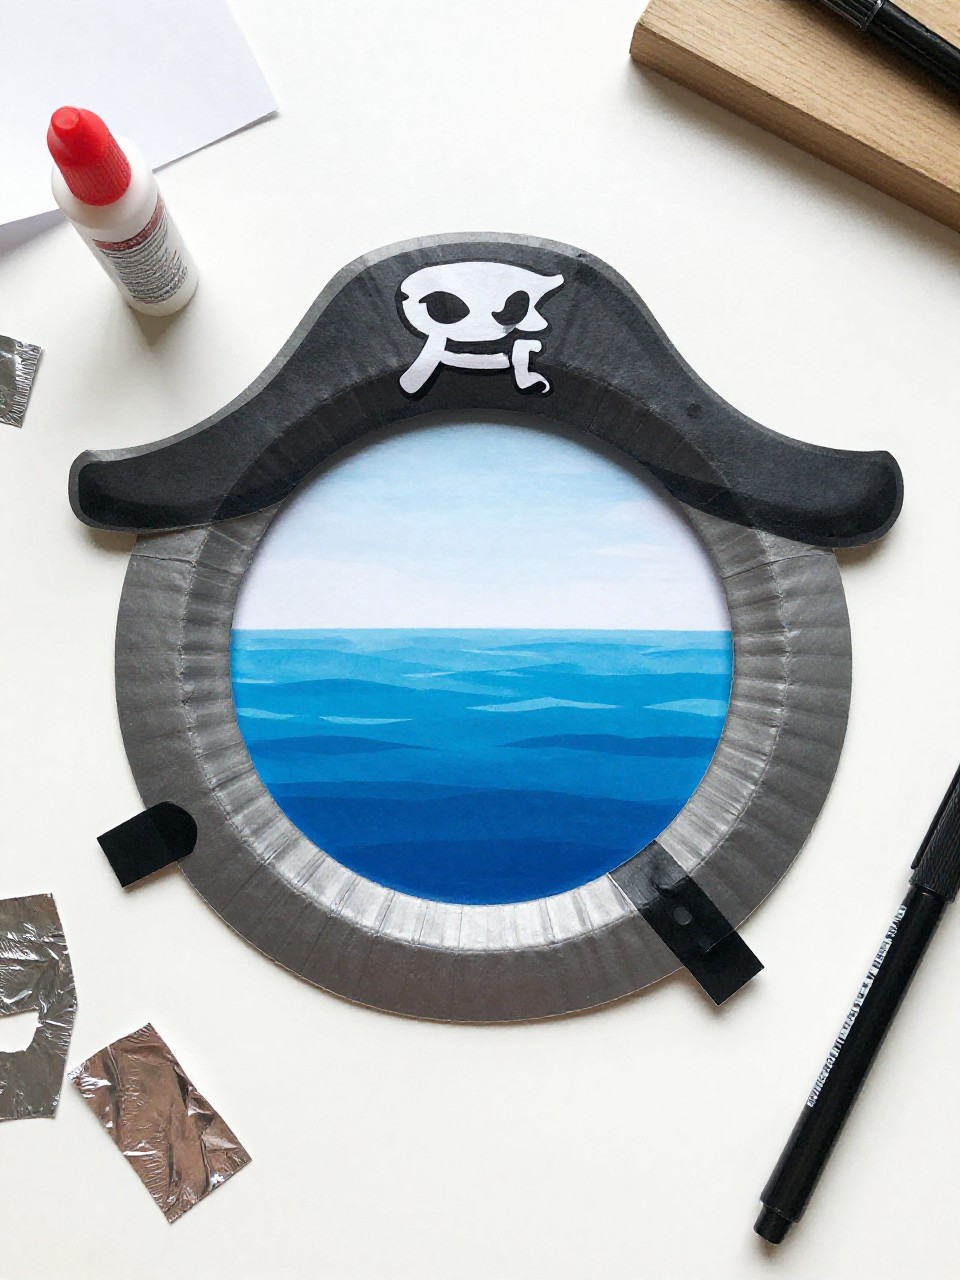
The finished craft looks like a round window with a view of the sea—waves, a tiny ship, maybe a shark fin—framed by a “metal” rim with faux bolts. Kids enjoy building a tiny scene and peeking through their porthole.
Materials Needed:
- Paper plate
- Blue and white paper
- Aluminum foil or gray paint
- Glue stick
- Black marker and hole punch (optional)
How to make it:
- Cut out the center of the plate to make a ring and paint or wrap it gray/foil.
- Build a small ocean scene on blue paper with waves, ship, and clouds.
- Glue the ring on top to frame the scene; draw “bolts” around the rim.
- Hang it in a window or on a door at kid height.
10. Pirate Flag Bandana Print
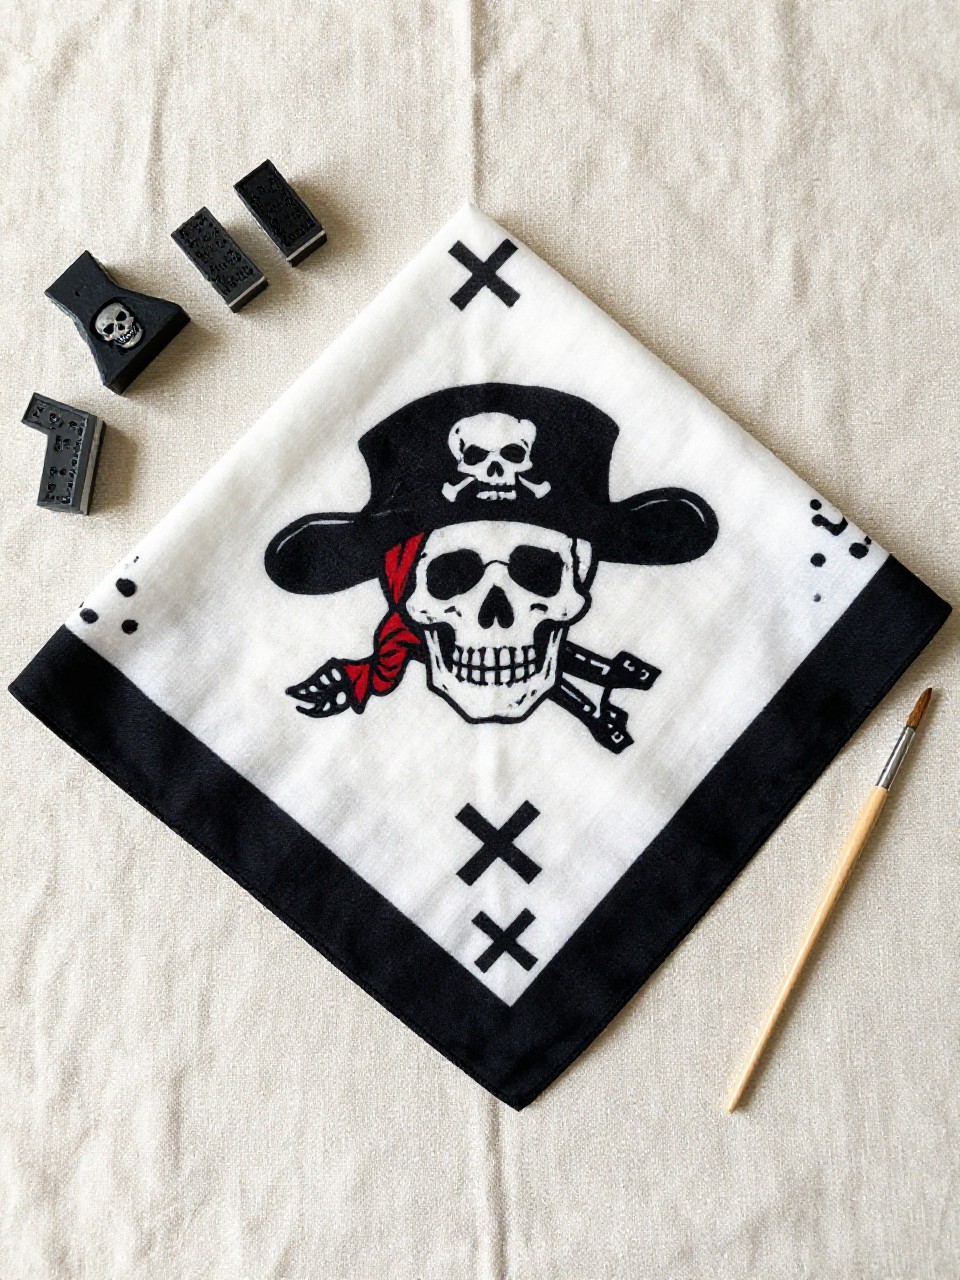
This looks like a bandana covered in small stamped skulls, anchors, and X marks, tied around the head like a pirate flag. Kids love designing their own symbol and wearing it outside on summer adventures.
Materials Needed:
- Plain cotton bandana or square fabric
- Fabric paint (black, red, white)
- Potato or foam shapes for stamps
- Paper plate for paint
- Wax paper to protect table
How to make it:
- Lay bandana flat on protected surface.
- Dip potato/foam stamps into fabric paint and press patterns across fabric.
- Add a big central symbol like a skull or “X” in contrasting color.
- Let dry fully, then tie it on for pirate play.
11. Mini Treasure Chest from Egg Carton
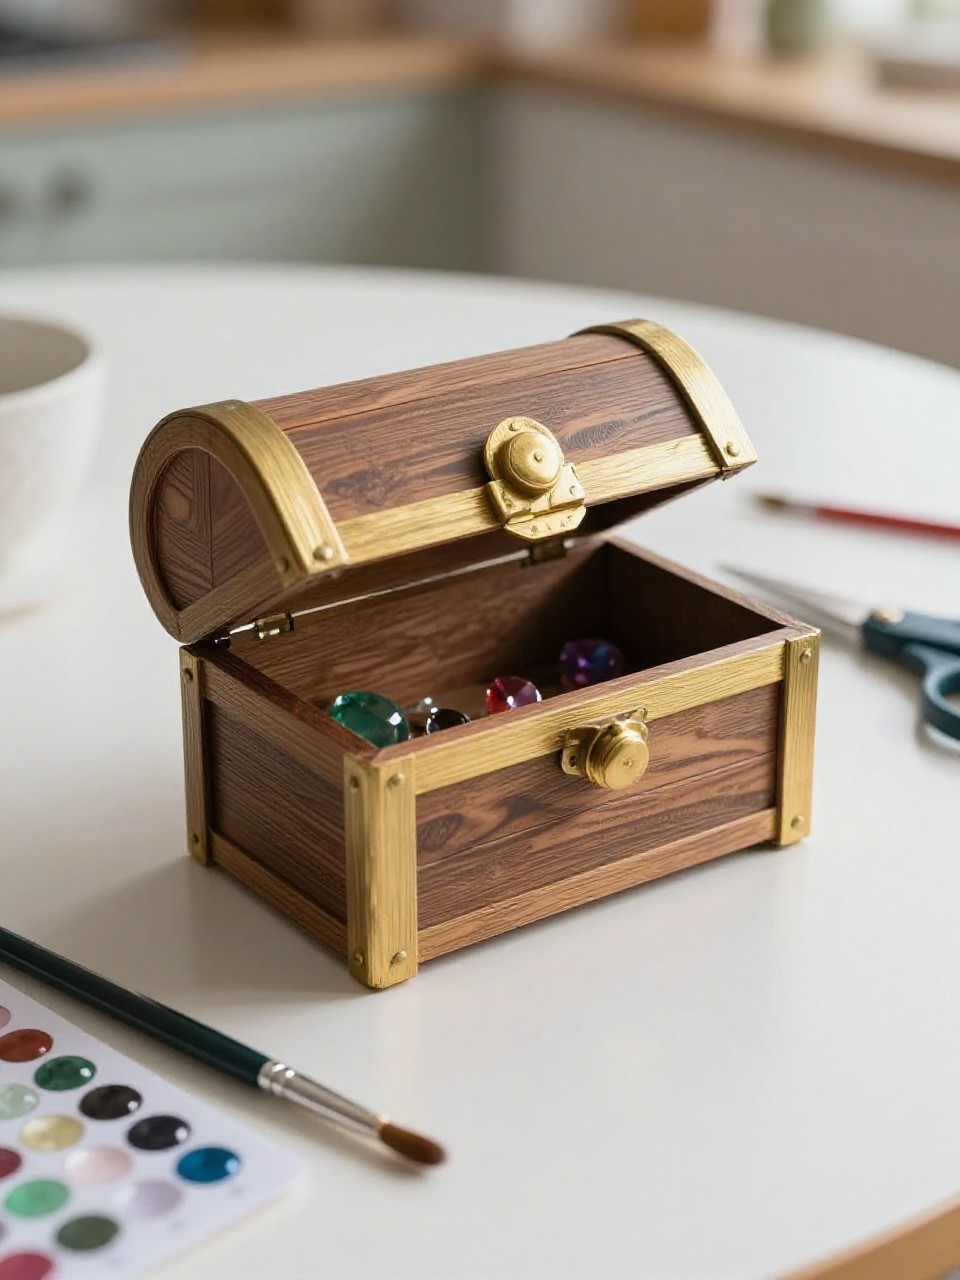
This craft turns an egg carton cup into a tiny pirate chest with a gold-painted rim and stick-on “jewels.” Kids love filling it with their coins, beads, or secret notes and using it for treasure hunts.
Materials Needed:
- Cardboard egg carton (cut into single cups with lid)
- Brown and gold paint
- Stick-on gems or beads
- Glue
- Small piece of ribbon (optional)
How to make it:
- Cut a lidded cup from the carton; paint the outside brown and edges gold.
- Glue on gems as studs and a front “lock.”
- Add a ribbon loop as a handle if desired.
- Let dry, then fill with coins and hide it for a search.
12. Compass Rose Paper Craft
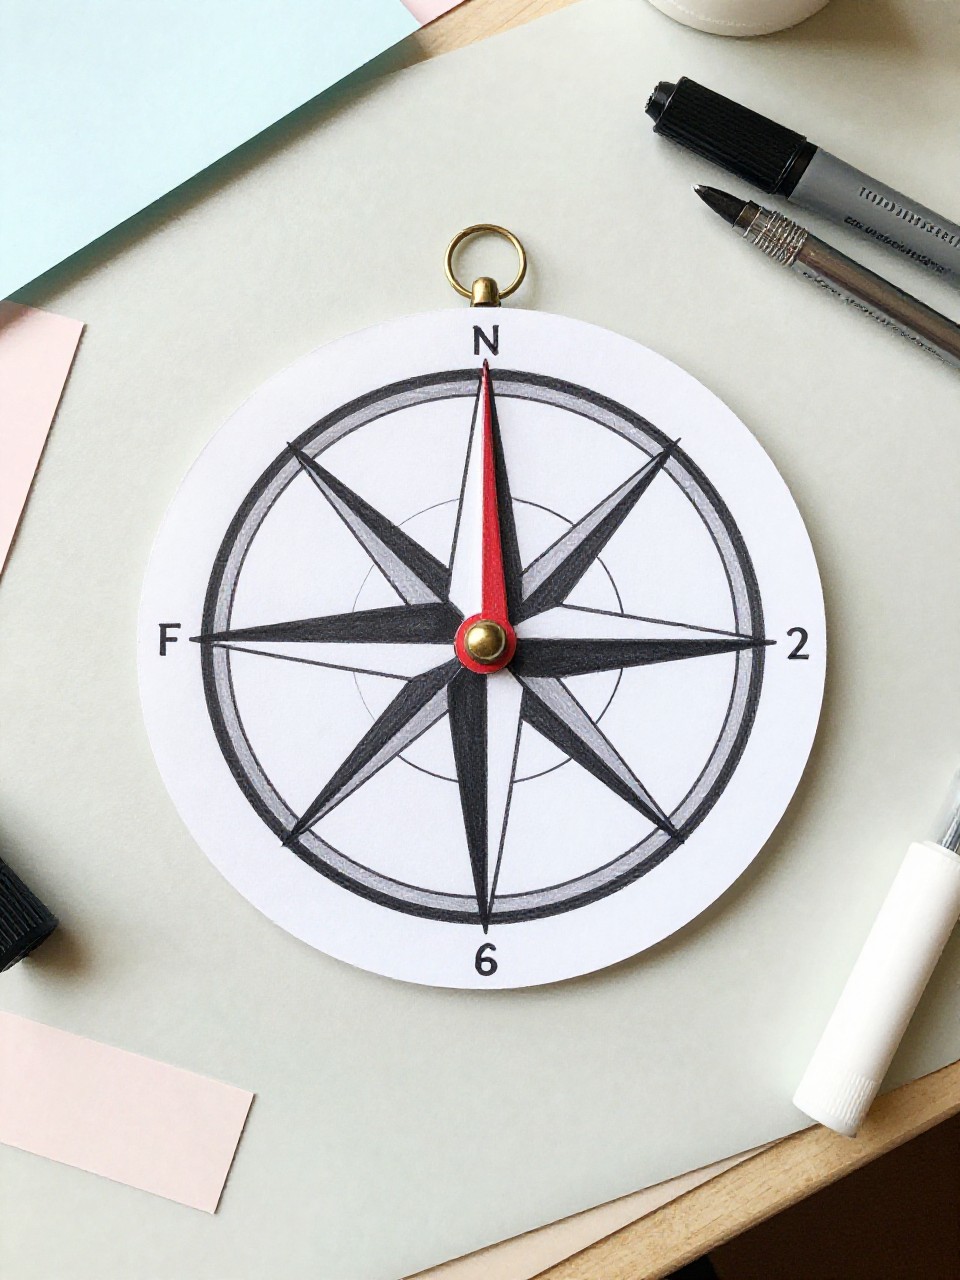
This looks like a circular compass with a bold red-and-black needle and labeled directions, all mounted on sturdy card. Kids enjoy spinning the needle and learning N, S, E, W while planning their pirate route.
Materials Needed:
- Cardstock circle
- Colored paper (red, black, white)
- Brass fastener (paper brad)
- Marker
- Glue stick
How to make it:
- Cut a large cardstock circle; draw tick marks and label N, S, E, W.
- Cut a two-tone paper needle and poke a hole in the center.
- Attach the needle to the circle with a brad so it spins.
- Add simple decorations, then use it to point the way to treasure.