







In This Article Show
Finding simple ways to keep kids busy over Labor Day weekend can be challenging, especially when outdoor plans change or the weather turns rainy. Crafting gives children something fun to do while helping them learn about community workers and the meaning of the holiday.
These Labor Day projects use easy supplies and include decorations, pretend-play crafts, and thoughtful appreciation activities. Most can be made at home, in a classroom, or during a family gathering.
1. Community Helper Badge Medals

These colorful paper medals feature stars, worker symbols, and cheerful titles such as “Helper Hero” or “Thank You.” Kids will enjoy designing badges for teachers, nurses, delivery drivers, cleaners, and other hardworking people. The project is easy enough for young children but still gives older kids room to add detailed drawings.
Materials Needed
- Colored cardstock
- Ribbon or yarn
- Markers or crayons
- Star stickers
- Glue stick
How to make it
- Step 1: Cut large circles from cardstock and prepare one circle for each medal.
- Step 2: Write a worker appreciation title in the center and draw tools, uniforms, or stars around it.
- Step 3: Decorate the medal with stickers, paper shapes, or colorful borders.
- Step 4: Glue a ribbon loop to the back and let it dry before giving the medal to someone special.
2. Labor Day Parade Paper Crown
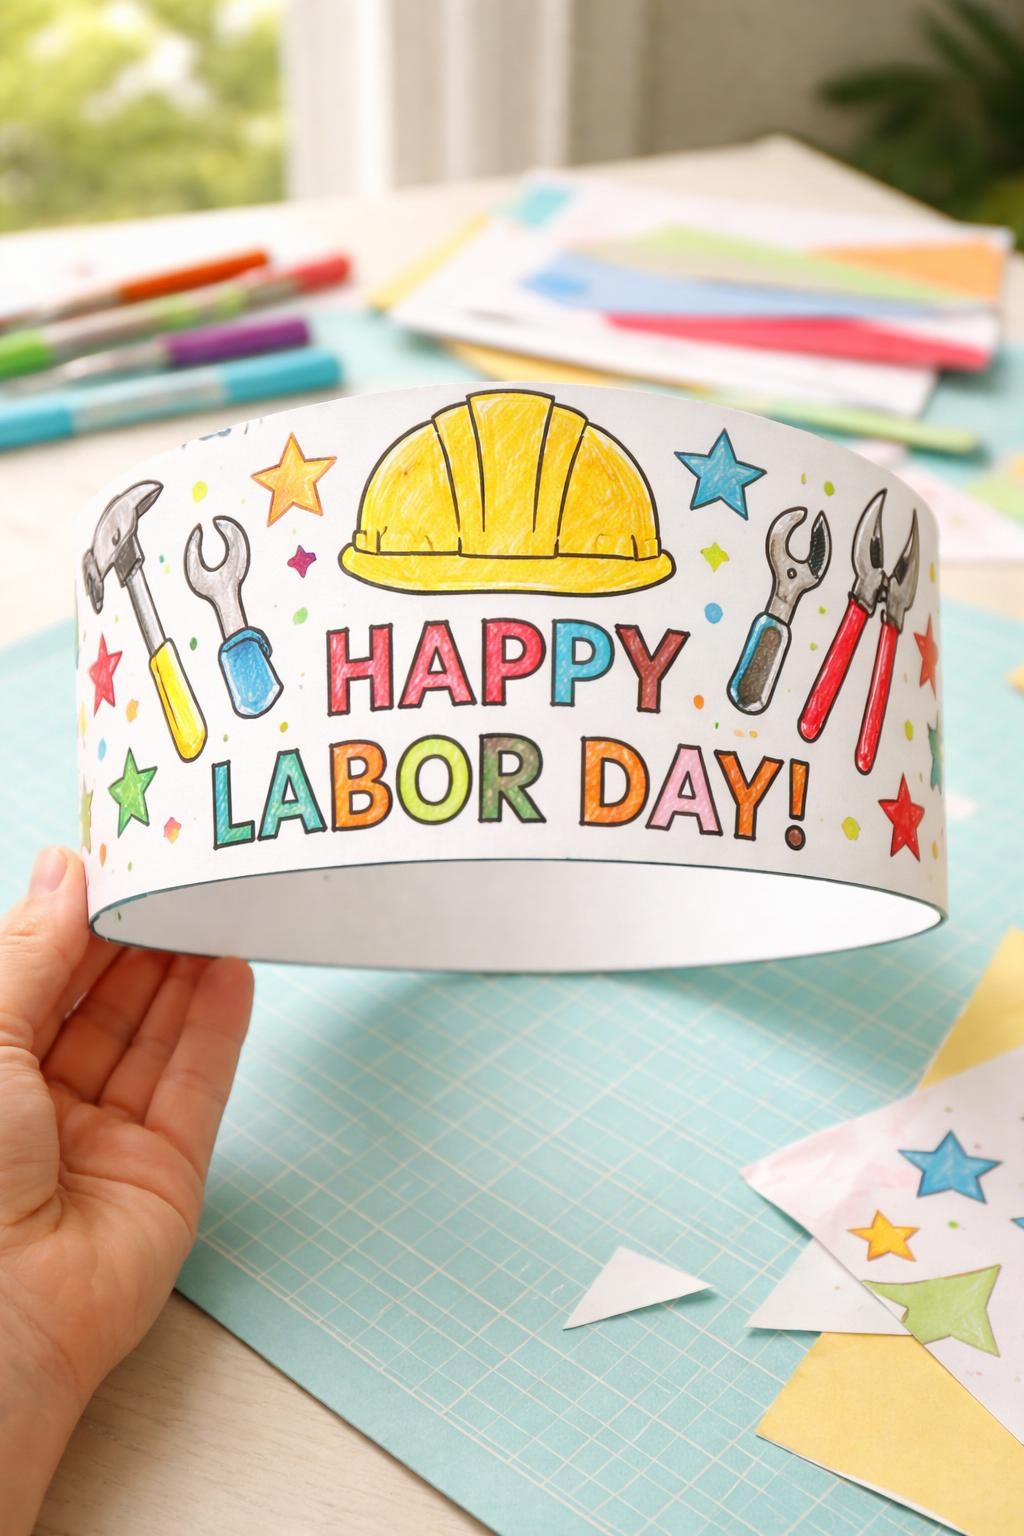
This festive paper crown is decorated with red, white, and blue shapes, worker tools, and cheerful Labor Day messages. Kids will enjoy wearing their crowns during a family picnic or pretend parade. The simple paper base makes it easy for children of different ages to decorate in their own style.
Materials Needed
- Cardstock or construction paper
- Markers
- Star stickers
- Glue stick
- Tape
How to make it
- Step 1: Cut a long strip of cardstock wide enough to fit comfortably around the child’s head.
- Step 2: Trim the top edge into crown points or rounded shapes.
- Step 3: Decorate the crown with stars, small tools, flags, and a “Happy Labor Day” message.
- Step 4: Wrap the strip around the child’s head, mark the correct size, and tape the ends together.
3. Cardboard Labor Day Parade Float

This miniature parade float is made from a small box decorated with flags, paper workers, and bright streamers. Kids will enjoy building their own moving display and choosing which jobs or community helpers to feature. It is a creative project for pretend play and can be rolled across the floor during a small Labor Day parade.
Materials Needed
- Small cardboard box
- Bottle caps
- Colored paper
- Glue
- Pipe cleaners or streamers
How to make it
- Step 1: Cover the cardboard box with colored paper or paint and allow it to dry if needed.
- Step 2: Glue bottle caps along the lower sides to look like wheels.
- Step 3: Add paper workers, tiny signs, flags, streamers, and other parade decorations.
- Step 4: Let the glue dry, then push the float gently across a table or floor during pretend play.
4. Fingerprint Community Worker Mural

This large mural uses colorful fingerprints to create groups of tiny community workers. Kids can turn each fingerprint into a person by adding faces, uniforms, hats, and simple tools with markers. The finished artwork looks lively and works well as a shared classroom or sibling craft.
Materials Needed
- Large sheet of white paper
- Washable paint
- Black marker
- Colored markers
- Paint tray
How to make it
- Step 1: Spread the large paper across a protected table and pour small amounts of paint into a tray.
- Step 2: Press fingertips into the paint and stamp rows of prints across the paper.
- Step 3: Let the paint dry, then turn the fingerprints into workers by adding faces, hats, uniforms, and tools.
- Step 4: Write a title such as “The People Who Help Our Community” across the top and display the mural.
5. Paper Plate Work Gear Collage

This round collage is filled with colorful paper tools, helmets, uniforms, boots, and other items used by workers. Kids will enjoy choosing different jobs and layering the shapes across the plate. It is a simple cutting and gluing activity that also encourages conversations about what different community workers do.
Materials Needed
- Paper plate
- Colored construction paper
- Child-safe scissors
- Glue stick
- Markers
How to make it
- Step 1: Choose three or four community jobs and talk about the items used in each one.
- Step 2: Cut simple tool, hat, boot, badge, and uniform shapes from colored paper.
- Step 3: Glue the shapes across the paper plate, slightly overlapping some pieces to form a collage.
- Step 4: Add names, outlines, and small details with markers, then let the collage dry before displaying it.
6. Construction Cone Pencil Toppers

These small orange paper cones sit on top of pencils and look like miniature road construction signs. Kids will enjoy turning an ordinary pencil into a playful Labor Day school supply. The project is quick, beginner friendly, and useful for classroom activities about builders and road workers.
Materials Needed
- Orange cardstock
- Yellow paper
- Glue stick
- Black marker
- Pencils
How to make it
- Step 1: Cut small orange triangles with flat bottoms from cardstock.
- Step 2: Roll each triangle into a cone shape and glue the overlapping edge.
- Step 3: Add a yellow stripe and draw small warning marks with a black marker.
- Step 4: Make a tiny opening at the bottom and slide the finished cone onto the top of a pencil.
7. Salt Dough Tool Magnets

These small salt dough shapes look like hammers, wrenches, paintbrushes, and hard hats after they are painted. Kids will enjoy pressing, cutting, and decorating the dough, while adults can handle the baking. The finished magnets make fun Labor Day decorations for a refrigerator, locker, or classroom board.
Materials Needed
- Salt dough
- Tool-shaped cutters or plastic knife
- Acrylic paint
- Paintbrush
- Small craft magnets
How to make it
- Step 1: Roll the salt dough into a flat layer on a clean surface.
- Step 2: Cut simple tool and worker-hat shapes using cutters or a plastic knife.
- Step 3: Bake or air-dry the shapes according to the salt dough recipe, then paint them in bright colors.
- Step 4: Glue a small magnet to the back of each shape and let it dry completely before using it.
8. Helper Thank-You Coupon Book

This small paper booklet contains thoughtful coupons offering simple acts of kindness, such as helping clean up or carrying groceries. Kids will enjoy decorating each page and deciding how they can help family members or community workers. It gives Labor Day a meaningful focus while still feeling creative and personal.
Materials Needed
- Colored paper
- Stapler
- Markers
- Stickers
- Child-safe scissors
How to make it
- Step 1: Cut several small paper rectangles of equal size for the cover and inside pages.
- Step 2: Write one helpful action on each page, such as “One Free Cleanup Helper” or “I Will Set the Table.”
- Step 3: Decorate the pages with stars, hearts, worker tools, and colorful borders.
- Step 4: Stack the pages neatly, staple one side, and give the book to a parent, teacher, or helper.
9. Paper Bag Worker Dress-Up Vest

This wearable vest is made from a large paper grocery bag decorated to look like a builder, postal worker, chef, or crossing guard uniform. Kids will enjoy choosing a job and adding pockets, badges, and tools. The finished vest is lightweight and perfect for pretend play or a community helper lesson.
Materials Needed
- Large paper grocery bag
- Colored paper
- Markers
- Glue stick
- Child-safe scissors
How to make it
- Step 1: Cut a large opening down the front of the paper bag, then carefully cut holes for the head and arms.
- Step 2: Choose a worker uniform and add paper pockets, collars, reflective strips, or buttons.
- Step 3: Draw a name badge, job symbol, and simple tools on the front.
- Step 4: Let any glued pieces dry, then help the child gently put on the vest for pretend play.
10. Patriotic Paper Fan

This folded paper fan features red, white, and blue stripes, stars, and short Labor Day messages. Kids will enjoy folding the paper back and forth and opening it to reveal the finished design. The fan is useful during a warm picnic and can also be displayed as a simple holiday decoration.
Materials Needed
- Red, white, and blue paper
- Glue stick
- Markers
- Popsicle sticks
- Star stickers
How to make it
- Step 1: Decorate a rectangular sheet of paper with stripes, stars, dots, and a Labor Day message.
- Step 2: Fold the paper back and forth in equal accordion folds.
- Step 3: Pinch one end together and glue a popsicle stick to each outer side.
- Step 4: Let the glue dry, then open the sticks apart to spread the paper into a fan shape.
11. Clay Tool Imprint Plaque
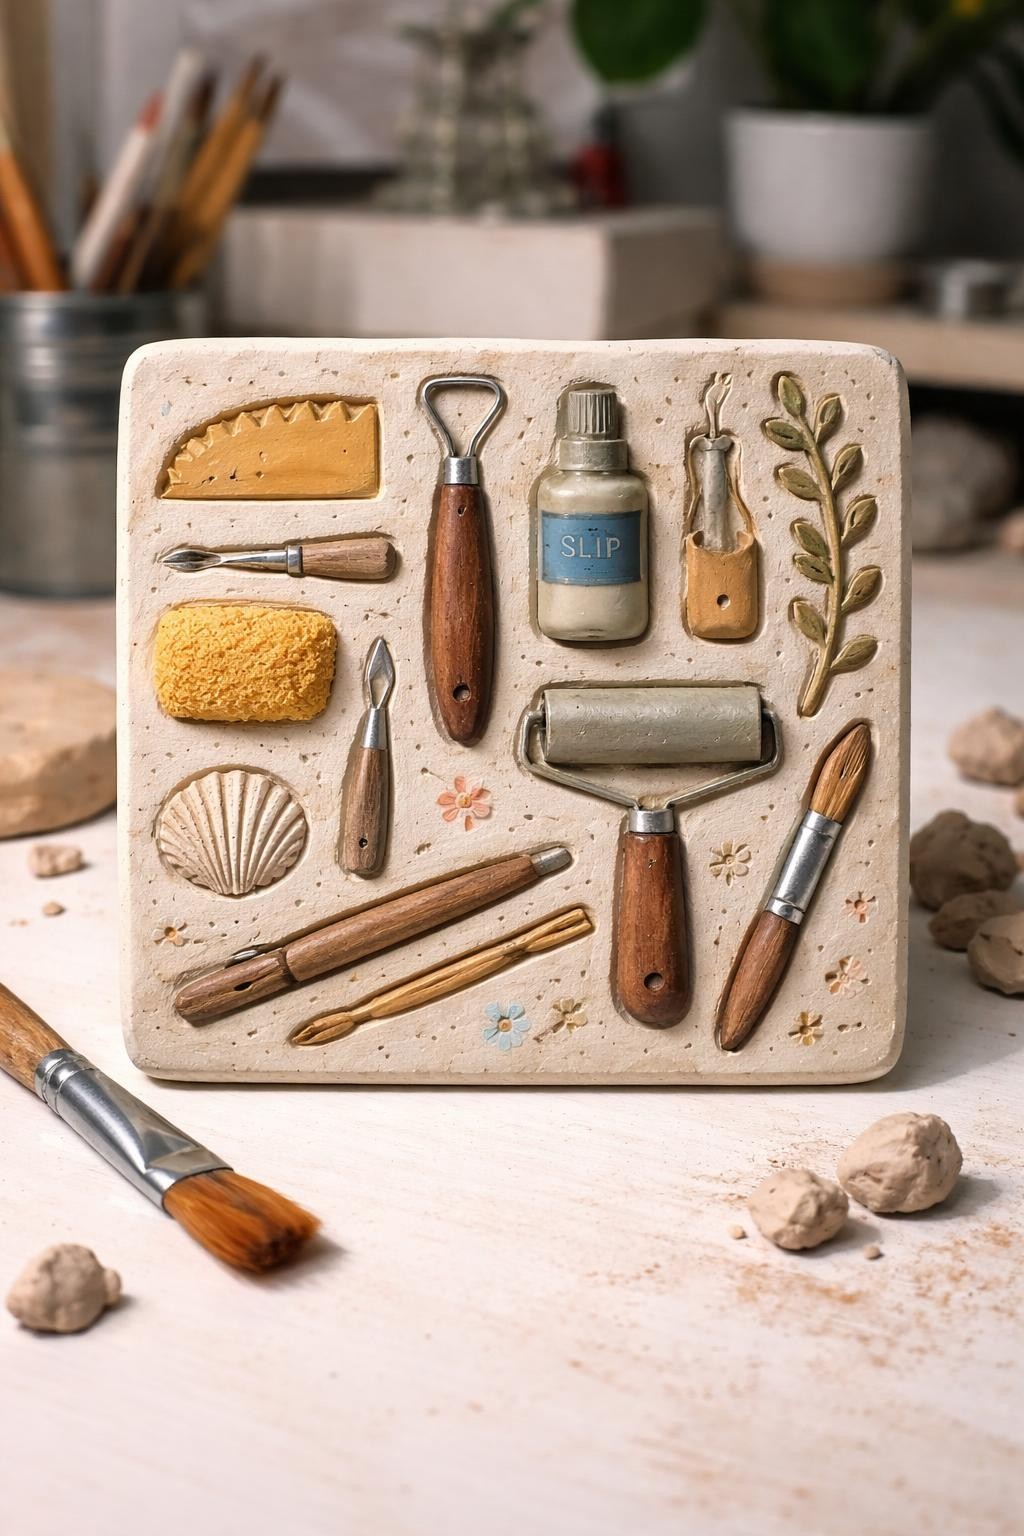
This small clay plaque is covered with pressed shapes from toy tools, bolts, screws, or textured craft supplies. Kids will enjoy pushing objects into the soft clay and seeing the patterns they leave behind. Once painted, the plaque becomes a creative Labor Day keepsake or classroom display.
Materials Needed
- Air-dry clay
- Toy tools or clean hardware pieces
- Acrylic paint
- Paintbrush
- Ribbon, optional
How to make it
- Step 1: Press the air-dry clay into a thick circle, square, or rectangle.
- Step 2: Gently push toy tools, bolts, or textured objects into the surface to create imprints.
- Step 3: Add a small hole near the top if the plaque will be hung, then let the clay dry completely.
- Step 4: Paint the raised and pressed details, allow the paint to dry, and add ribbon if desired.
12. Labor Day Job Matching Spinner

This colorful paper spinner helps children match workers with the tools they use. One layer shows pictures of different jobs, while the turning top layer reveals tools such as a stethoscope, hammer, whisk, or paintbrush. Kids will enjoy testing their knowledge and playing with the finished interactive craft.
Materials Needed
- Two paper plates
- Markers or crayons
- Child-safe scissors
- Paper fastener
- Pencil
How to make it
- Step 1: Divide the bottom paper plate into sections and draw a different community worker in each one.
- Step 2: Draw the matching tool beside each worker or in a second ring around the plate.
- Step 3: Cut a small viewing window from the top plate and decorate it with a Labor Day title.
- Step 4: Join the plates in the center with a paper fastener so the top plate can spin.
13. Handprint Work Glove Art

This bright artwork turns a child’s handprint into a pair of colorful work gloves. Kids can add stitched lines, cuffs, tools, and a thank-you message around the prints. The project is easy for young children and creates a sweet Labor Day keepsake for parents, teachers, or classroom displays.
Materials Needed
- White cardstock
- Washable paint
- Paintbrush
- Markers
- Colored paper
How to make it
- Step 1: Brush washable paint across the child’s hand and press it firmly onto the cardstock.
- Step 2: Repeat with the other hand, placing the prints side by side like a pair of gloves.
- Step 3: Add paper cuffs and draw stitch lines, tools, stars, or worker symbols around the prints.
- Step 4: Write a message such as “Helping Hands Make a Difference” and let the artwork dry.
14. Woven Paper Picnic Basket

This small paper basket is made from interlaced strips in warm picnic colors or red, white, and blue. Kids will enjoy weaving the strips over and under to create a simple pattern. The finished basket can hold paper food, crayons, wrapped snacks, or small Labor Day party favors.
Materials Needed
- Colored construction paper
- Child-safe scissors
- Glue stick
- Cardstock strip for the handle
- Stickers, optional
How to make it
- Step 1: Fold a sheet of paper in half and cut evenly spaced slits from the folded edge without cutting through the outer border.
- Step 2: Open the paper and weave narrow paper strips over and under the slits.
- Step 3: Glue the loose ends, then fold and secure the sides to create a shallow basket shape.
- Step 4: Attach a cardstock handle and decorate the basket with stars, picnic foods, or stickers.
15. Community Helper Puzzle Pieces
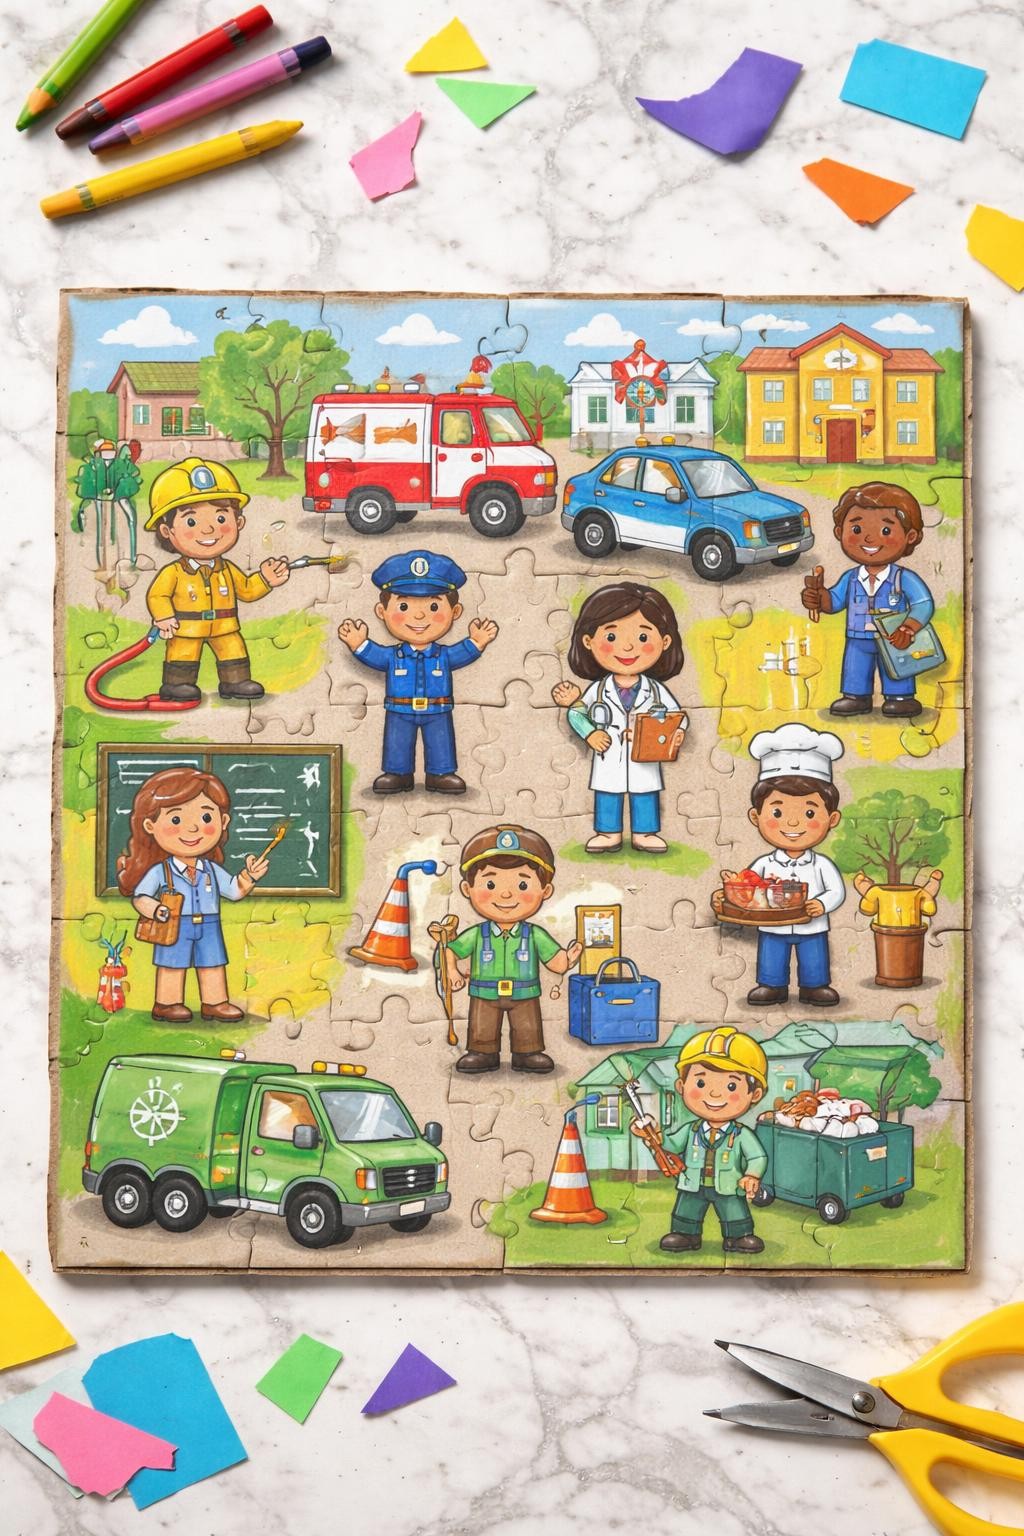
This handmade puzzle is made from a cardboard picture showing several community helpers working together. Kids will enjoy drawing the scene, cutting it into large pieces, and putting it back together. The activity combines art, problem-solving, and a simple lesson about how different jobs support a community.
Materials Needed
- Thin cardboard
- Markers or crayons
- Pencil
- Child-safe scissors
- Clear tape, optional
How to make it
- Step 1: Draw a large community scene on the cardboard with several workers, vehicles, and buildings.
- Step 2: Color the picture and add a Labor Day message across the top or bottom.
- Step 3: Turn the cardboard over and draw six to ten large puzzle-piece shapes.
- Step 4: Cut along the lines, mix up the pieces, and challenge children to rebuild the picture.