



In This Article Show
Fall is one of the most productive times to work in the garden. The cooler weather makes outdoor jobs more comfortable, the soil often stays workable, and many plants experience less stress than they would during the heat of summer. A few well-chosen projects can give you fresh harvests now while preparing your beds, containers, and perennial plants for the next growing season.
The best fall garden ideas are not only decorative. They should help protect your soil, reduce spring chores, support wildlife, and keep useful plants growing for as long as possible.
From planting cold-tolerant vegetables to making free leaf mold, these projects can turn the quieter gardening season into one of the most valuable times of the year.
1. Plant a Cut-and-Come-Again Salad Bed
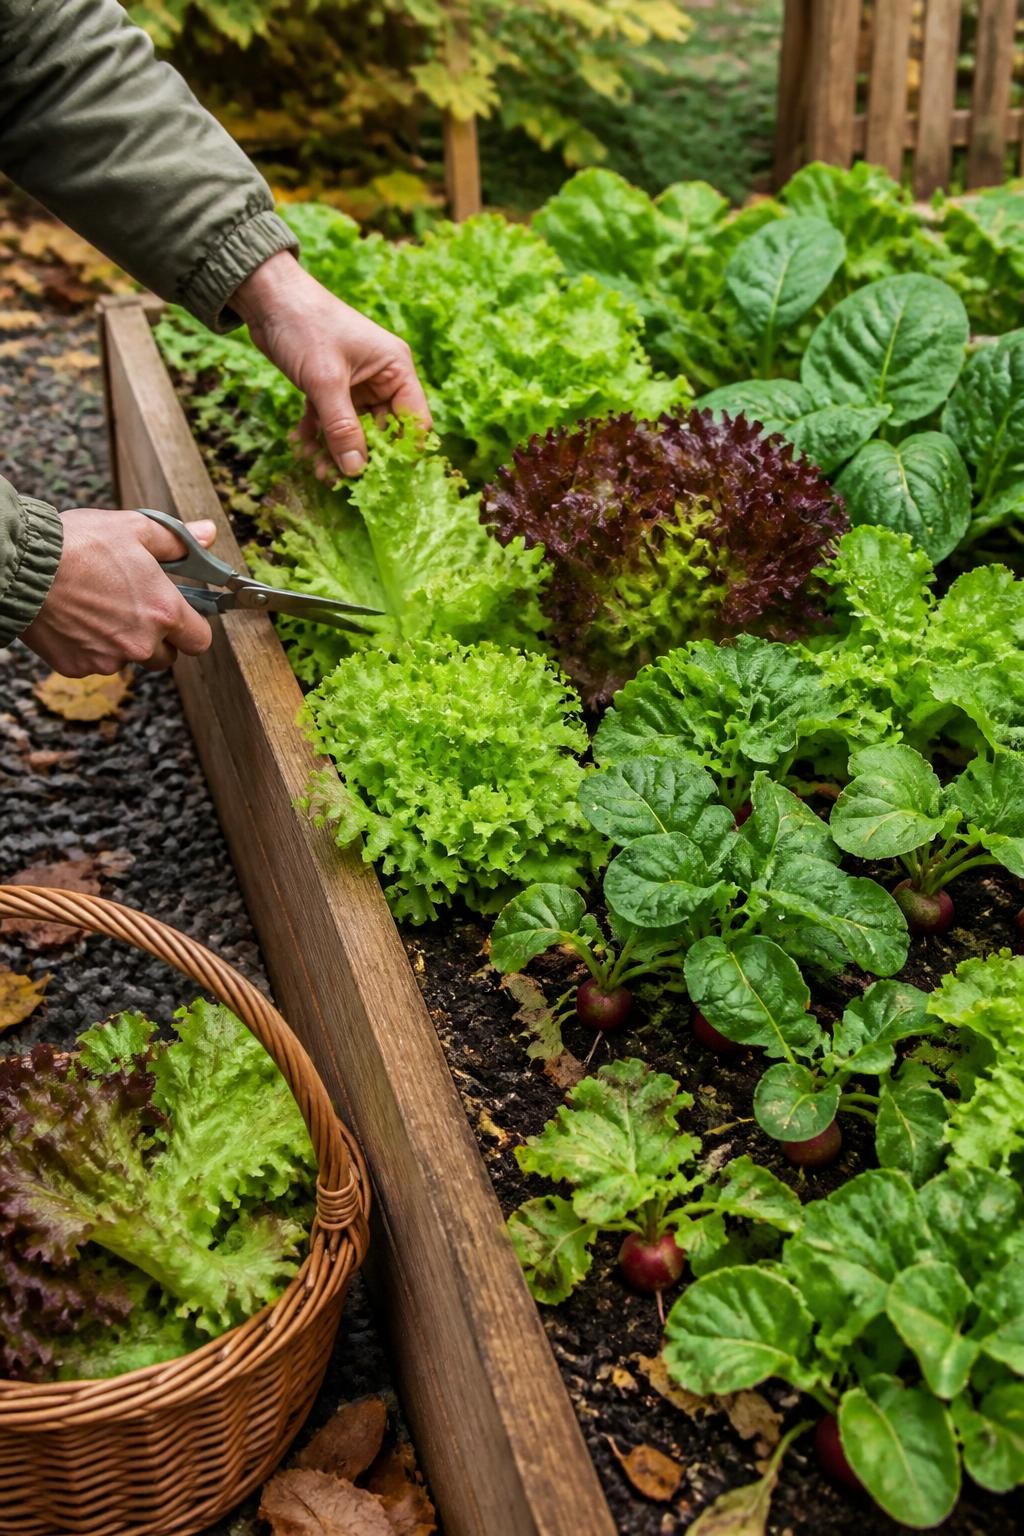
Turn an empty summer bed into a steady source of fresh salad greens. Lettuce, spinach, arugula, baby kale, mustard greens, and radishes all prefer cooler temperatures and can continue producing through mild autumn weather. Sow small sections every seven to ten days instead of planting the entire bed at once. This staggered approach gives you several harvests rather than one large crop that matures at the same time.
Harvest the older outer leaves while leaving the center of each plant intact. The plants will continue forming new growth until temperatures become too cold. Gardeners in colder regions can cover the bed with frost cloth or a low tunnel at night, while those in warmer climates may be able to grow salad greens throughout winter.
2. Sow a Cover Crop in Empty Garden Beds
Bare soil can lose nutrients, develop weeds, and become compacted during months of heavy rain or winter weather. Cover crops such as crimson clover, winter rye, oats, field peas, and hairy vetch protect the soil while adding organic material. Choose a crop that matches your climate and the amount of time available before the ground freezes.
Rake the bed smooth, scatter the seed evenly, and press it firmly into the soil so birds and wind are less likely to carry it away. Some cover crops will die naturally after a hard freeze, leaving a protective layer behind. Winter-hardy varieties can be cut down several weeks before spring planting and left on the surface as mulch.
3. Make a Layered Spring Bulb Container
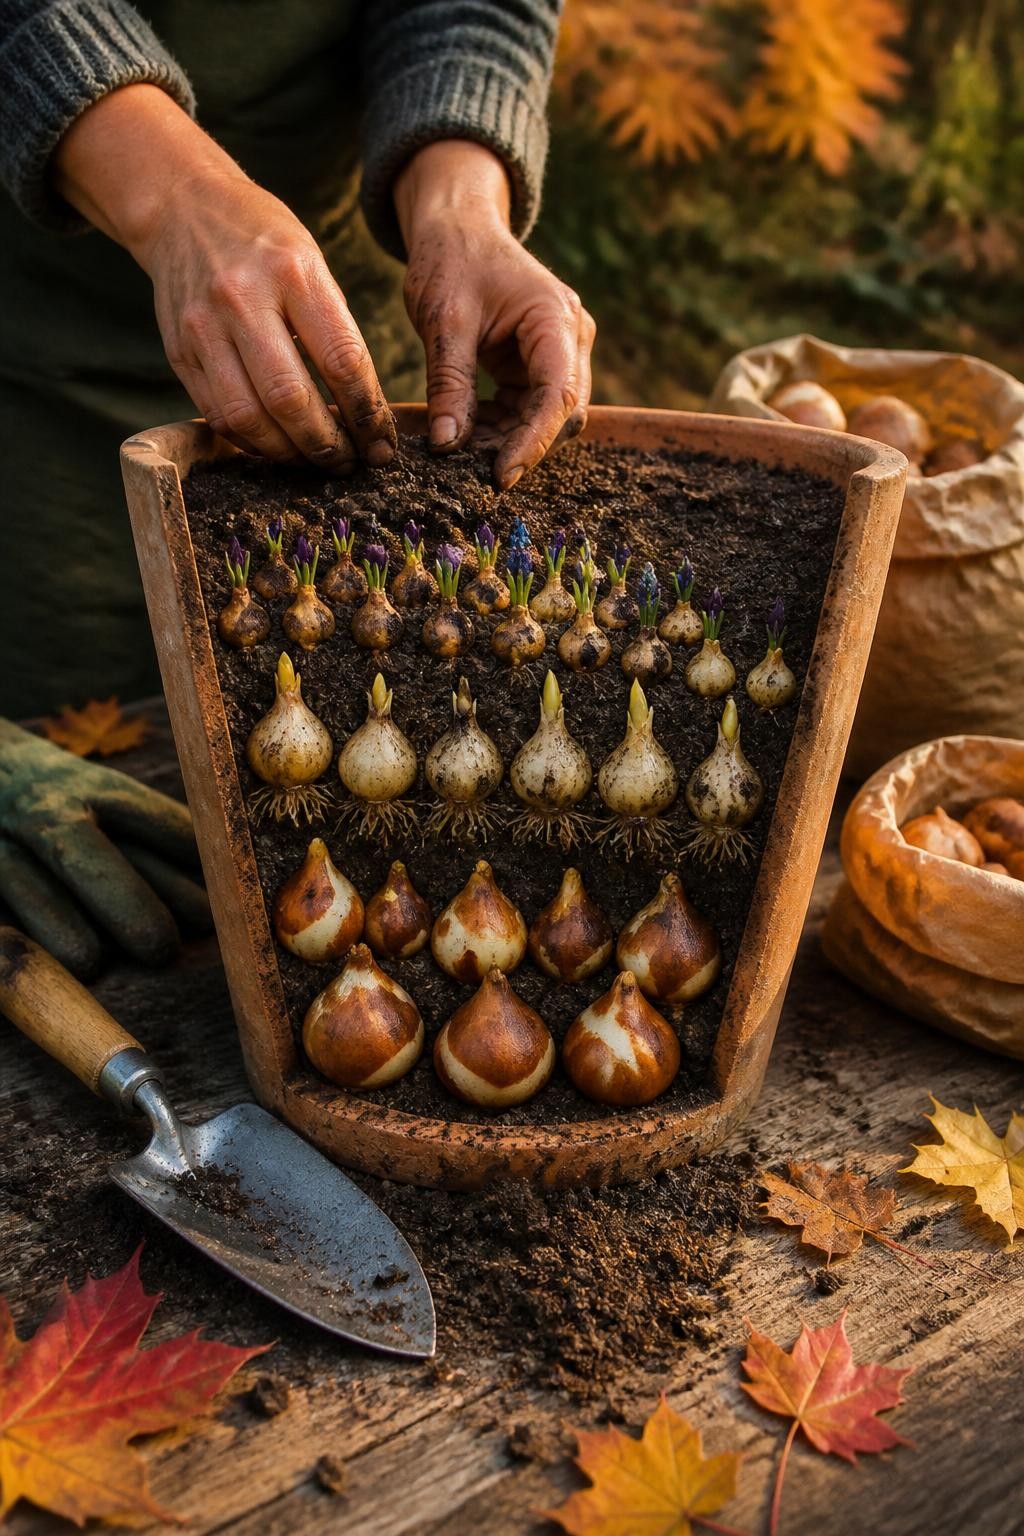
A layered bulb container lets you fit several waves of spring flowers into one pot. Start with a deep, frost-resistant container that has drainage holes. Place large late-blooming bulbs, such as tulips, near the bottom. Add a layer of soil, followed by daffodils or hyacinths, then finish with smaller early-flowering bulbs such as crocuses, snowdrops, or grape hyacinths.
The bulbs should not sit directly on top of one another, so stagger their positions as you build the layers. Water the finished container thoroughly and keep it in a sheltered outdoor location where it will receive winter chill without remaining waterlogged. In spring, the smallest bulbs appear first, followed by the middle and lower layers.
4. Build a Simple Leaf Mold Cage
Instead of bagging every fallen leaf, collect some in a basic wire cage and allow them to break down into leaf mold. Leaf mold is different from regular compost because it is made mainly from decomposed leaves. It improves soil structure, helps beds retain moisture, and makes an excellent mulch for woodland plants, vegetables, and containers.
Create a round cage using wire fencing or hardware cloth secured with garden stakes. Shred the leaves with a lawn mower when possible, place them inside, and moisten them if they are dry. The leaves may take one to two years to break down fully, but shredded leaves decompose more quickly than whole ones. Avoid adding diseased leaves or thick layers of black walnut leaves.
5. Plant Garlic and Shallots for Next Summer
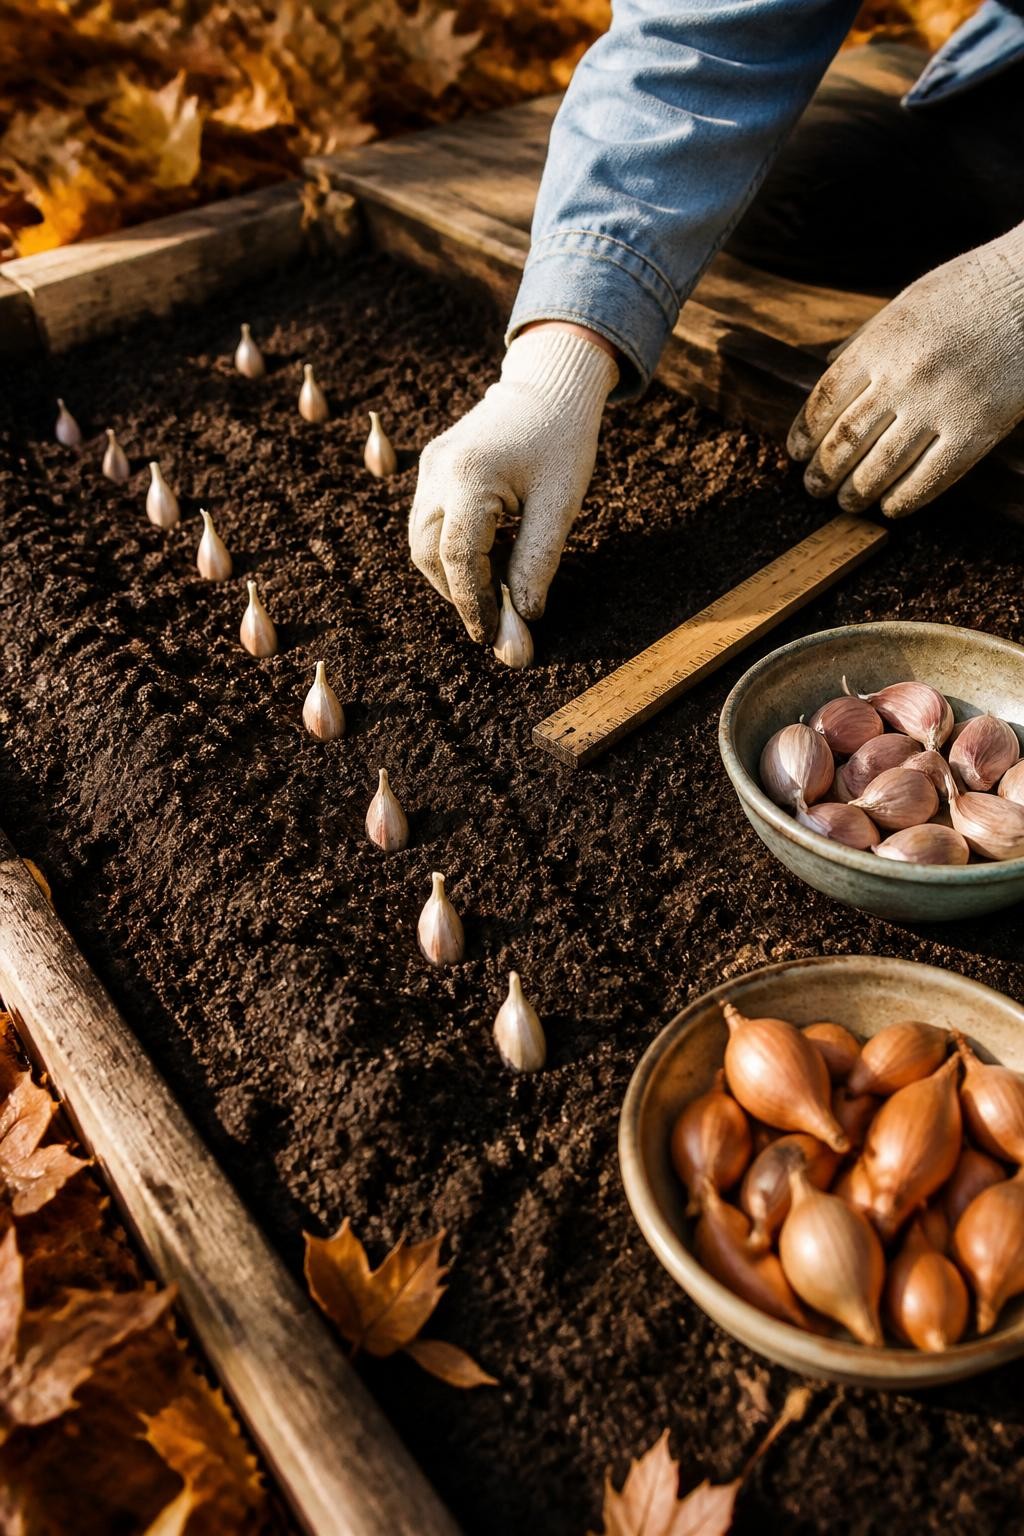
Garlic and many shallot varieties need a long cool growing period, making fall the best planting time in many regions. Separate healthy garlic bulbs into individual cloves shortly before planting. Place each clove with the pointed side facing upward, usually about two inches deep and four to six inches apart. Shallot sets can be planted in a similar way, with the top sitting close to the soil surface.
Cover the bed with several inches of clean straw, shredded leaves, or another loose mulch after the ground begins to cool. The mulch limits weed growth and protects the cloves from repeated freezing and thawing. Small shoots may appear before winter, but this is usually normal. Growth will resume when the soil warms in spring.
6. Organize a Ready-to-Use Frost Protection Station
Cold nights are easier to manage when all your frost supplies are stored in one accessible place. Gather frost cloth, old bedsheets, plant clips, stakes, bricks, buckets, and lightweight garden hoops. Keep them dry in a deck box, shed, or labeled storage container near the garden instead of searching for materials after a frost warning has already been issued.
Support fabric above the plants whenever possible rather than allowing it to press heavily against the leaves. Secure the edges at ground level to trap warmth rising from the soil. Remove or open the coverings the following morning once temperatures rise, especially on sunny days. Plastic should not touch foliage because it can transfer cold directly to the leaves.
7. Leave a Seedhead Border for Birds and Pollinators
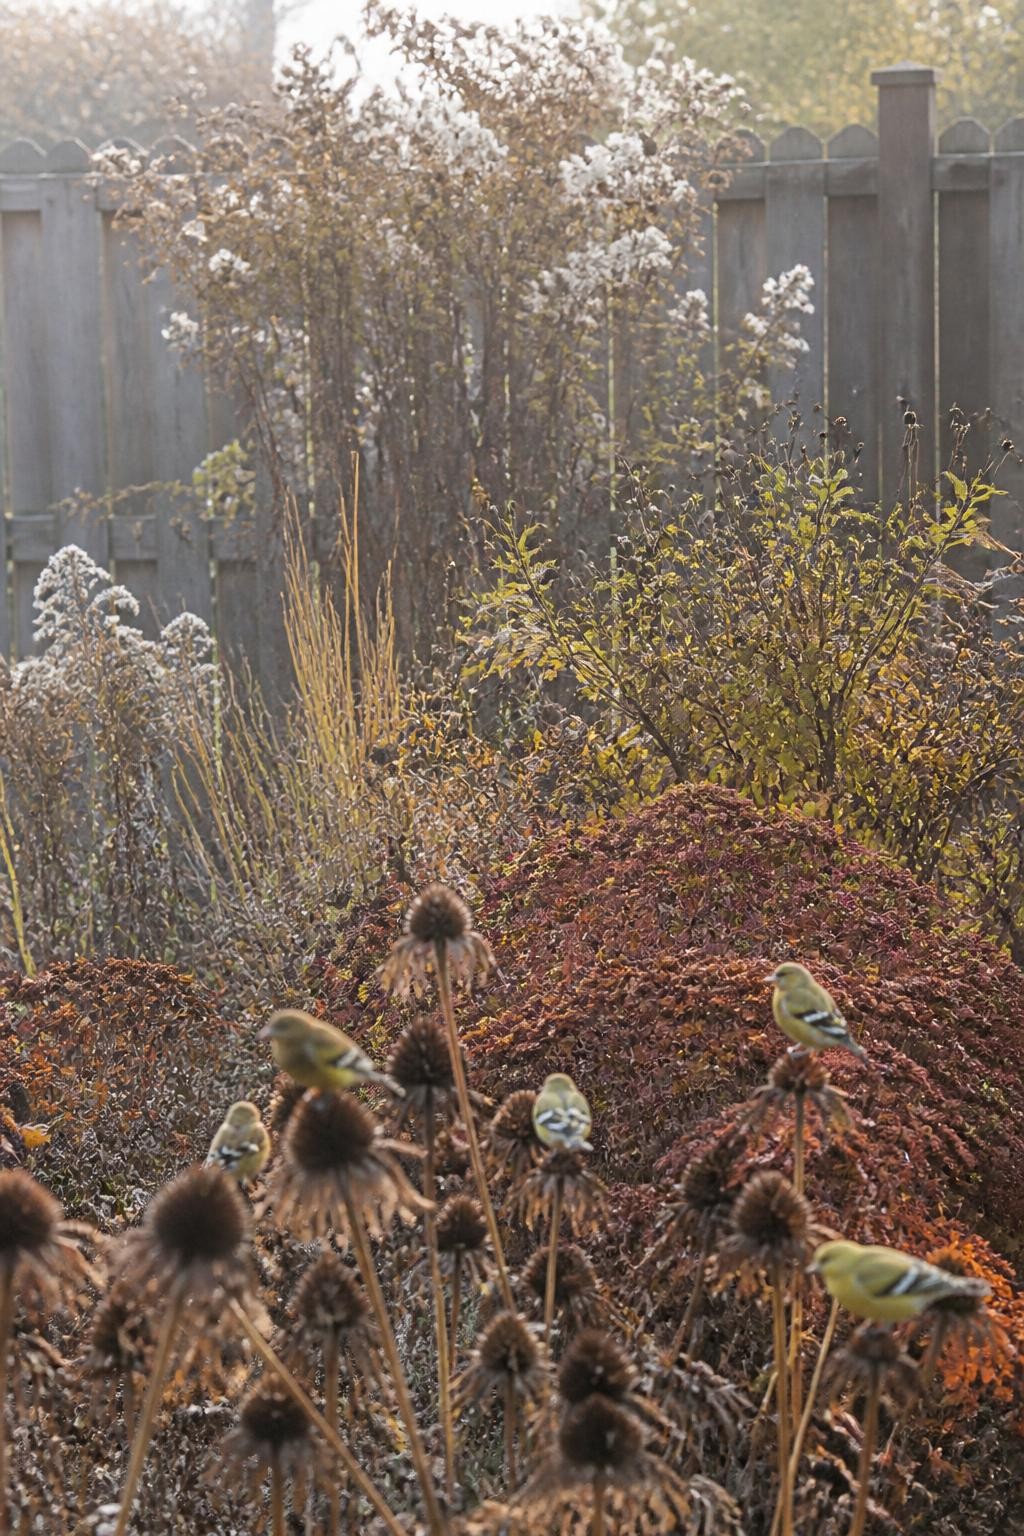
Not every perennial needs to be cut down in fall. Coneflowers, black-eyed Susans, sunflowers, asters, ornamental grasses, and many native plants hold seeds that birds can eat during colder months. Their hollow stems may also shelter beneficial insects, while the dried shapes give the garden structure after most flowers have faded.
Remove plants that are diseased, badly damaged, or likely to spread unwanted seeds, but leave a selected section standing until late winter or early spring. Place the wildlife border where it will not block paths or fall across delicate plants. A controlled area of seedheads looks intentional while providing valuable food and shelter.
8. Deep-Water Newly Planted Trees and Evergreens
New trees, shrubs, and evergreens can enter winter under stress when autumn rainfall is limited. Evergreens are especially vulnerable because they continue losing moisture through their leaves or needles even when the soil is cold. Water deeply every one to two weeks until the ground freezes, adjusting the schedule when substantial rain occurs.
Apply water slowly around the root zone rather than directly against the trunk. A soaker hose or slowly running garden hose allows moisture to penetrate deeply without washing soil away. Add a two- to three-inch layer of mulch over the root area, but leave a clear gap around the trunk to prevent rot and discourage pests.
9. Refresh Vegetable Beds with Compost and Mulch
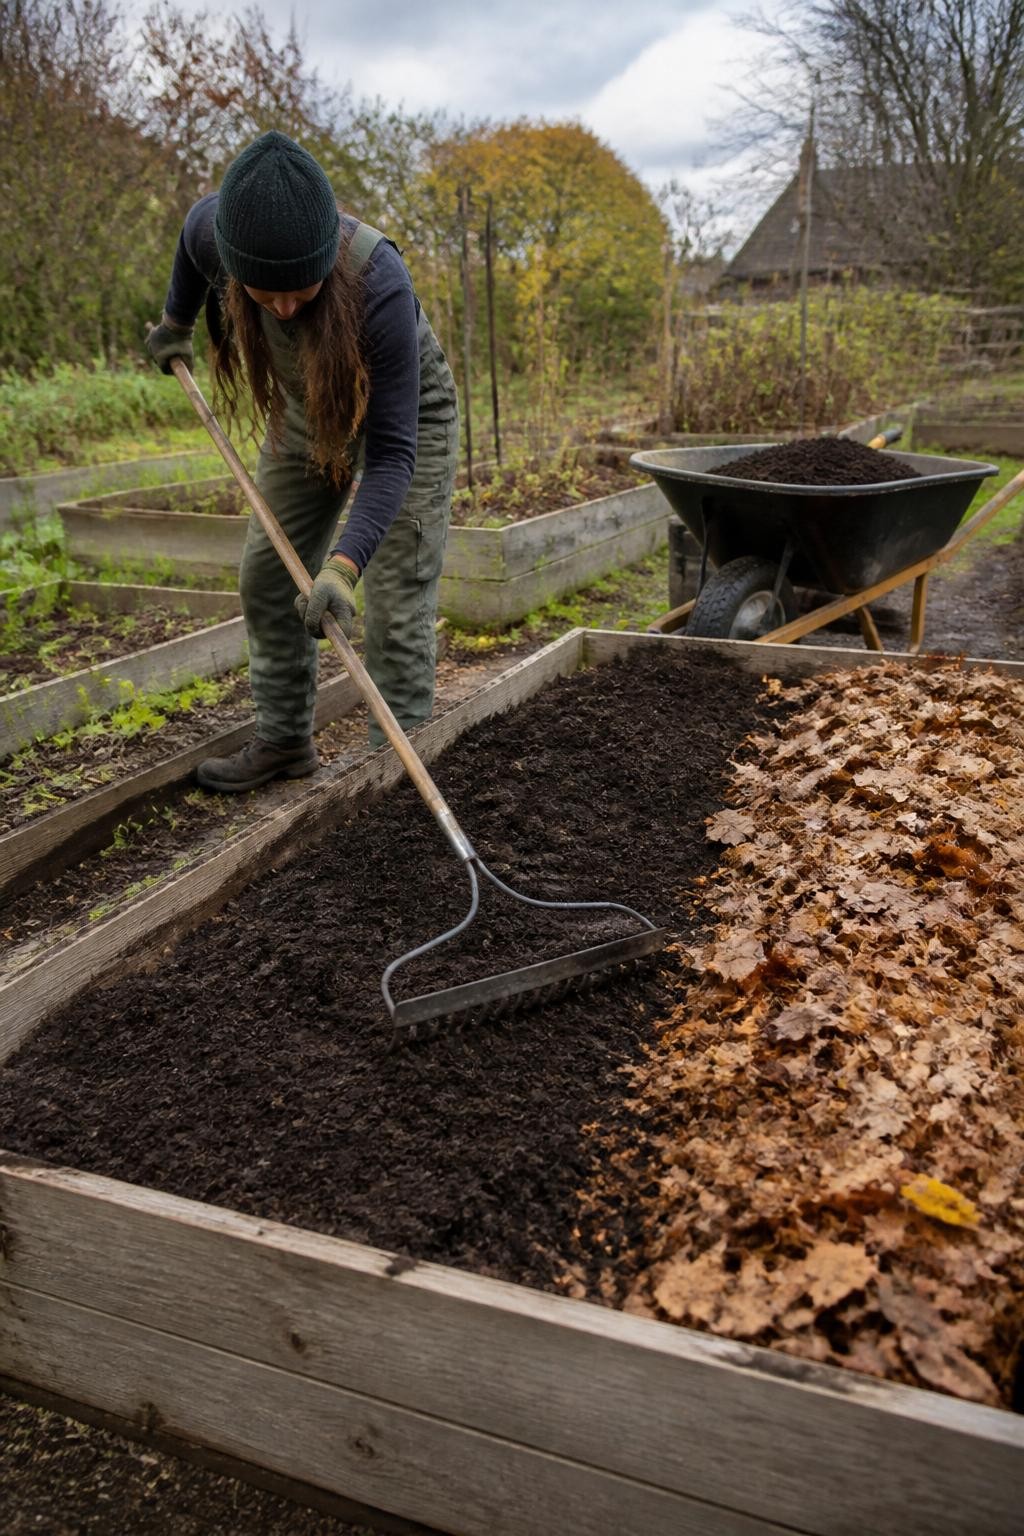
Once summer crops are removed, spread a layer of finished compost over the bed. You do not need to dig it deeply into the soil. Worms, rain, and natural soil activity will gradually mix the organic material into the upper layers. Leaving the soil mostly undisturbed also protects its existing structure and beneficial organisms.
Finish with shredded leaves, clean straw, or another organic mulch to prevent erosion and reduce winter weeds. Move the mulch aside when planting in spring. Avoid placing thick mats of whole leaves over heavy clay soil because they can block water and air. Shredding the leaves helps them settle evenly and decompose faster.
10. Build a Low Hoop Tunnel Over One Bed
A low tunnel can extend the harvest of spinach, kale, lettuce, parsley, carrots, and other cold-tolerant crops. Insert flexible PVC pipes, metal hoops, or sturdy wire arches into the soil along both sides of a narrow bed. Cover the frame with frost cloth for light protection or greenhouse plastic when greater warmth is needed.
The covering should be secured while remaining easy to lift for watering, harvesting, and ventilation. Even on cold days, a plastic-covered tunnel can become surprisingly hot in direct sunshine. Open the ends or lift one side when temperatures rise. Use clips, sandbags, boards, or buried edges to prevent strong winds from pulling the cover loose.
11. Divide Crowded Perennials
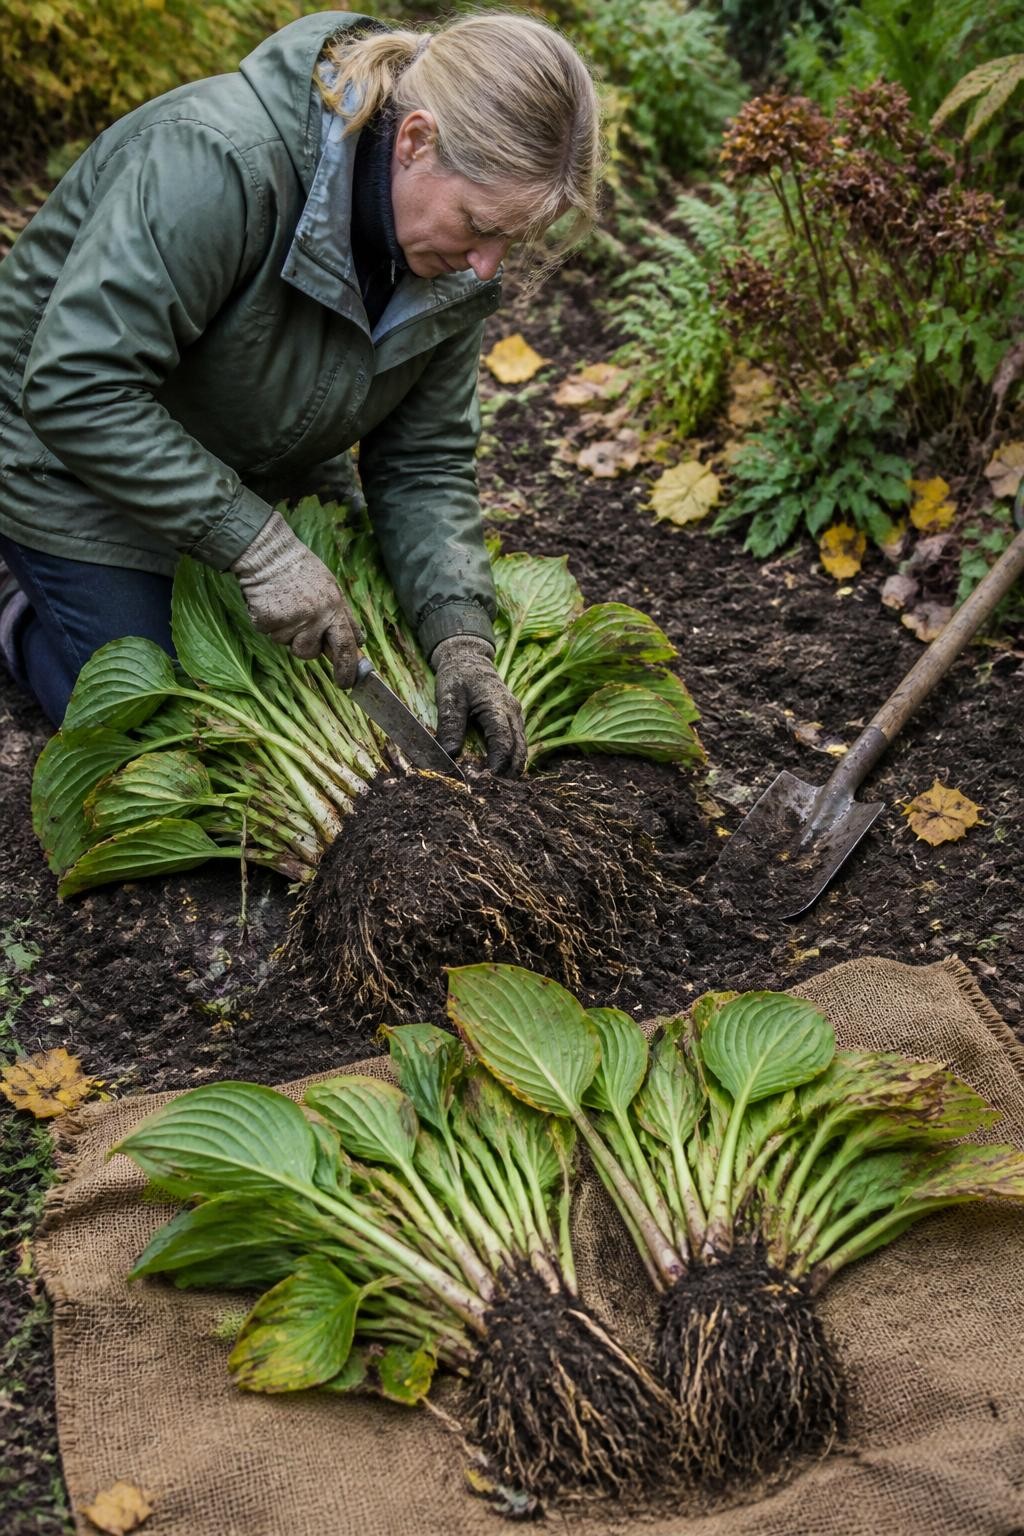
Many established perennials can be divided during cool fall weather, especially plants that have developed bare centers, produced fewer flowers, or outgrown their space. Hostas, daylilies, irises, peonies, and many ornamental grasses respond well when divided at the correct time. Water the plant a day before lifting it so the soil is easier to work.
Dig around the root ball, lift it carefully, and separate it into healthy sections with roots and growing points attached. Replant the divisions promptly at the same depth they were growing before. Water them thoroughly and add a light mulch. Complete the work several weeks before the ground freezes so the roots can begin settling into their new positions.
12. Create a Cold-Tolerant Herb Container
Parsley, chives, thyme, sage, rosemary, and certain varieties of mint can remain useful well into the cooler season. Combine herbs with similar moisture needs in a container placed close to the kitchen door. This makes harvesting easier when the weather is wet or chilly and prevents delicate herbs from being forgotten in a distant garden bed.
Choose a pot with good drainage and avoid allowing the soil to remain constantly wet. Rosemary and thyme prefer drier conditions, while parsley and chives appreciate more regular moisture, so separate containers may work better. Move tender herbs into a bright indoor area before severe frost, but inspect them carefully for insects first.
13. Design a Winter-Interest Porch Container
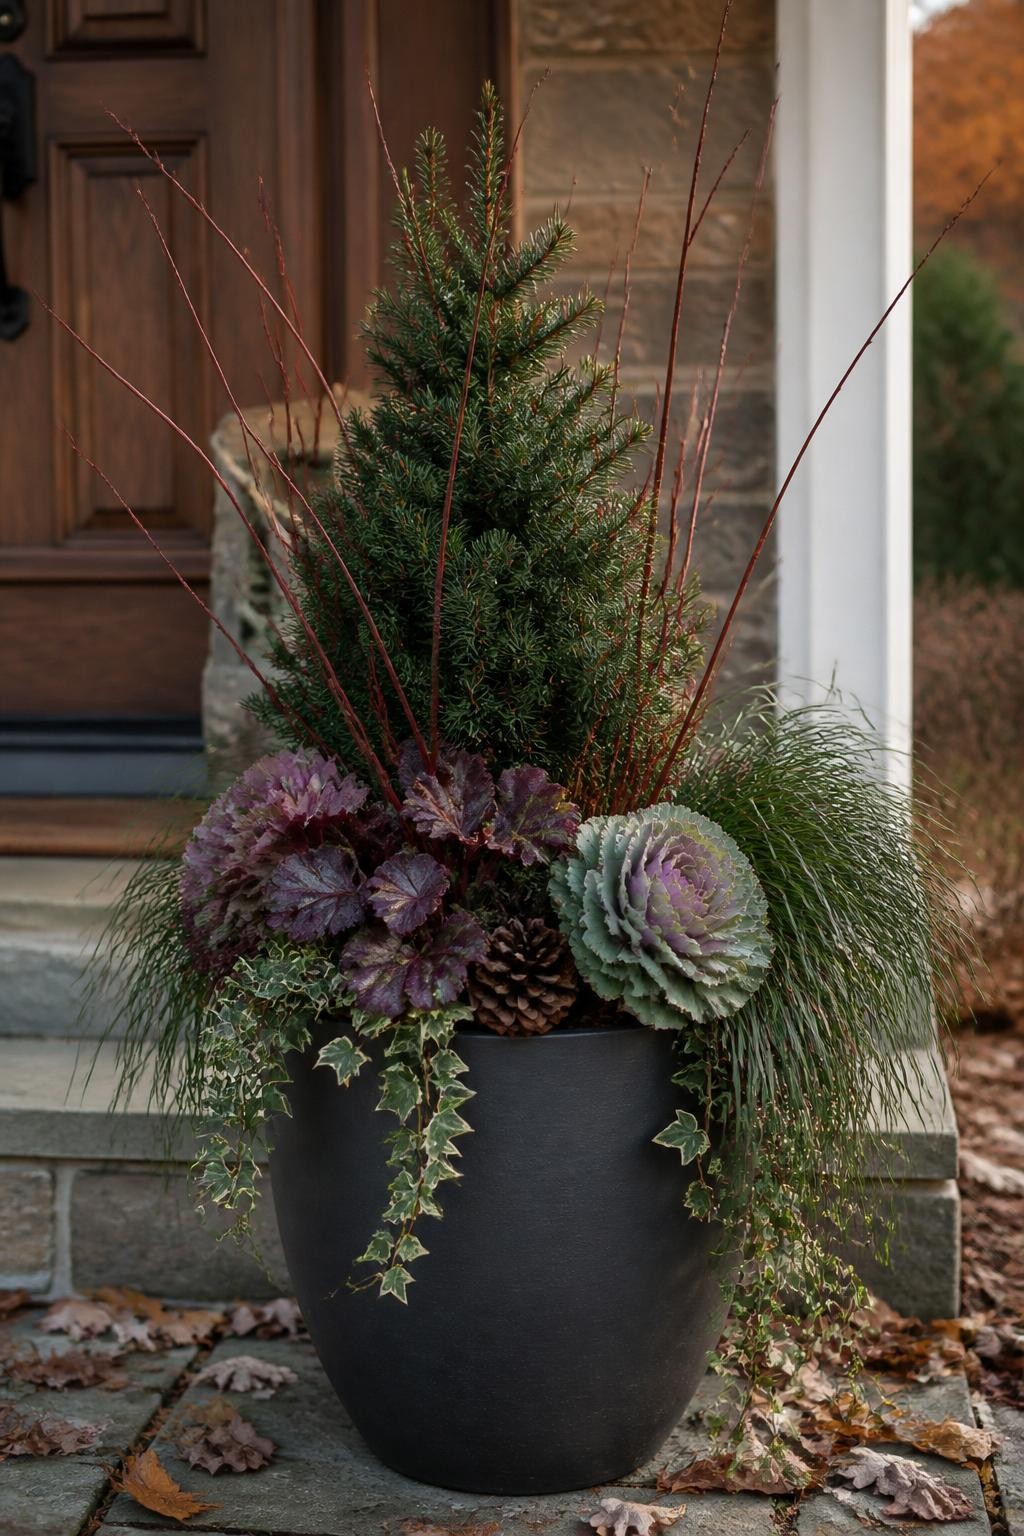
Replace exhausted summer annuals with a container that can remain attractive through colder weather. Start with a compact evergreen, small ornamental grass, or upright bundle of red dogwood stems for height. Add hardy foliage plants such as heuchera, ivy, sedge, ornamental cabbage, or small conifers, depending on what survives winter in your area.
Use fewer plant varieties than you would in a summer display and focus on contrasting shapes and textures. Water the container before the soil freezes and continue checking it during dry weather. In regions with severe winters, choose a container made from frost-resistant material and avoid thin terracotta pots that may crack after repeated freezing.
14. Make a Garden Map Before Plants Disappear
By late winter, it can be difficult to remember where dormant perennials, bulbs, and self-seeded flowers are located. Draw a simple map of each bed while the plants are still visible. Record plant names, problem areas, empty spaces, sunlight patterns, and anything that needs to be moved, divided, or replaced next year.
Take wide photographs from several fixed positions and save them in a folder labeled with the date and garden area. Add durable markers near plants that emerge late in spring so they are not accidentally dug up. This small planning job can prevent unnecessary plant purchases and make spring gardening much more organized.