

In This Article Show
Some days, kids want to make something that feels “wow” without you needing a full craft store in your pantry. Farm-themed projects are perfect for that—warm, homey, and full of texture. This list is packed with creative, beginner-friendly ideas that look impressive but are secretly simple.
Most use recyclables or basic supplies you already have, and each one has steps kids can actually follow.
Pick one, set out a tray of materials, and enjoy a calm, happy-making session.
1. Barn Door Shadow Box
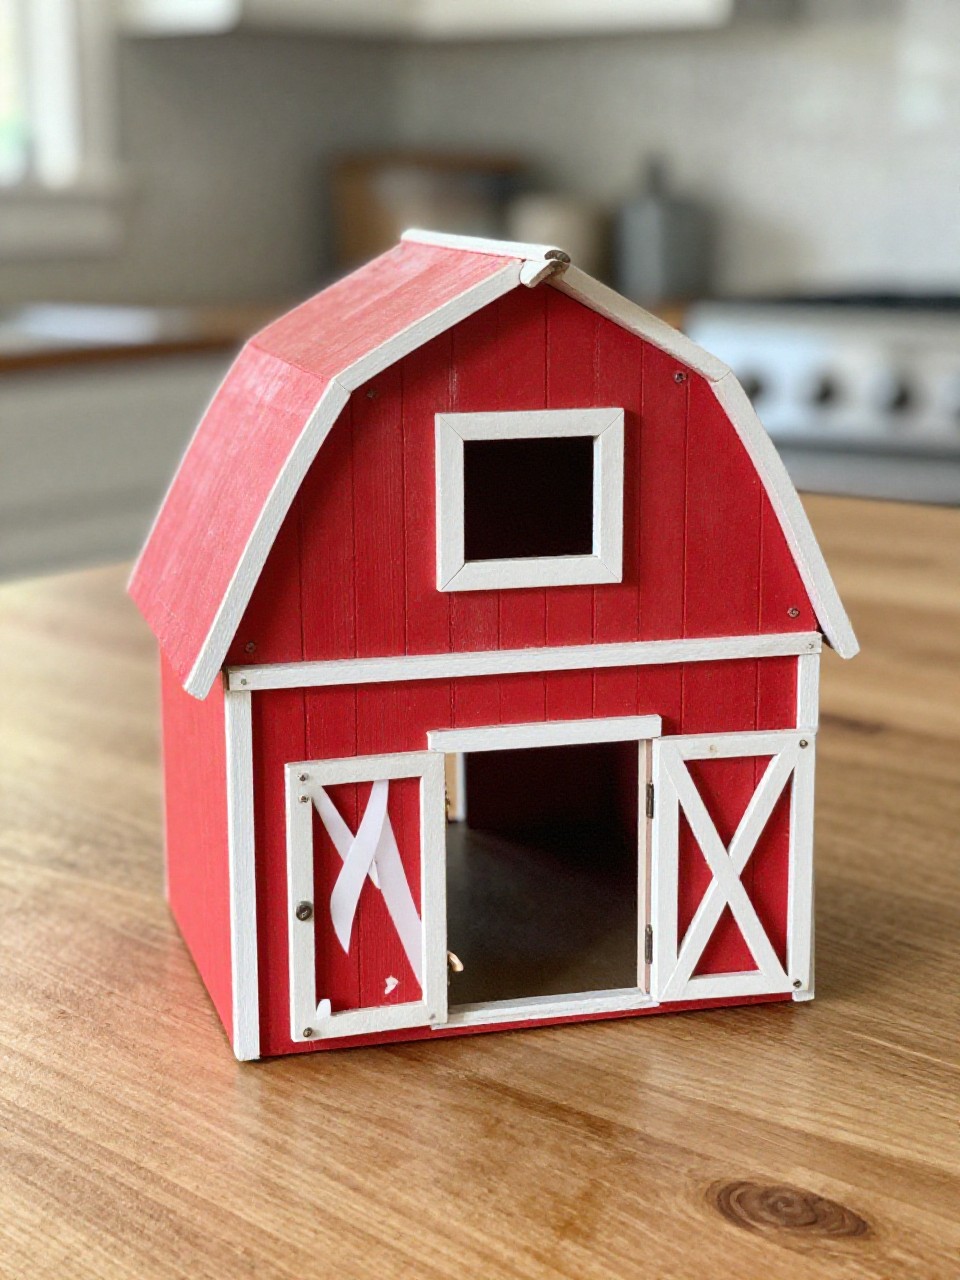
A mini “barn” with doors that open to reveal a tiny scene inside. It looks like a keepsake, but it’s built from a cereal box and paint. Kids love the peekaboo moment when they swing open the doors.
Materials Needed:
- Empty cereal box
- Red and white acrylic paint
- Craft knife or scissors
How to make it:
- Cut a window rectangle in the front of the cereal box and two door flaps that meet in the middle.
- Paint the box red and add white “X” barn beams with paint or marker.
- Decorate the inside with a simple sky (blue paper) and a paper animal.
- Close the doors and add a tiny paper latch so it opens like a real barn.
2. Cornfield Bubble Wrap Print
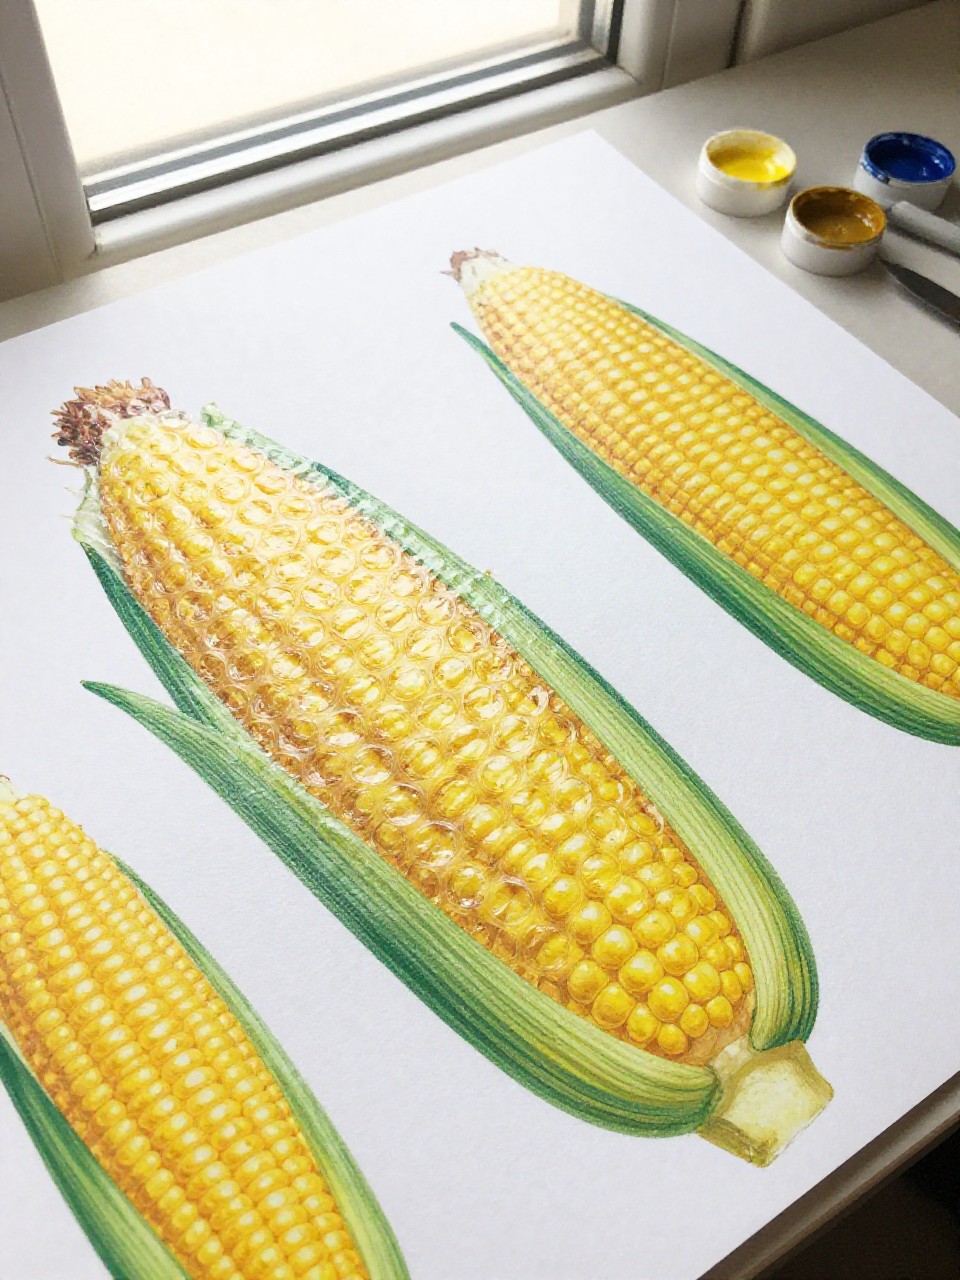
Turn bubble wrap into a cornfield stamp. The dotted texture instantly looks like rows of kernels, and the reveal is so satisfying.
Materials Needed:
- Bubble wrap
- Yellow and green paint
- White cardstock
How to make it:
- Paint a rectangle of bubble wrap with yellow paint.
- Press it onto cardstock to print “corn cobs.”
- Use green paint and a brush or fingers to add husks and leaves.
- Let dry and outline details with a fine marker if you like.
3. Mud Pie Farm Bakery (Air-Dry Clay)
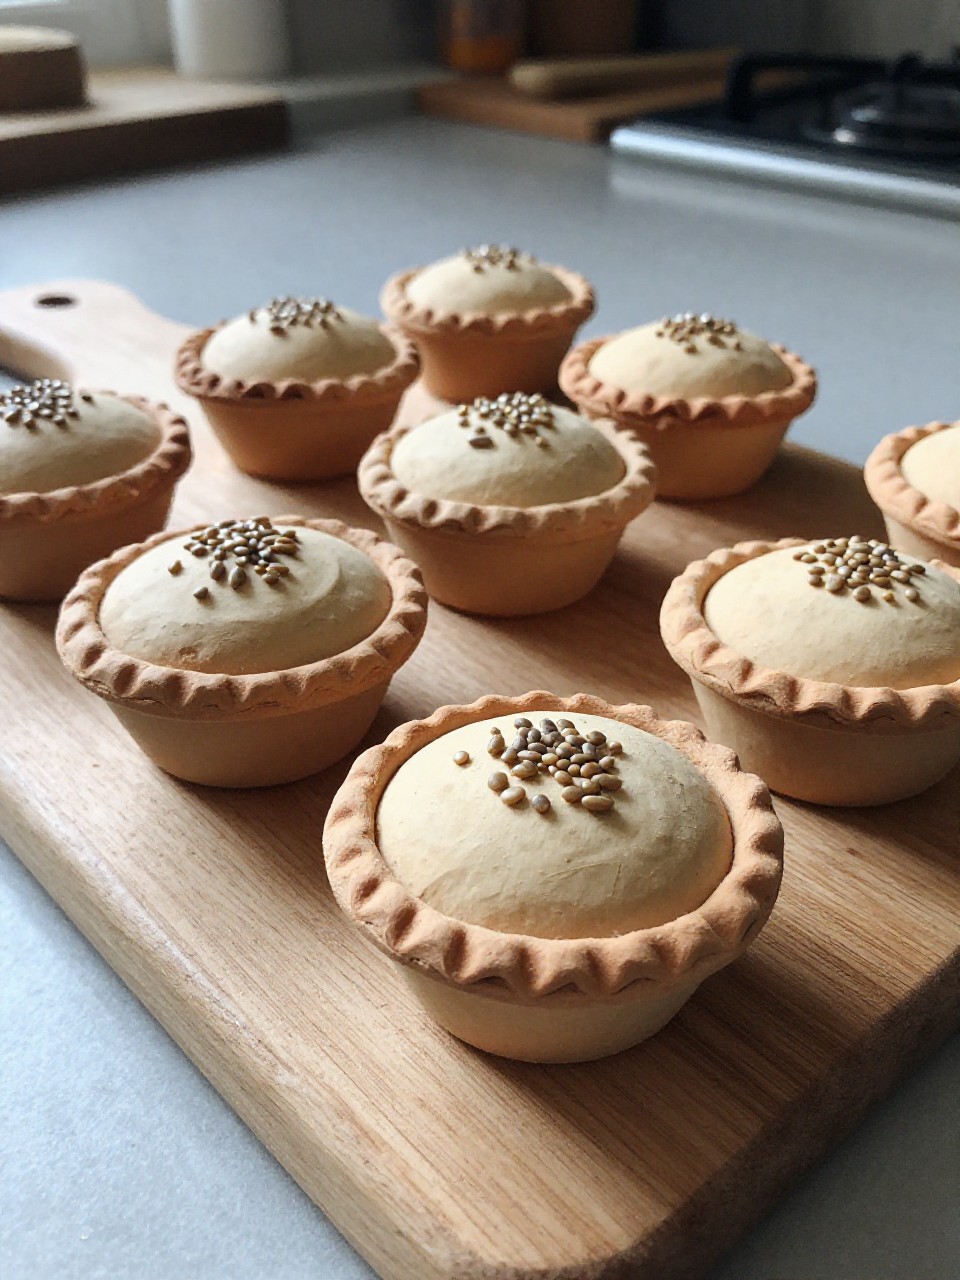
Make rustic “pies” with air-dry clay, then top with seed “berries.” They look like farmhouse decor but are easy enough for small hands.
Materials Needed:
- Air-dry clay
- Assorted seeds/beans
- Brown acrylic wash
How to make it:
- Roll a clay ball and press it into a shallow “pie” shape with a rim.
- Press seeds or beans on top like fruit.
- Use a toothpick to make a simple crisscross “lattice” texture.
- After drying, brush a thin brown wash to antique the look.
4. Sock Sheep Pom-Pom
This fluffy sheep uses a single sock and a homemade pom-pom. It’s squishy, adorable, and perfect for little shepherd play.
Materials Needed:
- White sock
- Yarn (white or cream)
- Black felt
How to make it:
- Wrap yarn around your hand 100–150 times; tie in the middle and trim to make a pom-pom.
- Stuff the toe of the sock with scrap fabric and tie off to form the head.
- Glue the pom-pom to the sock head as the body.
- Cut felt ears and face details; glue on.
5. Egg Carton Tractor Parade
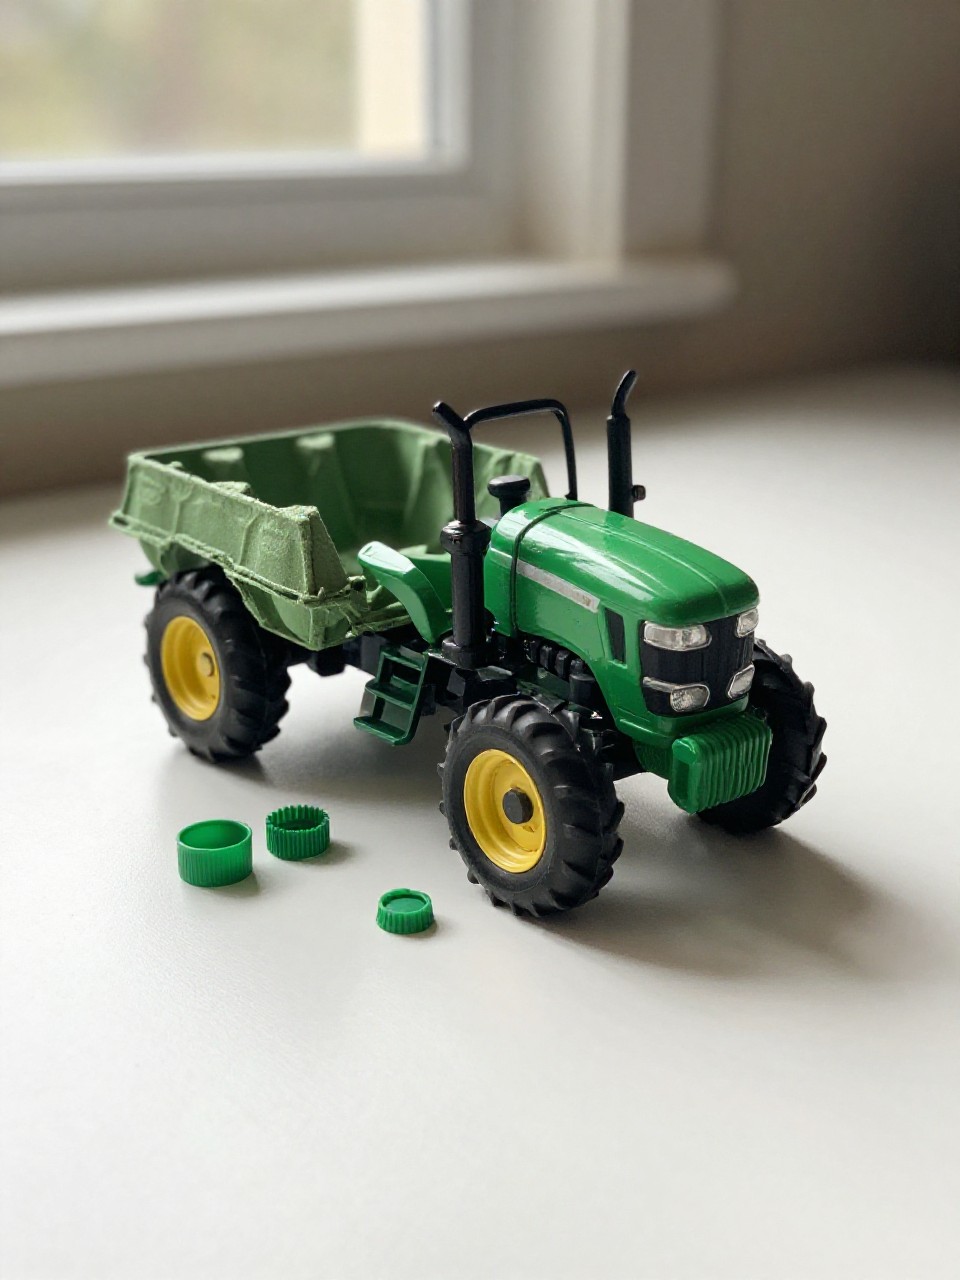
Create a mini tractor and trailer from an egg carton. The bumpy texture becomes rugged farm detail without any tricky cuts.
Materials Needed:
- Egg carton
- Bottle caps (wheels)
- Green paint
How to make it:
- Cut one egg cup for the tractor cab and a strip of four cups for the trailer.
- Paint everything green; let dry.
- Glue on bottle caps as wheels; add a straw “exhaust pipe.”
- Connect the cab and trailer with a string or a paper fastener.
6. Patchwork Fabric Barn Quilt
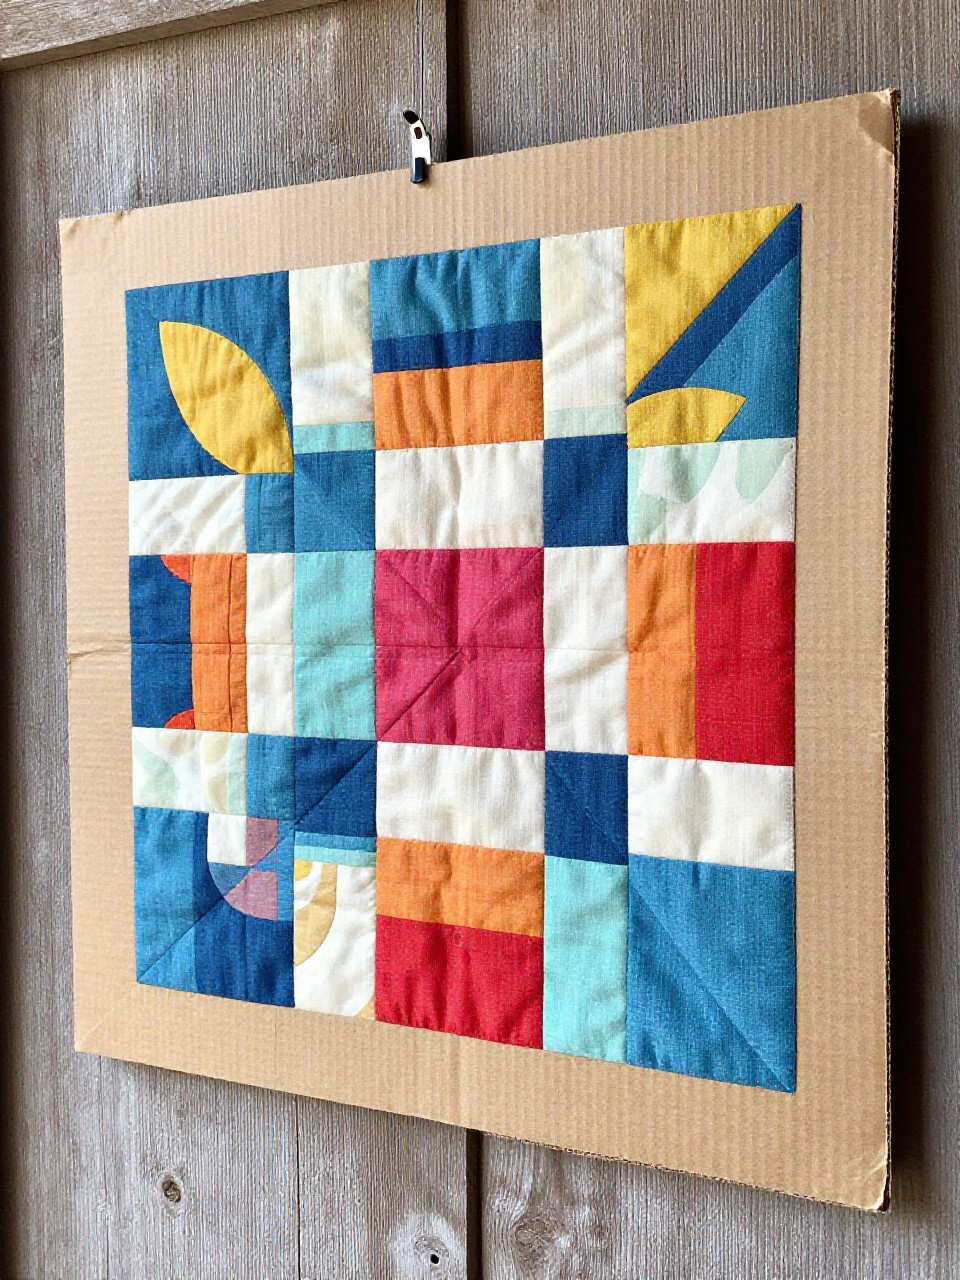
Make a no-sew “barn quilt” square using fabric scraps. The bold geometric look feels advanced, but it’s just cut-and-stick.
Materials Needed:
- Cardboard square
- Fabric scraps
- Glue stick
How to make it:
- Draw a simple grid on the cardboard (4×4 or triangles).
- Cut fabric pieces to fit and plan your color pattern.
- Glue fabric onto the grid, edge to edge.
- Add a hanging loop with a string and tape on the back.
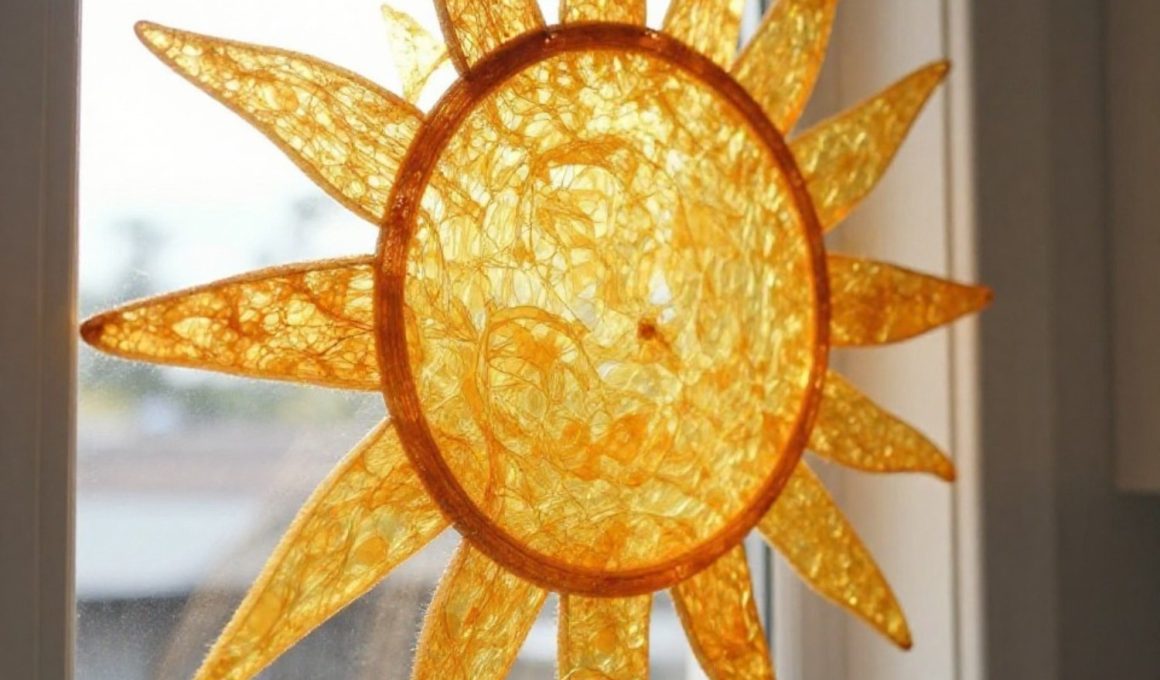
7. Harvest Sun Catchers
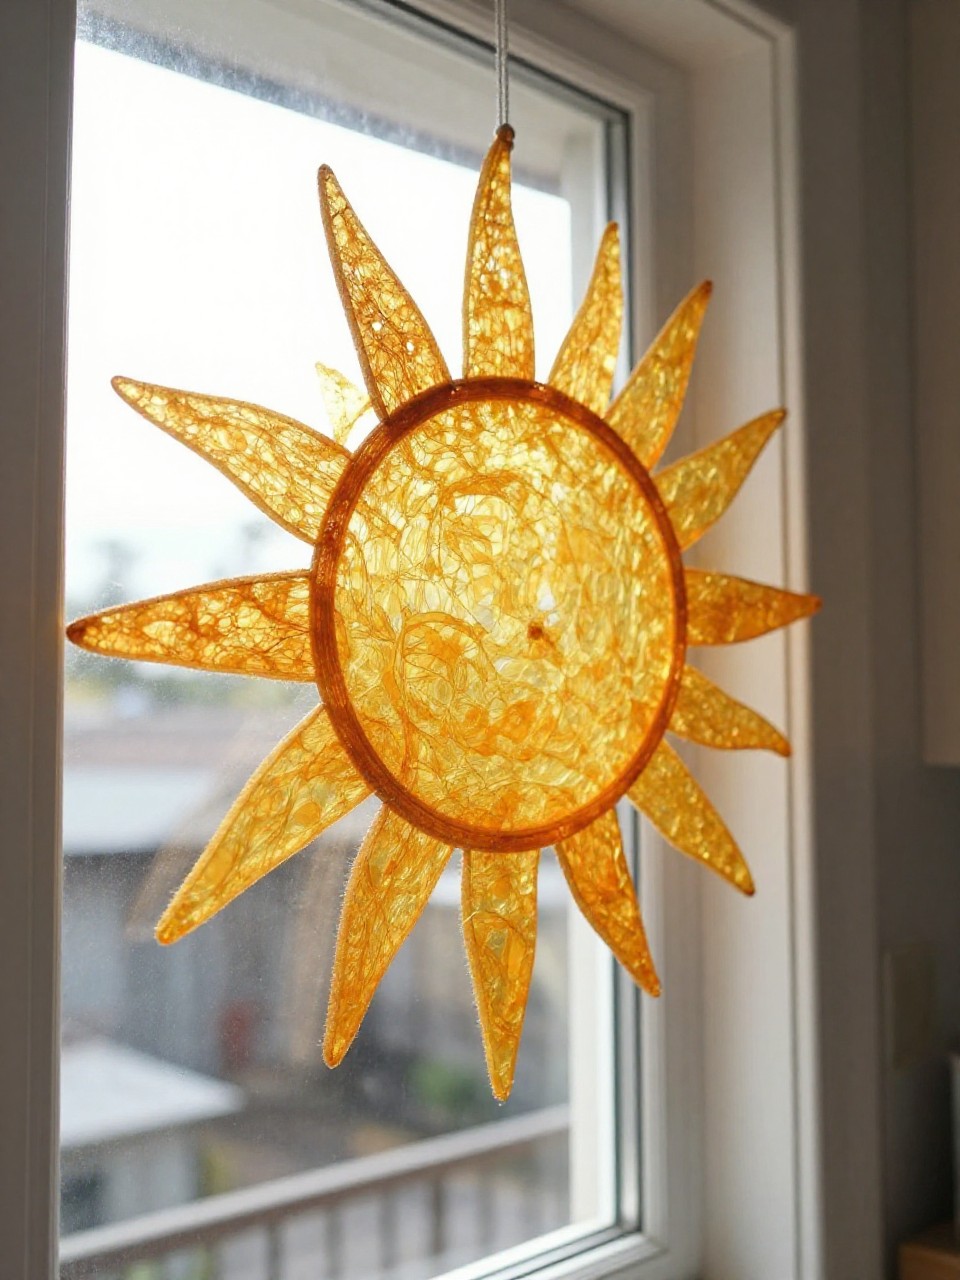
Look like stained glass using clear lids and tissue paper. When the sunlight hits, you’ll get warm, harvest colors.
Materials Needed:
- Clear plastic food lids
- Tissue paper bits
- Mod Podge or glue
How to make it:
- Brush a thin layer of glue on the lid.
- Press tissue paper in harvest tones (gold, orange, green).
- Seal with another glue layer; let dry clear.
- Punch a hole and hang with a string in a sunny window.
8. Felt Field Mouse Bookmarks
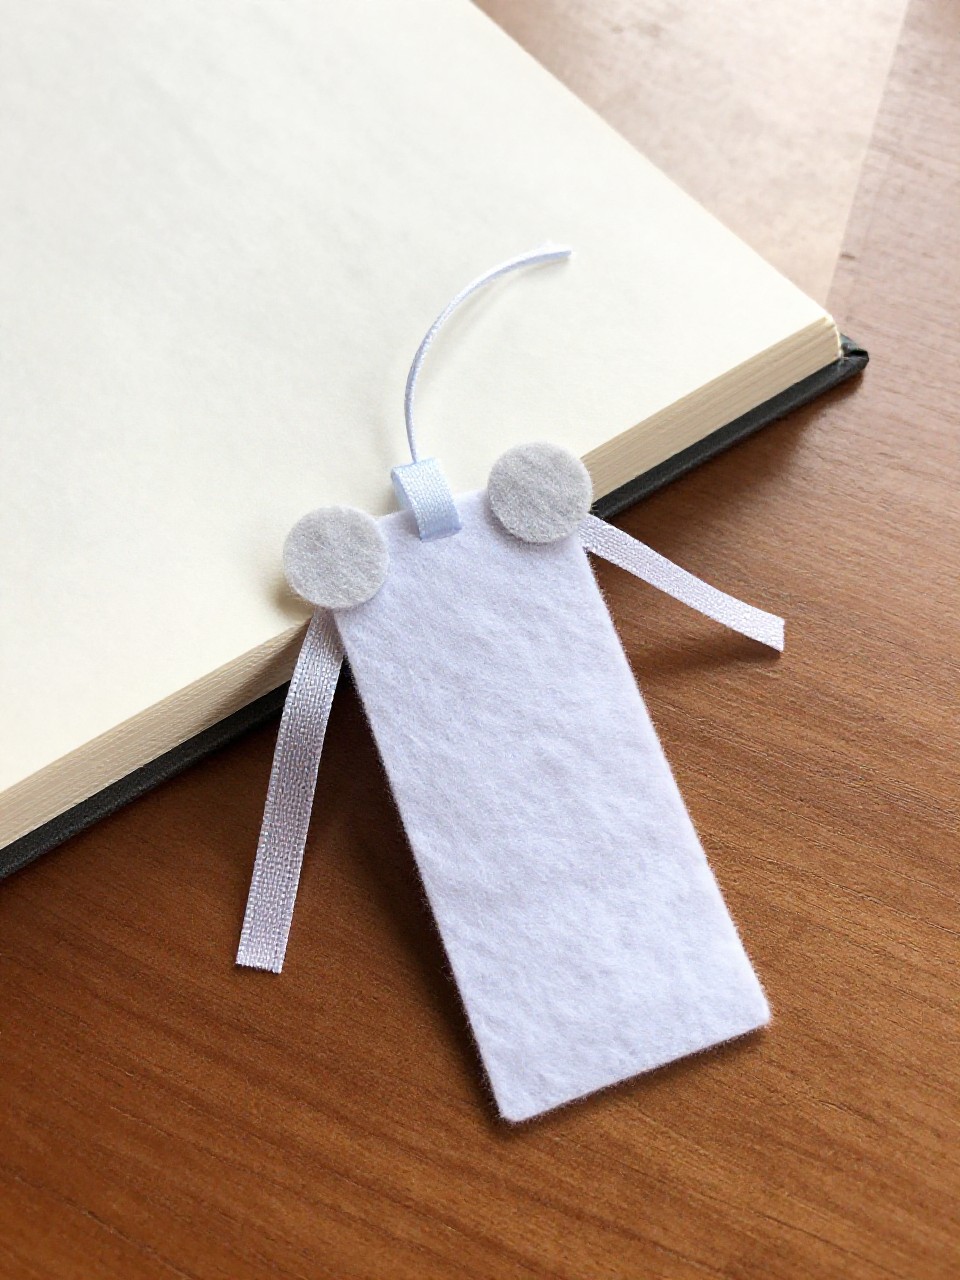
Slim, sweet mice that peek out of a book like they’re hiding in hay. This quick felt craft looks store-bought.
Materials Needed:
- Felt sheets (gray/brown)
- Ribbon
- Fabric glue
How to make it:
- Cut two simple mouse bodies (teardrop shapes) from felt.
- Sandwich a ribbon “tail” between them and glue edges.
- Add tiny felt ears and a nose dot.
- Press flat under a book to dry.
9. Painted Hay Bale Sponges
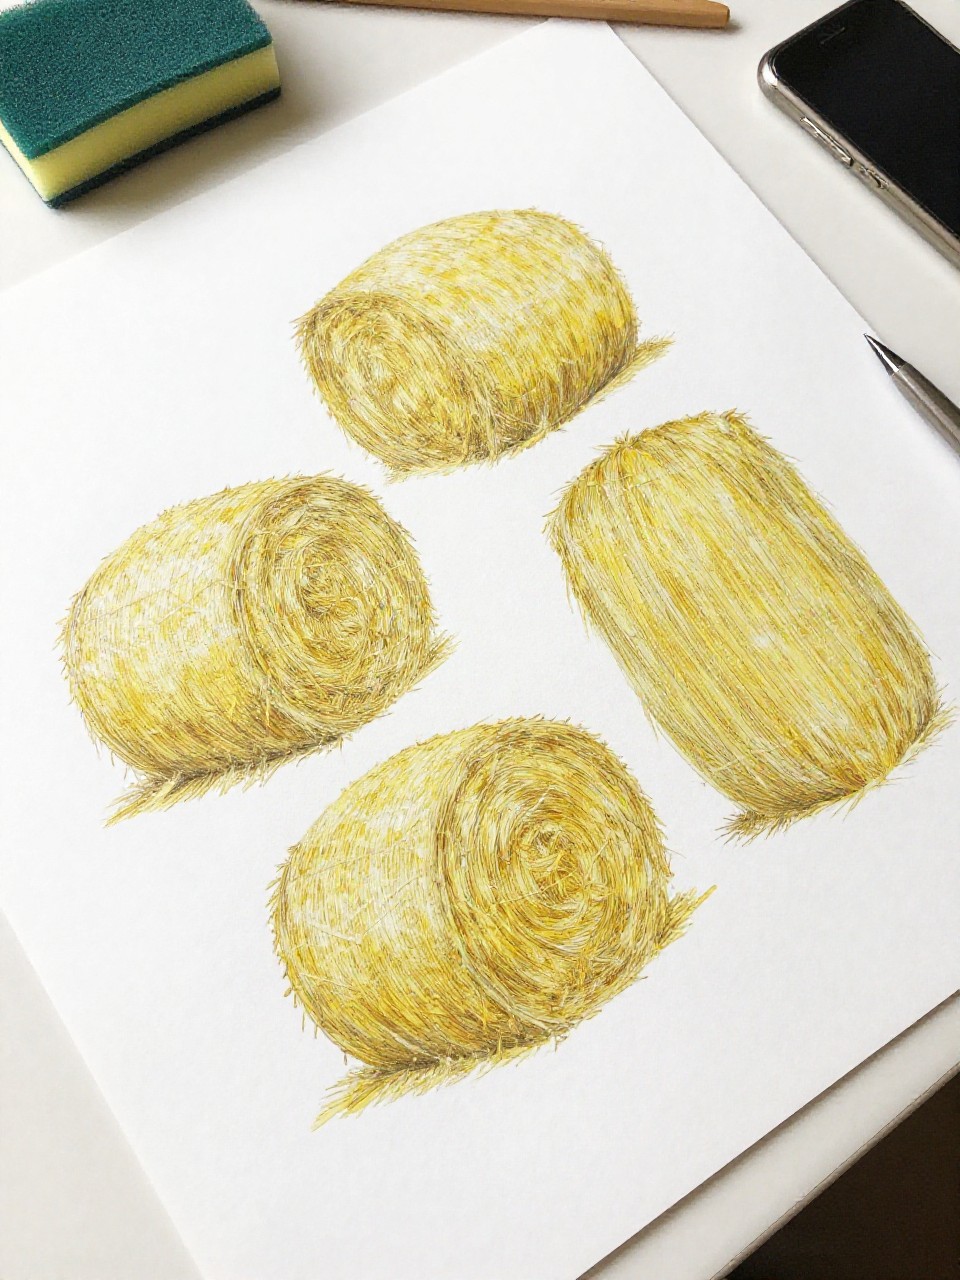
Sponge stamps become mini hay bales tied with “twine.” The blocky shapes are graphic and satisfying to line up.
Materials Needed:
- Rectangular sponge
- Yellow/golden paint
- Thin twine or marker
How to make it:
- Dip the sponge in yellow paint and stamp rows on paper.
- Once dry, draw or glue twine lines around each bale shape.
- Add simple field lines or a barn silhouette in the background.
- Sign your “farm print.”
10. Silhouette Chicken Wire Collage
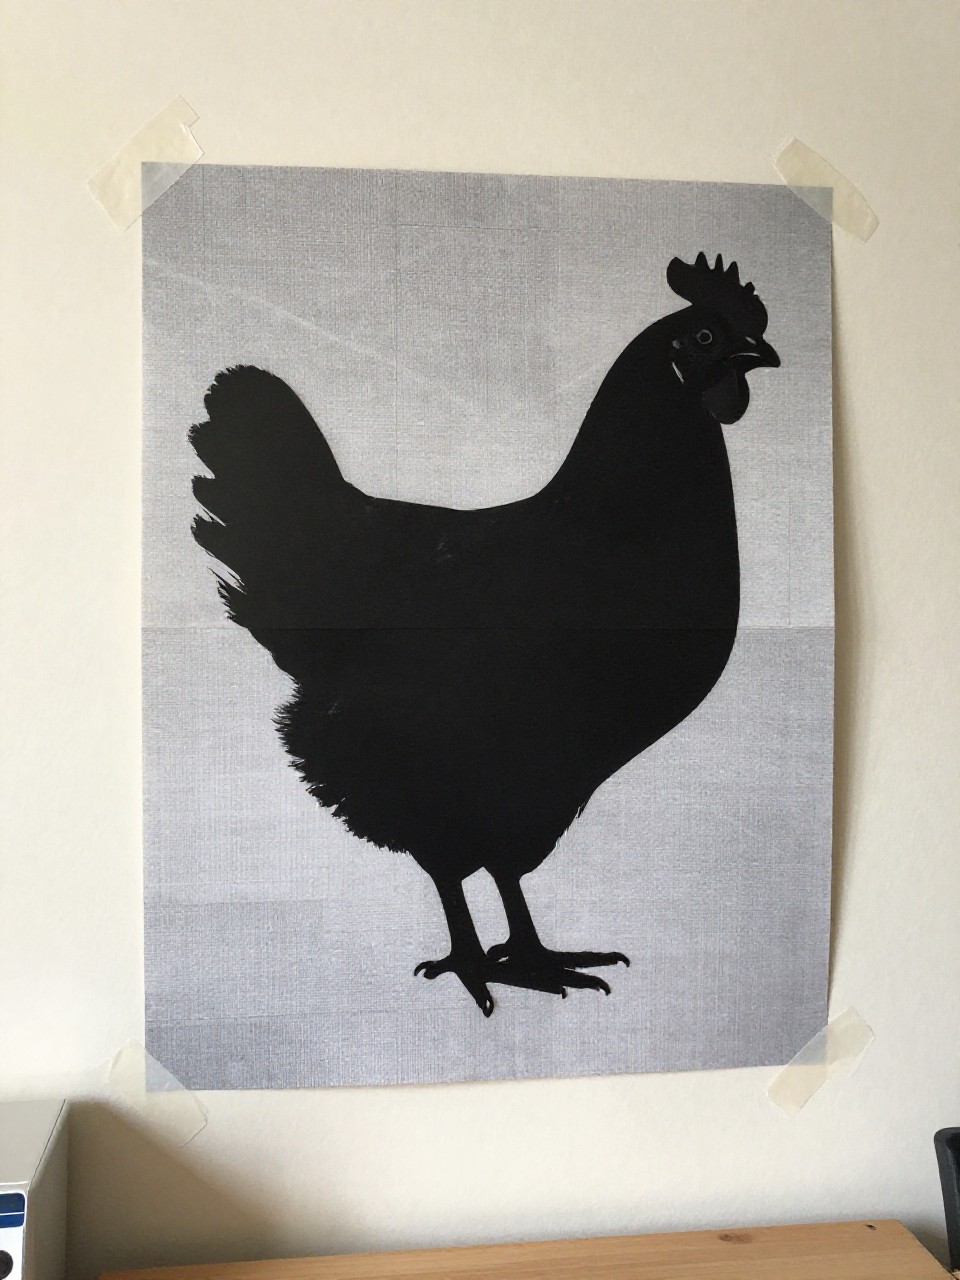
Create a bold farm animal silhouette filled with paper “wire” texture. It looks advanced but breaks down into easy steps.
Materials Needed:
- Black paper
- Gray/white paper strips
- Glue stick
How to make it:
- Cut a large animal silhouette (chicken, cow) from black paper.
- On another sheet, glue strips in a crisscross diamond pattern to mimic wire.
- Glue the silhouette on top so the “wire” shows through.
- Trim edges for a clean poster finish.
11. Rustic Stick Fence Frame
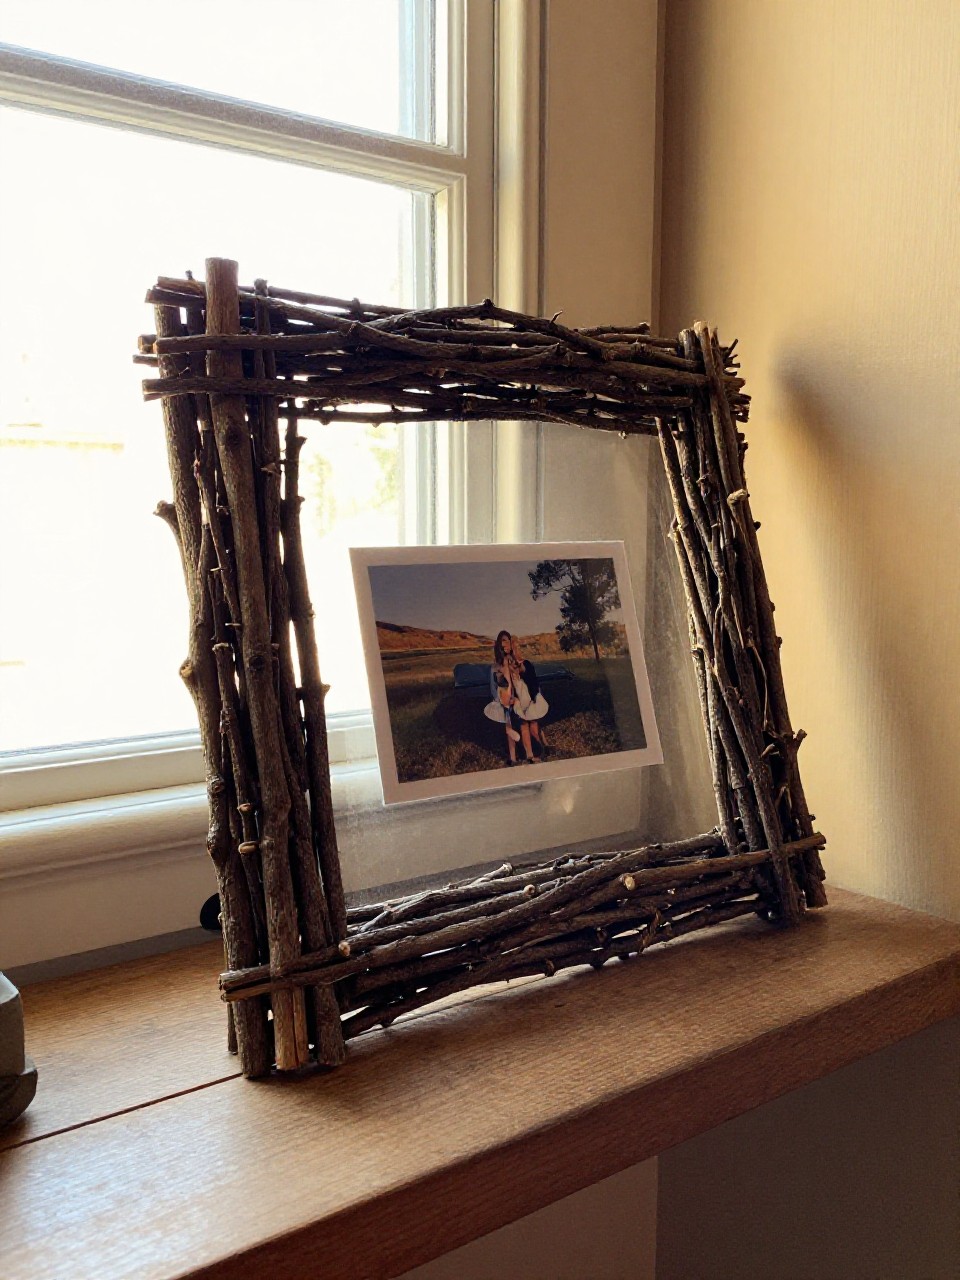
Turn twigs into a mini fence that frames a photo or drawing. The natural texture feels like a real paddock.
Materials Needed:
- Straight twigs
- Craft glue or hot glue (adult help)
- Cardboard backing
How to make it:
- Cut a rectangular cardboard backing.
- Glue two vertical twigs, then layer horizontal “rails” across.
- Leave a window in the center for a photo or art.
- Add a loop on top with twine and slide your picture behind.
12. Seed Packet Story Garland
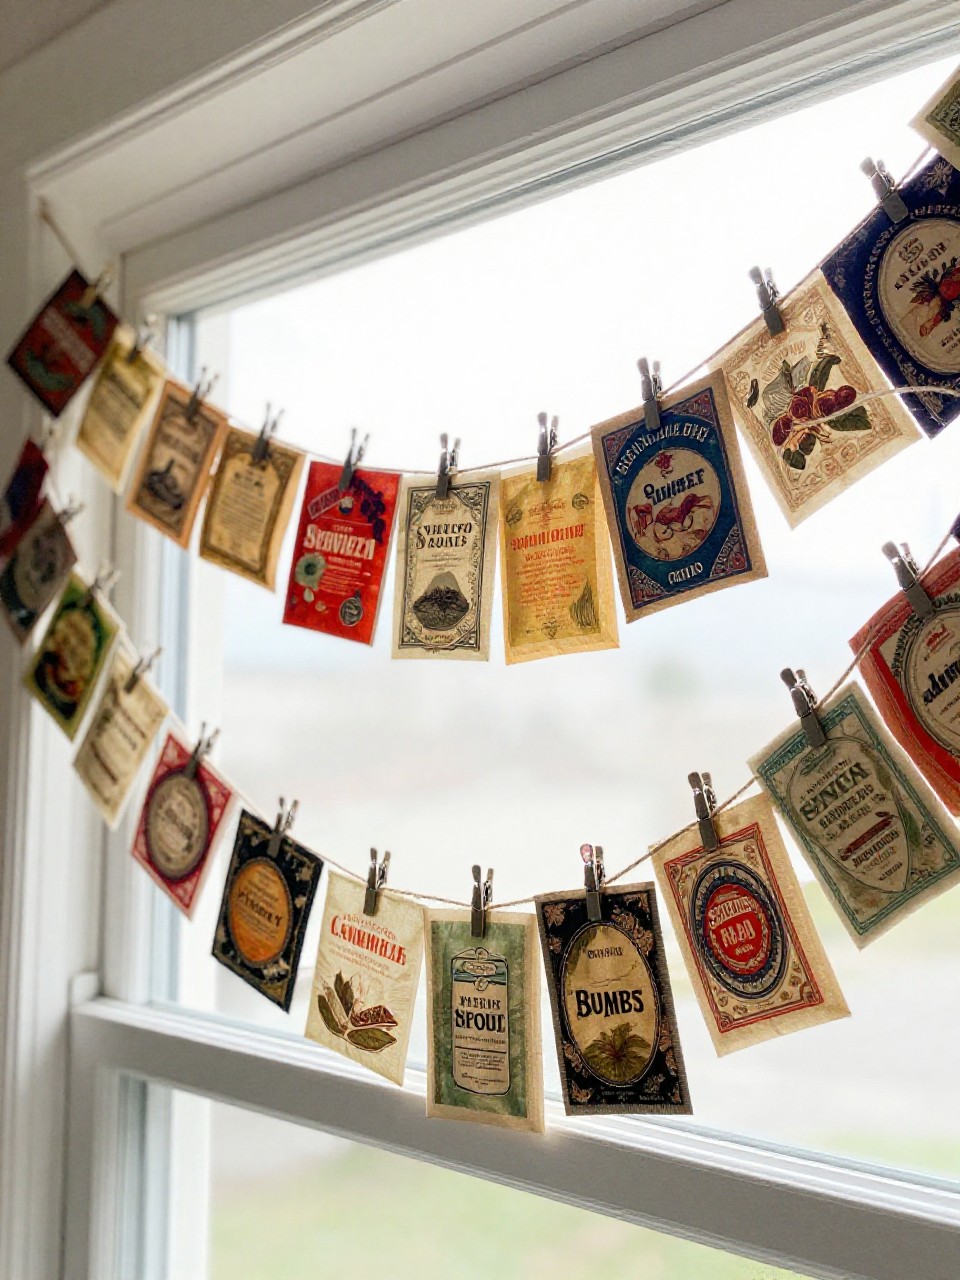
Old seed packets become a story line across the room. It looks like vintage decor and takes minutes.
Materials Needed:
- Empty seed packets
- String or twine
- Mini clothespins or tape
How to make it:
- Flatten and clean empty seed packets.
- Arrange them in “planting order” or by color.
- Clip or tape them onto a twine line.
- Hang across a window or shelf.
13. Farm Fresh Stamped Tea Towels
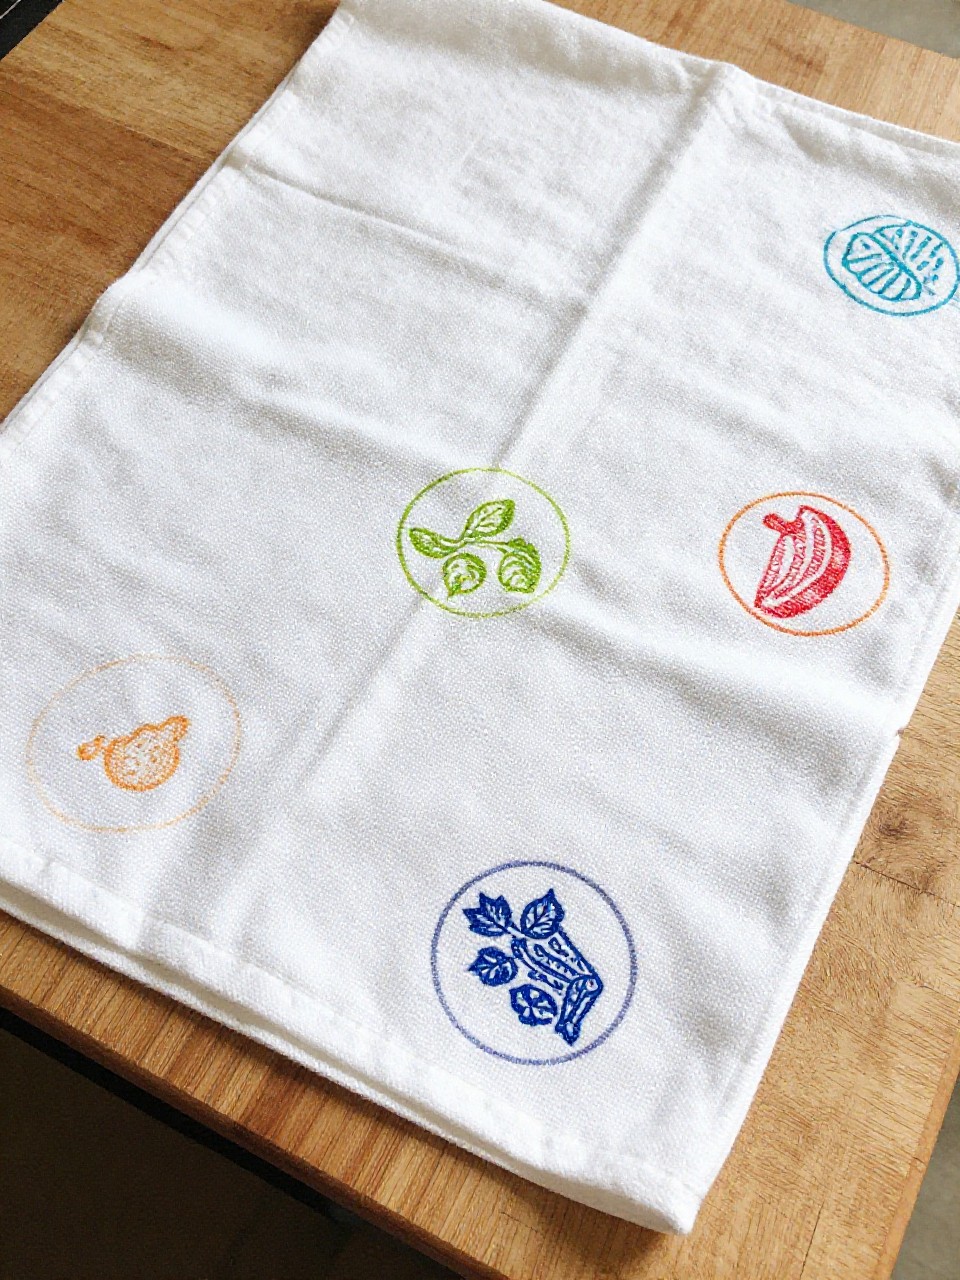
Potato stamps turn plain towels into market-style prints. The crisp shapes look boutique without fancy tools.
Materials Needed:
- Plain cotton towel
- Fabric paint
- Potato for stamping
How to make it:
- Cut simple shapes into a halved potato (apple, carrot, egg).
- Dip into fabric paint and stamp a repeating pattern on the towel.
- Add leaf or stem details with a brush.
- Heat-set per paint instructions.
14. Paper Strip Woven Fields
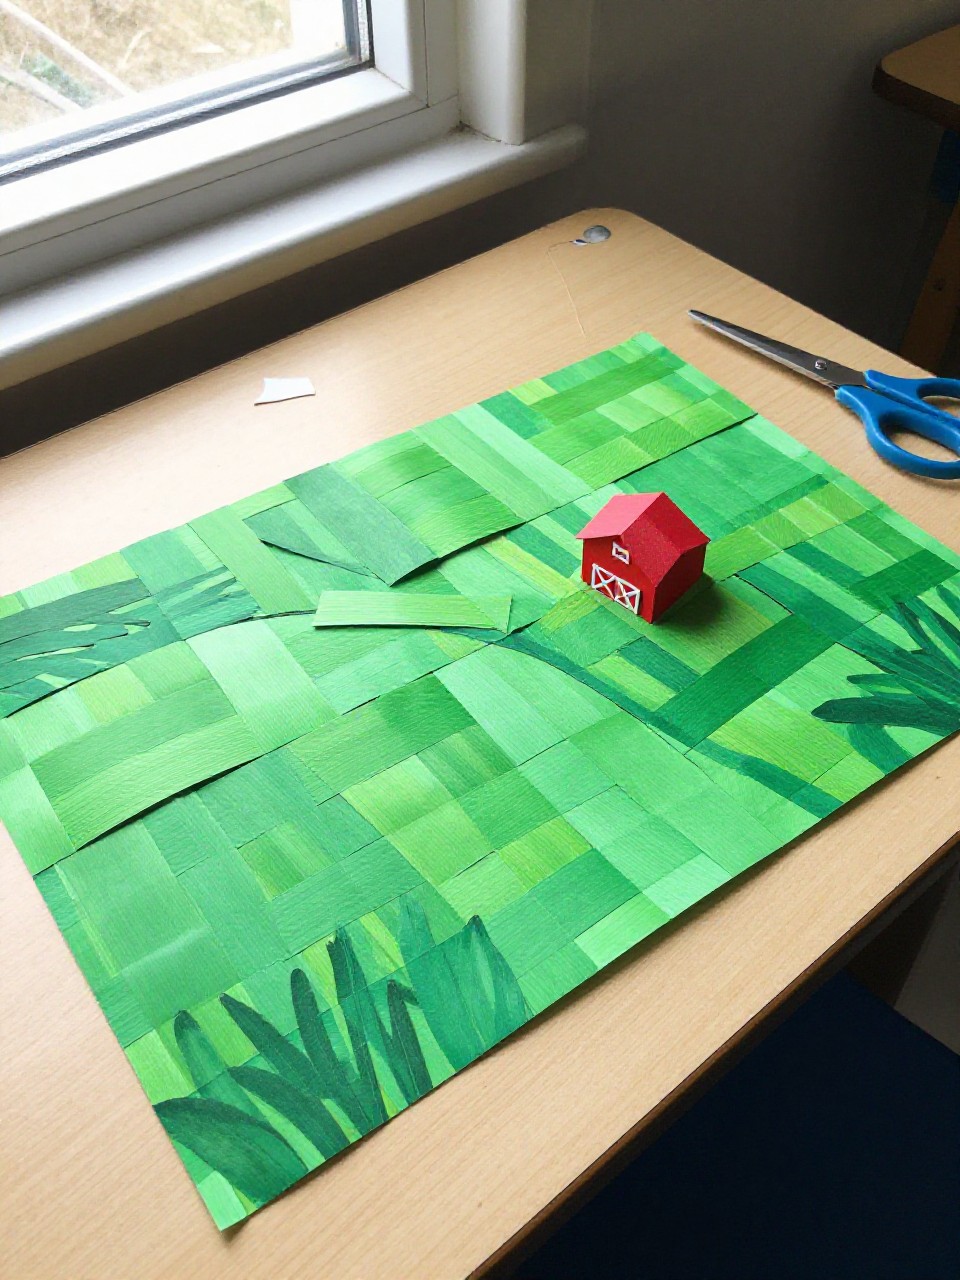
Weave strips to create rolling fields and rows. The pattern pops like a landscape quilt.
Materials Needed:
- Construction paper (greens, browns, blues)
- Scissors
- Glue stick
How to make it:
- Cut a base sheet with vertical slits, stopping 1 inch from the edge.
- Weave paper strips over-under to form fields.
- Glue down edges and add a blue “sky” strip on top.
- Finish with a small paper barn or sun.
15. Mason Jar Lid Horseshoe Wreath
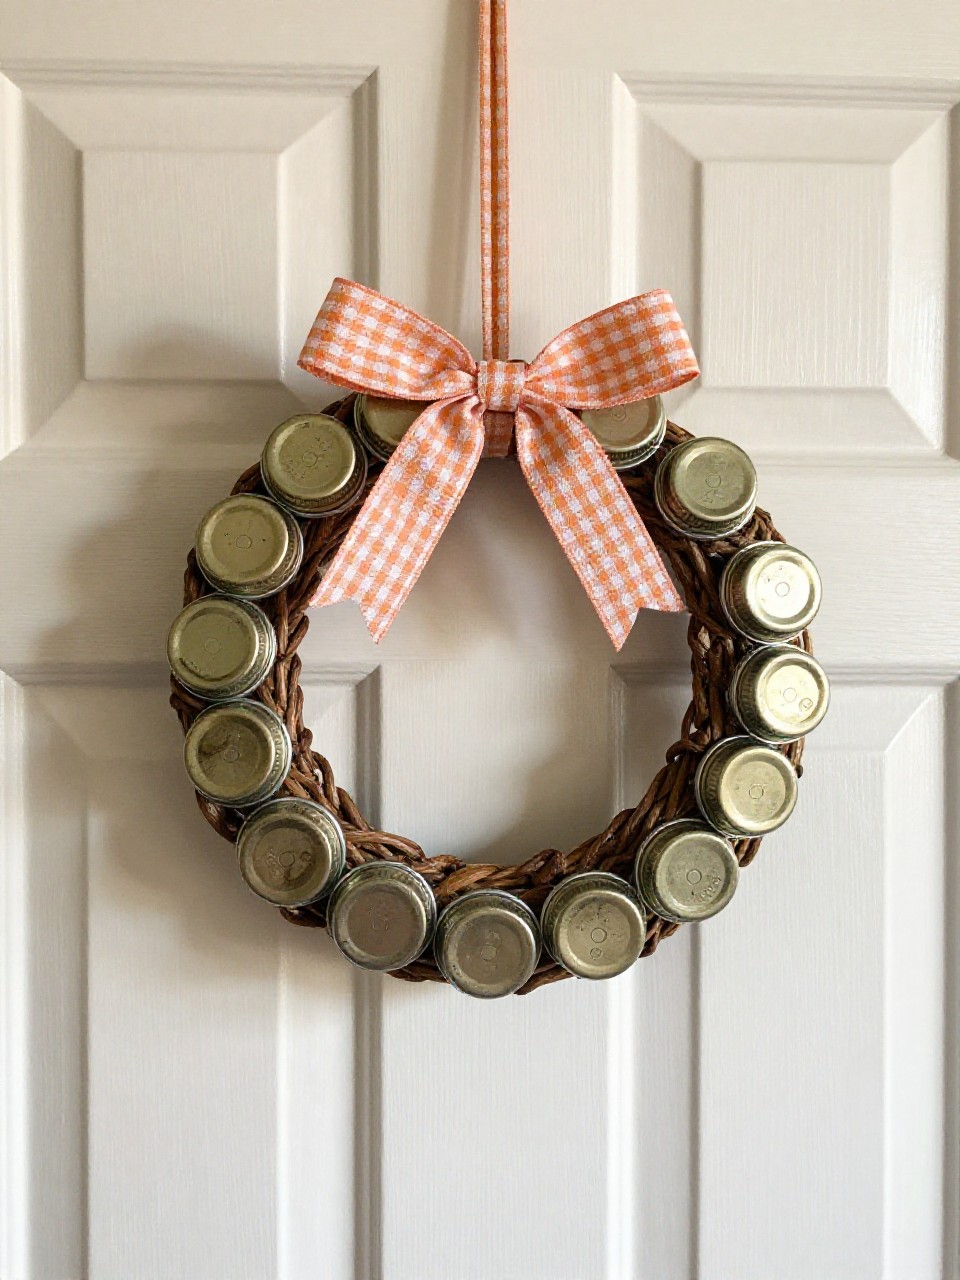
A mini wreath that looks like tiny horseshoes circling. It hangs sweetly on a bedroom door or peg.
Materials Needed:
- Mason jar lids (rings only)
- Ribbon or twine
- Hot glue (adult help)
How to make it:
- Arrange lids in a circle, edges touching like linked horseshoes.
- Glue the contact points and let them set.
- Wrap a ribbon around the circle for color and stability.
- Tie a bow and add a loop for hanging.