


In This Article Show
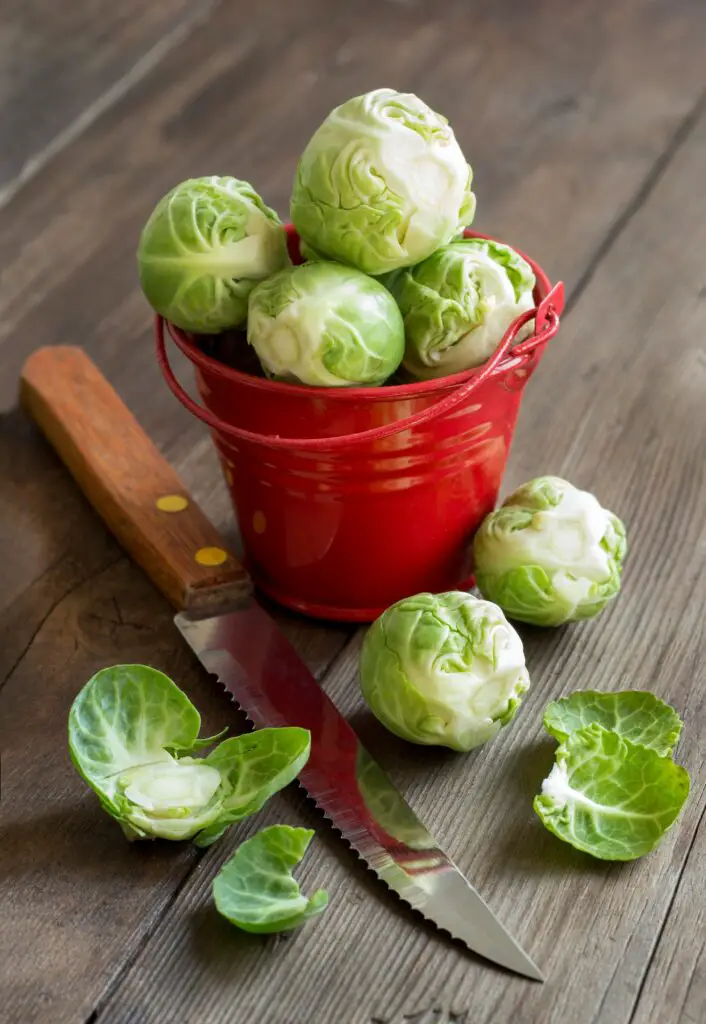
Today, we’re tackling a humble yet versatile veggie: Brussels sprouts. Whether you’re a seasoned gardener or simply a kitchen aficionado looking to expand your culinary repertoire, mastering the art of shredding Brussels sprouts opens up a world of delicious possibilities.
From hand shredding to utilizing a mandoline slicer or a trusty chef’s knife, we’ve got you covered. Even if you’ve never shredded a Brussels sprout in your life, fret not – we’ll walk you through each technique step by step, ensuring you achieve perfect, uniform shreds every time.
So, whether you’re gearing up for a hearty Brussels sprout salad, a savory stir-fry, or a delightful side dish, join us as we uncover the secrets to shredding Brussels sprouts like a pro. Let’s roll up our sleeves and get shredding!
1. Hand Shredding
When it comes to shredding Brussels sprouts without a food processor, hand shredding is perhaps the simplest and most accessible method. Follow these straightforward steps to efficiently shred your Brussels sprouts:
Step-by-Step Guide
- Prepare Your Brussels Sprouts: Start by selecting fresh Brussels sprouts and rinsing them under cold water. Trim off the tough stem ends and remove any damaged outer leaves.
- Halve the Brussels Sprouts: Using a sharp knife, carefully halve each Brussels sprout lengthwise. This step helps create a flat surface for easier shredding.
- Slice Thin Strips: With the flat side of the Brussels sprout facing down on your cutting board, begin slicing thin strips across the width of the sprout. Aim for uniform thickness to ensure even cooking.
- Continue Shredding: Work your way through all the halved Brussels sprouts, slicing them into thin strips.
- Tips for Uniform Shreds: To achieve uniform shredding without a processor, it’s essential to maintain a steady hand and consistent slicing motion. the thickness of each strip.
- Adjust Thickness as Needed: Depending on your recipe preferences, you can adjust the thickness of the shreds.
2. Mandoline Slicer Technique
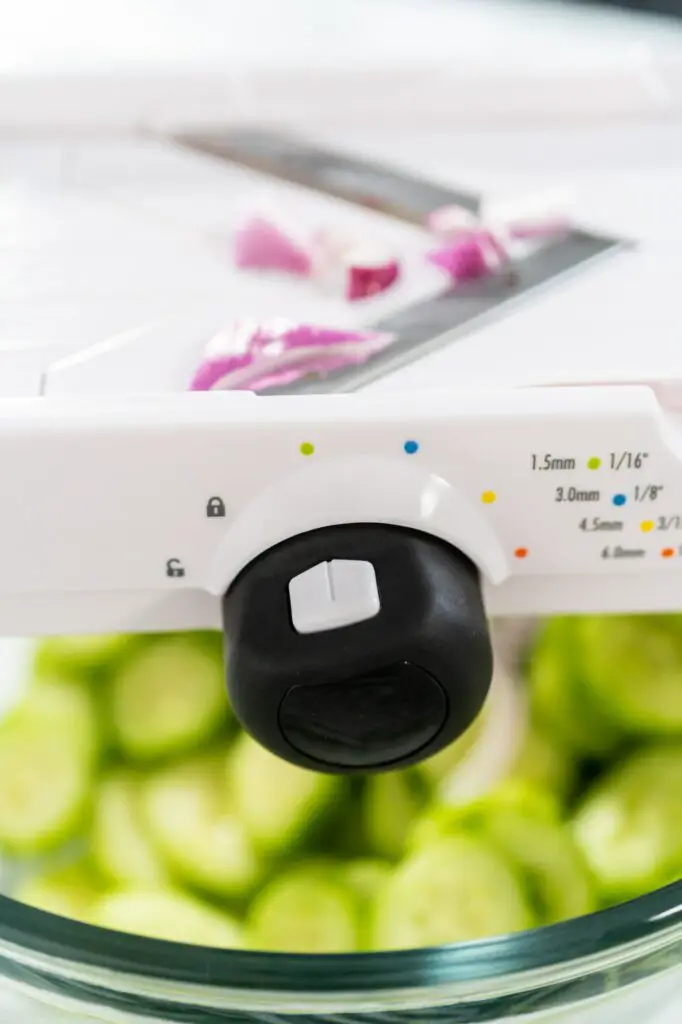
If you’re looking to step up your Brussels sprouts shredding game without investing in a food processor, a mandoline slicer can be your new best friend. Here’s everything you need to know to master this alternative method:
A mandoline slicer is a versatile kitchen tool that allows you to achieve precise and uniform cuts with ease. While traditionally used for slicing fruits and vegetables, a mandoline slicer can also be repurposed for shredding Brussels sprouts efficiently.
Step-by-Step Guide
- Use the Hand Guard: Most mandoline slicers come equipped with a hand guard or food holder. Always use this hand guard to protect your fingers from the sharp blades.
- Choose the Right Blade Setting: Mandoline slicers typically offer adjustable blade settings to control the thickness of your shreds. Start with a medium setting and adjust as needed based on your recipe requirements.
- Stabilize the Mandoline: Place the mandoline slicer on a stable surface, such as a cutting board, and ensure it doesn’t wobble during use. Some models feature non-slip feet or suction cups for added stability.
- Maintain Even Pressure: Apply gentle and even pressure when sliding the Brussels sprouts across the blade. Avoid forcing the vegetables through the slicer, as this can result in uneven cuts and potential accidents.
- Watch Your Fingers: Pay close attention to your hand placement and keep your fingers away from the blade at all times.
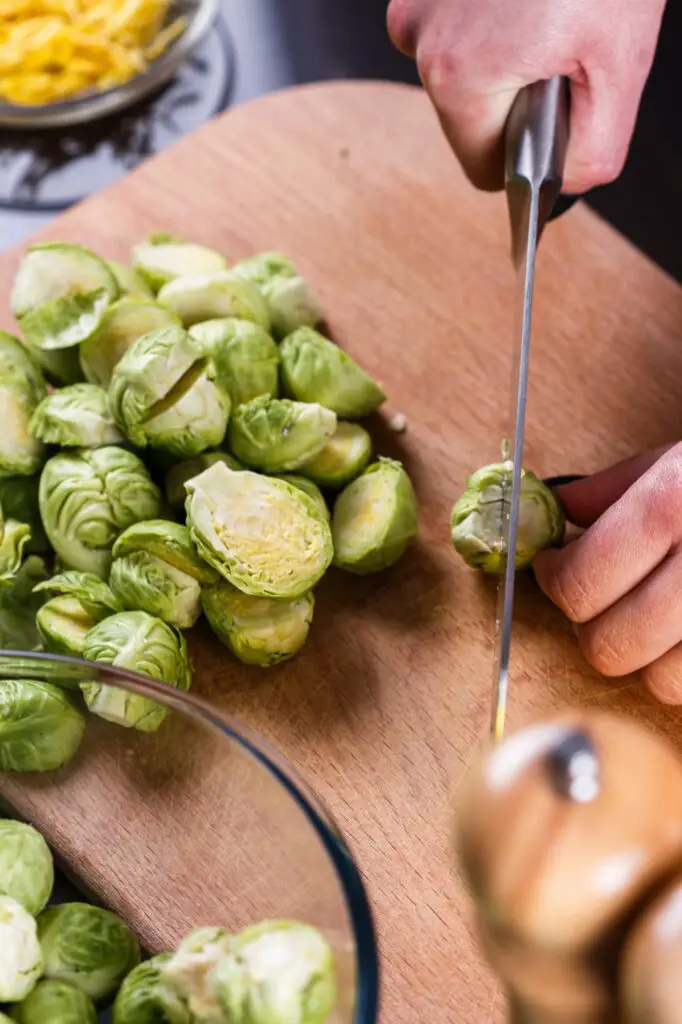
3. Chef’s Knife Method
When it comes to shredding Brussels sprouts without a food processor, a trusty chef’s knife can be your go-to tool. Here’s a step-by-step guide to mastering the chef’s knife method:
Step-by-Step Guide
- Prepare Your Brussels Sprouts: Start by rinsing your Brussels sprouts under cold water and trimming off the tough stem ends.
- Halve the Brussels Sprouts: Using a sharp chef’s knife, carefully halve each Brussels sprout lengthwise.
- Adjust Your Grip: Hold the Brussels sprout half firmly with your non-dominant hand, positioning your fingertips away from the knife blade to prevent accidents.
- Slice Thin Strips: With the flat side of the Brussels sprout facing down on your cutting board, begin slicing thin strips across the width of the sprout.
By following these steps and experimenting with different shred sizes, you’ll soon master the art of shredding Brussels sprouts with a chef’s knife. With a sharp blade and proper technique, you’ll achieve perfect shreds every time, elevating your culinary creations to new heights.
4. Grating
While not the most conventional method, using a grater to shred Brussels sprouts can be surprisingly effective and efficient. Here’s how to make the most of this alternative technique:
- Select the Right Grater: When it comes to grating Brussels sprouts, not all graters are created equal. Opt for a box grater or a handheld grater with medium-sized holes.
- Prepare Your Brussels Sprouts: Rinse your Brussels sprouts under cold water and trim off the stem ends. Cut the sprouts in half lengthwise to create flat surfaces for grating.
- Grate with Care: Holding the Brussels sprout half firmly with your non-dominant hand, carefully rub the flat side against the grater’s surface, moving in a downward motion.
- Rotate the Sprout: As you grate, periodically rotate the Brussels sprout to ensure all sides are evenly shredded. This helps prevent uneven pieces and ensures a consistent texture in your final dish.
By following these tips and utilizing the right type of grater, you can easily shred Brussels sprouts with minimal mess and maximum efficiency. Embrace the unconventional and discover a new way to incorporate this nutritious vegetable into your favorite recipes.