


In This Article Show
Here’s a friendly collection of nature crafts to keep kids busy and help adults unwind too. Whether you’re stuck inside on a rainy day, planning an easy classroom station, or just looking for a calm weekend activity, these projects use leaves, sticks, rocks, and other simple finds.
You’ll get fun, low-mess ideas that build creativity and curiosity about the outdoors. Gather a few supplies, take a short nature walk, and jump into these easy, colorful projects.
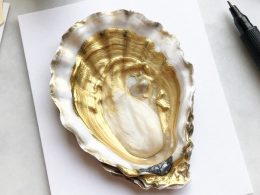
1. Pressed Leaf Sun Catcher
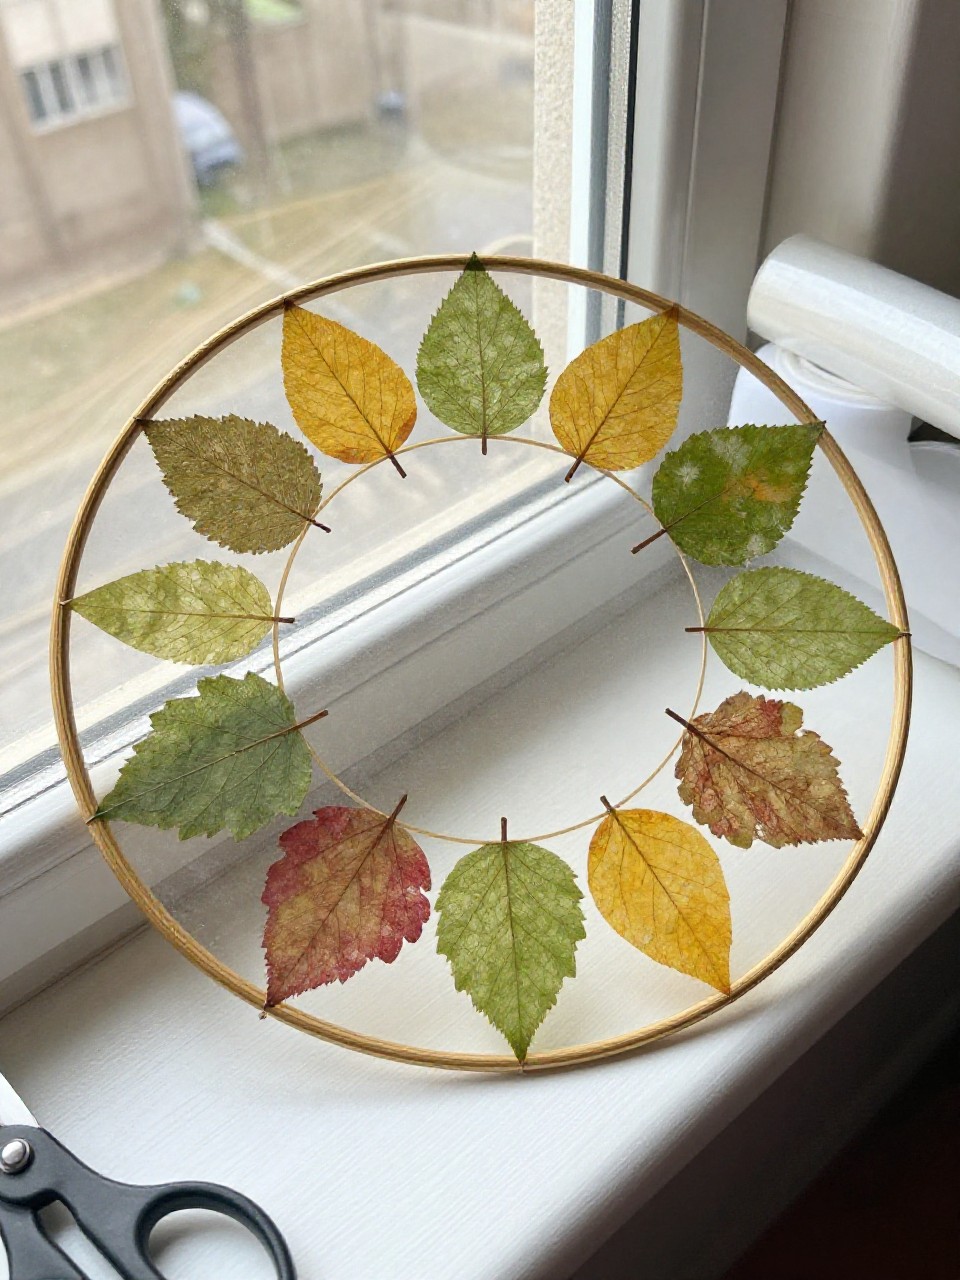
A bright circle of clear contact paper or laminating sheets holds a collage of pressed leaves and petals, glowing on a window like stained glass. Kids love choosing colors and shapes from nature, and adults enjoy the calm, simple process—great for beginners.
Materials Needed:
- Clear contact paper or laminating sheets
- Assorted flat leaves and flower petals (dried or freshly pressed)
- Scissors
- Ribbon or string (for hanging)
- Hole punch (optional)
How to make it:
- Cut two equal circles of contact paper; peel backing off one.
- Arrange leaves and petals on the sticky side in a pretty collage.
- Seal with the second contact circle; trim edges neat.
- Punch a hole, add ribbon, and hang in a sunny window to glow.
2. Pebble Family Portrait

Smooth river pebbles become a cute “family” arranged on cardstock with marker-drawn faces and tiny leaf hats. It’s satisfying to match stone shapes to people or pets, and the results feel personal and funny.
Materials Needed:
- Smooth pebbles (varied sizes)
- Heavy cardstock or small canvas panel
- White glue or tacky glue
- Fine-tip markers or paint pens
- Small leaves or twigs (for hats and details)
How to make it:
- Plan your family layout on the cardstock, choosing pebble “bodies.”
- Glue each pebble in place and let them set.
- Add faces, names, and leaf hats with markers and small leaves.
- Dry fully, then display on a shelf or frame it.
3. Leaf Rubbing Postcards

Colorful leaf vein rubbings turn into simple postcards you can mail or gift. Kids enjoy the “magic” of veins appearing under paper, while adults appreciate the calm coloring and easy cleanup.
Materials Needed:
- Blank postcard-size cardstock
- Fresh or dried leaves (with pronounced veins)
- Crayons or oil pastels (peeled)
- Tape (low-tack)
How to make it:
- Place a leaf vein-side up on the table and tape a postcard over it.
- Rub crayon on its side across the card to reveal the leaf pattern.
- Layer colors or overlap different leaves for depth.
- Address the back, add a note, and mail your nature art.
4. Twig Frame Photo Holder
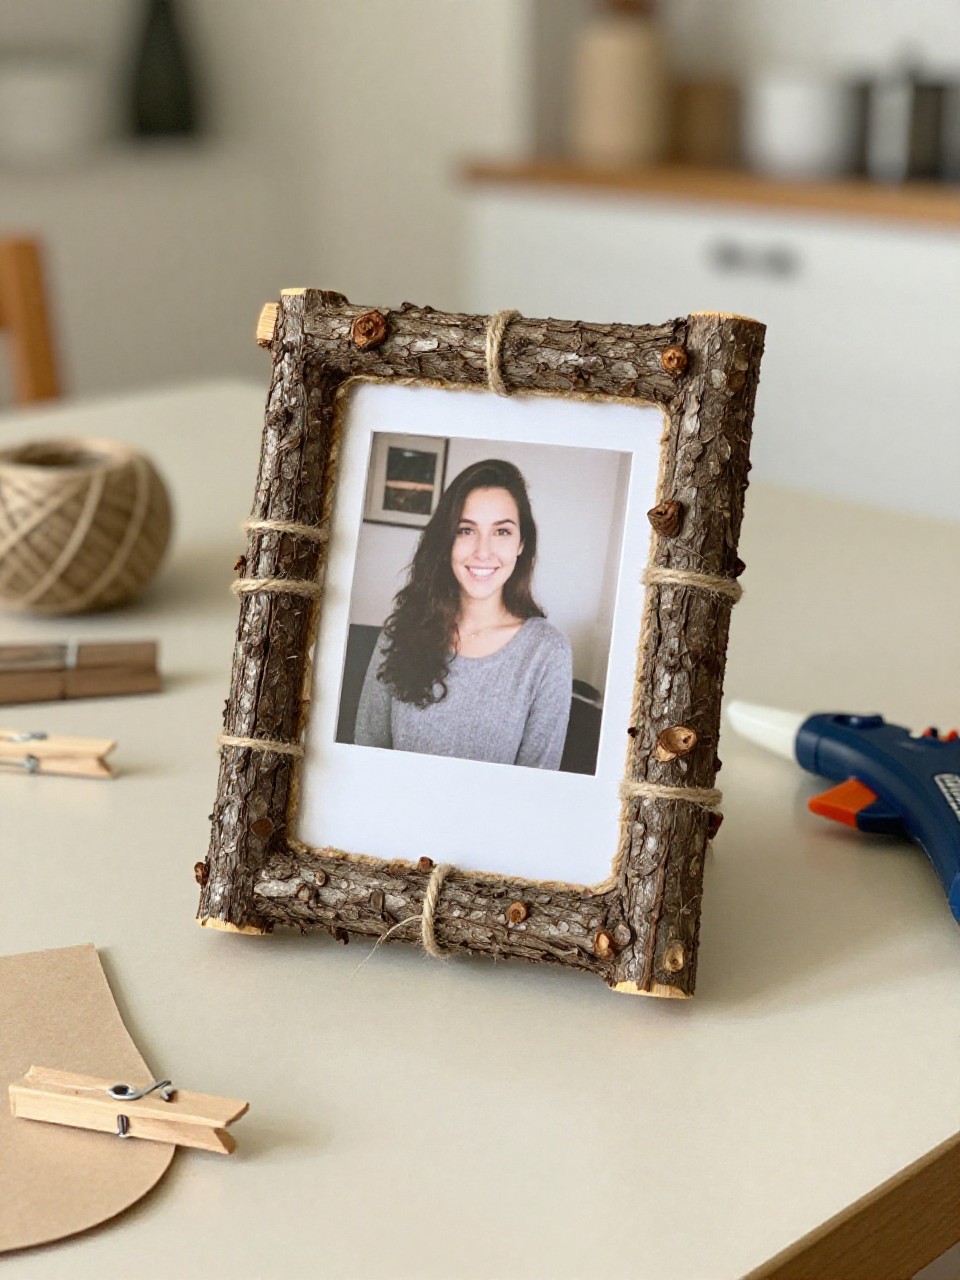
A rustic twig frame wraps around a photo or drawing with twine ties. It feels earthy and giftable, and the simple tying and gluing makes it doable for most ages with light help.
Materials Needed:
- Straight twigs (4, cut to photo size)
- Twine or jute
- Hot glue or tacky glue
- Small clothespin or paperclip
- Photo or small art print
How to make it:
- Trim four twigs to fit around your photo edges.
- Glue corners to make a rectangle, then wrap corners with twine.
- Glue a clothespin at the top center to hold the photo.
- Clip in your picture and set upright on a shelf.
5. Pinecone Bird Feeder Roll

A classic feeder made by rolling a pinecone in nut butter and seeds, then hanging it outside. Kids love the messy, hands-on rolling, and everyone enjoys spotting visiting birds later.
Materials Needed:
- Large pinecone
- Peanut butter or sunflower seed butter
- Birdseed mix
- String
- Butter knife or craft stick
How to make it:
- Tie string around the pinecone top to make a hanger.
- Spread nut butter into the scales with a craft stick.
- Roll the sticky cone in a tray of birdseed to coat fully.
- Hang on a branch and watch for birds from a window.
6. Nature Paintbrush Set
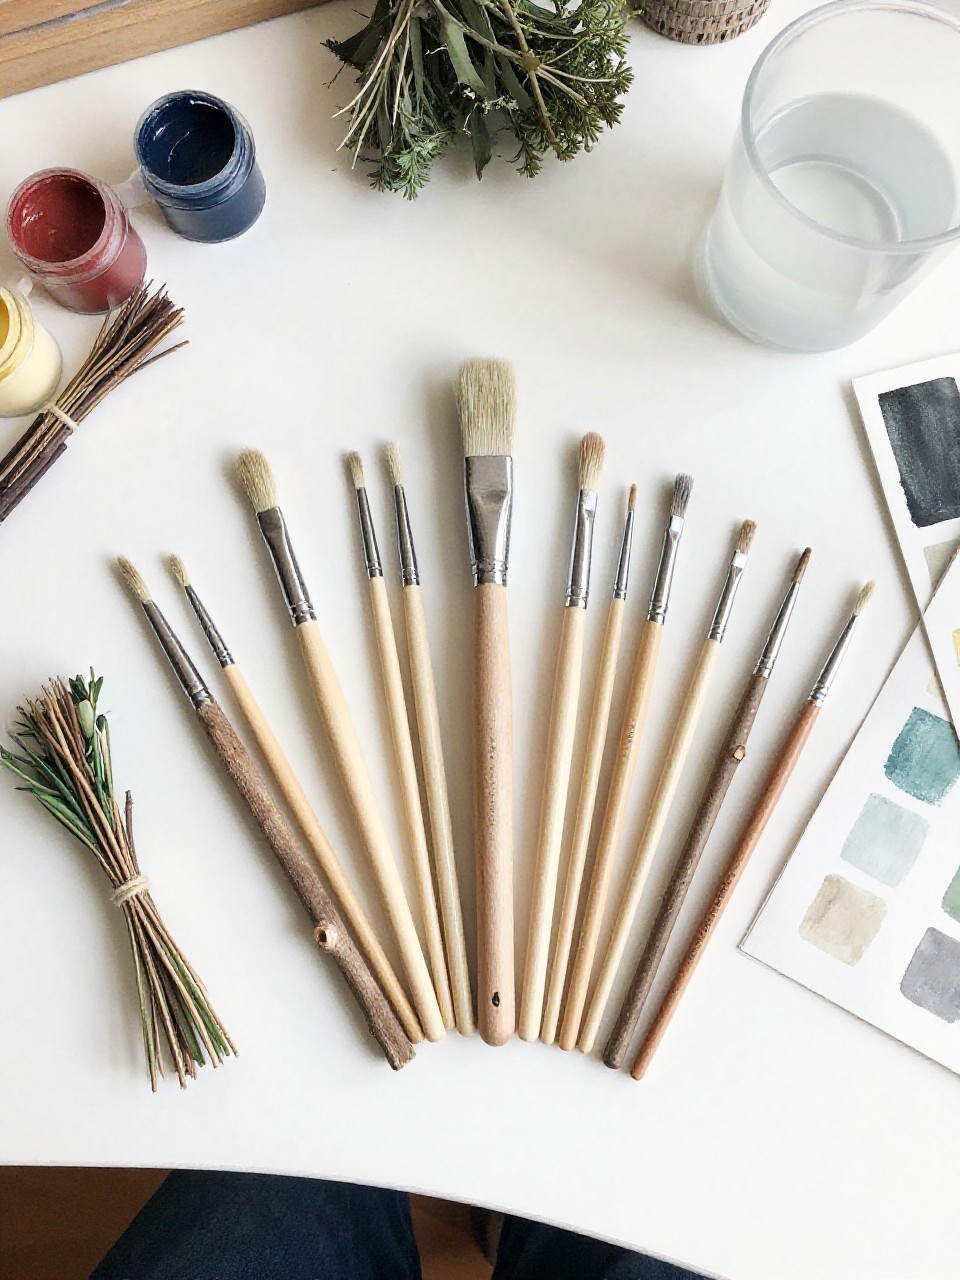
Bundle grasses, pine needles, and leaves onto sticks to make quirky paintbrushes that create surprising textures. Kids love testing the different strokes, and adults enjoy the creative twist on painting.
Materials Needed:
- Small sticks (as brush handles)
- Pine needles, grasses, or leafy sprigs
- Rubber bands or twine
- Washable paint
- Paper
How to make it:
- Gather plant pieces and group into small bundles.
- Attach bundles to stick ends with rubber bands or twine.
- Dip into paint and try lines, dots, and swirls on paper.
- Let artwork dry and keep the brushes for future sessions.
7. Rock Garden Labels
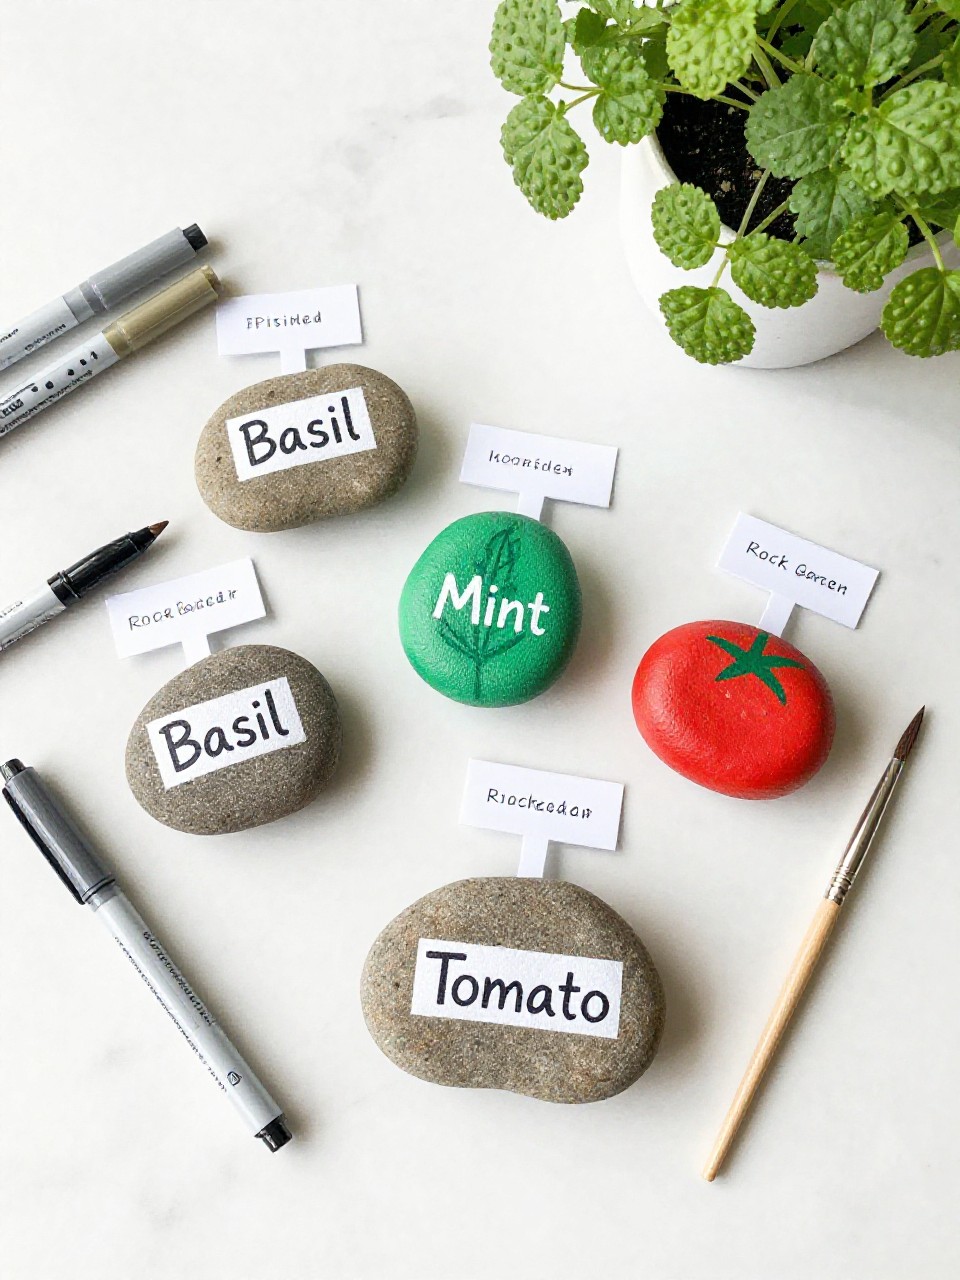
Flat stones become simple plant markers with painted names and tiny leaf or veggie icons. It’s rewarding because the results are useful outdoors and look cheerful in pots or beds.
Materials Needed:
- Flat, smooth rocks
- Acrylic paint and paint pens
- Clear outdoor sealer (spray or brush-on)
- Pencil (for sketching)
How to make it:
- Wash and dry rocks; sketch plant names lightly in pencil.
- Paint base shapes and icons; outline with paint pens.
- Add plant names in bold letters.
- Seal and place by your herbs or flowers.
8. Leaf Crown Headband
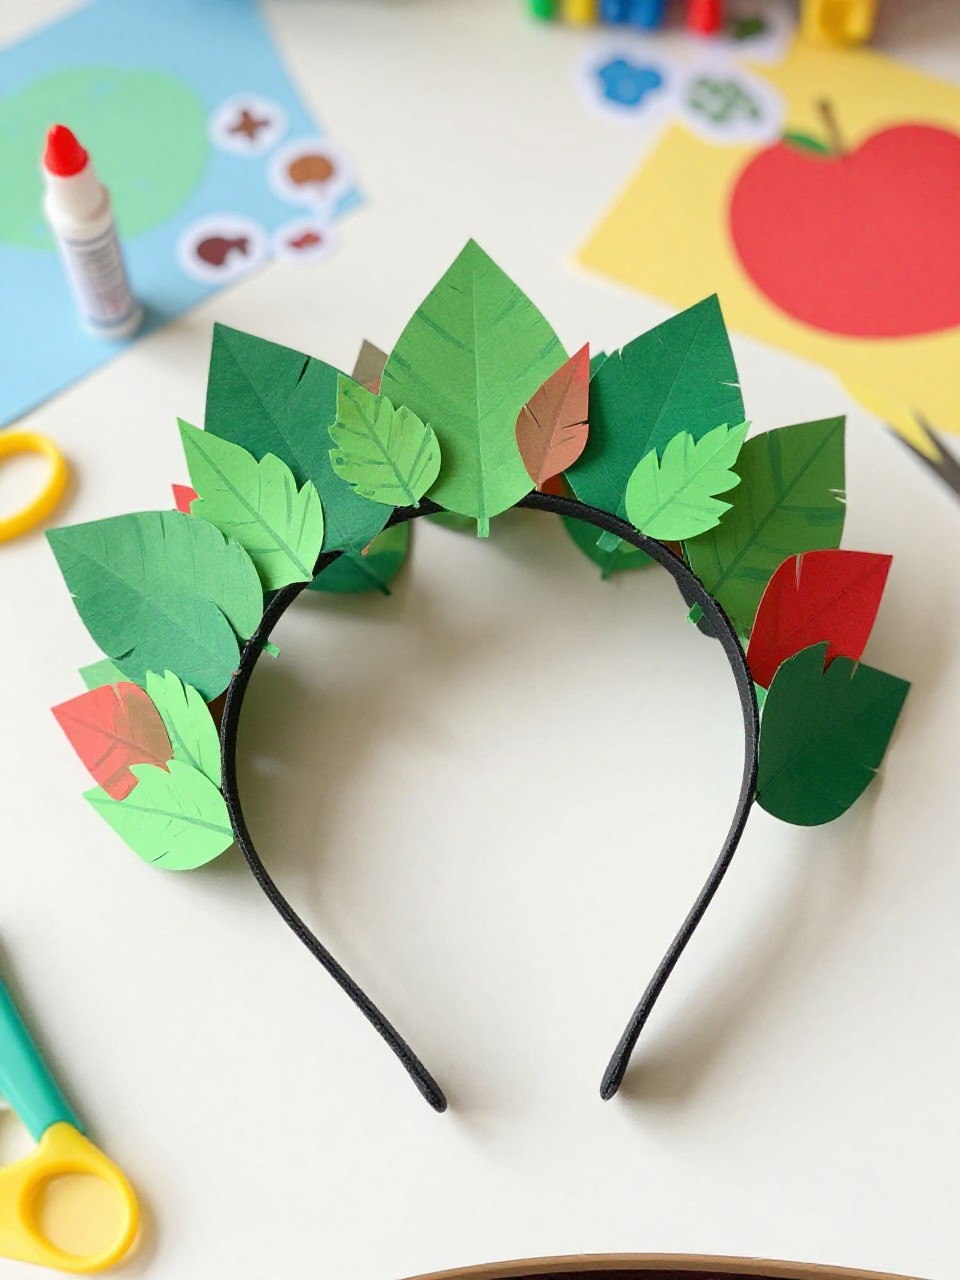
A simple paper band decorated with layered leaves becomes a woodland crown. Kids love wearing their creation for pretend play, and the quick steps make it great for classrooms.
Materials Needed:
- Strip of cardstock (headband base)
- Assorted leaves (similar size)
- Glue stick or tacky glue
- Tape or stapler
- Optional stickers or gems
How to make it:
- Fit and tape/staple the paper strip into a headband.
- Arrange leaves like feathers along the front.
- Glue leaves in overlapping rows; add stickers if desired.
- Let dry and wear for a forest-themed parade.
9. Bark Textured Clay Dish
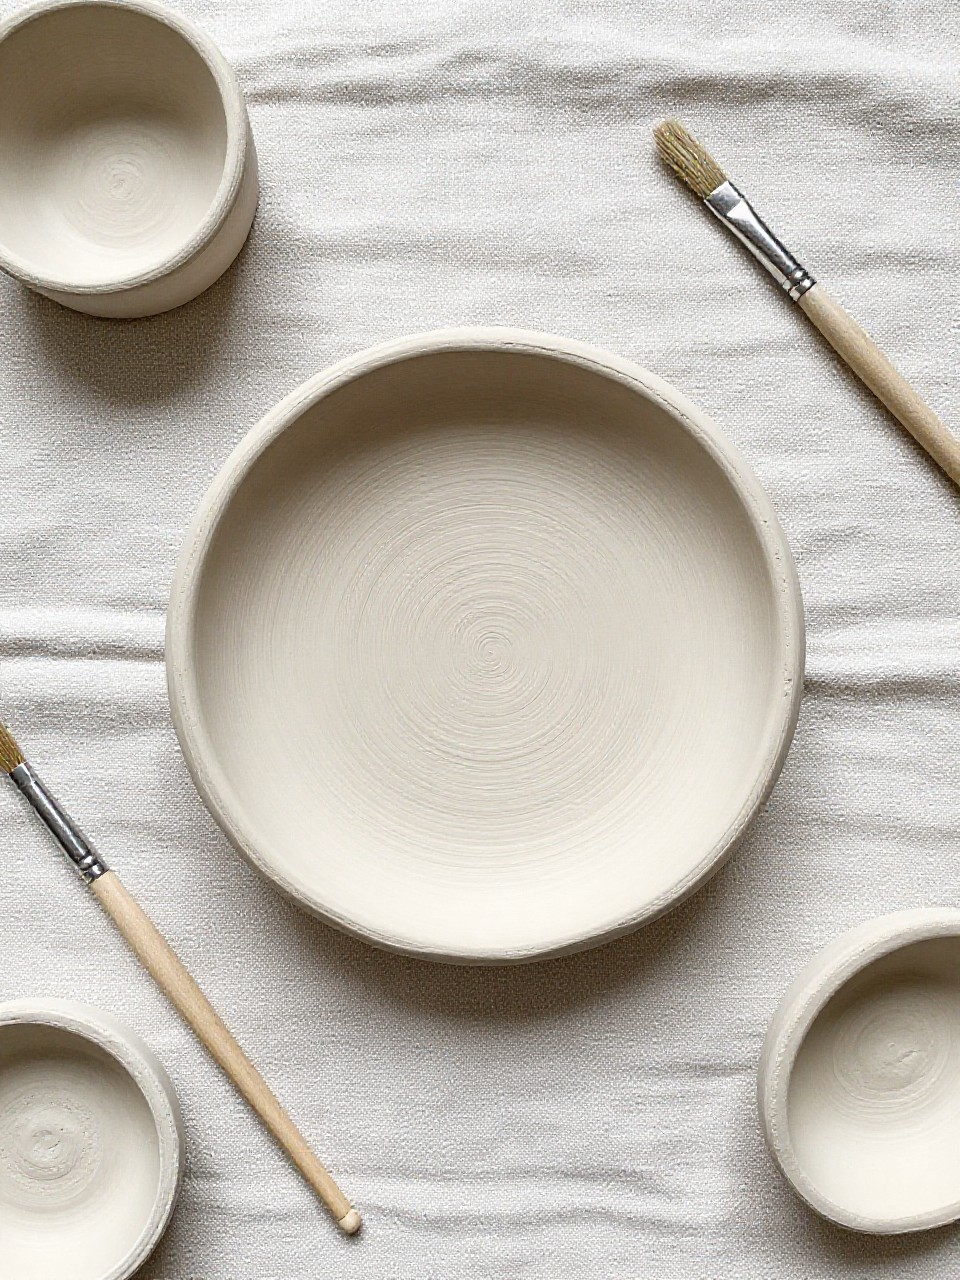
Air-dry clay pressed against tree bark makes a small trinket dish with natural texture. It’s soothing to press and mold, and the result looks like a boutique piece with very little effort.
Materials Needed:
- Air-dry clay
- Tree bark or a bark-textured mat
- Small bowl (as a mold)
- Acrylic paint (optional) and brush
- Clear sealer (optional)
How to make it:
- Roll clay flat and press firmly onto bark to imprint texture.
- Cut a circle and drape into a small bowl to form a dish.
- Smooth edges; optionally paint a light wash and dry.
- Seal if desired and use for keys or rings.
10. Acorn Cap Mini Creatures
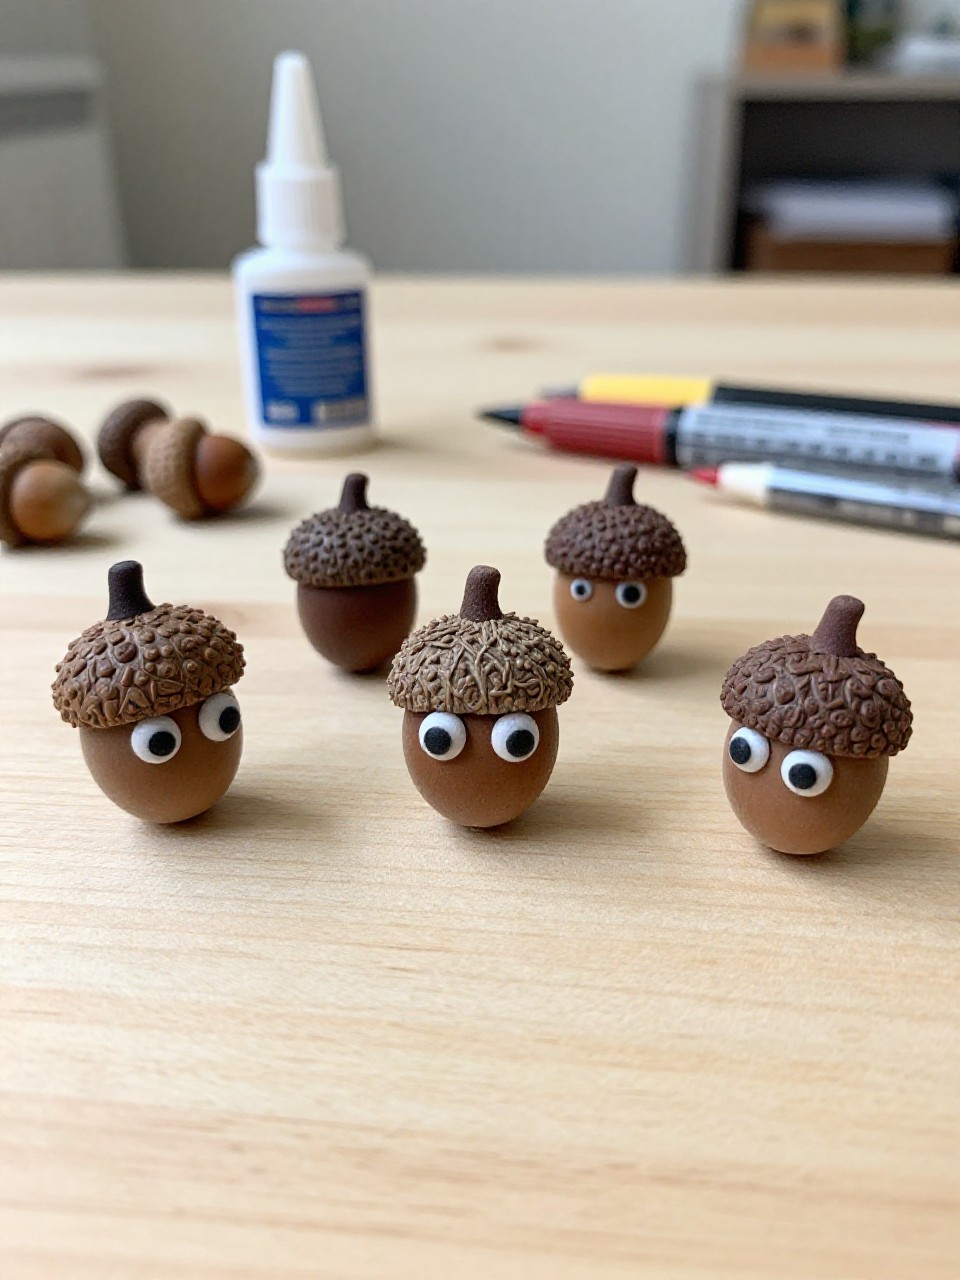
Acorn caps and tiny twigs become funny little creatures with painted eyes and leaf capes. Kids enjoy the character-making and storytelling that follows.
Materials Needed:
- Acorn caps and small twigs
- Tacky glue or hot glue (adult help)
- Paint pens or tiny googly eyes
- Small leaves or fabric scraps
- Marker
How to make it:
- Pair acorn caps and twigs to form heads and bodies.
- Glue parts together and let set.
- Add eyes, smiles, and mini leaf capes.
- Display on a shelf or build a small “forest” scene.
11. Nature Weaving Board
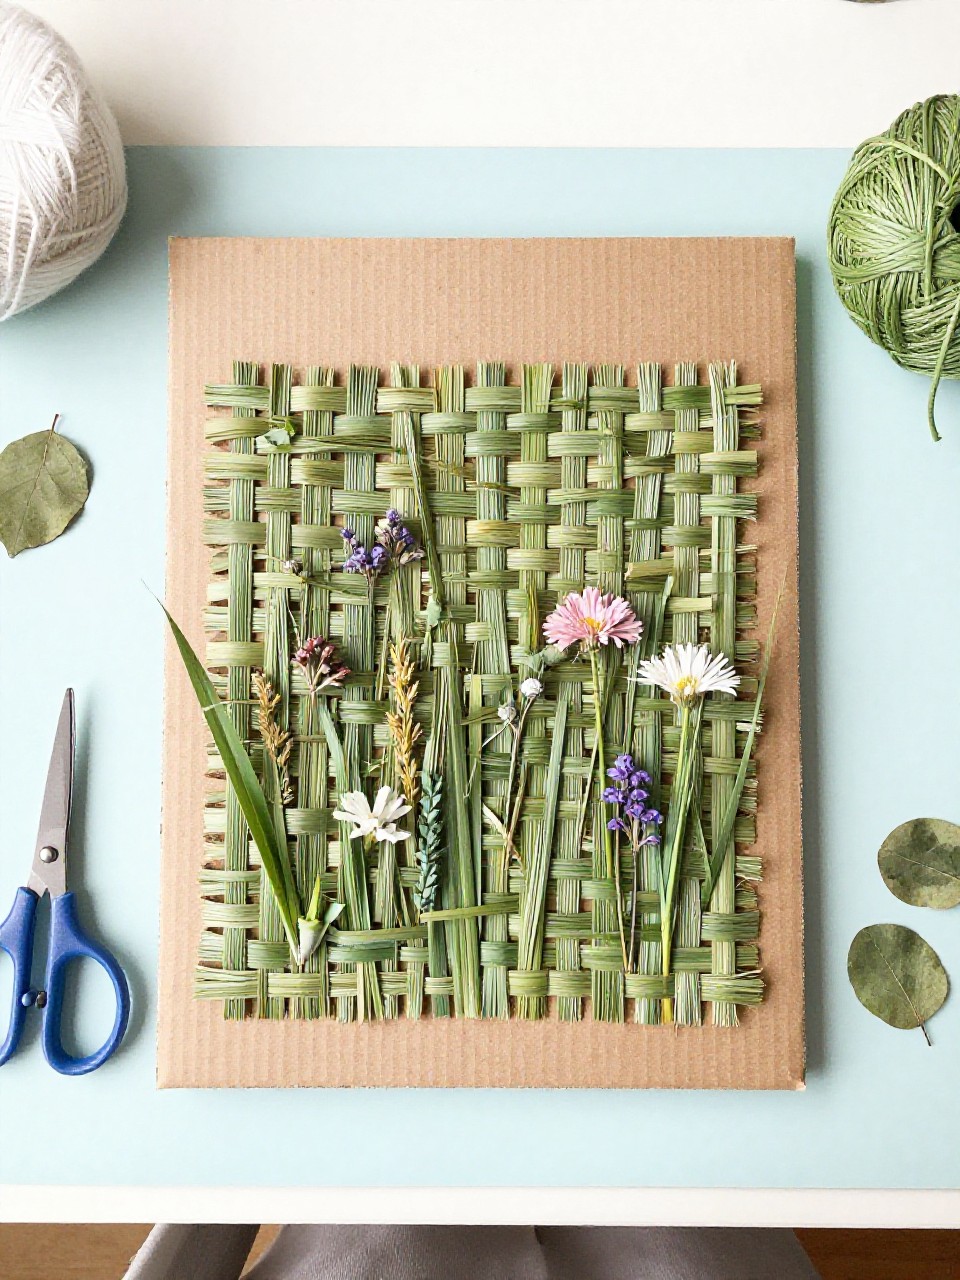
A cardboard loom filled with grasses, flowers, and leaves makes a framed, textural weave. It’s engaging for fine-motor skills and looks beautiful hung on a wall.
Materials Needed:
- Cardboard rectangle
- String or yarn
- Scissors
- Leaves, long grasses, flower stems
- Tape (optional)
How to make it:
- Cut small notches along two short edges of cardboard.
- Wrap string top-to-bottom into the notches to make warp lines.
- Weave plant pieces over-under across the strings.
- Tuck ends, trim, and hang with a yarn loop.
12. Sand and Shell Candle Holder
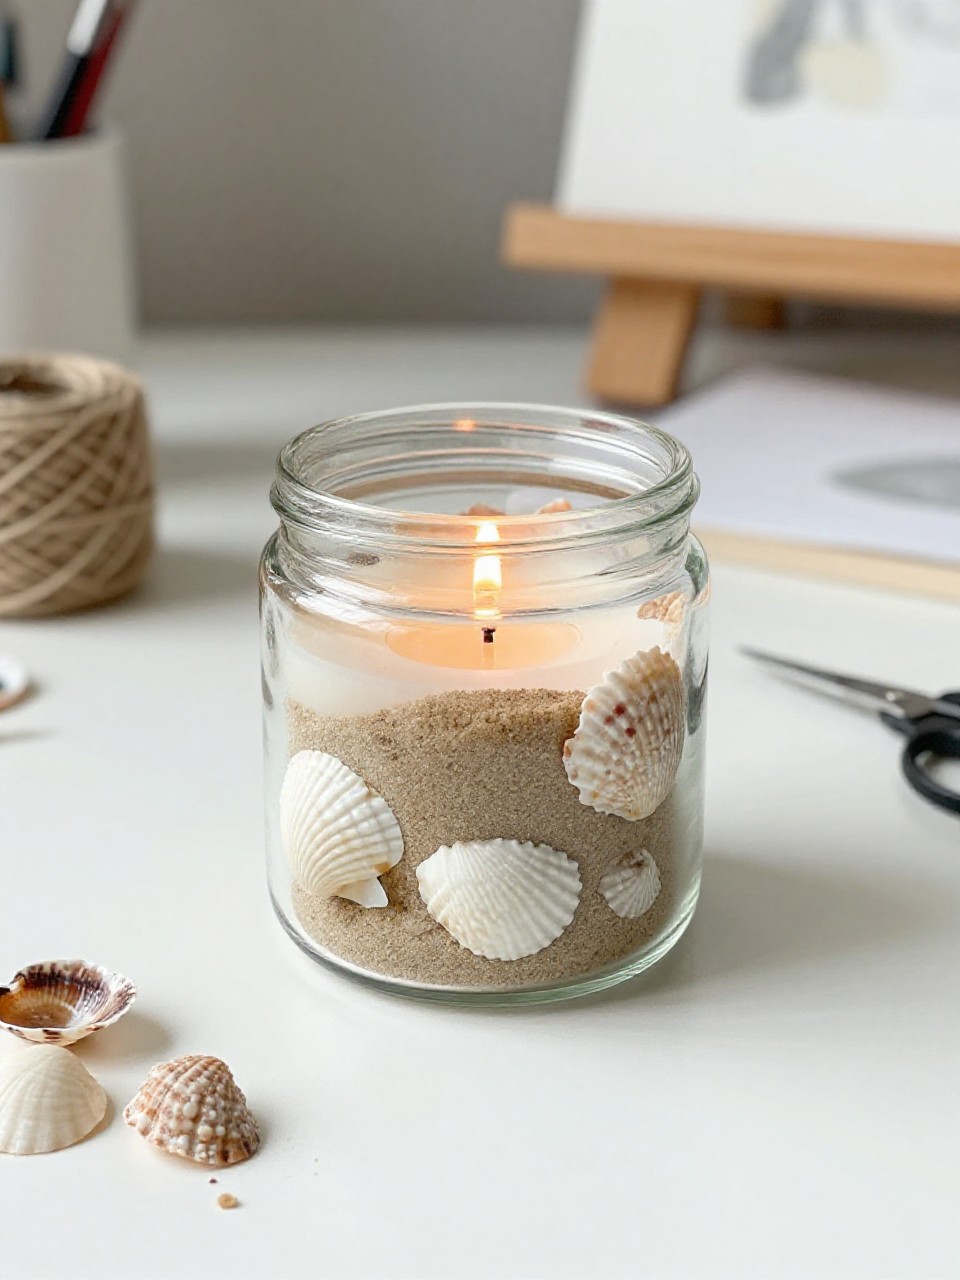
A small glass jar filled with sand and shells becomes a beachy tea light holder. Adults enjoy the calm, coastal vibe, and kids like arranging patterns.
Materials Needed:
- Small glass jar
- Clean dry sand
- Small shells and pebbles
- Tea light (LED recommended)
- Ribbon or twine (optional)
How to make it:
- Pour sand into the jar to about one-third full.
- Nestle shells and pebbles around the edge.
- Place a tea light in the center.
- Tie ribbon around the rim and display safely.
13. Stick Star Wall Hanging
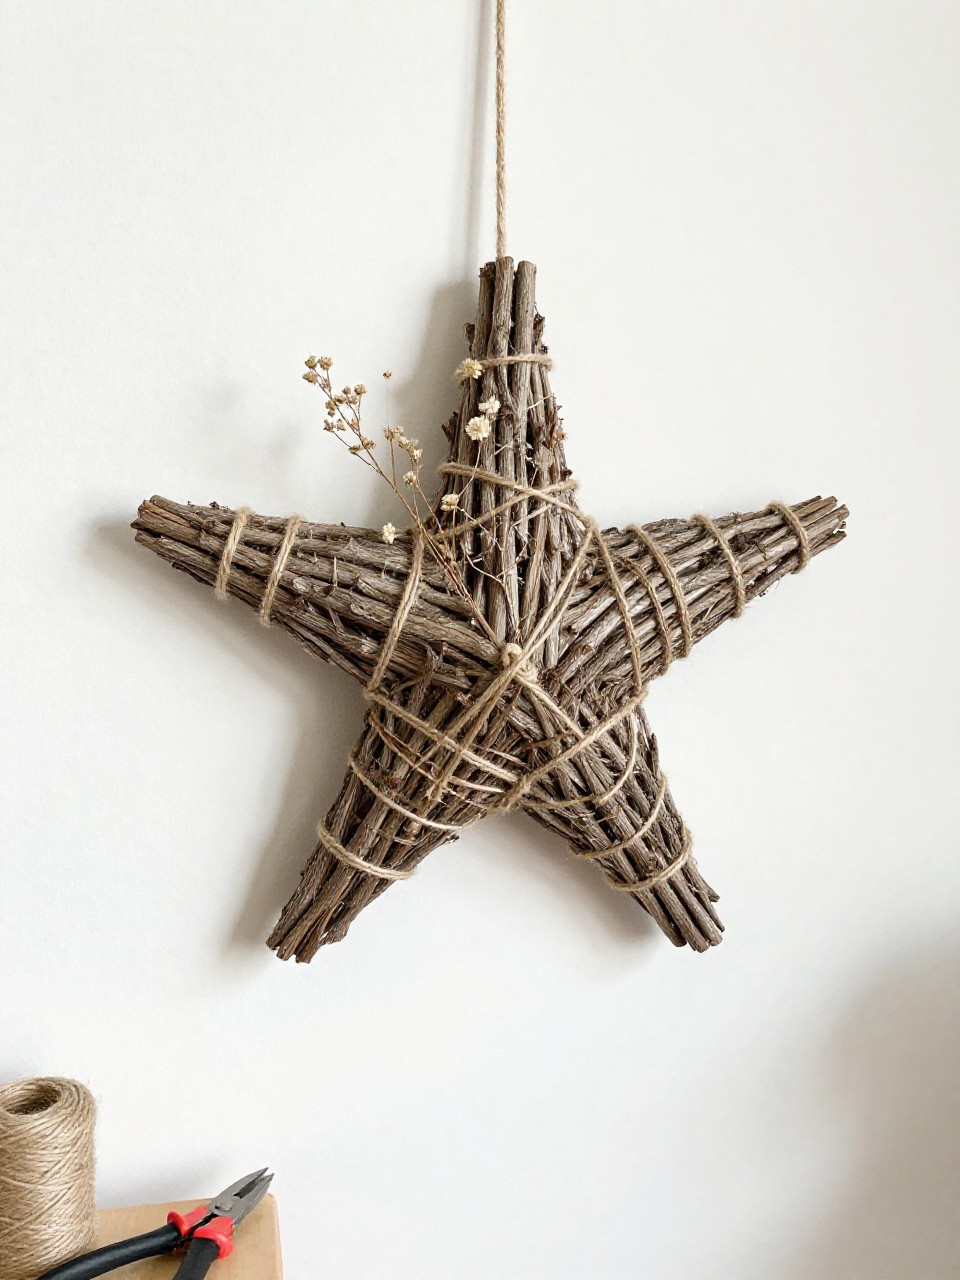
Five straight sticks tied into a star shape make a simple wall decor piece with a touch of rustic charm. It’s satisfying to see the shape come together quickly.
Materials Needed:
- Five equal-length sticks
- Twine or thin wire
- Scissors or wire cutters
- Optional: dried flowers or ribbon
How to make it:
- Lay sticks into a star outline on the table.
- Tie or wire each intersection snugly.
- Add small dried flowers or ribbon bows.
- Tie a hanging loop and place on a wall.
14. Fern Print Tote Bag
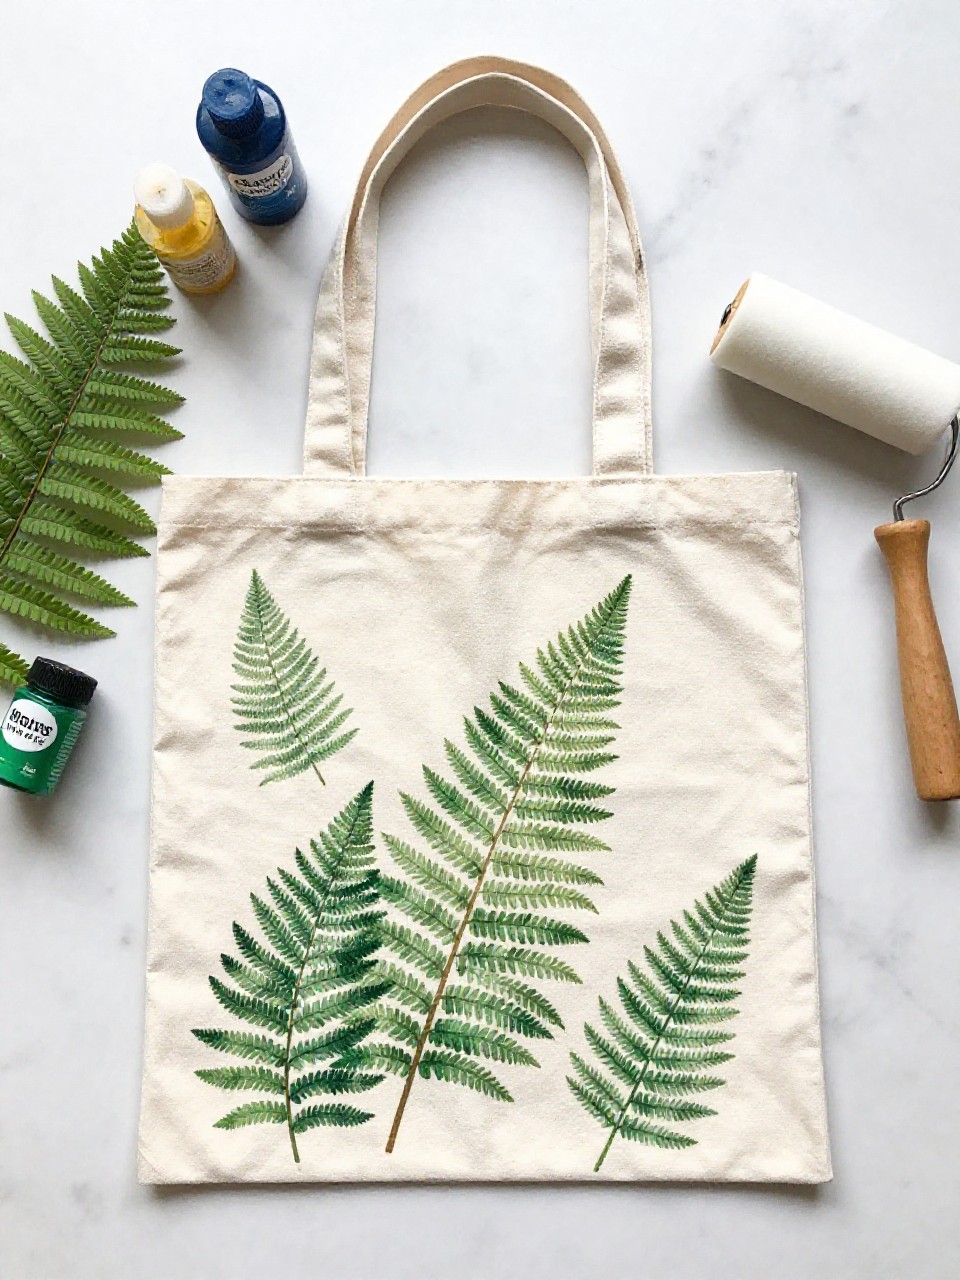
Fabric paint and real fern fronds create crisp prints on a plain tote bag. It feels professional but is beginner-friendly, and the bag is useful right away.
Materials Needed:
- Plain cotton tote
- Fresh fern fronds
- Fabric paint
- Foam brush or roller
- Cardboard insert
How to make it:
- Slide cardboard inside the tote to prevent bleed-through.
- Brush fabric paint onto the back of a fern.
- Press fern paint-side down on the tote; smooth and lift.
- Let dry, heat-set per paint instructions, and use your bag.
15. Flower Petal Bookmark
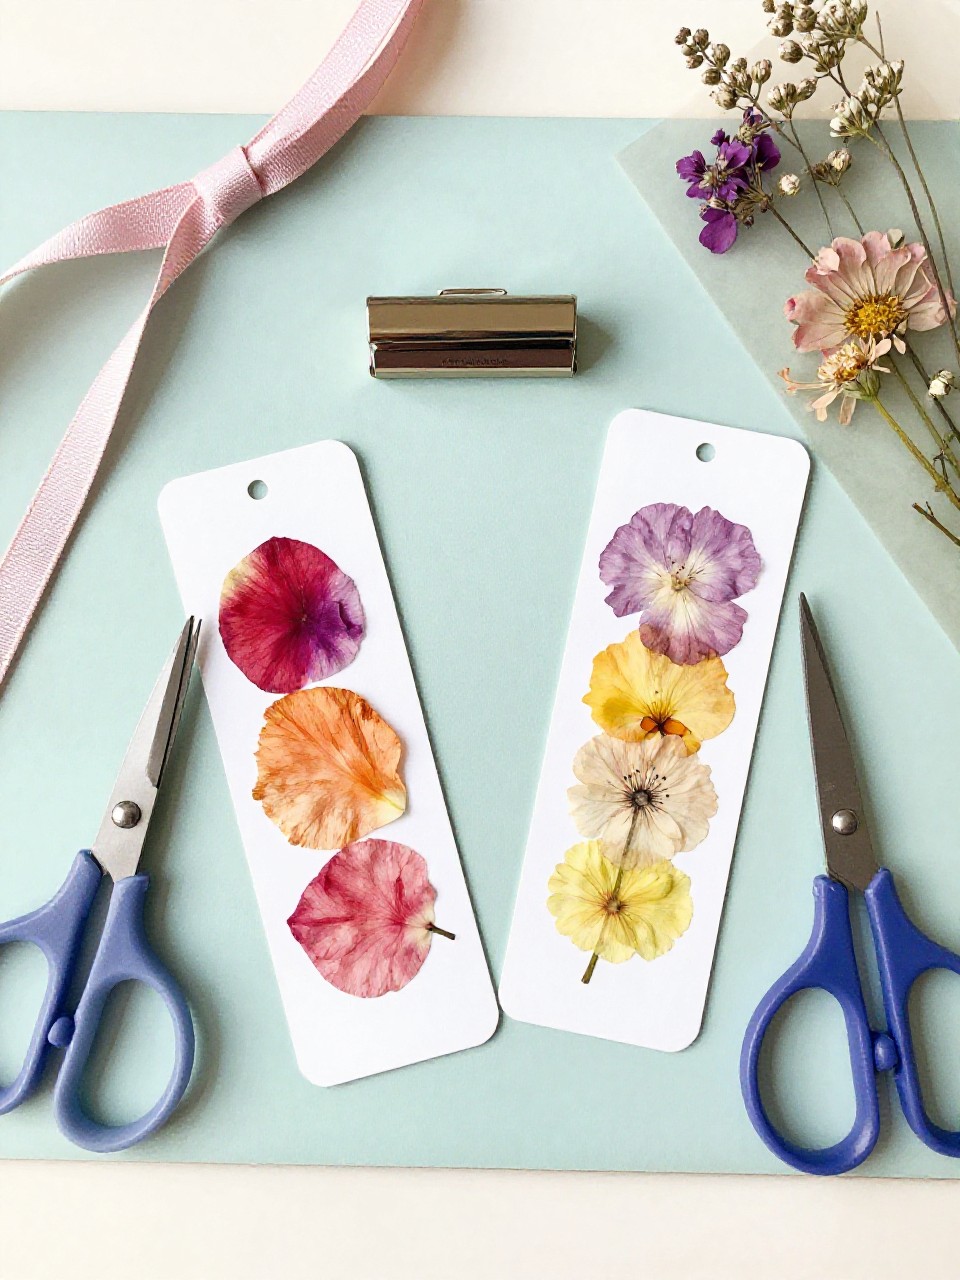
Pressed petals and leaves sealed in clear packing tape make slim, pretty bookmarks. Kids enjoy arranging tiny patterns, and readers love the delicate look.
Materials Needed:
- Pressed flower petals and small leaves
- Clear packing tape or laminating sheets
- Scissors
- Hole punch
- Ribbon or tassel thread
How to make it:
- Cut two strips of clear tape longer than your bookmark size.
- Arrange petals on the sticky side; seal with second strip.
- Trim edges neatly and punch a top hole.
- Add a ribbon tassel and slip into your favorite book.
16. Mossy Fairy Door
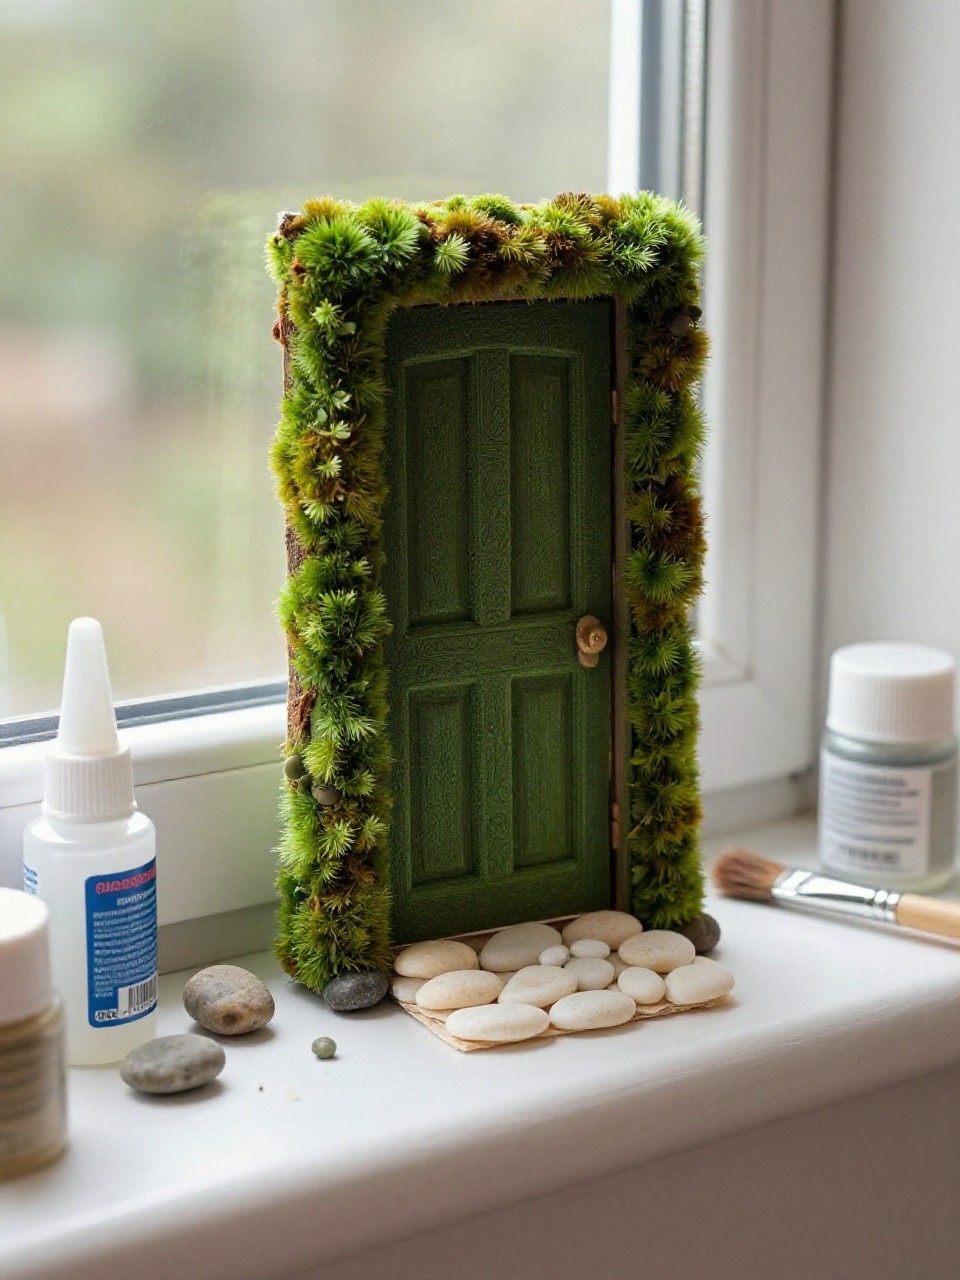
A small cardboard or wood door decorated with moss, pebbles, and tiny twigs turns any baseboard or garden pot into a fairy home. It sparks pretend play and looks whimsical.
Materials Needed:
- Small wood craft shape or thick cardboard (door shape)
- Craft moss
- Pebbles and twigs
- Tacky glue or hot glue
- Paint and tiny bead for a doorknob
How to make it:
- Cut or choose a small door shape and paint it.
- Glue moss around the edges and path stones at the base.
- Add twig trim and a bead doorknob.
- Prop against a wall or glue to a planter.
17. Nature Mandala Tray Art
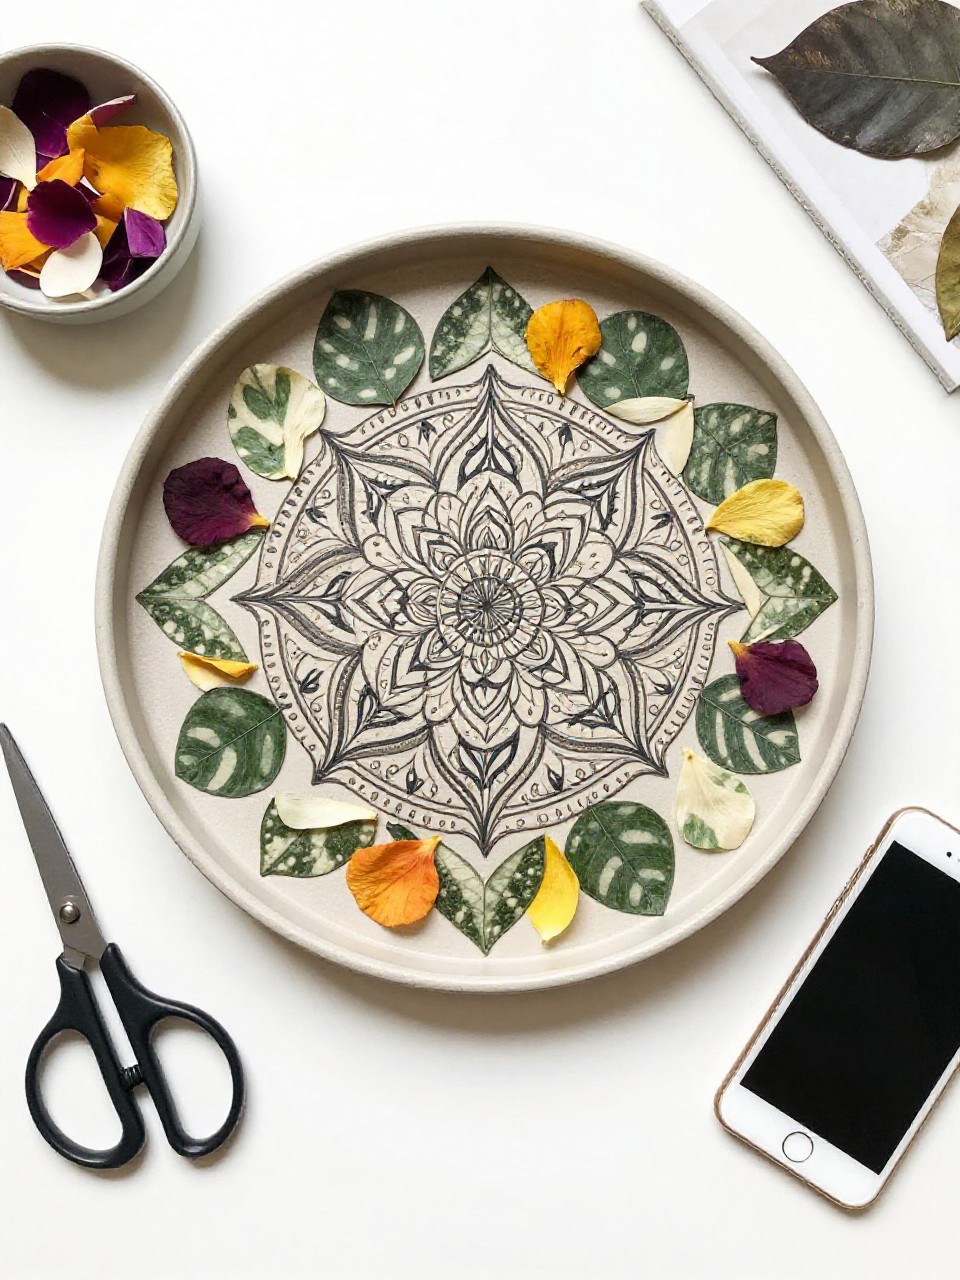
Arrange leaves, petals, cones, and seeds into a round mandala on a tray or plate for a temporary display. The repeating patterns are relaxing to design and photograph.
Materials Needed:
- Round tray or large plate
- Assorted natural items (leaves, petals, cones, seeds)
- Optional double-sided tape dots (for light hold)
- Camera or phone (to capture the design)
How to make it:
- Sort items by size and color.
- Start from the center and place pieces in repeating circles.
- Adjust spacing for symmetry; use tape dots if needed.
- Photograph your mandala and keep on display or reuse parts.