


In This Article Show
Fall wreath crafts are a great way to bring warmth and color into your home as the season changes. I enjoy how these projects can be simple or detailed, making them perfect for adults and kids alike.
Creating wreaths allows me to celebrate autumn while adding a personal touch to my decorations.

These 14 fall wreath craft ideas show how anyone can make beautiful and unique decorations for the season
Whether you want something classic or modern, easy or a bit more creative, there’s something here that fits different styles and skill levels. Making wreaths is a fun way to spend time and get ready for fall.
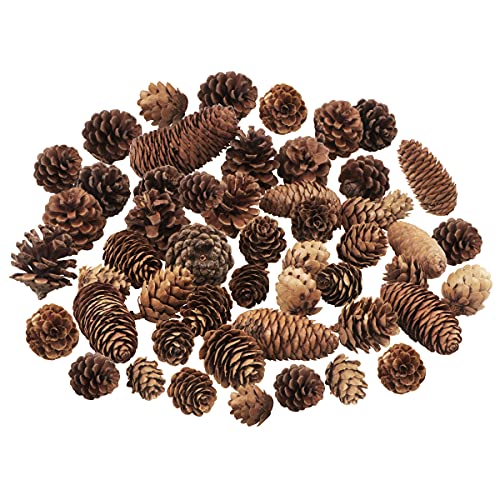
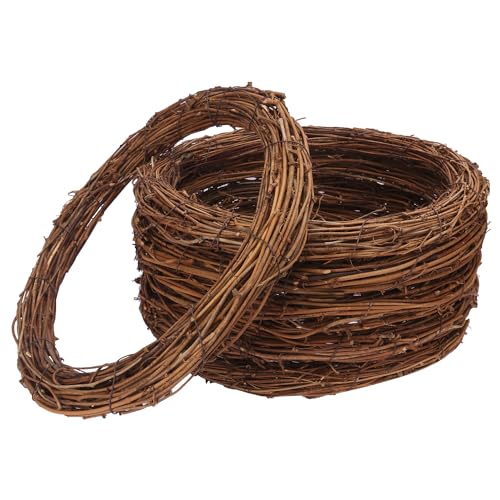
1. Rustic grapevine wreath with burlap and pinecones

I like using a natural grapevine wreath as the base for this craft. Burlap adds a simple, rustic texture that fits well with fall decor.
Pinecones give the wreath an organic touch. They are easy to attach and bring a natural look that complements the burlap nicely.
Shop the materials


How to Make a Rustic Grapevine Wreath with Burlap and Pinecones
Materials needed:
- Grapevine wreath form (12–18 inches)
- Burlap ribbon (2–3 inches wide)
- Pinecones (8–10, small to medium size)
- Hot glue gun and glue sticks
- Scissors
- Jute twine (optional, for hanging or wrapping)
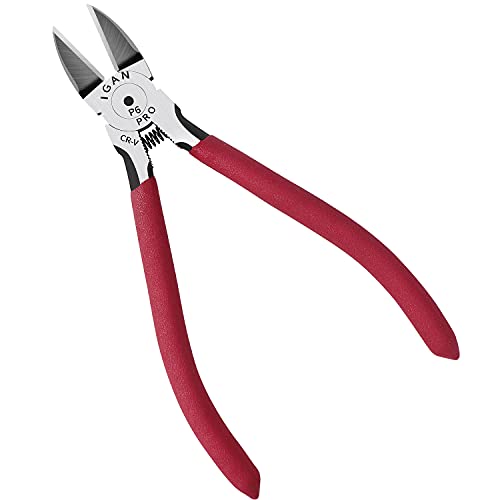
- Wire cutters (optional)
Instructions:
- Step 1: Prep the Wreath Form
Start by fluffing out the grapevine wreath and removing any loose pieces. You can lightly shake it to get rid of dust or debris. - Step 2: Wrap with Burlap Ribbon
Take the burlap ribbon and wrap it loosely around the wreath form, spacing it evenly. Secure the ends at the back of the wreath with hot glue. - Step 3: Create Bows
Cut 2–3 short strips of burlap and tie them into simple bows. Place them evenly around the wreath — typically one at the top, one on the side, and one at the bottom for balance. - Step 4: Attach the Pinecones
Glue the pinecones between the burlap wraps or near the bows. Hold each in place for a few seconds until the glue sets. Vary the sizes and directions to make it look natural. - Step 5: Add Twine (Optional)
For an extra rustic feel, wrap jute twine around parts of the wreath or tie a loop at the top for hanging. - Step 6: Hang and Style
Once all the glue has dried, hang your finished wreath on a front door, wall, or mantel using a hook or a piece of twine.
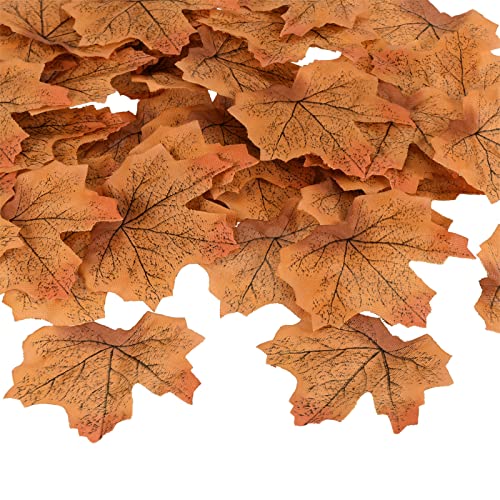
2. Colorful leaf and ribbon wreath

I like using bright leaves combined with ribbons to make a wreath. The mix of colors from fall leaves and the texture of ribbons create a nice, simple decoration. It is easy to do and works well for both adults and kids.
shop the materials


How to Make a Colorful Leaf and Ribbon Wreath
Materials Needed
- Grapevine or foam wreath base (12–18 inches)
- Artificial fall leaves (mixed colors: orange, yellow, red, brown)
- Satin ribbons (burgundy, gold, or bronze)
- Hot glue gun and glue sticks
- Floral wire or twist ties
- Scissors
- Optional: pinecones or small berry stems for added texture
Instructions
- Step 1: Prepare the Base
Start with a plain wreath base and check for loose vines or foam debris. Trim or secure any uneven spots for a smooth working surface. - Step 2: Sort the Leaves
Organize your artificial leaves by color and size. Mixing shades evenly will give your wreath a balanced, layered appearance. - Step 3: Attach the Leaves
Using hot glue, begin attaching the leaves around the wreath in small clusters. Overlap them slightly to cover gaps and create a full look. Alternate colors as you move around. - Step 4: Add Ribbon Accents
Cut pieces of ribbon about 12–15 inches long and form loose loops or bows. Secure them to the wreath with floral wire or glue, spacing them evenly for symmetry. - Step 5: Add Pinecones or Berries (Optional)
Glue small pinecones or berry stems between the leaves and ribbons for extra fall texture and detail. - Step 6: Final Touches
Check for any exposed spots or glue strings. Adjust the ribbons and leaves until everything looks natural and full. - Step 7: Hang Your Wreath
Attach a loop of ribbon or wire to the back of the wreath for hanging on your front door or wall.
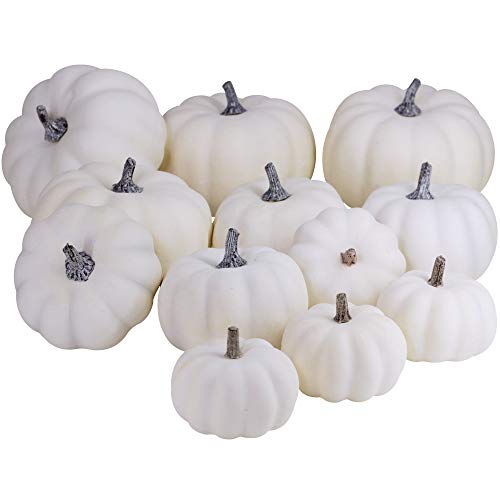
3. Pumpkin and acorn embellished wreath

I like using pumpkins and acorns to decorate wreaths for fall. These natural elements add texture and a seasonal feel. A simple grapevine wreath works well as a base for this craft.
Shop the materials


How to make a Pumpkin and acorn embellished wreath
Materials Needed
- Grapevine wreath base (14–18 inches)
- Mini foam or faux pumpkins (orange, cream, striped)
- Artificial acorns (plastic or wood)
- Faux autumn leaves (red, orange, and yellow)
- Hot glue gun and glue sticks
- Scissors or wire cutters
- Optional: floral wire for extra support
Instructions
- Step 1: Prepare Your Materials
Lay out all your pumpkins, acorns, and leaves on a flat surface. Plug in your glue gun and let it heat while you plan your wreath design. - Step 2: Arrange the Pumpkins
Before gluing, place the mini pumpkins around the wreath to find a balanced layout. Space them evenly, alternating sizes and colors for a natural look. - Step 3: Glue the Pumpkins in Place
Once satisfied with the placement, glue each pumpkin securely to the wreath base. Hold each one in place for about 10–15 seconds while the glue sets. - Step 4: Add the Acorns
Glue small acorns in the gaps between the pumpkins or near the inner and outer edges of the wreath. Mix in a few at random angles to create visual depth. - Step 5: Fill with Leaves
Tuck fall leaves behind the pumpkins and acorns, gluing them as you go. Overlap the leaves slightly to make the wreath appear full and layered. - Step 6: Final Touches
Check for any visible glue strings or gaps. Add a few smaller elements — like tiny pinecones or berries — if you want extra texture. - Step 7: Hang Your Wreath
Attach a loop of jute twine or ribbon to the top for easy hanging on your front door or over a fireplace.
4. Neutral-toned fall foliage wreath

I enjoy making neutral-toned fall foliage wreaths because they use soft colors like cream, taupe, and green. These wreaths include natural elements like eucalyptus and dried leaves. They create a calm, simple look that works well for any home style.
Shop the materials


How to How to Make a Neutral-Toned Fall Foliage Wreath
Materials Needed
- Foam or grapevine wreath base (14–18 inches)
- Neutral-toned artificial leaves (cream, tan, ivory, and brown)
- Pinecones (small and medium sizes)
- Faux acorns or wooden beads
- Hot glue gun and glue sticks
- Twine or jute rope (for wrapping and hanging)
- Scissors or wire cutters
- Optional: dried pods or wheat stems for added detail
Instructions
- Step 1: Wrap the Wreath Base
If using a foam wreath, wrap it completely in twine or jute rope. Secure the ends at the back with hot glue. This adds texture and hides the base. - Step 2: Arrange the Leaves
Lay out your leaves before gluing. Mix shades of cream, tan, and brown evenly around the wreath to maintain balance. - Step 3: Glue the Leaves in Layers
Attach the leaves to the wreath using hot glue, overlapping them slightly as you move around. Alternate leaf sizes for a more natural, full appearance. - Step 4: Add Pinecones and Acorns
Glue pinecones and faux acorns between clusters of leaves, spacing them evenly. Use smaller ones near the edges and larger ones closer to the center for depth. - Step 5: Add Finishing Touches
If desired, tuck in dried pods or wheat stems to bring in extra texture and seasonal flair. - Step 6: Check and Clean Up
Inspect the wreath for gaps or excess glue. Add any missing leaves, then gently remove glue strings. - Step 7: Hang and Enjoy
Attach a small loop of twine or ribbon at the back and hang your wreath on a front door, mantel, or wall.
5. Bright autumn colors with faux berries wreath

I like using faux berries to add bright colors to my fall wreath. They bring in red, orange, and sometimes yellow tones that stand out. Faux berries last longer and keep the wreath looking fresh all season.
Shop the materials


How to Make a Bright Autumn Colors with Faux Berries Wreath
Materials Needed
- Grapevine wreath base (14–18 inches)
- Artificial fall leaves (mix of orange, yellow, red)
- Faux berry stems (orange and red)
- Pinecones (small and medium)
- Hot glue gun and glue sticks
- Wire cutters or scissors
- Floral wire (optional, for securing heavier items)
instructions
- Step 1: Prepare Your Materials
Lay out all your leaves, berries, and pinecones on a table. Heat your glue gun and trim any long stems so they fit neatly against the wreath. - Step 2: Arrange the Leaves First
Start by gluing the leaves onto the grapevine wreath. Overlap them as you go, alternating the colors for an even mix of red, orange, and yellow. - Step 3: Add Faux Berry Stems
Cut your berry stems into smaller sections. Insert and glue them between the leaves, focusing on creating small clusters for pops of color. - Step 4: Attach Pinecones
Glue pinecones throughout the wreath to add texture and depth. Place them near berry clusters or between leaves for balance. - Step 5: Fill in Gaps
Look over the wreath and fill any empty spaces with smaller leaves or extra berries. The goal is to make it look lush and full without overcrowding. - Step 6: Hang the Wreath
Attach a loop of floral wire or ribbon at the top for hanging. Make sure it’s centered so the wreath hangs evenly.
6. Mini pumpkin cluster wreath for kids

I like using small pumpkins and felt leaves to make a mini pumpkin cluster wreath for kids. It’s simple and fun to put together with safe, soft materials. Kids enjoy creating the clusters and arranging them on a small wreath form.
Shop the materials


How to Make a Mini Pumpkin Cluster Wreath for Kids
Materials Needed
- Foam wreath base (8–10 inches, lightweight for kids)
- Mini foam or plastic pumpkins
- Faux leaves (green or fall-colored)
- Small pinecones (optional)
- Hot glue gun (or craft glue for younger kids)
- Craft-safe scissors
- Twine or ribbon for hanging
Instructions
- Step 1: Prep the Wreath Base
Lay the foam wreath flat on a table. If desired, let the kids paint it orange or brown to match the fall theme and allow it to dry before decorating. - Step 2: Arrange the Pumpkins
Place mini pumpkins around the wreath base to see how they fit. Keep them evenly spaced for a balanced look. - Step 3: Glue the Pumpkins in Place
With adult supervision, glue each pumpkin to the wreath base. For younger kids, use strong craft glue instead of hot glue. - Step 4: Add Faux Leaves
Tuck faux leaves between the pumpkins to fill gaps and give the wreath a lush look. Secure with small dabs of glue. - Step 5: Decorate with Pinecones (Optional)
Add a few pinecones or acorns between the pumpkins for extra texture and fall flair. - Step 6: Attach a Hanger
Glue or tie a loop of twine or ribbon at the top of the wreath for hanging. - Step 7: Let It Dry
Allow the wreath to dry completely before hanging or displaying.
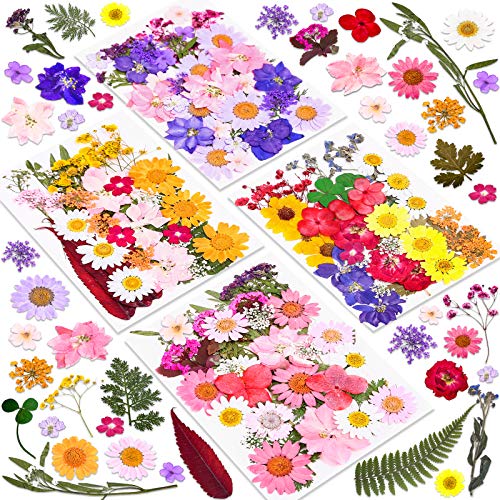
7. Natural twig and dried flower wreath

I like using twigs and dried flowers to make wreaths. They bring a simple, natural look that fits well.
You can gather twigs from outside and add dried flowers in warm colors. It’s easy to create a wreath this way.
Shop the materials


8. Fabric strip tie wreath in fall hues

I use fabric strips in warm fall colors like orange, brown, and yellow.
Tying these strips to a wire wreath frame is simple and fast.
This wreath looks nice on a door and adds a cozy feel to any room.
shop the materials


How to Make a Fabric Strip Tie Wreath in Fall Hues
Materials Needed
- Foam or wire wreath base (12–16 inches)
- Assorted fabric strips or ribbons in fall colors (orange, red, yellow, brown, tan)
- Scissors or rotary cutter
- Ruler or measuring tape
- Optional: bow for finishing touch
Instructions
- Step 1: Cut Your Fabric Strips
Cut your fabric into strips about 1.5 to 2 inches wide and 10–12 inches long. You can mix patterns and textures like burlap, flannel, and cotton for variety. - Step 2: Tie the Strips Around the Wreath Base
Wrap one fabric strip around the base and tie it in a tight double knot. Push the knot close to the previous one to cover the base completely. Continue tying strips around until the wreath looks full. - Step 3: Alternate Colors
Alternate between different shades and fabrics to create a balanced and layered fall palette. Adjust strips as you go to fill gaps. - Step 4: Fluff the Strips
Once you’ve tied all the fabric pieces, gently fluff and spread them to make the wreath look even and full. - Step 5: Add a Bow
Tie a large bow using a coordinating ribbon or leftover fabric strip and glue or tie it to the bottom or side of the wreath. - Step 6: Hang and Enjoy
Attach a loop of ribbon or twine to the back for easy hanging
9. Hand-painted wooden leaf wreath

I like using wooden leaves for this wreath because they hold paint well and last longer than real leaves. Painting each leaf lets me choose colors that fit my style or match my home. It’s a simple way to create a clean, polished look for fall.
shop the materials


How to Make a Hand-Painted Wooden Leaf Wreath
Materials Needed
- Wooden leaf cutouts (20–25 pieces)
- Grapevine or wooden wreath base
- Acrylic paints (in red, orange, yellow, brown, and cream)
- Small paintbrushes
- Black paint pen or fine marker
- Hot glue gun and glue sticks
- Ribbon or twine for hanging
instructions
- Step 1: Prepare the Wooden Leaves
Lay out all the wooden leaves on your work surface. Make sure they’re clean and smooth. If needed, sand the edges lightly. - Step 2: Paint the Leaves
Paint each leaf in fall-inspired colors like mustard yellow, burnt orange, deep red, and chestnut brown. Apply two coats for solid coverage and let them dry completely. - Step 3: Add Leaf Veins
Use a black paint pen or fine marker to draw leaf veins. This simple detail makes each leaf look crisp and defined. - Step 4: Arrange the Leaves
Lay the painted leaves around the wreath base before gluing. Alternate colors for a balanced pattern and overlap some leaves for depth. - Step 5: Glue the Leaves in Place
Once you’re happy with the arrangement, glue each leaf securely to the base. Hold each one for a few seconds to ensure a good bond. - Step 6: Add Finishing Touches
If desired, add a bow or a few pinecones for extra texture. Then attach a ribbon or twine loop to the back for hanging.
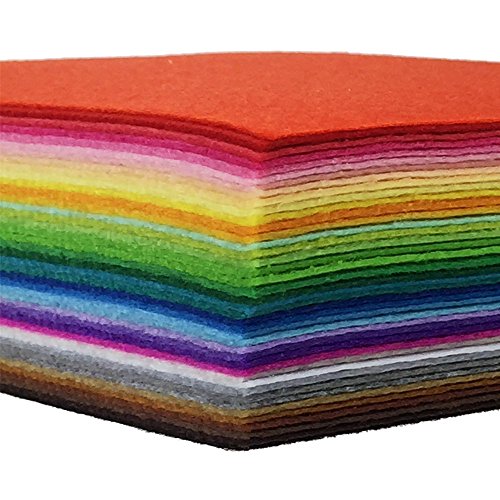
10. Wreath with felted wool leaves

I like using felted wool leaves for fall wreaths because they add texture and color. The wool can be shaped easily and stays soft.
Making a wreath with felted wool leaves is simple. You can twist and attach the wool onto a frame, layering different autumn colors like red, gold, and green.
shop the materials


How to Make a Wreath with Felted Wool Leaves
Materials Needed
- Foam or straw wreath base (12–14 inches)
- Assorted felt sheets in fall colors (mustard, red, orange, brown, gray)
- Scissors
- Hot glue gun and glue sticks
- Marker or fabric pen
- Leaf templates (optional)
- Twine or ribbon for hanging
Instructions:
- Step 1: Prepare the Wreath Base
Wrap the wreath base in felt or burlap to give it a soft, finished look. Secure the ends with glue and - Step 2: Cut the Leaves
Draw or trace leaf shapes on your felt sheets using a marker or pen. Cut out about 25–30 leaves in various colors and sizes for a natural layered look. - Step 3: Add Vein Details
Use a darker felt marker or embroidery thread to draw or stitch simple veins on each leaf to give them texture and depth. - Step 4: Arrange the Leaves
Lay out your leaves on the wreath base before gluing. Overlap and mix colors as you go for a full, natural appearance. - Step 5: Glue the Leaves in Place
Begin gluing leaves around the wreath base, working in one direction. Alternate colors and layer the leaves to fill any gaps. - Step 6: Add Finishing Touches
Attach a loop of twine or ribbon to the back for hanging. You can also glue a bow at the top or bottom for added charm.
11. DIY corn husk wreath

I like making corn husk wreaths because they bring a natural, autumn feel to any space. You just need dried corn husks, a wreath form, glue, and some wire. It’s a simple, affordable craft anyone can try.
Shop the materials


How to Make a DIY Corn Husk Wreath
Materials Needed
- Straw or foam wreath base (12–16 inches)
- Dried corn husks (available at craft stores or from fresh corn)
- Mini decorative corn cobs or dried corn kernels
- Hot glue gun and glue sticks
- Scissors
- Twine or floral wire
- Optional: faux flower or ribbon for accent
Instructions
- Step 1: Prepare the Corn Husks
If using fresh corn husks, soak them in warm water for about 10 minutes to make them flexible. Pat dry with a towel before using. - Step 2: Wrap the Wreath Base
Start by covering the wreath base with a layer of corn husks. Overlap the pieces slightly, securing each one with hot glue until the base is completely covered. - Step 3: Add More Layers for Fullness
Once the first layer is set, add a second layer of husks to give the wreath a fuller, textured look. Alternate the direction of the husks slightly to create movement. - Step 4: Attach the Corn Cobs
Glue mini corn cobs or dried corn sections around the wreath, spacing them evenly. Make sure they’re secure before moving on. - Step 5: Add an Accent Flower
Glue a faux sunflower or autumn bloom to one side of the wreath for a finishing touch. You can also add ribbon or raffia for extra detail. - Step 6: Attach a Hanging Loop
Use twine or floral wire to create a loop on the back of the wreath for easy hanging.
12. Grapevine wreath with cinnamon sticks and star anise

I like using a grapevine wreath as a base because it feels natural and rustic. Adding cinnamon sticks and star anise gives it a warm smell and a simple, autumn look. This craft is easy to do for both adults and kids.
Shop the materials


How to Make a Grapevine Wreath with Cinnamon Sticks and Star Anise
Materials Needed
- Grapevine wreath base (12–14 inches)
- Cinnamon sticks (about 10–12)
- Star anise pods (10–15)
- Twine or jute string
- Hot glue gun and glue sticks
- Scissors
- Optional: small pinecones or dried orange slices
Instructions
- Step 1: Prepare the Grapevine Wreath
Lay your grapevine wreath flat and remove any loose twigs. This ensures a clean surface for your decorations. - Step 2: Arrange the Cinnamon Sticks
Group 3–4 cinnamon sticks together and tie them with a short length of twine. Make two or three bundles, then glue or tie them onto the wreath at even intervals. - Step 3: Add the Star Anise
Glue star anise pods around the cinnamon bundles and in between the twigs. Their star shapes add beautiful texture and a subtle spice scent. - Step 4: Fill in the Gaps
If desired, add small pinecones, dried orange slices, or berries between the spices for added depth and warmth. - Step 5: Wrap with Twine
Wrap the wreath loosely with twine to add rustic charm and help secure the decorations in place. Tie a bow or knot at the bottom. - Step 6: Add a Hanging Loop
Attach a piece of twine or jute to the back of the wreath for hanging. Make sure it’s sturdy enough to hold the weight.
13. Paper flower fall wreath

I like using paper flowers for fall wreaths because they are simple and affordable. You can make them in warm colors like orange, yellow, and red to match the season. This craft works well for both adults and kids.
shop the materials


How to Make a Paper Flower Fall Wreath
Materials Needed
- Cardstock or craft paper in fall colors (orange, yellow, red, brown)
- Scissors
- Hot glue gun and glue sticks
- Pencil
- Wreath base (foam, cardboard, or grapevine)
- Paper flower templates (optional)
- Ruler
- String or ribbon for hanging
Instructions
- Step 1: Prepare the Paper
Choose several fall shades of cardstock or craft paper. Cut each sheet into smaller squares that will be used for the flower petals. - Step 2: Draw and Cut the Petals
Using a pencil or a printed template, draw petal shapes in different sizes. Cut them out neatly with scissors. You’ll need about 6–8 petals per flower. - Step 3: Shape the Petals
Gently curl each petal by rolling the edges around a pencil or ruler. This adds a more natural, three-dimensional look. - Step 4: Assemble the Flowers
Start gluing petals together in layers, largest to smallest, creating full blooms. Add a small circular piece at the center for the flower core. - Step 5: Attach the Flowers to the Wreath
Arrange the paper flowers around your wreath base. Once you’re happy with the layout, glue them securely in place. Layer and overlap to fill any gaps. - Step 6: Add the Final Touches
You can mix in paper leaves or berries for extra texture. Finally, attach a ribbon or string at the top for hanging.
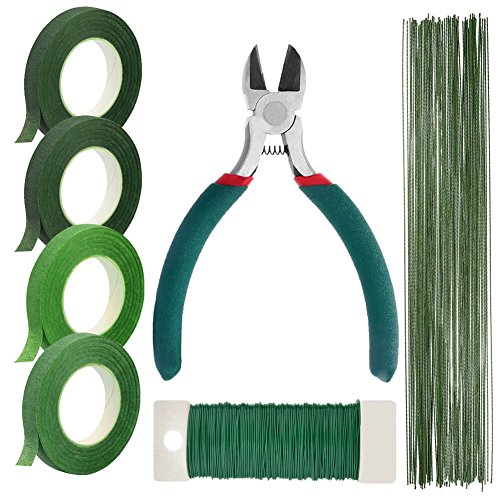
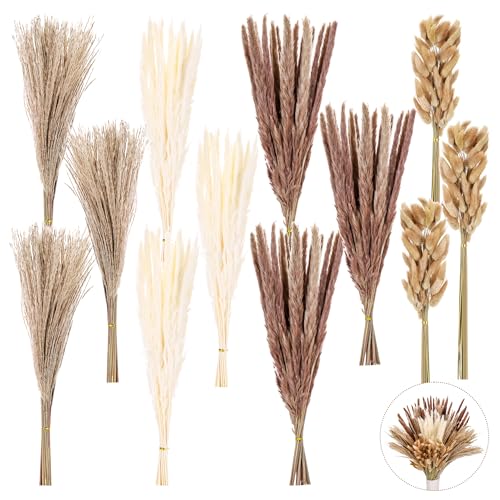
14. Mixed media wreath with dried wheat and silk flowers

I like combining dried wheat with silk flowers for a mixed media wreath. It brings natural texture and lasting color together. This style adds depth and interest to fall decor without much effort.
Shop the materials


How to Make a Mixed Media Wreath with Dried Wheat and Silk Flowers
Materials Needed
- Grapevine or straw wreath base (14–18 inches)
- Dried wheat stalks (1–2 bundles)
- Assorted silk flowers in fall shades (burgundy, orange, ivory, gold)
- Faux berries or dried accents (optional)
- Hot glue gun and glue sticks
- Floral wire
- Wire cutters
- Scissors
- Jute or ribbon for hanging
Instructions
- Step 1: Prepare the Wreath Base
Lay the wreath base on a flat surface. Fluff and reshape it if needed, removing any loose twigs. - Step 2: Add the Dried Wheat
Trim the wheat stalks to about 8–10 inches long. Starting from one side, insert and glue small bundles into the wreath base, following the circular shape. Overlap slightly as you go for a full, layered look. - Step 3: Attach the Silk Flowers
Choose a mix of large and small silk blooms. Arrange them evenly around the wreath, concentrating more flowers on one side for a balanced asymmetrical design. Secure each with hot glue or floral wire. - Step 4: Fill in Gaps with Accents
Add faux berries, dried leaves, or small filler flowers to fill any spaces between the wheat and larger blooms. This step adds texture and depth. - Step 5: Create a Hanging Loop
Cut a piece of jute or ribbon and tie it securely to the back of the wreath for hanging. Make sure it’s centered so the wreath hangs evenly. - Step 6: Final Adjustments
Once everything is glued and secure, gently fluff the flowers and reposition any stems that look flat.