


In This Article Show
As an experienced gardener with over 13 years of hands-on soil-and-seeds experience, I deeply appreciate the art of growing garlic. It’s not just a hobby; it’s a passion that nurtures a connection with nature and contributes to the well-being of our planet. But more than that, it provides us with one of nature’s most robust and versatile flavors.
Garlic, known scientifically as Allium sativum, is a beloved ingredient in numerous global cuisines, recognized for its unique aroma and health benefits. But have you ever thought about growing it in your backyard? If yes, you’re in for an incredible journey of watching a small garlic clove transform into a full-fledged, aromatic bulb.
This guide, crafted from my years of gardening experience, will lead you to step by step through the garlic-growing stages. By understanding each stage, you’ll be better equipped to care for your garlic plants, handle any challenges that come your way, and eventually reap a bountiful harvest.
Understanding Garlic Varieties
If you’re starting your journey to grow garlic, the first decision you’ll need to make is which variety to plant. With my 13 years of gardening experience, I’ve worked with numerous garlic types, each unique in its flavor profile, growth requirements, and overall characteristics.
Generally, garlic is divided into two main types: Softneck and Hardneck.
1. Softneck Garlic (Allium sativum ssp. sativum)
Softneck garlic, as the name implies, has a soft, flexible stem that is perfect for braiding. This variety is commonly found in supermarkets due to its long shelf-life and robust flavor. Softnecks are often the go-to choice for gardeners in warmer climates as they are less winter-hardy than their hard-neck counterparts.
Two popular subtypes of soft neck garlic are Artichoke and Silverskin, each boasting a different flavor and growth habit.
2. Hardneck Garlic (Allium sativum ssp. ophioscorodon)
Hardneck garlic varieties are known for their hard, woody central stalk and the production of a flowering stem or scape. The scapes, when young, are edible and have a delicious, mild garlic flavor. Hardnecks are typically grown in cooler climates, and while they have a shorter shelf life than softnecks, they are celebrated for their complex and rich flavors.
Notable hard neck subtypes include Rocambole, Purple Stripe, and Porcelain, each with distinct taste and appearance characteristics.
By understanding these garlic varieties, you can select the type that’s best suited for your climate, soil type, and personal taste preferences. In my years of growing garlic, I’ve learned that the choice of variety significantly influences the journey and final result of garlic cultivation.
Choosing the Right Time to Plant Garlic
Selecting the right time to plant garlic is just as crucial as choosing the right variety. Timing your planting correctly can be the difference between a bountiful harvest and disappointment. In my 13 years of gardening, I’ve found that the ‘when’ of planting garlic depends largely on your climate and the garlic variety you’ve chosen.
1. Planting in Cooler Climates
For those living in cooler climates, hard-neck garlic varieties are your best bet. These are typically planted in the fall, around 4–6 weeks before the ground freezes. This allows the cloves enough time to establish roots before winter arrives, but not so much time that they produce above-ground growth vulnerable to frost damage.
2. Planting in Warmer Climates
For warmer climates, soft-neck garlic varieties are a better choice. While they can be planted in the fall for a late spring or early summer harvest, they can also be planted in late winter or early spring for a fall harvest. This flexibility makes soft-neck garlic a popular choice in these regions.
Remember, garlic isn’t overly picky about when it’s planted. I’ve found in my gardening journey that it’s a forgiving plant that, given decent conditions and care, can still produce good yields even when not planted at the ‘perfect’ time.
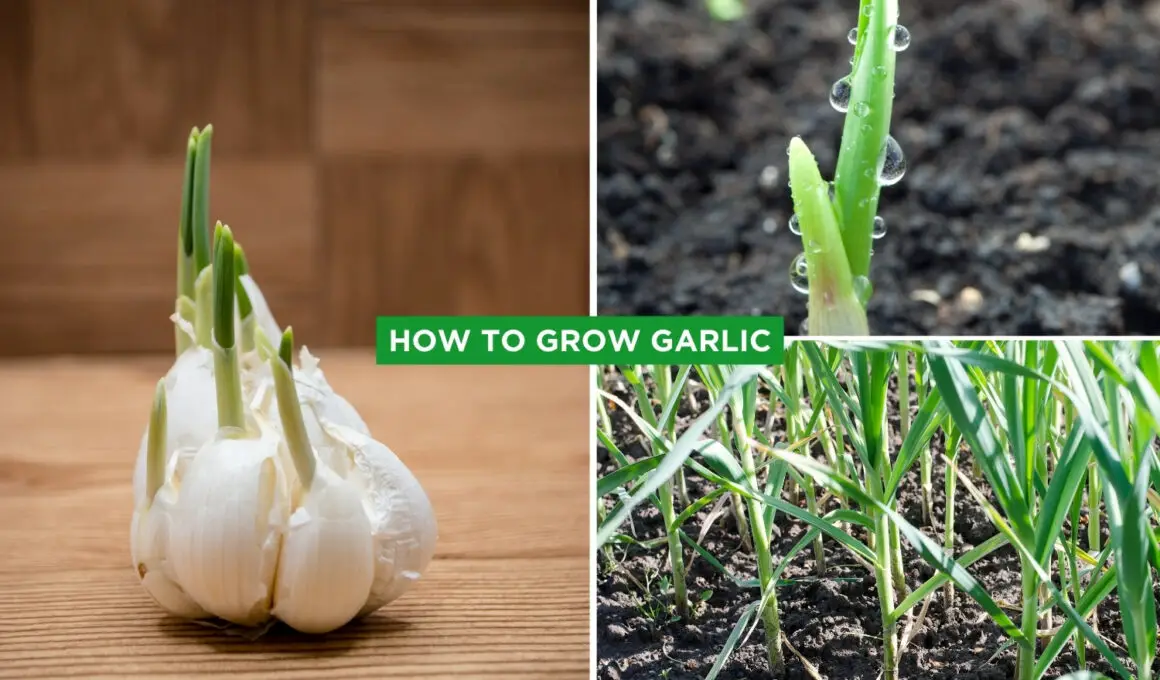
How to Plant Garlic
Planting garlic might seem straightforward – and in many ways, it is – but a few crucial steps can make all the difference in your yield. Having planted garlic countless times in my 13 years of gardening, I can assure you that a little effort, in the beginning, goes a long way.
1. Preparing The Soil
Garlic thrives in well-drained soil rich in organic matter. Before planting, enrich your soil with compost or well-rotted manure. This provides the necessary nutrients and improves soil structure, allowing for better water absorption and root penetration. Aim for a pH level between 6.0 and 7.0 for optimal growth.
2. Choosing the Right Garlic Cloves
As with any plant, healthy seeds (or in this case, cloves) lead to healthy plants. Select large, firm garlic cloves from a reliable source. The larger the clove, the larger the bulb it will produce. Avoid any cloves that appear shriveled, discolored, or show signs of disease.
3. Planting Process
Plant individual cloves pointy end up, about 2 inches deep and 6-8 inches apart. This allows enough space for the bulbs to grow without competition. If you’re planting multiple rows, space the rows about a foot apart to allow for cultivation and air circulation.
4. Mulching
After planting, cover the area with a layer of mulch. This could be straw, leaves, or grass clippings. Mulching helps retain soil moisture, suppresses weeds, and protects hardneck varieties in winter.
Once your garlic is in the ground, the real growth journey begins. Each garlic growth stage has unique characteristics and needs, and understanding these stages can significantly enhance your garlic-growing success.
Garlic Growing Stages: A Detailed Guide
Understanding the life cycle of garlic is essential for a successful harvest. Each stage of growth brings with it specific needs and potential challenges. Let’s delve into the details of each stage so you can confidently navigate your garlic’s growth journey.
Stage 1: Root Establishment
After planting, the garlic cloves begin to develop roots. Even though there won’t be much to see above the ground, a crucial process is unfolding beneath the soil. During this stage, it’s essential to keep the soil moist but not waterlogged, as too much water can cause the cloves to rot.
Stage 2: Leaf Development
Following root establishment, green shoots begin to appear above the ground. These shoots will grow into leaves that photosynthesize to feed the developing bulb. During this stage, garlic benefits from a balanced, slow-release fertilizer to support vigorous leaf growth.
Stage 3: Bulb Formation
Bulb formation usually begins in late spring or early summer when the days start to lengthen. The plant begins to transition energy from leaf development to bulb formation. It’s essential during this stage to maintain even soil moisture to facilitate bulb growth.
Stage 4: Bulb Swelling
This is the stage where the magic happens – your garlic bulbs begin to swell and take shape. Regular watering becomes increasingly crucial at this stage, as any water stress can result in smaller bulbs. But be careful – overwatering can lead to bulb rot or disease.
Stage 5: Maturation
As the garlic plants mature, the lower leaves will start to yellow and dry out. When about half of the leaves have yellowed, it’s typically a good indication that the garlic is ready for harvest. Avoid watering at this stage to prevent the bulbs from becoming waterlogged and potentially rotting.
Understanding these stages can help you anticipate your garlic plants’ needs and respond effectively, maximizing your chances of a bountiful harvest.
Identifying And Dealing With Garlic Pests And Diseases
Just like all plants, garlic can be prone to certain pests and diseases. Understanding the potential issues and how to address them can keep your garlic crop healthy and thriving.
Pests
1. Nematodes
These microscopic worms can cause yellowing and stunting of plants. Rotate your crops every year and avoid planting garlic in the soil where nematodes have previously been a problem.
2. Onion Thrips
These tiny insects can cause the garlic leaves to appear silvery or mottled. Insecticidal soaps and neem oil can be effective in dealing with these pests.
3. Leek Moth
Caterpillars of the leek moth can burrow into the leaves, causing them to yellow and wilt. If infestation is minor, manual removal of the caterpillars can help. For more severe cases, consider using an organic pesticide.
Diseases
1. White Rot
This fungus can cause yellowing of leaves and rotting of the bulbs. Unfortunately, there’s no effective treatment once plants are infected. The best approach is prevention: rotate crops and avoid planting garlic in areas where white rot has been a problem.
2. Basal Rot
This disease, caused by a different type of fungus, leads to rotting at the base of the stem and discoloration of the bulbs. Again, prevention is key. Plant only healthy cloves and consider soil solarization before planting if basal rot has been a problem.
3. Botrytis Neck Rot
This can cause the neck of the plant to soften and decay, and grey mold to form on the affected area. To prevent this, ensure good air circulation and avoid overwatering.
Remember, the best defense against pests and diseases is a healthy, well-maintained garden. Regular watering, proper spacing, and rotation of crops can go a long way in preventing these issues.

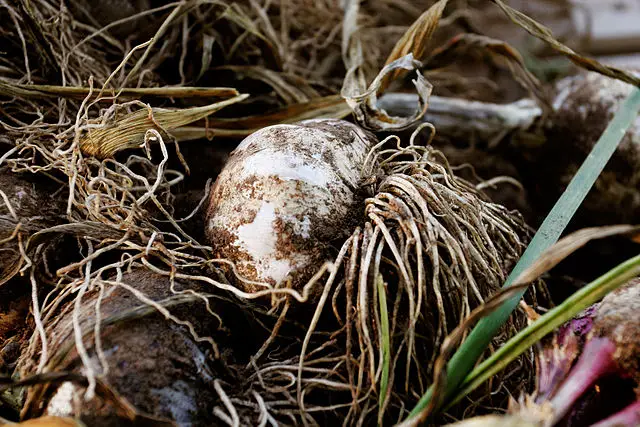
When And How to Harvest Garlic
One of the most exciting moments in your garlic-growing journey is when it’s time to harvest. Being able to see, smell, and eventually taste the results of your efforts is immensely satisfying. However, determining when exactly to harvest can sometimes be tricky.
1. When to Harvest
Harvesting time varies depending on your climate, the variety of garlic, and when you planted. Generally, garlic is ready to harvest when half to two-thirds of the leaves have yellowed. This usually occurs in the summer months, from as early as June to as late as August.
Resist the temptation to pull up the garlic as soon as you see a sizeable bulb forming. If harvested too early, the cloves won’t have fully formed and the bulb won’t store well.
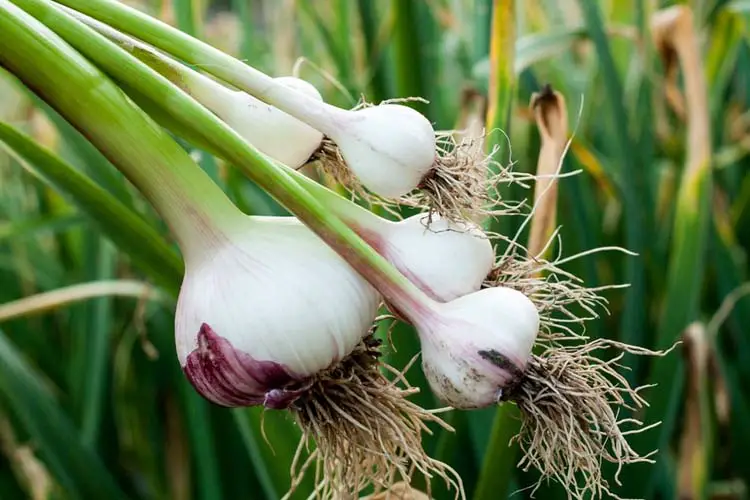
2. How to Harvest
To harvest your garlic, gently loosen the soil around the bulb with a fork or spade, being careful not to bruise or cut the bulb. Then, pull the plant out by the base of the stem.
Brush off any excess soil but avoid washing the bulbs as this can lead to rot during storage. Trim off the roots, and attach the stems and leaves for the curing process.
After harvesting comes curing, a critical process to prepare the garlic for storage.
Storing And Curing Garlic
The journey of your garlic doesn’t end at harvest. Proper curing and storage are essential to prolong the life of your garlic and maximize its flavor. Here’s how you can do it right:
1. Curing Garlic
Curing is the process of allowing your garlic to dry, which helps extend its shelf life. After harvesting, place your garlic in a well-ventilated area out of direct sunlight. A garage, shed, or covered porch can be a good curing spot.
If you’re dealing with a large harvest, you can hang garlic bunches or lay them out on a raised screen for better airflow. Let your garlic cure for 3-4 weeks. During this time, the skins will dry out and the flavors in your garlic will further develop.
2. Trimming And Cleaning
Once your garlic is properly cured, it’s time for a little cleanup. Trim the stems about an inch above the bulb and cut off the roots. You can also brush off the outer, dirty layers of skin to reveal clean, white, ready-to-use bulbs.
3. Storing Garlic
Store your garlic in a cool, dry place with good ventilation. A pantry or cellar is often a good choice. Garlic prefers temperatures of around 60°F (15°C) with a relative humidity of about 60-70%.
Avoid storing garlic in the refrigerator as it can encourage sprouting. Also, steer clear of storing in plastic bags or sealed containers, which can lead to moisture buildup and promote rot.
With the right curing and storage techniques, you can enjoy your home-grown garlic for 6-9 months, or even up to a year for some varieties. Now that you’re equipped with all the knowledge needed to grow, harvest, cure, and store your garlic, it’s time to get your hands dirty and begin the exciting journey of garlic growing.
FAQs About Garlic Growing Stages
As a final wrap-up to our guide to garlic growing stages, let’s look at some frequently asked questions. These questions often arise among novice and seasoned gardeners, so they may provide additional insights to enhance your garlic growing experience.
Why is my garlic not forming bulbs?
Several factors can prevent garlic from forming bulbs, including improper planting time, insufficient sunlight, or lack of nutrients. Plant at the right time for your garlic variety, ensure your garlic gets at least 6 hours of sunlight a day, and supplement with a balanced fertilizer if needed.
Can I plant store-bought garlic?
While it’s possible to plant store-bought garlic, it’s not always recommended. Store-bought garlic may not be suitable for your local climate and can carry diseases. For best results, buy garlic cloves specifically intended for planting from a reputable nursery or seed provider.
How much water does garlic need?
Garlic prefers evenly moist soil but doesn’t do well in waterlogged conditions. A good rule of thumb is to water deeply once a week, adjusting based on weather conditions. In particularly hot or dry periods, more frequent watering may be necessary.
Do I need to rotate my garlic crops?
Yes, crop rotation is important for all plants, including garlic. It helps prevent the buildup of soil-borne diseases and pests and keeps the soil rich and balanced.
When should I fertilize my garlic, and what should I use?
A slow-release, balanced fertilizer applied at planting and again in the spring when growth resumes is usually sufficient for garlic. Some gardeners also like to supplement with a high-nitrogen fertilizer in early spring to support leaf growth.
Conclusion
There you have it – your complete guide to garlic growing stages. From understanding the different garlic varieties to planting, nurturing, and finally harvesting and storing your home-grown garlic, you are now equipped with all the knowledge you need.
Growing garlic might seem a daunting task initially, but once you understand the process and the stages involved, it becomes a satisfying journey that brings you closer to nature and rewards you with fresh, flavorful garlic for your culinary adventures.