


In This Article Show
Keeping kids busy can be tough, especially on rainy days or when you need a quick classroom activity. If you’ve got a jar of shank buttons (the ones with the loop on the back), you’re in luck. This list gives you simple, colorful projects that turn those buttons into cute art and playful accessories.

You’ll find ideas that are easy to set up, fun to decorate, and satisfying to finish. Let’s dive into 15 creative shank button crafts you’ll want to try.
1. Shank Button Flower Garden Collage
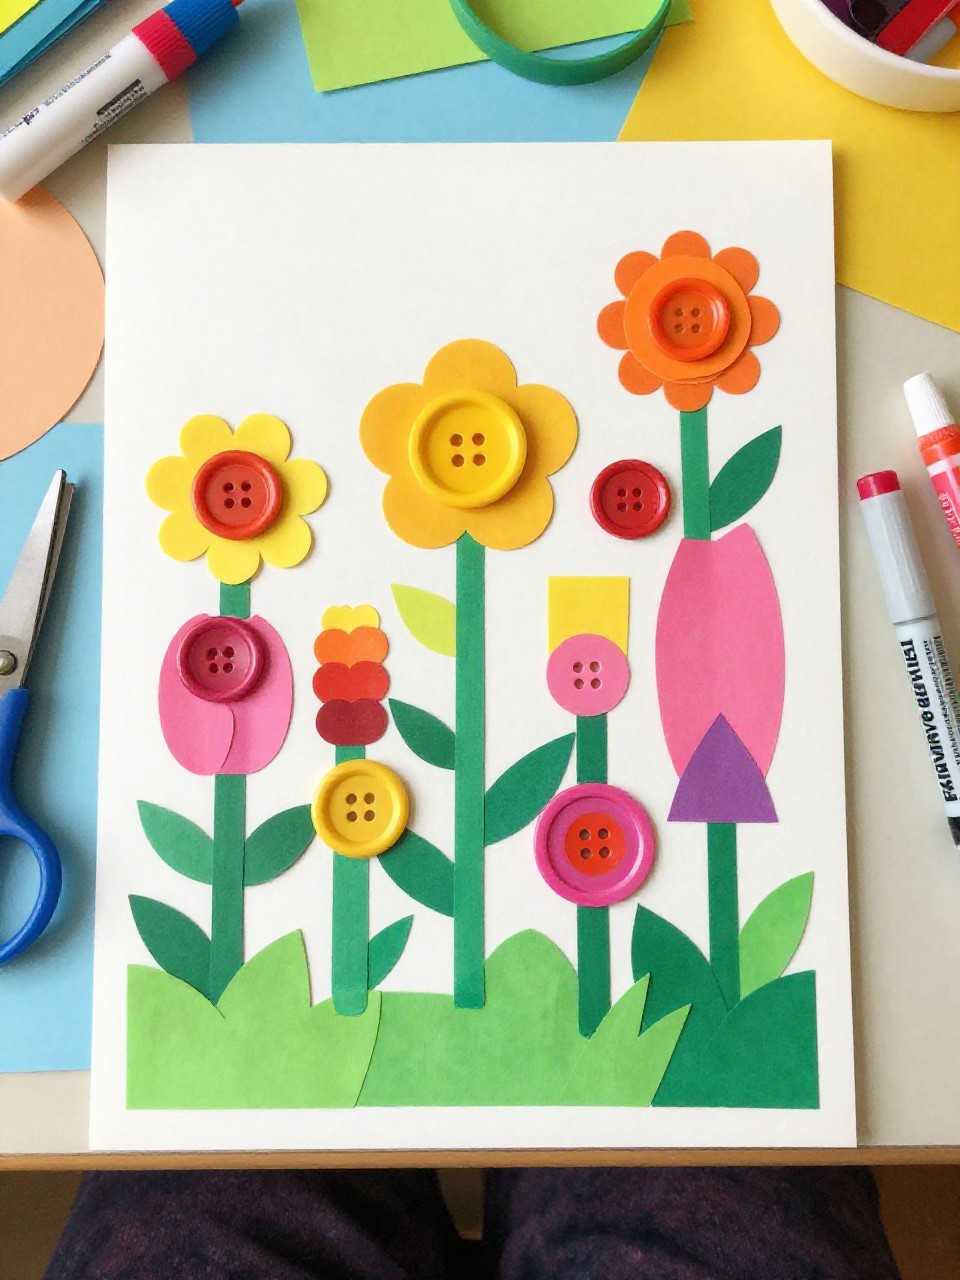
This collage looks like a cheerful garden with shank buttons as the flower centers and paper stems and leaves around them. Kids love how the raised button centers make the flowers pop, and it’s easy enough for beginners to enjoy success.
Materials Needed:
- Cardstock or canvas board
- Assorted shank buttons (various sizes/colors)
- Craft glue or glue dots
- Green paper for stems/leaves
- Markers or crayons
How to make it:
- Cut green paper into stems and leaves; arrange on the base.
- Glue shank buttons where each flower center will be.
- Add petal shapes with paper or draw them around the buttons.
- Let dry and display your bright button garden on a wall or shelf.
2. Cozy Shank Button Bookmarks
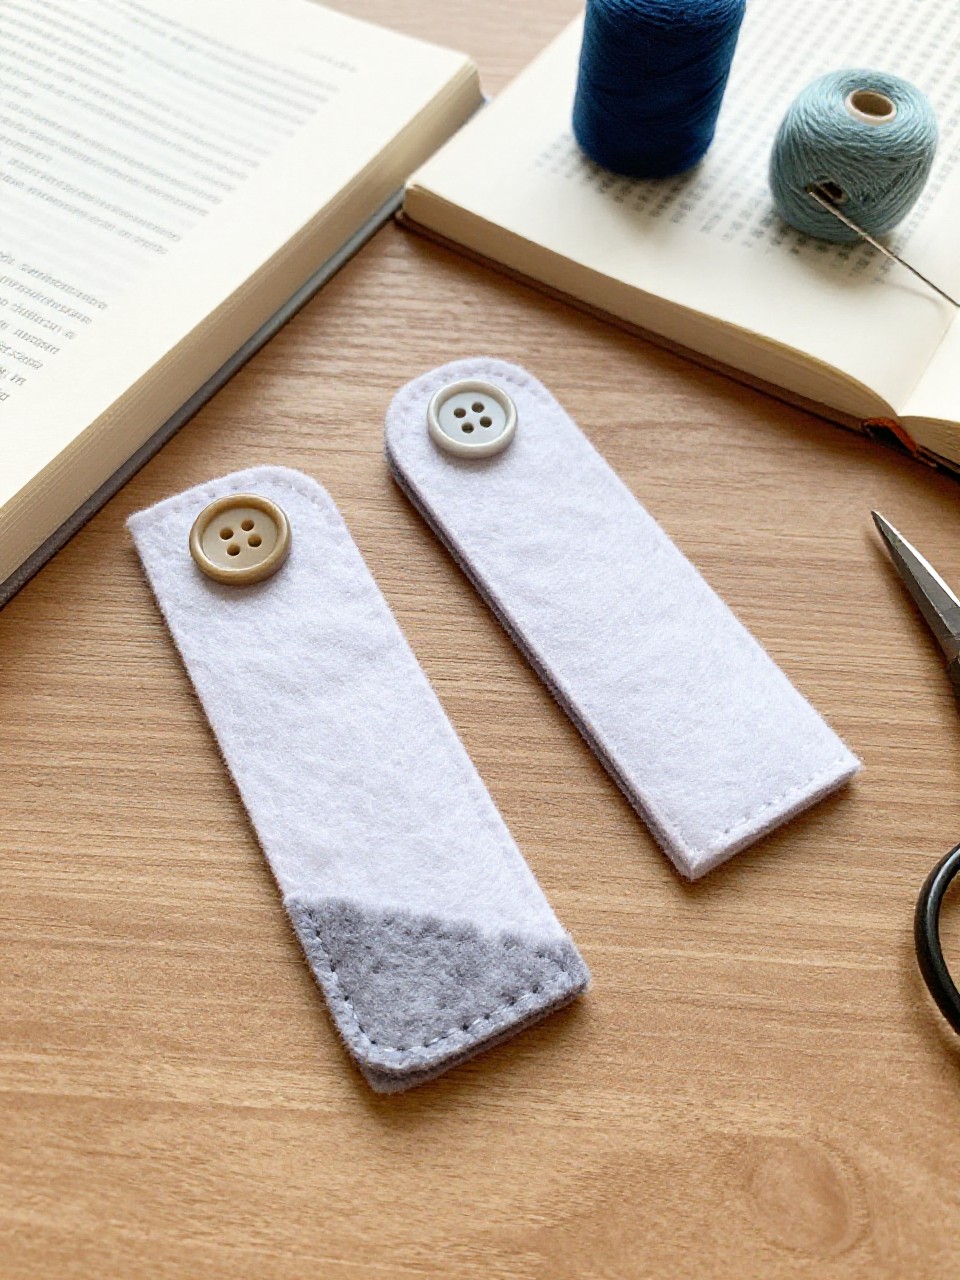
These corner bookmarks hug the page with a shank button charm stitched or glued on top. Kids enjoy choosing a special button that pokes out of the book like a tiny treasure.
Materials Needed:
- Felt squares
- Needle and thread or strong craft glue
- Assorted shank buttons
- Scissors
- Fabric markers (optional)
How to make it:
- Cut two felt triangles to fit a book corner; layer them to form a pocket.
- Stitch or glue the sides together to make the corner sleeve.
- Attach a shank button to the front tip; add stitched or drawn details.
- Let dry if glued, then slide onto a page to mark your spot.
3. Shank Button Bug Magnets

These little fridge bugs have button bodies, pipe cleaner legs, and googly eyes, making a tiny swarm that sticks to any magnet board. Children love bending the legs and choosing wild color combos.
Materials Needed:
- Assorted shank buttons (large for bodies)
- Mini magnets (self-adhesive or with glue)
- Pipe cleaners
- Googly eyes
- Craft glue
How to make it:
- Glue a magnet to the back of each shank button.
- Cut and bend pipe cleaners into legs and antennae; glue to the button sides.
- Add googly eyes and small pom noses if desired.
- Let dry, then march your bug magnets onto the fridge.
4. Ribbon-Wrapped Shank Button Hair Clips

These clips feature a ribbon-wrapped snap clip topped with a single pretty shank button for a simple, polished look. Kids enjoy picking a button that shows off their style and seeing a quick win.
Materials Needed:
- Plain snap hair clips
- Thin ribbon
- Hot glue (adult help) or strong craft glue
- Assorted shank buttons
- Small scissors
How to make it:
- Wrap ribbon tightly around each clip, gluing the start and finish.
- Attach the shank button to the top center with a glue dab.
- Press firmly and trim any loose ribbon ends.
- Let set, then wear your new button hair clip.
5. Shank Button Spinner Tops

These spinning toys use a shank button as the center weight with a toothpick through the shank, creating fast, colorful spins. Kids love testing which button shape spins longer and racing their tops.
Materials Needed:
- Large shank buttons (flat and round work best)
- Toothpicks or cocktail sticks
- Beads (optional for balance)
- Glue (optional)
- Washi tape or markers
How to make it:
- Push a toothpick through the shank hole; center it so the button sits midway.
- Add a tiny bead and glue dot above/below for stability if needed.
- Decorate the toothpick with washi tape stripes or color the button rim.
- Spin on a smooth surface and experiment with different buttons.
6. Mini Shank Button Picture Frames

These palm-sized frames get a charming border from rows of shank buttons glued around cardboard windows. Kids enjoy arranging colors like a mosaic and framing tiny drawings or photos.
Materials Needed:
- Cardboard rectangles with center cutouts
- Assorted shank buttons
- Craft glue
- Mini clothespins or string (optional for hanging)
- Small photo or drawing
How to make it:
- Cut a window in the cardboard and back it with another piece to hold a photo.
- Glue shank buttons around the front edge as a border.
- Slide in a picture and secure the back with tape if needed.
- Let dry and display on a string with mini clothespins or stand it up.
7. Shank Button Friendship Bracelets

These bracelets use a shank button as a clasp and charm on braided yarn or embroidery thread. Kids like choosing a special button centerpiece and gifting matching sets to friends.
Materials Needed:
- Embroidery floss or yarn
- Assorted shank buttons
- Tape or clipboard (to hold while braiding)
- Beads (optional)
- Scissors
How to make it:
- Cut three long strands and tape the top to a table; braid to wrist length.
- Thread the braid through the shank loop of a button and tie a knot to secure.
- Add beads and tie the ends into a loop that fits over the button for closure.
- Trim and wear your new bracelet.
8. Shank Button Sock Puppets

These silly puppets have shank buttons for eyes or noses that stand out and add character. Kids enjoy giving each puppet a voice and decorating with yarn hair and felt tongues.
Materials Needed:
- Clean socks
- Assorted shank buttons
- Felt scraps
- Yarn
- Fabric glue or needle and thread
How to make it:
- Slide a sock over your hand and mark eye and mouth spots.
- Glue or sew shank buttons onto the sock for eyes and a nose.
- Cut felt for a tongue, teeth, and ears; add yarn hair.
- Let dry and put on a puppet show.
9. Shank Button Wind Chime

This gentle wind chime hangs rows of shank buttons from a stick or hoop, making soft clicks in the breeze. Kids like arranging sizes so the buttons tinkle together.
Materials Needed:
- Dowel, stick, or small embroidery hoop
- Assorted shank buttons
- Fishing line or strong thread
- Scissors
- Beads (optional)
How to make it:
- Tie several lengths of line to the dowel or hoop as hanging strands.
- Thread each line through the shank loops, knotting under each button to space them.
- Add beads between buttons for sparkle and balance.
- Hang near a window and enjoy the gentle sounds.
10. Shank Button Felt Critter Pins

These small felt animal pins use a shank button as a cute nose or belly badge. Kids love turning simple felt shapes into wearable art.
Materials Needed:
- Felt sheets
- Assorted shank buttons
- Pin backs or safety pins
- Needle and thread or fabric glue
- Marker for tracing
How to make it:
- Cut two matching felt shapes (like a fox head or bear face).
- Attach a shank button to the front piece as a nose/belly.
- Stitch or glue the edges together and fix a pin back on the rear.
- Let set and pin to a jacket or bag.
11. Shank Button Suncatchers

These window hangers sparkle with translucent and bright buttons strung inside a clear frame. Kids enjoy how the raised shank loops make threading easy and the colors glow in sunlight.
Materials Needed:
- Clear plastic lid or canning ring
- Assorted shank buttons (translucent if possible)
- Fishing line or clear thread
- Hole punch or craft awl
- Ribbon for hanging
How to make it:
- Punch two small holes across the lid rim for threading lines.
- String buttons on lengths of clear thread and tie them across the opening.
- Add a ribbon to the top for hanging.
- Hang in a sunny window and watch the colors shine.
12. Shank Button Bookmark Paperclips

These jumbo paperclips get a cute topper by attaching a shank button with felt backing. Kids like picking different buttons for subjects like animals, fruit, or stars.
Materials Needed:
- Jumbo paperclips
- Assorted shank buttons
- Small felt circles
- Hot glue (adult help) or strong craft glue
- Scissors
How to make it:
- Place a dab of glue on the paperclip’s top loop.
- Press the shank button onto the glue, then sandwich with a felt circle behind to secure.
- Hold until set and trim any visible felt.
- Clip onto pages, planners, or notebooks.
13. Shank Button Balloon Cards

These greeting cards feature shank buttons as balloon tops with drawn or string “ribbons.” Kids enjoy making a quick, happy card for birthdays or thank-yous.
Materials Needed:
- Blank cards or folded cardstock
- Assorted shank buttons (round works best)
- Craft glue or glue dots
- Thin string or markers
- Stickers (optional)
How to make it:
- Arrange round shank buttons on the card front like a bunch of balloons.
- Glue them down and draw or glue string tails to meet at a bow.
- Add a simple greeting and stickers if you like.
- Let dry and pop it in an envelope.
14. Shank Button Woven Wall Hanging

This mini tapestry weaves yarn through a cardboard loom and adds shank buttons as raised accents. Kids enjoy the calm rhythm of weaving and the surprise texture from the buttons.
Materials Needed:
- Cardboard loom (notched at top and bottom)
- Yarn in a few colors
- Assorted shank buttons
- Plastic yarn needle
- Dowel or stick for hanging
How to make it:
- Warp the loom with yarn and tie at the back.
- Weave weft yarn across, sliding on shank buttons to sit between rows.
- Pack rows gently and mix colors for stripes.
- Slide off, tie the top to a dowel, and hang on the wall.
15. Shank Button Key Fob Charms

These simple key fobs use a loop of leather or felt with a bold shank button as the front charm. Kids like making quick gifts that look store-bought but are easy to assemble.
Materials Needed:
- Leather strip or thick felt
- Assorted shank buttons (one large focal)
- Key ring
- Hole punch
- Strong glue or rivet (optional)
How to make it:
- Cut a strip, punch a hole at one end, and slide on the key ring.
- Fold the strip so the ends meet under the ring; glue or rivet to secure.
- Attach the shank button to the front center with strong glue.
- Let cure and add to a backpack or keys.