


In This Article Show
Kale thrives in cooler temperatures, making it a fantastic choice for both spring and fall gardens. By getting to know the specific phases from seed to harvest, you can optimize the care your kale plants need at each stage, resulting in healthier plants and more delicious leaves. Whether you’re a seasoned gardener or a curious beginner, understanding the growth stages of kale can significantly enhance your gardening success and ensure a bountiful harvest.
Kale Growth Stages & Timelines
In this post, we’ll guide you through each critical stage of kale’s development, discuss ideal growing conditions, and share tips on overcoming common challenges. Our goal is to equip you with the knowledge to grow robust kale plants that are both a joy to cultivate and a delight to eat.
1. Germination

Kale germination is the initial growth phase when kale seeds sprout and begin to develop. For successful germination, kale seeds need a soil temperature between 45°F and 85°F, consistent moisture without waterlogging, and well-draining soil rich in organic matter.
Timeframe for Kale Seeds to Germinate
Kale seeds typically begin to sprout within 5 to 8 days under optimal conditions. However, this timeframe can vary based on soil temperature and moisture levels. Cooler soil temperatures might extend the germination period slightly.
Conditions Needed for Successful Germination
To ensure successful germination of kale seeds, here are a few key conditions to meet:
- Soil Temperature: The ideal soil temperature for kale germination is between 45°F and 85°F (7°C to 29°C). Seeds will germinate quickest around 70°F (21°C).
- Moisture: Kale seeds need consistent moisture to germinate properly. Water the soil lightly but regularly to keep it evenly moist. Avoid waterlogging as it can rot the seeds.
- Soil Quality: Use a well-draining soil mix that’s rich in organic matter. The soil should be loose and not too compact, allowing air to reach the seeds, which is crucial for their development.
- Depth of Planting: Plant kale seeds about 1/4 to 1/2 inch deep. This shallow planting helps the fragile seedlings break through the soil surface more easily.
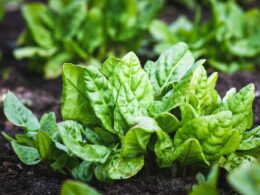
2. Seedling

After germination, kale seedlings begin to show their first true leaves, which will look different from the initial sprouting leaves (cotyledons). These true leaves will be slightly serrated and darker. Typically, kale seedlings are robust and can reach up to 2 to 4 inches tall with a few sets of leaves within a few weeks.
How to Care for Kale During the Seedling Stage
Proper care during the seedling stage is crucial for establishing a strong foundation for future growth. Here’s how you can ensure your kale seedlings thrive:
1. Light
Ensure the seedlings receive plenty of light; if grown indoors, a south-facing window or a grow light can help provide adequate light exposure. Seedlings need about 14-16 hours of daylight. Insufficient light can lead to leggy, weak plants.
2. Watering
Keep the soil consistently moist but not waterlogged. Water gently to avoid dislodging the young plants. Using a spray bottle or a watering can with a fine rose are good method to water seedlings safely.
3. Temperature
While kale is tolerant of cooler temperatures, protecting the seedlings from freezing is important. Ideal growing temperatures for kale seedlings are between 60°F and 70°F (15°C to 21°C). If temperatures dip, consider using a cloche or frost cloth to protect the plants.
4. Thinning
If seedlings are crowded, thin them out to allow adequate space for growth. Aim for spacing of about 4 to 6 inches apart, which helps in preventing disease and promotes even growth.
5. Nutrition
Once seedlings have several true leaves, you can begin to feed them with a balanced, light fertilizer. This will help in building strong roots and robust foliage.
3. Vegetative Stage

During the vegetative stage, kale plants undergo rapid growth and begin to develop the lush, leafy greens they are known for. This stage typically lasts until the plants are ready to harvest. You’ll notice the plants growing taller, reaching anywhere from 12 to 18 inches in height, and the leaves expanding in size, creating a denser foliage canopy.
Nutrient Requirements
Kale is a heavy feeder, meaning it requires a rich supply of nutrients to support its rapid growth during this stage:
- Nitrogen: High levels of nitrogen are crucial for leaf development. A balanced, slow-release fertilizer or a nitrogen-rich organic option like fish emulsion or composted manure can be very effective.
- Potassium and Phosphorus: These nutrients support overall plant health and resilience, aiding in root development and the ability of kale to withstand pests and diseases.
- Calcium: Essential for cell wall development, calcium helps prevent common issues like leaf tip burn. Incorporate gypsum or lime into the soil if tests show a deficiency.
Sunlight Exposure
Kale requires full sun to partial shade to thrive:
- Full Sun: At least 6 hours of direct sunlight per day is ideal for kale. This exposure ensures robust growth and optimal development of the leaves.
- Partial Shade: While kale can tolerate partial shade, particularly in warmer climates, too little light can lead to thin, leggy plants. If grown in areas with less intense sunlight, ensure the plants still receive sufficient indirect light.
4. Maturation

As kale plants near the end of their growth cycle, several signs indicate they are approaching maturity:
Signs That Kale is Approaching Maturity
- Leaf Size: Mature kale leaves will typically be about the size of your hand or larger, depending on the variety. They should be firm, deeply colored, and have a crisp texture.
- Plant Height: Kale plants can reach up to 2 to 3 feet in height when they are mature. The central stem will be thick and sturdy, supporting the heavy load of leaves.
- Leaf Flavor and Texture: As kale matures, the leaves may become slightly tougher and more flavorful. Some gardeners prefer to harvest before the leaves become too fibrous, especially if they are used in raw dishes.
How to Recognize Mature Kale Ready for Harvest
Identifying when your kale is ready to harvest is key to enjoying it at its best:
- Leaf Check: Gently check the leaves for firmness and size. Mature leaves should be robust, vibrant, and large enough to use in cooking.
- Taste Test: If unsure about maturity, taste a small leaf. It should have a strong, pleasant flavor without being overly tough or bitter.
- Overall Health: Look at the overall health and vitality of the plant. A kale plant ready for harvest should look vigorous and well-developed.
Timing and Techniques For Harvesting Your Kale
Kale is generally ready for harvest when the leaves are about the size of your hand or larger, depending on the variety. The texture should be firm, and the color deep and even. Here are some specific cues:
- Leaf Size and Texture: Mature kale leaves will be large enough to handle and eat, typically ranging from 8 to 12 inches long. They should feel substantial and crisp.
- Plant Maturity: If the kale plants are between 2 to 3 months old, they are likely at the peak of maturity, especially if they’ve reached about 12 to 18 inches in height.
- Flavor: Mature kale leaves have a rich, slightly peppery flavor. Younger leaves tend to be milder, and older leaves can become too tough and bitter.
Tips for Harvesting Kale Without Damaging the Plant
Harvesting kale properly ensures that the plant continues to produce fresh leaves, extending its yield:
- Harvest the Outer Leaves First: Always start harvesting from the lower outer leaves and work your way inward. This method encourages the plant to continue producing new leaves from the center.
- Use Sharp Scissors or Pruning Shears: Cut the leaves at their base, close to the stem. This helps avoid tearing the plant, which can make it vulnerable to disease.
- Avoid Over-Harvesting: Leave at least four or five central leaves intact so the plant can continue to photosynthesize and grow. This is especially important early in the season.
- Regular Harvests: Regularly picking leaves can stimulate further growth, keeping the plants productive longer. Aim to harvest once a week or as needed.