


In This Article Show
Malabar spinach is a tasty and easy-to-grow vegetable that can add variety to your garden. I’ve found it to be a great addition to my backyard, providing fresh greens throughout the summer. This climbing vine, also known as Basella alba, is not related to spinach but has a similar flavor.
Growing Malabar spinach is simple – plant seeds 1/4 inch deep and 1-2 inches apart in rich, well-draining soil. I like to start mine indoors about 3 weeks before the last frost date. Once the seedlings emerge, I make sure they get plenty of sunlight. These plants love warmth and do best when temperatures are above 60°F.
One thing I enjoy about Malabar spinach is its climbing habit. I give my plants a trellis or fence to grow on, which saves space in my garden. The vines can reach 6-8 feet tall, producing lots of thick, glossy leaves. With regular harvesting, I’m able to enjoy these nutritious greens all season long.
Getting Started with Malabar Spinach

Malabar spinach is a unique, heat-loving vine that can add variety to your garden. I’ll cover the basics of this plant, help you pick the right type, and show you where to grow it best.
Understanding Malabar Spinach
Malabar spinach, also called Basella alba or Basella rubra, isn’t true spinach. It’s a fast-growing vine that thrives in hot weather. The leaves are thick and crisp, with a mild flavor.
I’ve found that Malabar spinach is easy to grow and very productive. It can climb up to 10 feet tall with support. The plant has pretty flowers and berries too.
There are two main types:
- Basella alba (green stem and leaves)
- Basella rubra (red stem and green leaves)
Both types taste similar and grow the same way.
Choosing the Right Variety
When I pick a Malabar spinach variety, I consider a few things:
- Space: How much room do I have?
- Look: Do I want green or red stems?
- Use: Am I growing it for food or looks?
For small spaces or containers, I choose compact varieties. If I have a trellis or fence, I go for vigorous climbers. Green varieties are better for eating raw. Red types add color to the garden and cooked dishes.
Some popular varieties I like are:
- Rubra (red stem)
- Ceylon spinach (green stem)
- Indian spinach (very productive)
Determining the Best Planting Location
Malabar spinach needs the right spot to thrive. I make sure to give it:
- Lots of sun: At least 6 hours of direct sunlight daily
- Warm temps: It loves heat and won’t grow below 50°F
- Good soil: Rich, well-draining soil is best
- Support: A trellis, fence, or poles for climbing
I’ve had success planting it along fences or on trellises near walls. These spots provide heat and support. In hot climates, I give it some afternoon shade to prevent wilting. Partial shade works in very warm areas.
For the best growth, I pick a spot with full sun and protection from strong winds. This helps the vines climb and produce lots of leaves.
Planting and Germination
Growing Malabar spinach starts with proper soil preparation, seed sowing, and caring for young seedlings. I’ll guide you through each step to help you successfully start your Malabar spinach plants.
Soil Preparation
I always make sure my soil is rich in organic matter before planting Malabar spinach. I mix compost or well-rotted manure into my garden bed to improve fertility and drainage. The soil should be loose and crumbly.
I aim for a pH between 6.0 and 6.8. If needed, I add lime to raise the pH or sulfur to lower it. Good soil prep is key for healthy plants. I also work in a balanced fertilizer to give seedlings a strong start. Malabar spinach is like fertile soil high in organic matter.
Sowing Seeds and Germination Process
I sow Malabar spinach seeds directly in the garden after the last spring frost. The soil needs to be at least 65°F for good germination. I plant seeds 1/4 inch deep and 2 inches apart in rows. I space rows 3 feet apart to give vines room to grow. I keep the soil consistently moist but not soggy. Seeds usually sprout in 7-14 days.
For an earlier start, I sow seeds indoors 4-6 weeks before the last frost:
- Use seed starting mix in small pots
- Plant 2-3 seeds per pot, 1/4 inch deep
- Keep soil warm (70-80°F) and moist
- Provide bright light after germination
Transplanting Seedlings
I transplant indoor-started seedlings to the garden 2-3 weeks after the last frost. I harden them off first by gradually exposing them to outdoor conditions over a week.
When transplanting, I space seedlings 12 inches apart in rows 3 feet apart. I dig holes twice as wide as the root ball and at the same depth.
I water well after planting and mulch around seedlings to retain moisture. I provide support like a trellis for the vines to climb. For the first week, I protect seedlings from intense sun and wind while they adjust to their new home.

Caring for Your Malabar Spinach
Malabar spinach needs regular attention to thrive. I’ll cover the key aspects of watering, support, and nutrition to help your plants grow strong and healthy.
Watering and Moisture Management
I water my Malabar spinach plants regularly to keep the soil moist but not waterlogged. These plants like consistent moisture, especially in hot weather. I check the soil daily and water when the top inch feels dry.
For container plants, I water more often as pots dry out faster. I use well-draining soil to prevent root rot. A layer of mulch helps retain moisture and keep the roots cool.
In dry spells, I give my plants a deep watering once or twice a week. This encourages deep-root growth. I avoid wetting the leaves to prevent fungal issues.
Providing Adequate Support and Trellising
Malabar spinach is a vigorous climber, so I always provide support. I use a trellis, fence, or sturdy poles for the vines to climb. This keeps the plant tidy and makes harvesting easier.
I set up my support system when I plant the seeds or seedlings. The vines can grow 6-8 feet tall, so I make sure my trellis is tall and strong enough.
For container plants, I use a teepee-style support or a cage. I gently guide the young vines onto the support as they grow. This helps them climb and spread out for better sun exposure.
Fertilization and Nutrition
I fertilize my Malabar spinach every 3-4 weeks during the growing season. I use a balanced, water-soluble fertilizer or compost tea. This provides the nutrients needed for lush growth and leaf production.
For organic options, I mix compost into the soil before planting. I also add a layer of compost or well-rotted manure around the plants mid-season. This slow-release method feeds the plants over time.
Malabar spinach benefits from extra potassium and magnesium. I sometimes use a seaweed-based fertilizer for these nutrients. This helps boost the plant’s protein content and antioxidant levels.
Pests and Disease Management
Growing Malabar spinach can be rewarding, but pests and diseases can sometimes cause problems. I’ll cover how to prevent issues, spot and treat diseases, and deal with common pests.
Preventing Common Problems
I find that prevention is key when growing Malabar spinach. Good airflow helps a lot. I space plants about 3 feet apart and use trellises or supports. This cuts down on humidity and leaf wetness which can lead to fungal growth.
I also use mulch around my plants. It keeps the soil moist and stops soil from splashing onto leaves when I water. This helps prevent soil-borne diseases.
Proper fertilizing is important too. I use a balanced organic fertilizer every 4-6 weeks during the growing season. Too much nitrogen can make plants more attractive to pests, so I’m careful not to overdo it.
Identifying and Treating Diseases
Cercospora beticola is a common fungal disease I watch out for. It causes round spots with dark edges on leaves. If I see this, I remove the affected leaves right away.
For treatment, I use a copper-based fungicide. I spray it on leaves every 7-10 days when conditions are humid. It’s important to coat both sides of the leaves.
Root rot can happen in wet soils. If plants look wilted even when watered, I check the roots. If they’re brown and mushy, I remove the plant to stop it from spreading.
Dealing with Pests Effectively
Aphids are tiny pests that can damage Malabar spinach. I look for curled leaves or sticky residue on the leaves. A strong spray of water often knocks them off. For bigger infestations, I use insecticidal soap. I spray it on both sides of the leaves, focusing on stem tips where aphids cluster.
Slugs and snails can also be a problem. I use beer traps or copper tape around planters to keep them away. Hand-picking at night when they’re active works well too.
Spider mites thrive in hot, dry conditions. I mist plants regularly to increase humidity, which they don’t like. If I see fine webbing on leaves, I use neem oil spray as a natural treatment.
Harvesting and Using Malabar Spinach

Malabar spinach is easy to harvest and versatile in the kitchen. I’ll cover when to pick it and share some tasty ways to use this nutritious green.
When and How to Harvest
I start harvesting Malabar spinach when the vines reach about 6 inches long. I pick the tender new leaves and stem tips, which are the tastiest parts. To harvest, I simply pinch off the top 2-3 inches of each stem with my fingers or clean scissors.
This encourages bushier growth. I can keep harvesting all season long as new leaves grow. For a big harvest, I cut entire stems near the base. The plants grow back quickly. In the fall, I pick small purple berries too. They make a natural food coloring.
Cooking and Storing Ideas
I eat Malabar spinach raw or cooked. The crisp leaves are great in salads. I chop them up and toss them with other greens and veggies. For cooking, I add the leaves to stir-fries, soups, and stews. They hold up well to heat and add a nice texture. I sometimes sauté them with garlic as a simple side dish.
To store, I wrap unwashed leaves in paper towels and keep them in a plastic bag in the fridge. They stay fresh for about a week. I can also blanch and freeze the leaves for later use. Malabar spinach is packed with vitamins A and C. It’s a healthy addition to many meals.
Frequently Asked Questions
Growing Malabar spinach can raise some common questions. Here are the answers to help you succeed with this unique climbing plant.
What are the optimal conditions for planting Malabar spinach?
Malabar spinach thrives in warm weather. I plant it when soil temperatures reach at least 65°F (18°C). It needs full sun and well-draining soil rich in organic matter. I space plants 12 inches apart with 3 feet between rows. This gives the vines room to climb and spread.
Can Malabar spinach be grown successfully in containers and if so, how?
Yes, Malabar spinach grows well in containers. I use pots at least 12 inches deep and wide. Good drainage is key, so I add holes if needed. A trellis or support in the pot helps the vines climb. I use a potting mix with compost for nutrients. Regular watering is important in containers.
What are the steps for propagating Malabar spinach from stem cuttings?
I take 4-6 inch cuttings from healthy stems. I remove lower leaves, leaving 2-3 at the top. Then I place the cuttings in water or moist soil. Roots form in 1-2 weeks. Once the roots are an inch long, I plant the cuttings in the soil. I keep them moist until new growth appears.
What is the correct way to harvest Malabar spinach without damaging the plant?
I harvest leaves and tender stems regularly. I pinch off leaves and shoot with my fingers or use clean scissors. I avoid taking more than a third of the plant at once. This lets the plant keep growing. New leaves quickly replace what I harvest.
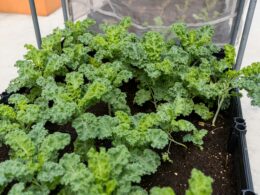
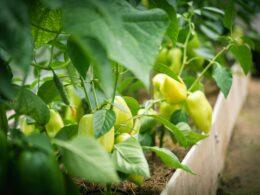
Are there any specific plants that make good companions for Malabar spinach in the garden?
Malabar spinach grows well with many plants. I like pairing it with tomatoes, peppers, and eggplants. These plants enjoy similar conditions. Herbs like basil and cilantro also make good neighbors. I avoid planting it near other vining crops to prevent competition for space.
What kind of support structures are required for growing Malabar spinach?
Malabar spinach needs sturdy support to climb. I use trellises, fences, or poles at least 6 feet tall. Teepee structures also work well. The support should be in place before planting. I make sure it’s strong enough to hold the heavy vines as they grow.