


In This Article Show
Starting your garden can be a rewarding journey, especially when you begin with seeds. However, the perception that you need expensive tools to kickstart this process couldn’t be further from the truth. In this blog post, I’m going to share with you seven must-have tools for seed starting on a budget.
Whether you’re a seasoned gardener or just planting your first seed, these tips will help you save money while creating a thriving garden.
From DIY seed starting mixes to repurposing household items for your gardening needs, we’ll cover all the essentials you need to get your green thumbs going without breaking the bank. Let’s get your garden started with tools that are not only affordable but also effective.
DIY Seed Starting Mix
Creating your own DIY seed starting mix can be a game-changer for gardeners looking to save money while providing the best care for their seeds. The main benefit of making your mix is the ability to control the ingredients, ensuring your seedlings get the precise nutrients and soil structure they need to thrive.
Unlike pre-made mixes, which can sometimes contain unnecessary chemicals or not quite match your plants’ requirements, a homemade mix can be tailored to promote healthy root development and growth.
Benefits of DIY Seed Starting Mix
- Cost-Effective: Making your mix is significantly cheaper than purchasing pre-made options, especially if you’re starting a large number of seeds.
- Customizable: You can adjust the components based on the specific needs of your seeds. For instance, some seeds may require more drainage, while others might need a firmer soil structure to support growth.
- Sustainability: By choosing organic and sustainable components, you can create a mix that’s not only good for your plants but also for the environment.
Simple, Cost-Effective Recipe
Here’s a basic recipe that serves as a great starting point for most seeds. Remember, you can tweak this recipe based on your specific gardening needs.
Ingredients
- 1 part peat moss or coco coir (for water retention)
- 1 part vermiculite (for aeration and moisture retention)
- 1 part compost (for nutrients)
Instructions
- Mix Thoroughly: In a large container, combine the peat moss or coco coir with vermiculite. Ensure these ingredients are mixed well for an even distribution that will support your seedlings’ roots.
- Add Compost: Introduce the compost to your base mixture and blend it in thoroughly. This step is crucial as compost is the primary source of nutrients for your seedlings.
- Moisten the Mix: Before using the mix for seed starting, lightly moisten it with water. The mix should be damp but not soaking wet to create the ideal environment for seed germination.
- Ready to Use: Once your mix is prepared, it’s ready to fill your seed starting containers. Plant your seeds according to their specific depth and spacing requirements, and keep the soil moist as they germinate and grow.
By using this simple and adaptable recipe, you not only save money but also take a big step toward growing healthy, robust plants right from the start. Plus, the satisfaction of knowing you’ve created the very foundation of your garden’s life is a bonus that’s hard to beat.
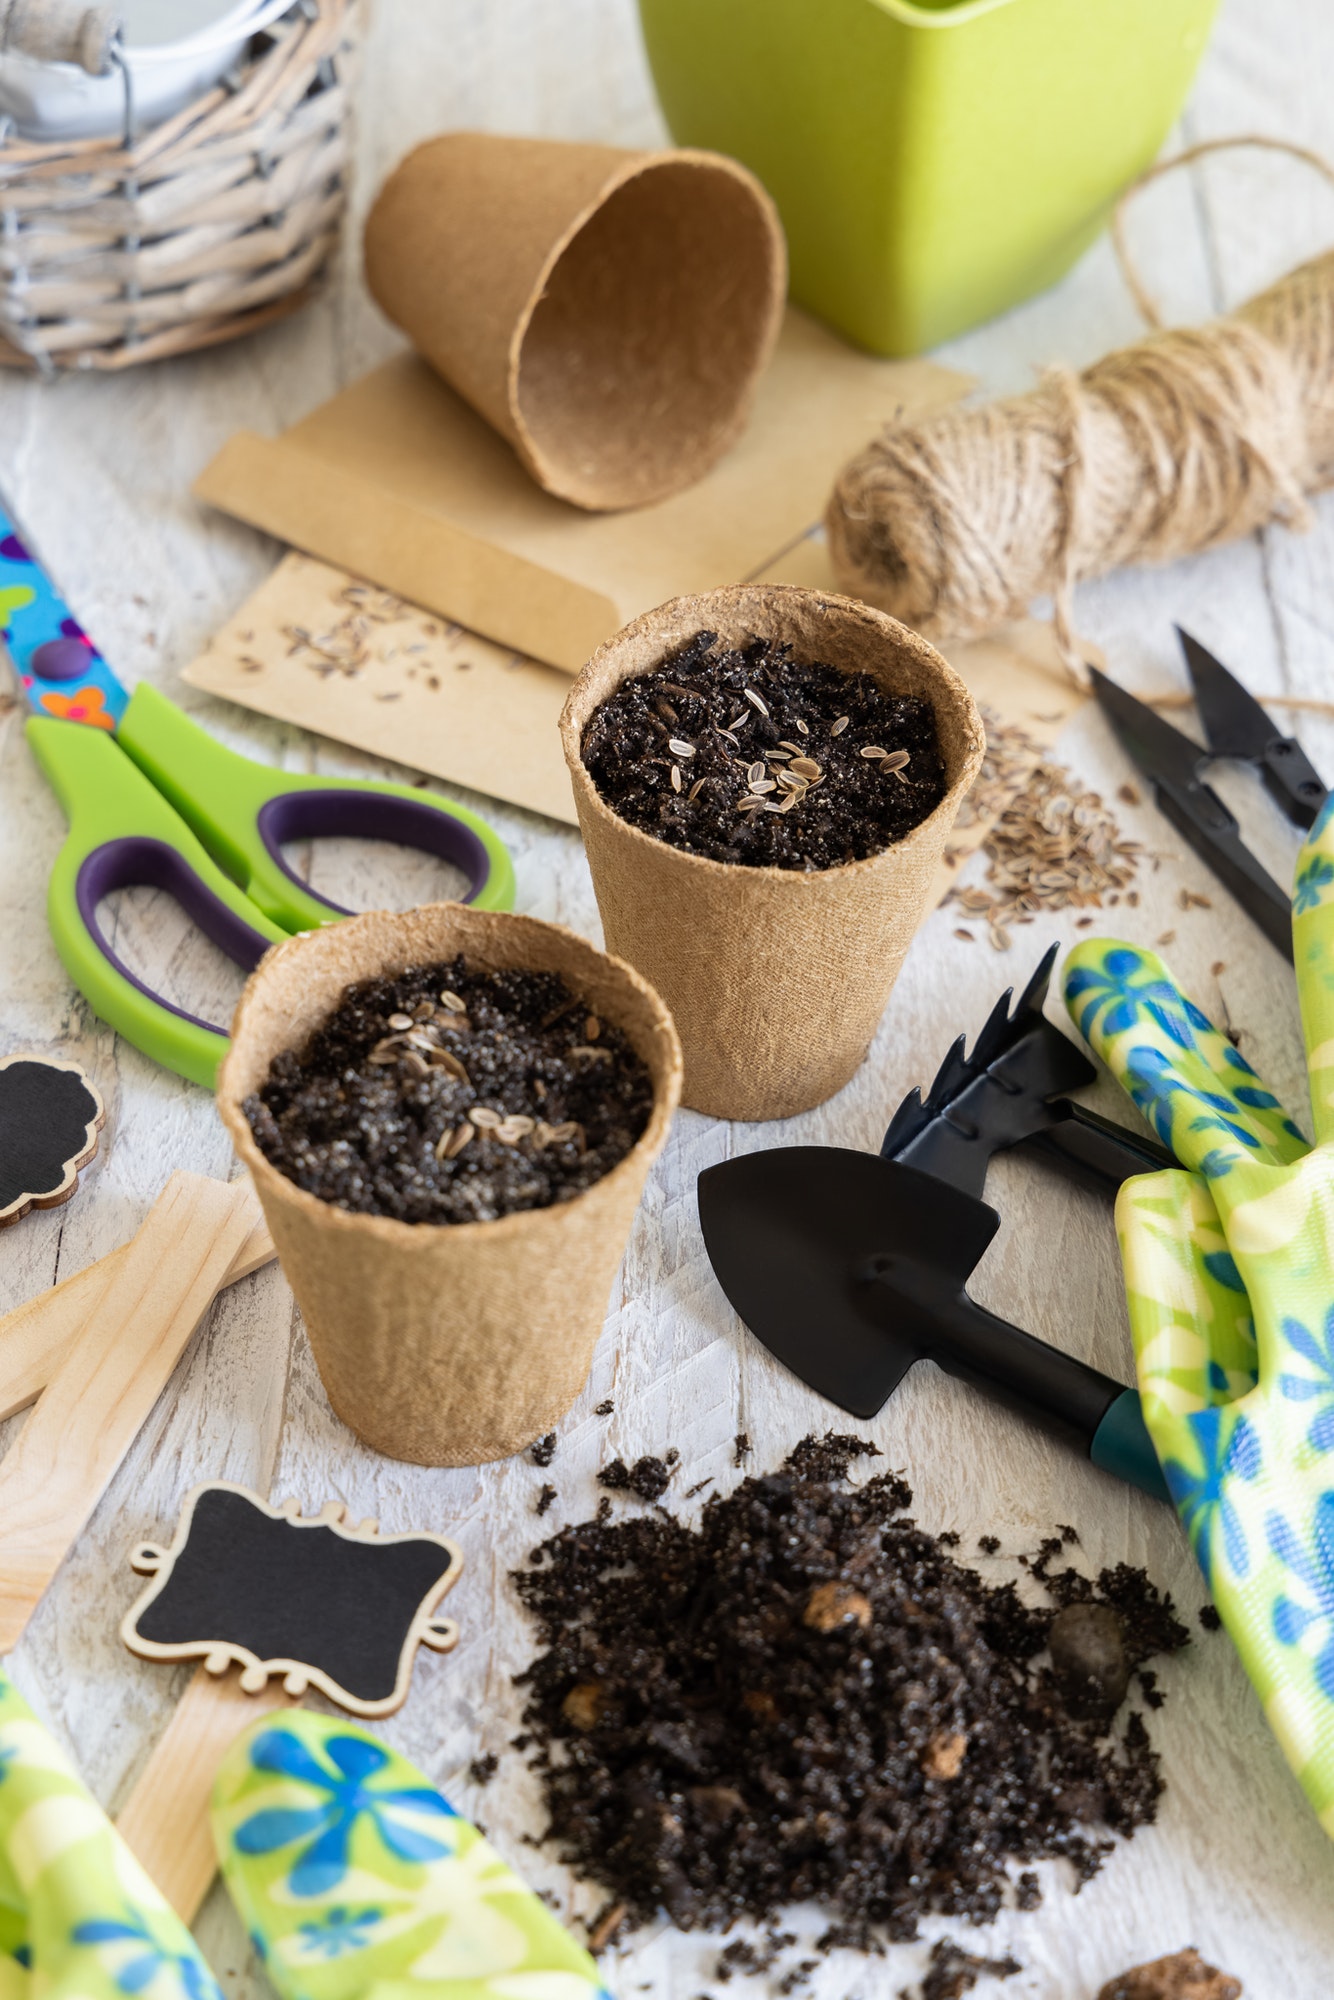
Repurposed Containers for Seedlings
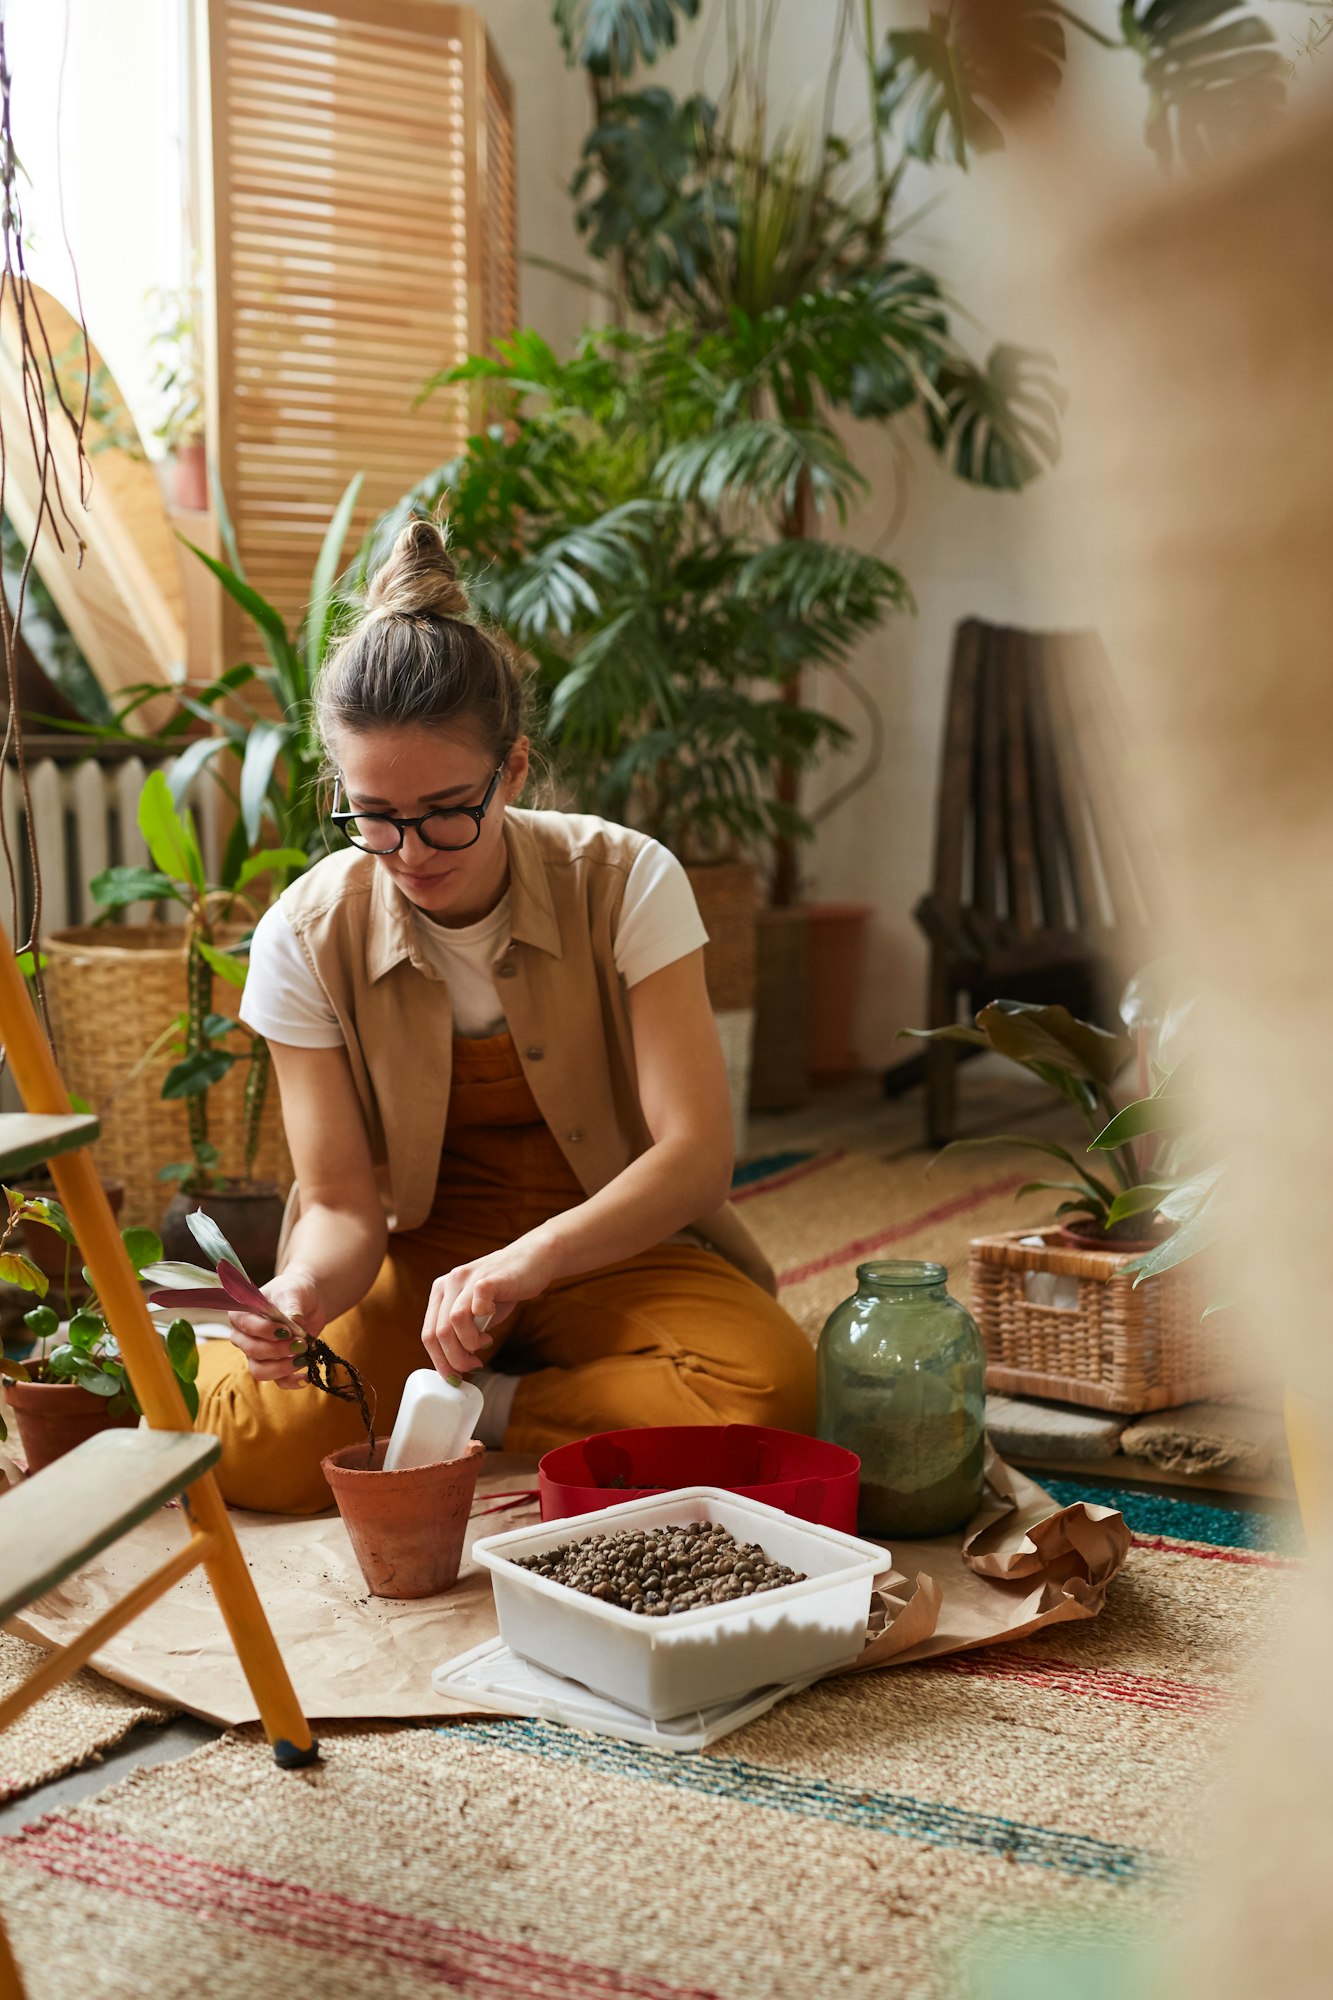
Repurposing everyday items as containers for seedlings is a smart and sustainable gardening practice that benefits both your wallet and the planet. This approach not only reduces waste by giving a second life to items that might otherwise end up in a landfill but also allows gardeners to start their seedlings without the need for expensive pots or trays. Here are some creative ideas for turning household items into perfect homes for your burgeoning plants.
Examples of Repurposed Containers
1. Yogurt Cups
Clean out yogurt cups, poke a few drainage holes in the bottom, and they become ideal containers for starting individual seedlings. Their size is perfect for nurturing a seed until it’s ready to be transplanted.
2. Egg Cartons
Both plastic and paper egg cartons can be used to start seeds. The individual compartments are the perfect size for seeds and can be cut apart to plant the seedling still in its biodegradable “pot” if using paper cartons. Just remember to poke holes for drainage.
3. Toilet Paper Rolls
Toilet paper rolls can be cut in half and then folded at one end to create a bottom, creating a biodegradable pot that can be planted directly into the soil. This method avoids disturbing the roots during transplanting.
4. Coffee Pods
After cleaning and removing the coffee grounds (which can be composted), these small cups can serve as excellent seed-starting containers. Ensure to poke a hole for drainage.
5. Takeout Containers
Plastic containers from takeout meals can be repurposed as mini greenhouses for your seedlings. After planting your seeds in smaller containers, place them inside the clear takeout container and close the lid to retain moisture and warmth.
Benefits of Repurposing Containers
- Cost Savings: Utilizing items you already have means you don’t need to purchase new pots or trays for your seedlings.
- Environmental Impact: Reducing waste by repurposing items decreases your carbon footprint and contributes to a more sustainable planet.
- Innovation and Creativity: Finding new uses for old items can be a fun and creative aspect of gardening, adding another layer of satisfaction to the hobby.
By looking around your home for items that can be repurposed as seedling containers, you’re not only saving money but also participating in a form of eco-friendly gardening. This practice highlights the principle that sustainable living and resourcefulness can go hand in hand with successful gardening endeavors.
Affordable Lighting Solutions

Proper lighting is crucial for the healthy growth of seedlings, as it influences not only their rate of growth but also their overall health and stability. Young plants require consistent and adequate light to photosynthesize effectively, develop strong stems, and grow into vigorous plants. However, natural light conditions, especially during late winter or early spring, may not be sufficient for seed starting indoors.
This is where supplemental lighting comes into play. Fortunately, you don’t need to invest in expensive grow light setups to meet your seedlings’ needs. There are budget-friendly alternatives that are just as effective.
The Importance of Proper Lighting
- Consistent Light: Seedlings need about 14-16 hours of light per day, which is challenging to achieve with natural light alone, especially in certain climates or during specific seasons.
- Prevent Legginess: Without enough light, seedlings tend to stretch toward the light source, becoming “leggy” – weak and elongated, which can lead to poor development and growth.
- Enhance Growth: Adequate lighting ensures that seedlings grow sturdy and healthy, setting the stage for successful transplanting and future growth.
Budget-Friendly Lighting Solutions
1. LED Lights
Modern LED grow lights are energy-efficient and have a long lifespan. They emit less heat, reducing the risk of overheating your plants. LED bulbs designed for growing plants often produce a broad spectrum of light, mimicking natural sunlight. You can find affordable LED strip lights or bulbs that can be used in standard light fixtures.
2. Fluorescent Lights
Fluorescent lights, especially T5 or T8 tubes, are a cost-effective option for seed starting. They provide the intensity of light needed for growing seedlings without the high cost associated with specialized grow lights. Fluorescent fixtures can be mounted under shelves or suspended above your plants and are widely available at hardware stores.
3. Repurpose Household Lamps
For a small number of seedlings, you can even repurpose desk lamps or standing lamps by fitting them with LED or fluorescent bulbs. Adjust the distance between the light source and the plants as they grow, keeping the light about 2-3 inches above the top of the seedlings to prevent stretching and to ensure even light exposure.
By exploring these affordable lighting solutions, gardeners can provide their seedlings with the light they need for strong, healthy development without overspending. This approach ensures that your gardening project remains both cost-effective and productive
Homemade Humidity Domes

Homemade humidity domes are an excellent way to create a moist and warm environment that encourages seed germination. These domes trap moisture and heat, mimicking a mini greenhouse effect, which is particularly beneficial for seeds that require high humidity levels to sprout. Using everyday items like clear plastic bags or recycled clear containers, you can easily and inexpensively create these conditions. Here’s how to do it:
Using Clear Plastic Bags
- Prepare Your Seedling Trays: Sow your seeds in your chosen seed starting mix within trays or pots that fit your seeds’ needs.
- Water Thoroughly: Ensure the soil is evenly moistened but not soaking wet, as too much water can lead to mold growth or rot.
- Cover with Plastic Bags: Place the entire tray or individual pots into clear plastic bags. The bags should not touch the soil or the seeds; you can use sticks or skewers to keep the bag elevated.
- Seal the Bags: Tie or tape the bags shut to keep the humidity in. Make sure there is still a bit of air movement to prevent the growth of mold.
- Place in a Warm, Bright Area: Keep the trays under your affordable lighting solution or in a naturally bright location, avoiding direct sunlight that can overheat the seeds.
- Monitor and Ventilate: Check daily for germination and to ensure the soil remains moist. Open the bags periodically to allow for air exchange and to prevent excessive moisture buildup.
Using Recycled Clear Containers
- Select Suitable Containers: Clear plastic containers, such as salad boxes, bakery containers, or even large water bottles cut in half, can serve as effective humidity domes.
- Prepare for Drainage and Airflow: Ensure your container has holes for drainage if you’re planting directly into it. For containers used as covers over pots, ensure there are openings or leave the lid partially open to allow for some airflow.
- Set Up Your Mini Greenhouse: After planting your seeds and watering, cover them with your clear container. If using a large container as a dome over multiple pots, make sure it’s elevated enough not to touch the plants.
- Place in Appropriate Conditions: Similar to the plastic bag method, keep these containers in a place with sufficient light and warmth.
- Monitor Your Seeds: Watch for seed germination and adjust humidity levels by opening the containers as needed to prevent mold growth and to harden off seedlings gradually before transplanting.
Creating homemade humidity domes is a straightforward and cost-effective method to enhance seed germination. It utilizes readily available materials, reducing waste and the need for expensive equipment. By closely monitoring your seeds and adjusting conditions as necessary, you can achieve optimal germination rates and give your seedlings a strong start in their growth journey.
Thrifty Watering Tools

Thrifty watering tools made from repurposed household items can be just as effective as store-bought options, especially for the delicate task of watering seedlings. The goal is to deliver water gently to avoid disturbing the soil or damaging the tender plants. Here are some innovative and cost-effective ideas for DIY watering tools:
Spray Bottles
- Gentle Watering: A clean spray bottle can be adjusted to a fine mist setting, providing a gentle shower that won’t dislodge seeds or harm young seedlings. This method is ideal for keeping the soil evenly moist without overwatering.
- Versatility: Spray bottles are perfect for hydrating the leaves of seedlings, simulating a natural dew environment. This can be particularly beneficial for certain plants that appreciate humidity.
- Ease of Use: Their portability and ease of use make spray bottles an excellent tool for targeted watering, allowing you to moisten the soil precisely where needed.
Recycled Water Bottles
1. Slow Drip System
By poking small holes in the cap of a plastic water bottle, you can create a slow drip irrigation system. Fill the bottle with water, screw the cap on, and invert it near the plants. This allows for a slow release of water directly to the roots, minimizing waste and reducing the need for frequent watering.
2. Watering Spike
Alternatively, cut the bottom off a plastic bottle, leaving the cap off, and bury it neck-down into the soil near the plants. Pouring water into the inverted bottle delivers it directly to the roots, encouraging deep root growth and reducing evaporation.
3. Squeeze Bottle Waterer
A clean, empty ketchup or mustard squeeze bottle can be filled with water and used to gently water seedlings. The narrow spout allows for precise watering directly at the base of each plant, minimizing disturbance to the soil or young leaves.
Using repurposed items as thrifty watering tools not only saves money but also promotes sustainability by giving a second life to everyday objects. With a little creativity and some DIY spirit, you can efficiently water your seedlings, ensuring they grow healthy and strong.
Heat Mats Alternatives

Warmth plays a critical role in the germination of many seeds, as it simulates the natural conditions of spring, signaling to the seeds that it’s time to sprout. Some seeds, especially those of warm-season crops like tomatoes, peppers, and certain flowers, require consistent warmth to germinate effectively.
While commercial heat mats are specifically designed to provide this consistent bottom heat, several cost-effective alternatives can achieve similar results without the added expense.
Alternatives to Commercial Heat Mats
Using the Top of the Fridge
- Natural Heat Source: The top of the refrigerator is a surprisingly effective place for seed germination due to the gentle warmth it emits. This area typically stays warm but not hot, making it ideal for placing seed trays.
- Easy to Use: Simply place your seed trays on a towel or mat on the top of the fridge. The ambient warmth will help raise the soil temperature, encouraging seed germination.
- Considerations: Monitor moisture levels closely, as the warmth may cause the soil to dry out more quickly. Also, ensure that your seed trays receive adequate light once seeds have sprouted, either by placing them near a sunny window or under grow lights.
DIY Heat Mat Setups
- Water Bottle Warmer: Fill plastic bottles with hot water and place them around your seed trays, creating a warm environment. Replace the water as it cools to maintain consistent warmth. This method requires more attention to keep the temperature steady.
- Incandescent Light Bulbs: Construct a simple frame to hold seed trays and install incandescent bulbs underneath. The bulbs should be placed far enough away to avoid overheating the soil but close enough to raise the temperature.
- Heating Pad for Home Use: Some gardeners repurpose a home-use electric heating pad by setting it on a low setting and placing it under seed trays. If using this method, ensure the pad is not set too high, as excessive heat can damage seeds.
By utilizing these cost-effective alternatives to commercial heat mats, gardeners can provide the essential warmth needed for successful seed germination without the need for specialized equipment. This approach not only saves money but also allows for a more hands-on and sustainable gardening practice.
Labeling on a Dime

Labeling seedlings is a crucial step in the gardening process that should not be overlooked. It helps gardeners keep track of what has been planted where especially when managing a variety of crops with different germination times and care requirements.
Effective labeling can save you from the confusion of trying to identify seedlings by sight alone, which can be challenging even for experienced gardeners. Fortunately, several creative and low-cost labeling ideas make use of everyday items, eliminating the need to purchase specialized garden markers.
Creative, Low-Cost Labeling Ideas
Popsicle Sticks
- Simple and Effective: Clean popsicle sticks can be written on with a permanent marker and stuck into the soil next to each plant. They blend in naturally with the garden and are biodegradable.
- Versatility: They can be used whole for larger plants or broken in half for smaller pots, offering flexibility depending on your garden’s needs.
Recycled Plastic Tags
- Eco-Friendly Choice: Cut up old yogurt containers, milk jugs, or any other clean plastic containers into small tags. Use a permanent marker to write the plant names and stick them into the soil.
- Durability: These homemade plastic tags are waterproof and durable, lasting throughout the growing season without fading or deteriorating.
Homemade Labels from Household Items
- Innovative Materials: Look for other items that can be repurposed into plant labels, such as wooden spoons, broken pieces of blinds, or even old silverware. With a bit of creativity, almost anything can become a plant marker.
- Customized Tags: Craft your labels from cardboard or thick paper (laminated for durability) if they will be used in a protected environment like a greenhouse or indoors. These can be cut into any shape and decorated to your liking, adding a personal touch to your garden.
Tips for Effective Labeling
- Use Permanent Marker: Ensure the writing lasts by using a waterproof, fade-resistant permanent marker. This is especially important for outdoor gardens where rain and sunlight can cause ink to fade.
- Be Specific: Include as much detail as needed on your labels, such as plant variety, sowing date, and any specific care instructions. This information can be invaluable when it comes time to transplant or care for your seedlings.
- Place Securely: Make sure your labels are securely placed and won’t be easily moved by wind, watering, or animals. It’s also helpful to position them so they can be easily seen and read without disturbing the plants.
Labeling your seedlings on a dime not only helps keep your garden organized but also supports sustainable practices by repurposing household items. These creative solutions are not just practical; they also add a personal and eco-friendly touch to your gardening endeavors.