


In This Article Show
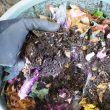
Fall crafts using pinecones and leaves bring a warm, natural feel to any space. I enjoy working with these simple materials because they capture the essence of the season and are easy to find. These crafts let me bring a bit of autumn inside without much effort.

I’ll share 11 cozy pinecone and leaf craft ideas that add charm and comfort to your home during the fall. These projects are simple enough for anyone to try and create a seasonal touch that feels personal and inviting.
1. Diy Pinecone and Leaf Flowers

This DIY pinecone flower was made to be part of a Christmas decor, but we have to agree that it is super perfect for autumn. It is pretty interesting, and assembling it doesn’t take forever compared to other autumn crafts.
This is going to look pretty on your Thanksgiving table. If you are also looking for craft ideas to sell, it’s an excellent choice.
Shop the materials


How to make DIY Pinecone and Leaf Flowers
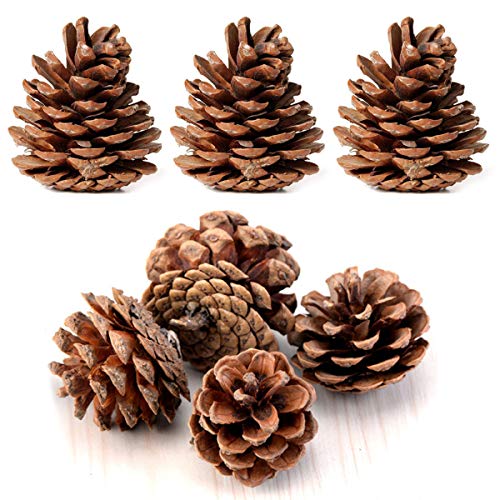
Materials Needed:
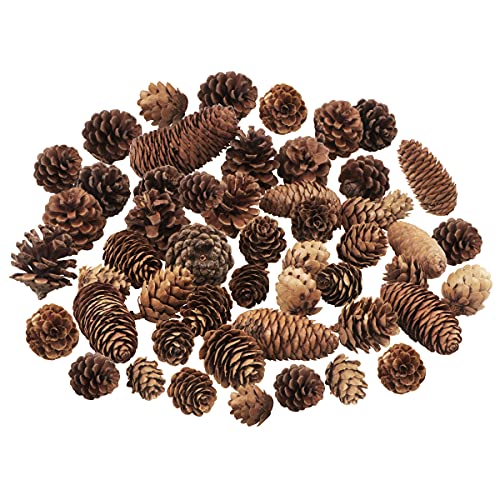
- Pinecones (various sizes)
- Acrylic paint (red, green, white, or any preferred colors)
- Paintbrush
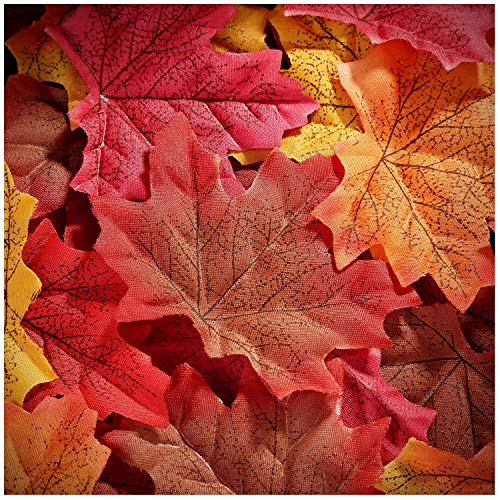
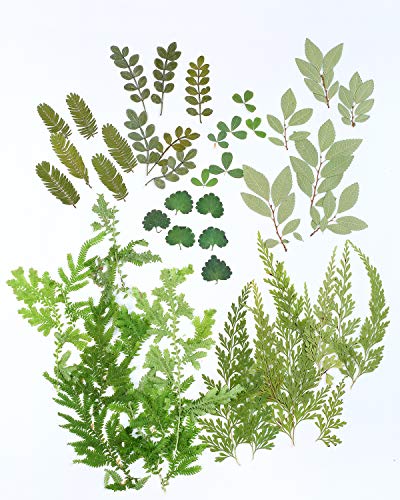
- Dried or faux leaves and berry stems
- Wooden skewers or floral wire
- Hot glue gun
- Vase or jar for display
The Steps:
- Step 1: Prepare the Pinecones
Clean your pinecones to remove any dirt or debris. Let them dry completely before starting. - Step 2: Paint the Pinecones
Use a small paintbrush to lightly paint the tips of the pinecone scales. You can mix colors like red and green for a festive touch or keep them neutral for a natural look. Allow them to dry. - Step 3: Attach the Stems
Glue a wooden skewer or floral wire to the base of each pinecone. Hold it in place for a few seconds until secure. - Step 4: Add Leaves and Berries
Attach small faux leaves or berry stems around the base of the pinecone using hot glue. This adds color and texture, making them look like blooming flowers. - Step 5: Arrange and Display
Once everything is dry, place your pinecone flowers in a vase or jar. Adjust the heights for a fuller, more natural arrangement that brightens up any space.
2. DIY Pinecone Turkey Craft

Get your pinecones and leaves, time to make a large or small turkey you can use as a centerpiece for your Thanksgiving dinner table.
Not only is this easy to make, but your kids can easily join in the fun of making it. It makes use of minimal supplies, and it’s quite an adorable choice for autumn decor.
Shop the materials


how to make DIY Pinecone Turkey Craft
Materials Needed:
- Pinecones (medium size)
- Artificial fall leaves
- Small red pom-poms (for the turkey’s wattle)
- Googly eyes
- Brown or orange felt (for the beak)
- Hot glue gun or craft glue
The Steps
- Step 1: Prepare the Pinecones
Choose a pinecone that can sit flat on the table without rolling. If needed, trim the bottom slightly so it stands upright. - Step 2: Add the Feathers
Glue several artificial leaves to the back of the pinecone, fanning them out like a turkey’s tail. Mix red, orange, and yellow leaves for a vibrant fall look. - Step 3: Make the Face
Attach two googly eyes to the front top of the pinecone. Below the eyes, glue a small triangle of felt to create the beak. - Step 4: Add the Wattle
Glue a small red pom-pom next to the beak to make the wattle. Hold in place until the glue sets. - Step 5: Display Your Turkey
Once dry, place your pinecone turkey on a tray, shelf, or Thanksgiving table centerpiece. It’s a fun, festive touch that brings warmth to your fall décor.
3. Woodland Pinecone Fairy Nature Craft

When the aim is for your kids to have fun while making an autumn craft, then you have found the perfect one for them. This beautiful woodland fairy nature craft can adorn your porch or garden.
Ensure to use fall leaves for the wings, as that adds a beautiful color to the result. Note that if you are going to leave it outdoors, you will need a strong glue for that.
Shop the materials


How to make Woodland Pinecone Fairy Nature Craft
Materials Needed:
- Pinecones
- Small wooden beads or round wooden balls (for faces)
- Dried moss or craft grass (for hair)
- Artificial or real leaves (for wings)
- Hot glue gun or craft glue
- Fine-tip marker (for drawing faces)
- Small flowers or embellishments (optional)
The Steps:
- Step 1: Choose and Prepare Your Pinecones
Select medium-sized pinecones that stand upright or slightly tilt for character. Brush off any dirt and make sure they’re clean and dry. - Step 2: Make the Fairy’s Head
Glue a small wooden bead or ball to the top of each pinecone to form the fairy’s head. Hold it in place until the glue sets. - Step 3: Add Hair
Use moss, raffia, or dried grass to create hair. Glue small bunches around the head, trimming as needed to shape your fairy’s hairstyle. - Step 4: Attach the Wings
Glue artificial or real leaves to the back of the pinecone to serve as wings. Fan them out slightly for a natural, whimsical look. - Step 5: Add Details
Draw eyes and a smile on the face with a fine-tip marker. Finish by adding small flowers, beads, or other decorative touches to make each fairy unique.
Once dry, display your woodland pinecone fairies on a windowsill, garden shelf, or nature-themed centerpiece.
4. Pinecone and Leaf Wreath

I like making wreaths using pinecones and leaves because they bring a natural look to any space. I start with a wreath form and attach pinecones of different sizes. Then, I add colorful fall leaves for a warm, cozy feel.
Shop the Materials


How to make Pinecone and Leaf Wreath
Materials Needed:
- Assorted pinecones (different sizes)
- Artificial or dried fall leaves
- Grapevine or foam wreath form
- Hot glue gun and glue sticks
- Ribbon or twine for hanging
The Steps:
- Step 1: Prepare Your Materials
Gather your pinecones and leaves, making sure they’re clean and dry. If you’re using real leaves, press them for a day or two to keep them flat. - Step 2: Arrange the Pinecones
Lay your pinecones around the wreath form before gluing to find a pleasing balance. Mix sizes for texture and depth. - Step 3: Glue the Pinecones in Place
Attach each pinecone to the wreath form with hot glue. Press firmly and hold for a few seconds until secure. Continue until the wreath is mostly covered. - Step 4: Add the Leaves
Tuck fall leaves between the pinecones, gluing them gently in place. Alternate colors like orange, yellow, and red to create a warm, layered look. - Step 5: Finish and Display
Attach a ribbon or twine loop to the back for hanging. Once dry, hang your wreath on the front door or use it indoors to bring cozy fall vibes to your space.
5. Pinecone Owl Figurines

I enjoy making pinecone owl figurines because they are simple and charming. With just a pinecone and a few craft supplies, I can create a small owl that looks great on my shelf. These figurines bring a warm, natural touch to fall decor.
shop the materials


How to make Pinecone Owl Figurines
Materials Needed:
- Pinecones (medium size)
- Googly eyes or small white and black paper circles
- Yellow felt or paper (for beaks)
- Brown and tan felt or craft foam (for wings and face details)
- Scissors
- Hot glue gun or craft glue
The Steps:
- Step 1: Prepare the Pinecones
Choose pinecones that stand upright and are fully open. Brush off any dirt or debris and let them dry if needed. - Step 2: Make the Face
Cut two small circles of tan felt for the owl’s face area. Glue them near the top of the pinecone. Then, attach googly eyes or paper eyes on top of those circles. - Step 3: Add the Beak
Cut a small triangle from yellow felt or paper and glue it right below the eyes. Hold for a few seconds until secure. - Step 4: Create the Wings
Cut two wing shapes from brown or tan felt. Glue one on each side of the pinecone to give your owl a balanced, lifelike look. - Step 5: Let Dry and Display
Allow the glue to dry completely, then place your owls on a table, mantel, or shelf. You can even make a few in different sizes for a cute woodland family display!
6. Leaf and Pinecone Garland

I like making a leaf and pinecone garland because it’s simple and looks natural. I use dried leaves and pinecones, sometimes adding beads or small acorns for extra detail. It’s easy to hang and brings a cozy, fall feel to any room.
shop the materials


how to make Leaf and Pinecone Garland
Materials Needed:
- Pinecones (various sizes)
- Artificial or dried fall leaves
- Twine or jute string
- Hot glue gun and glue sticks
- Scissors
- Small eye screws or floral wire (optional for attaching pinecones)
The Steps:
- Step 1: Prepare the Materials
Clean your pinecones and make sure they’re dry. Lay out your leaves and choose colors that blend well together for a natural fall look. - Step 2: Cut the Twine
Measure the length of garland you need and cut a piece of twine slightly longer to allow for tying loops on both ends. - Step 3: Attach the Pinecones
Glue the tops of the pinecones directly onto the twine, spacing them evenly. You can also screw in small eye hooks or wrap floral wire around them to tie onto the twine if you prefer a sturdier hold. - Step 4: Add the Leaves
Glue leaves between the pinecones, alternating colors like orange, yellow, and red for a rich, layered effect. Press them firmly so they stick well. - Step 5: Hang and Enjoy
Once dry, hang your garland across the fireplace mantel, along a doorway, or around a window to bring a festive fall vibe to your space.
7. Painted Pinecone Centerpiece

I like using painted pinecones for a simple centerpiece. You can add color by painting them white, gold, or any fall shade. Mix the painted pinecones with leaves and small pumpkins for a natural look. It brightens the table without much effort.
shop the materials


How to make a Painted Pinecone Centerpiece
Materials Needed:
- Pinecones (assorted sizes)
- Acrylic paint (in your preferred colors)
- Paintbrushes or small sponges
- Decorative bowl, tray, or vase
- Optional: glitter, faux leaves, or candles for accent
- Paper towels or newspaper for drying
The Steps:
- Step 1: Prepare the Pinecones
Clean your pinecones to remove any dirt or debris. Let them dry completely before painting. - Step 2: Paint the Pinecones
Using a paintbrush or sponge, apply acrylic paint to the tips or entire surface of each pinecone. Mix colors like white, gold, and red for a festive look, or pastel shades for a softer touch. - Step 3: Add Extra Details
While the paint is still wet, you can sprinkle on a bit of glitter for shimmer. Allow the pinecones to dry fully on paper towels or newspaper. - Step 4: Arrange the Centerpiece
Place your painted pinecones in a decorative bowl, tray, or vase. Add faux leaves, candles, or berries for extra texture and warmth. - Step 5: Display and Enjoy
Set your finished centerpiece on your dining table, coffee table, or mantel for a colorful, nature-inspired decoration that celebrates the beauty of the season.
8. Pinecone Candle Holders

I like using pinecones to make simple candle holders. You just need a few pinecones, glue, and small candles or LED lights. The natural shape of pinecones holds the candle securely. This adds a warm, cozy feel to any room without much effort.
Shop the materials


how to make Pinecone Candle Holders
Materials Needed:
- Large, flat-bottomed pinecones
- Tea light candles or LED candles
- Hot glue gun and glue sticks
- Scissors or wire cutters (optional)
- Decorative accents like faux leaves, berries, or twine
The Steps:
- Step 1: Choose and Prepare Your Pinecones
Pick pinecones that can sit flat on a surface. If the base is uneven, trim off a few bottom scales or use a bit of hot glue to stabilize them. - Step 2: Create the Candle Space
Gently press a tea light candle into the top of each pinecone. If it doesn’t fit snugly, remove a few top scales with wire cutters until the candle sits securely. - Step 3: Secure the Candle
Add a small dab of hot glue around the base of the candle to keep it in place. For safety, you can use LED tea lights instead of real ones. - Step 4: Add Decorative Details
Glue small faux leaves or berries around the base for extra color and texture. You can also wrap a bit of twine around the bottom for a rustic touch. - Step 5: Display Your Candle Holders
Arrange your pinecone candle holders on a tray, along your dining table, or on a mantel. Light the candles to enjoy the soft glow and woodland charm.
9. Natural Pinecone Table Scatter

I like using small pinecones as table scatter for fall. They add a simple, natural touch without much effort. You can spread them across the table to bring a bit of the outdoors inside.
shop the materials


How to make a Natural Pinecone Table Scatter
Materials Needed:
- Pinecones (various sizes)
- Optional: dried leaves or faux fall leaves
- Optional: cinnamon sticks, acorns, or small pumpkins
The Steps:
- Step 1: Collect and Clean Your Pinecones
Gather pinecones in different shapes and sizes. Shake off any dirt or debris, then bake them on a foil-lined tray at 200°F (93°C) for about 30 minutes to remove any insects or sap. - Step 2: Prepare the Surface
Lay down a table runner, burlap cloth, or wooden tray as a base. This adds warmth and helps your natural elements stand out. - Step 3: Arrange the Pinecones
Scatter pinecones randomly across your table, focusing on creating a balanced mix of sizes. Let some stand upright and others lie on their sides for a relaxed, natural look. - Step 4: Add Finishing Touches
Tuck in fall leaves, acorns, or small gourds between the pinecones for texture and color. For a festive twist, lightly dust the pinecones with gold paint or glitter. - Step 5: Display and Enjoy
Use your finished pinecone scatter as a centerpiece for dinner gatherings, holiday parties, or seasonal home décor. It’s simple, elegant, and effortlessly cozy.
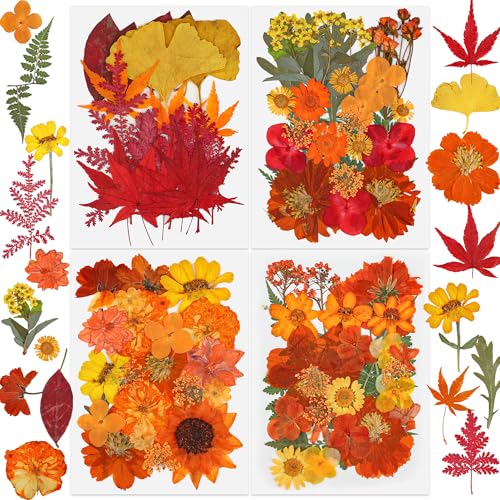
10. Pressed Leaf Art with Pinecones

I enjoy pressing leaves to capture their shapes and colors. Adding pinecones gives the art more texture and a natural feel. This simple craft brings fall indoors with little effort.
shop the materials


Materials Needed:
- Pressed leaves (real or faux)
- Pinecones (assorted sizes)
- White or neutral background paper or canvas
- Hot glue gun or craft glue
- Frame (optional)
The Steps:
- Step 1: Press and Prepare Your Leaves
If using real leaves, place them between parchment paper and press them under heavy books for a few days until they’re flat and dry. Faux leaves can be used immediately. - Step 2: Choose Your Layout
Arrange your leaves and pinecones on the paper or canvas before gluing. Try a balanced design—like a circle, diagonal pattern, or scattered layout—for a natural yet stylish look. - Step 3: Attach the Leaves
Once you’re happy with the placement, glue the leaves flat onto the surface. Press gently to avoid wrinkles or folds. - Step 4: Add Pinecones for Texture
Glue pinecones strategically between or around the leaves to add depth and dimension. Mix large and small cones for a natural effect. - Step 5: Frame or Display
Once everything is dry, place your artwork in a frame or prop it up on a shelf. It’s perfect as a seasonal wall piece, entryway décor, or Thanksgiving display.
11. Pinecone Pumpkin Decorations

I like using pinecones to make pumpkin decorations. They are easy to create by attaching small stems or twigs to the top. These decorations add a simple, natural look to fall displays on tables or shelves.
shop the materials


how to make Pinecone Pumpkin Decorations
Materials Needed:
- Pinecones
- Small artificial pumpkins or orange paint
- Green felt or faux leaves
- Hot glue gun
- Small sticks or twigs (for stems)
the steps:
- Step 1: Prepare Your Pinecones
Clean your pinecones by brushing off dirt and debris. If you collected them outdoors, bake them at 200°F (93°C) for 30 minutes to remove any insects or sap. - Step 2: Add the Pumpkin Top
Glue a small artificial pumpkin to the top of each pinecone. If you’re painting, coat the upper part of the pinecone orange and let it dry completely before continuing. - Step 3: Create the Stem
Break small twigs into short pieces and glue one to the center top of each pumpkin to serve as the stem. - Step 4: Add Leaves
Cut out small leaf shapes from green felt or use faux fall leaves. Attach them near the stem using hot glue for a finished, natural look. - Step 5: Arrange and Display
Place your pinecone pumpkins on a tray, along a mantel, or as part of your Thanksgiving centerpiece. They add a charming handmade touch that fits perfectly with fall décor.
12. Rustic Pinecone Lanterns

I use pinecones to add a natural, warm look to lanterns. The rough texture pairs well with soft candlelight.
You can place pinecones inside or glue them on the outside of a lantern for a simple fall touch. It brightens rooms with a cozy, rustic feel.
shop the materials


how to makeRustic Pinecone Lanterns
Materials Needed:
- Small lanterns (wood or metal style)
- Pinecones
- LED tea lights or battery-operated candles
- Faux fall leaves (optional)
- Hot glue gun
The Steps:
- Step 1: Prepare Your Lanterns
Wipe down the lanterns to remove dust. If you want a rustic look, lightly brush them with white or gold paint for a weathered finish. - Step 2: Add the Lights
Place LED candles or tea lights inside each lantern. Avoid real candles for safety, as pinecones are flammable. - Step 3: Decorate with Pinecones
Arrange pinecones around the base of the lanterns or glue smaller ones on top as accents. You can mix different pinecone sizes to add texture and depth. - Step 4: Add Finishing Touches
Tuck faux fall leaves or acorns around the pinecones for a festive, natural touch. - Step 5: Display Your Lanterns
Place your finished lanterns on your porch, mantel, or dining table. When lit, they give off a soft, golden glow that enhances any cozy fall evening.
13. Pinecone and Leaf Mobile

I like making pinecone and leaf mobiles because they bring a simple, natural look to any room. I use twine to hang pinecones and colorful leaves from a small branch. This craft is easy to do and looks nice when it moves gently in the air.
shop the materials


how to make Pinecone and Leaf Mobile
Materials Needed:
- Pinecones
- Faux or real fall leaves
- Twine or string
- Wooden dowels or sticks (2 pieces)
- Hot glue gun
- Scissors
The Steps:
- Step 1: Prepare the Frame
Form a cross by laying the two wooden dowels on top of each other and securing them with hot glue or tightly wrapped twine at the center. This will be the base of your mobile. - Step 2: Cut and Attach Hanging Strings
Cut several pieces of twine in varying lengths. Tie one end of each string to the dowel cross, spacing them out evenly so the mobile hangs balanced. - Step 3: Attach Pinecones
Tie or glue a pinecone to the bottom of each string. Mix different sizes for a more natural, eye-catching look. - Step 4: Add Leaves
Glue or tie faux or pressed leaves along the twine, positioning them at random heights between the pinecones for movement and color contrast. - Step 5: Hang and Adjust
Tie a final piece of twine at the top of the cross to hang your mobile. Adjust the string lengths if needed to make sure it hangs evenly.
14. Autumn Leaf and Pinecone Frame

I like using autumn leaves and pinecones to make a simple frame. The natural colors create a warm and cozy look. This craft is easy and quick. I glue leaves and pinecones around a plain frame for a nice fall decoration.
shop the materials


How to make Autumn Leaf and Pinecone Frame
Materials Needed:
- Pinecones (medium to small size)
- Faux or dried fall leaves
- Plain wooden or cardboard frame
- Hot glue gun
- Scissors
- Optional: ribbon or twine for hanging
The Steps:
- Step 1: Prepare the Frame
Lay your frame on a flat surface and clean it to remove any dust. If you’d like a rustic look, lightly sand or paint it in a warm tone such as brown or gold. - Step 2: Arrange Your Pinecones
Start by placing pinecones around the edges of the frame to plan your layout. Use a mix of sizes to create depth and visual interest. - Step 3: Glue the Pinecones in Place
Once satisfied with the arrangement, hot glue each pinecone onto the frame. Hold each one for a few seconds to ensure a secure bond. - Step 4: Add Fall Leaves
Tuck faux or real leaves between the pinecones, securing them with glue. Let them overlap slightly for a natural, layered effect. - Step 5: Finishing Touches
Attach a small bow or loop of twine at the top for hanging if desired. Allow the glue to dry completely before displaying your finished piece.


Where are the instructions, please.
Hi, please check now.
This has been updated.